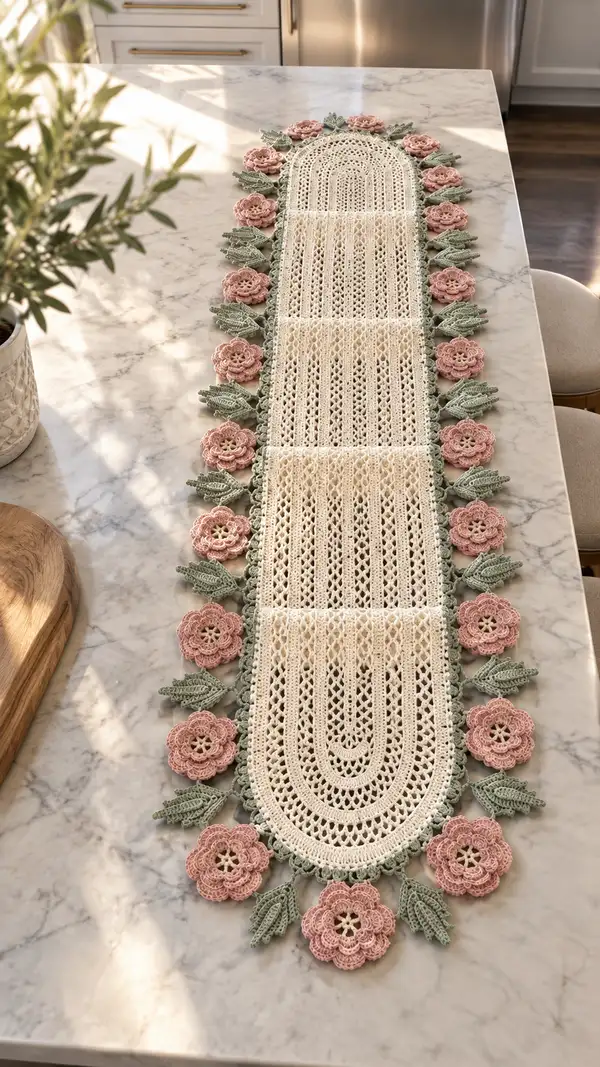
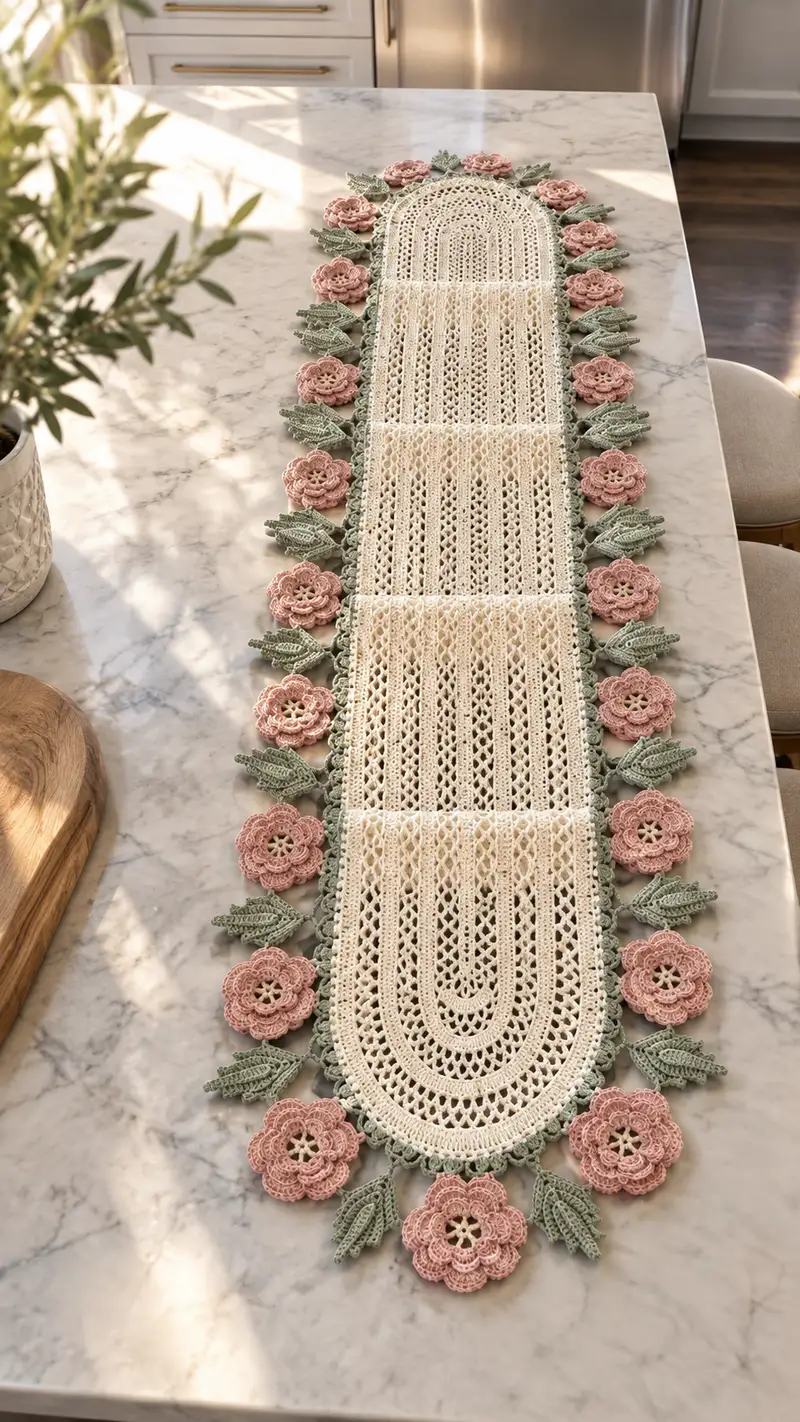
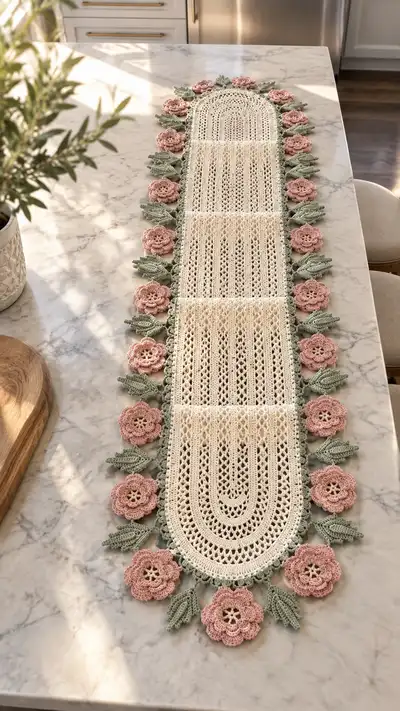
A long, elegant lace table runner featuring a creamy central lace panel framed by soft sage leaves and rose-pink layered flowers. This design combines delicate openwork stitches, scalloped oval ends and 3D floral motifs for a romantic, cottage-style centerpiece. The runner is worked in sections (center panels, semicircular ends, flowers, leaves and edging) and joined with a neat picot/loop border for a finished look.
Progress Tracker
0% Complete
— Overview & Gauge :
Info :
This runner is constructed from three identical rectangular lace panels joined by narrow ribbed bands, with two semicircular oval end panels and a decorative floral-leaf border. Work panels flat in rounds around a foundation chain to create oval shaping. Gauge is flexible for home decor but aim for approx 18 sts and 12 rows = 4 inches in lacy pattern using a 3.5mm hook with worsted cotton; adjust hook for fabric drape. Final finished length in pictured sample is approximately 60-70 inches; width approximately 12-14 inches. Blocking will change final dimensions slightly.
— Center Rectangular Lace Panel (Make 3) :
Materials :
Use main cream color. Foundation chain (ch) = 60 (this creates a comfortable width). When joined into rounds this gives a first-round count of 2 x 60 + 6 = 126 stitches forming an oval base.
Round 1 :
Ch 60, join with sl st to first ch to form a loop (do not twist). Ch 1, 1 sc in each ch across to last ch, 3 sc in last ch, working down the opposite side of foundation chain work 1 sc in each ch back to beginning, 3 sc in first ch = 126 sc total (126).
Round 2 :
Ch 3 (counts as dc), *skip 1, dc in next st, ch 1, dc in same st (V-st worked into single st), skip 1, sc in next st* repeat across ending with sc in last base st to keep counts consistent. Maintain 126 stitches (count measured as 126 main anchor points).
Info :
From Round 2 forward the stitch 'count' is governed by the number of primary anchor stitches (sc or dc) and is 126. Many lace rounds will have chains creating decorative eyelets but the number of worked anchors remains 126. Use a stitch marker at the start of each round to keep orientation.
Round 3 :
Ch 1, 1 sc in each anchor st across (126).
Round 4 :
Ch 3 (counts as dc), *(dc, ch2, dc) in next sc (V), sk 1, sc in next st, ch1, sk1* rep across. Maintain 126 anchors (126).
Round 5 :
Ch 1, 1 sc in each st (126).
Round 6 :
Ch 3, *sk 2, (3 dc in next st) as a small shell, sk 2, sc in next* rep across (126 anchors).
Info :
These early rounds establish the lace language for the runner: alternating rounds of filled sc rounds with decorative rounds of V-sts and small shells. The anchor count remains steady at 126, which allows the lace to lie flat while maintaining oval shaping from the foundation chain and the 3-sc corners at each chain end.
Round 7 :
Ch 1, 1 sc in each st BLO to create a shallow ridge (126).
Round 8 :
Ch 3, *(dc in next st, ch1, sk1, dc in next st) - create elongated eyelets across the center by working dc-ch1-dc separated by chs and sc anchors* repeat to the end. Keep 126 anchor points (126).
Round 9 :
Ch 1, sc in each st (126).
Round 10 :
Ch 3, *dc in next 2 sts, ch1, sk1, dc in next 2 sts* rep across (126 anchors).
Info :
If you prefer a more open lace, change to a 4.0mm hook for every other decorative round and then resume the 3.5mm hook for sc rounds to keep structure. Pin the first panel flat after 6 decorative rounds to check that the panel lies flat and adjust tension if rippling occurs.
Round 11 :
Ch 1, 1 sc in each st (126).
Round 12 :
Ch 3, *sk 1, (dc,ch2,dc) in next st (V), sk 1, sc in next* rep across (126 anchors).
Round 13 :
Ch 1, 1 sc in each st (126).
Round 14 :
Ch 3, *3 dc in next st, ch2, sk 2, sc in next* rep across (126 anchors).
Round 15 :
Ch 1, 1 sc in each st BLO (126).
Info :
By Round 15 you have established a reversible lace with defined ridges. Keep the tension even; if your panel cups, block lightly and reduce hook size by 0.25mm on the next set of rounds to tighten tension slightly.
Round 16-20 :
Repeat Rounds 8-12 (work the same sequence of eyelet and sc rounds) to create a long, consistent lace panel section. Each round maintains 126 anchors (126).
Round 21 :
Ch 1, 1 sc in each st (126).
Round 22 :
Ch 3, *work (dc in next st, ch1, dc in same st) V-st to create spaced vertical columns: *(V, sc) across* keep 126 anchors (126).
Round 23 :
Ch 1, sc in each st (126).
Round 24-28 :
Work a repeated lace set: R24 = ch3, shell pattern (3 dc in next st, ch2, 3 dc in next) separated by sc anchors; R25 = ch1 sc across; R26 = ch3, V-sts; R27 = ch1 sc across; R28 = ch3, elongated dc eyelets. Maintain 126 anchors across all rounds (126).
Info :
End each lace panel when the panel reaches the desired rectangular height. In the pictured runner each rectangular panel is roughly 9-11 inches in height before joining bands. Repeat this entire panel pattern to create three identical panels. Block each panel flat before moving to joining for best results.
Round 29-30 :
Finish the panel with two rounds of firm edging: R29 ch1 sc in each st BLO (126) to create a ridge; R30 ch3 and work single-row picot-like spacing by alternating (dc in next, ch3, sl st in 3rd ch to create decorative openwork) across to keep 126 anchors (126).
Info :
Make 3 of these rectangular lace panels. Block and measure to ensure all three panels match in height. If lengths differ slightly, add or remove a repeat of rounds 16-20 to equalize heights.
— Narrow Joining Bands (Make 2 to join panels) :
Info :
These narrow bands are worked in rounds after joining or can be crocheted and sewn between panels. They are worked over a short foundation chain equal to the width of the panel (ch 60) and produce a firm ribbed spacer that visually separates the three central panels as in the photo.
Round 1 :
Ch 60, join with sl st, ch1, 1 sc in each ch all the way around (60 anchors, but treated as one short loop). Work in joined rounds lengthwise until band measures approximately 1/2 to 3/4 inch tall—R1 to R6 typically (60).
Round 2-6 :
Ch1, 1 hdc in each st around to create a sturdy rib (60).
Info :
Make 2 bands. When joining, align one band to the right edge of panel 1 and left edge of panel 2, pinning carefully before sewing. Join with a whip stitch through the back loops only of the band and the panel to keep the join neat and slightly recessed.
— Semicircular Oval End Panels (Make 2) :
Info :
Each end panel creates a rounded oval tip that mirrors the foundation of the center panels. Work these as a shallow oval by starting with a foundation chain and working in rounds with 3-sc increases at each end to form smooth semicircles.
Round 1 :
Ch 30, join with sl st to form a loop, ch1, 1 sc in each ch across to last ch, 3 sc in last ch, 1 sc in each ch back to start, 3 sc in first ch = 2 x 30 + 6 = 66 sc (66).
Round 2 :
Ch 3, *dc in next st across until you reach the first corner 3-sc group, in that 3-sc group work 3 dc in each sc (9 dc total) distributed evenly across that arc, continue dc across until the opposite 3-sc group and repeat increases* Resulting count is increased to build the broader semicircle: after increasing evenly you will have 66 + 12 = 78 anchors approx (78).
Info :
Round 2 intentionally increases the semicircular arc to make a gentle round. For simplicity the pattern describes the visual increases. The total anchor count will increase by 12-18 stitches across the first 2-3 rounds of the oval end; track increases consistently to keep the arc even on both sides.
Round 3 :
Ch1, sc in each st around to secure increase (78).
Round 4 :
Ch3, work a decorative fan-and-eyelet round: *(sk1, (2 dc, ch2, 2 dc) in next st, sk1, sc in next)* rep across (78 anchors).
Round 5 :
Ch1 sc in each st (78).
Round 6-10 :
Work 5 rounds repeating the main lace language used in the center panels (V-st and small shell alternations) to match the height and look of the center panels. Keep anchor counts steady (78) unless you need to add or remove occasional increases to shape the arc smoothly.
Round 11 :
Ch1, sc in each st BLO to create a defined edge ridge on the oval (78).
Info :
Make 2 of the semicircular oval ends. Block them to match the curved ends of the assembled runner and adjust any stray stitches with a careful blocking pin. These will be attached to the two short ends of the joined three-panel center piece.
— Decorative Rose Flower Motif (Make 16 - 8 per side) :
Info :
Flowers are 3D layered rosettes worked in dusty rose color. Each flower is made flat in rounds and finished with a small central picot ring. Make 16 flowers total and block them slightly with light steam or starch for crisp petals.
Round 1 :
With dusty rose, make a mr, ch1, 6 sc into mr, pull tight and join with sl st to first sc (6).
Round 2 :
Ch1, 2 sc in each st around (12).
Round 3 :
Ch1, (1 sc in next st, 2 sc in next) x 6 (18).
Round 4 :
Ch1, sc in next 2 sts, (hdc, dc, hdc) in next st (small petal cluster), sc in next 2 sts, rep around to create 6 petal bases (18 anchor petals).
Info :
Round 4 establishes the petal bases; keep stitch tension a bit firmer to make petals hold their curve. Use a slightly smaller hook (3.0mm) for the flowers if you want a tighter, more sculpted petal edge.
Round 5 :
Switch to working petals: ch3, (sl st into base of petal, ch3, 5 dc in next petal base, ch3, sl st into base) repeat around to create scalloped layer of 6 outer petals. Fasten off and weave tail. This round adds visible scalloped petals (no anchor count change).
Round 6 :
For layered depth: Join dusty rose to the back of each petal base and work a short ruffle: ch1, (sc, hdc, dc, hdc, sc) into each petal crease around to create a second layered petal ring. Fasten off and weave ends.
Round 7 :
Optional: For a subtle center, with beige or gold, work a small center cluster: join color in the mr center, ch1, 8 sc around forming a tiny rosette. Secure and hide ends behind the flower.
Info :
Make 16 flowers total. Block each lightly into a circular shape. If you want a more delicate flower, omit Round 6 or use a thinner yarn for petals. Use matching tails to sew flowers to the runner when assembling; position them so petals sit atop the sage picot loops for a dimensional edge.
— Leaf Motif (Make 16 - 8 per side) :
Info :
Leaves are worked in sage green in a slightly denser stitch pattern to hold shape. Each leaf uses a foundation of ch 12 and shaping rounds to create a sharp pointed leaf with surface ridges.
Round 1 :
Ch 12, sc in 2nd ch from hook, hdc in next, dc in next 6, hdc in next, sc in next, 3 sc in last ch to turn, continue down opposite chain working sc in each ch back to start and sl st to join - leaf base created (approx 24 sts around leaf base depending on shaping).
Round 2 :
Ch1, sc evenly around leaf base; at center spine of leaf work 3 sc in one st to create a raised spine (24 anchors).
Round 3 :
Ch1, 1 sc in first 3 sts, *BLO hdc in next 2 (to make raised rib), sc in next 2* rep across to create textured ribbing that mimics veins (24 anchors).
Round 4 :
Ch1, sc in each st, at tip decrease to a point by sc2tog across the three center dc to create a tapered point, then continue sc around (approx 22-24 anchors depending on decreases).
Round 5 :
Ch1, sc in each st, finishing with a neat sl st at base and fasten off leaving long tail for sewing. Pin and steam lightly to set shape if desired.
Info :
Make 16 leaves. Work each leaf with a slightly smaller hook (3.0mm) for crisp edges. When placing leaves between flowers on the runner edge, alternate one leaf pointing outward and one slightly angled upward for a natural staggered look.
— Decorative Border & Picot Loop Edge :
Info :
The border is worked in sage green as a series of small picot loops that form the base where flowers are sewn. Work this border around the entire runner after the center panels and oval ends have been joined, creating even loops for sewing flowers and leaves.
Round 1 (Border attach) :
With runner assembled and seams secured, join sage yarn at any point on the outermost stitch of the runner, ch1, sc evenly around outer edge placing approx 2 sc for every 3 anchors to build a base ridge. Aim for approx 140-150 sc around the full runner depending on actual measurements.
Round 2 :
Ch4, sl st into base to form a picot loop, *ch4, sl st into base every 3-4 sc across* repeat to end creating regular picot loops. Count should be approx 40-50 loops around the full runner (adjust spacing so loops line up with intended flower positions). Fasten off and weave ends.
Info :
Arrange picot loops so there are 8-9 loops per long side and 1-2 additional loops along each semicircular end for even placement of 8 flowers per side. Use blocking pins to mark loops prior to attaching flowers to ensure symmetry.
— Placement & Sewing Flowers and Leaves :
Info :
Layout: Place the assembled center panels and oval ends flat. Evenly space 8 flowers down each long side nested on the picot loops; place a leaf cluster between each flower pair so the leaf points sit between flowers and enhance the scalloped outline.
Round 1 :
With yarn tails left from flowers, pin a flower over a picot loop, sew through the runner fabric and back into the flower using small whip stitch across the flower base using matching yarn tail. Secure with at least 6-8 passes to prevent shifting then knot and weave tail through the back to hide.
Round 2 :
Position leaf under each flower (slightly offset) and sew the leaf base to runner through the back loops of the border and leaf base using the long tail. Use small, even stitches to anchor leaves with minimal visibility on the front.
Info :
For the semicircular ends, place one flower every 2-3 picot loops following the curve; adjust spacing so flowers follow the curve naturally. Use pins to check symmetry along both sides before sewing permanently.
— Final Finishing Rounds :
Round 1 :
After sewing, work a final round of slip-stitch scallops in cream along the very edge to blend the join lines: join cream to any edge point, *sl st in next st, ch3, sl st in base to make a small scallop* repeat around the entire runner, spacing scallops evenly. Fasten off and weave ends.
Round 2 :
Lightly steam-block the entire runner. Pin the runner to desired final dimensions and spray lightly with starch if you prefer a crisper decorative effect. Allow to dry fully before unpinning.
Info :
Final blocking is crucial to open the lace and flatten the runner. Use rust-proof pins and pin each picot loop outward to show the scalloped floral border clearly. Allow 24 hours to fully set and dry for best results.
— Alternate Section: If You Prefer a Single Continuous Base :
Info :
Instead of three panels and two bands, you may crochet one long oval base using foundation chain ch 180 (or proportional multiple) and follow the same lace pattern repeats used in the center panel to create an unbroken runner. Keep math consistent: first-round sc count will be 2 x 180 + 6 = 366 anchors. Adjust repeats of decorative stitches to fit repeat counts that divide evenly into 366 (for instance, repeats of 6 or 9).
Round 1 :
Ch 180 and join to work in rounds with the same initial technique (3 sc in each end ch to create oval corners). Proceed with the lace rounds as described for the center panel, scaling the number of repeats accordingly. Blocking and border attachment are identical.
Info :
Working a single continuous base saves assembly time but may be more cumbersome to block and manage on the lap. Use blocking wires if you choose a single-piece construction to keep edges even during steam-blocking.
This delicate lace runner is an elegant statement piece that blends vintage charm with contemporary simplicity. Each panel, flower and leaf combines to create a layered, handcrafted finish that elevates any table or dresser. I love how the soft rose flowers and sage leaves form a botanical frame around the airy cream lace — it's the kind of project that rewards patience with stunning results. Add this runner to special occasion settings or everyday spaces for a touch of handmade beauty. 🧶🌸