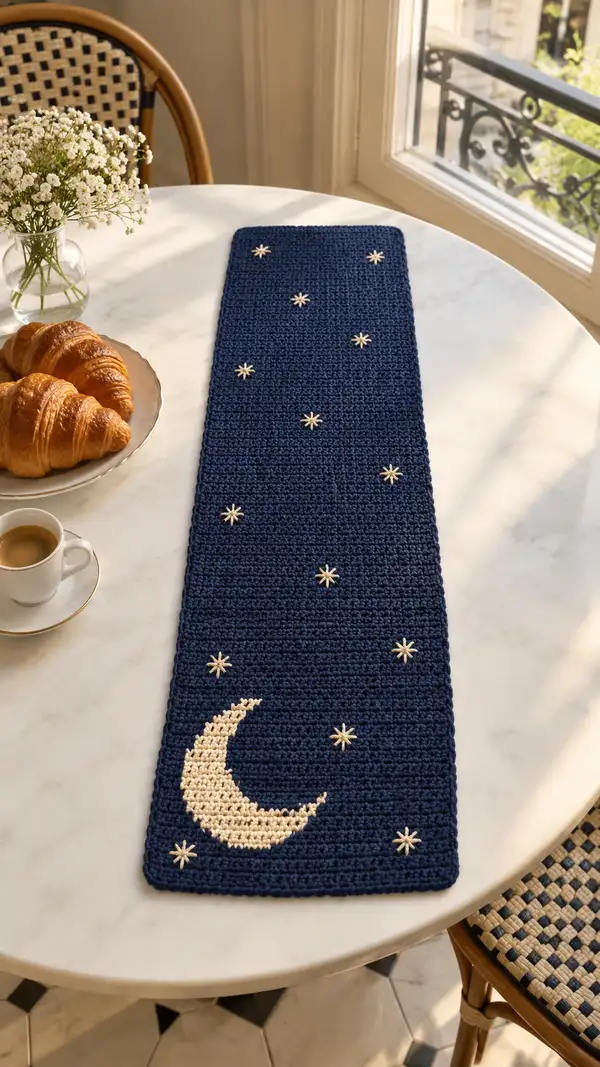
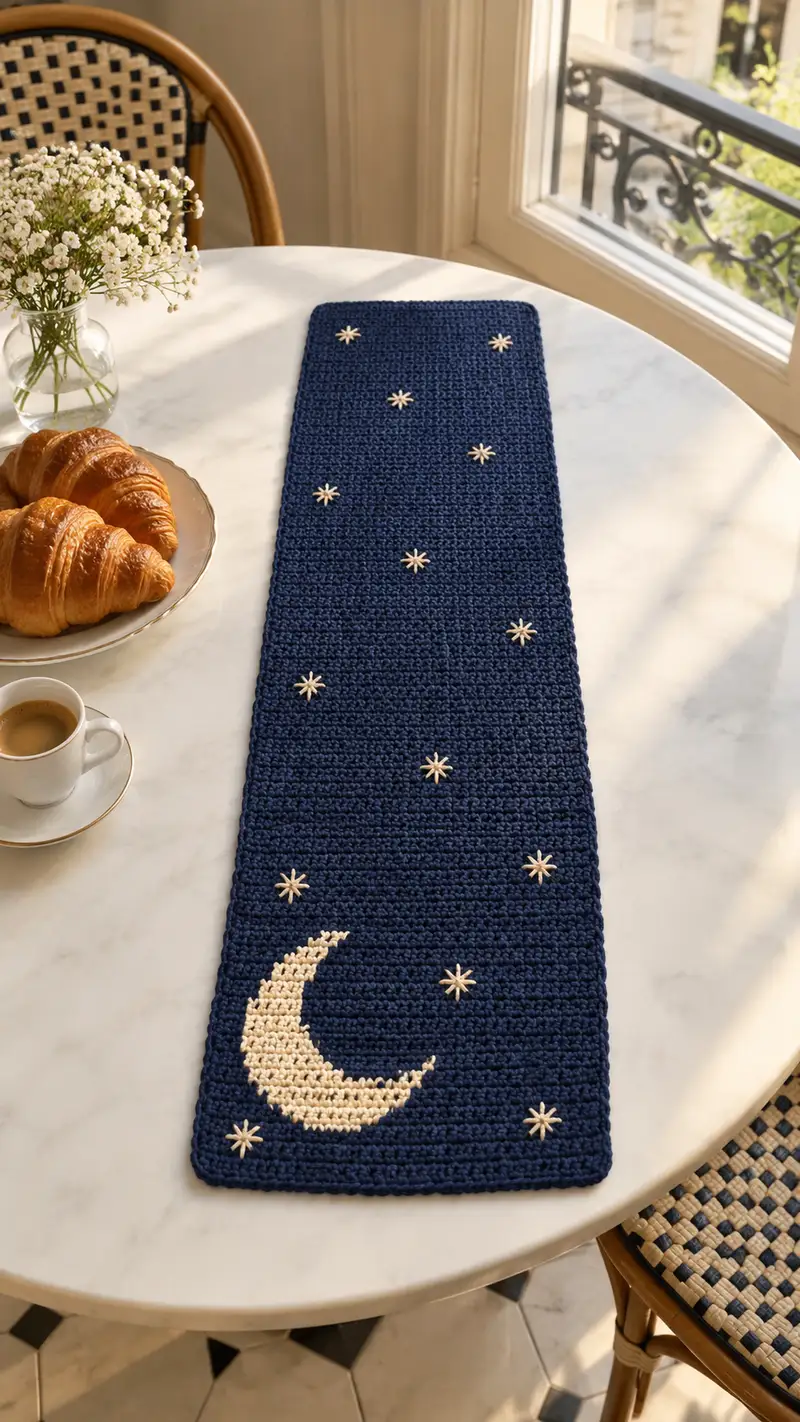
A slim, elegant table runner worked in deep navy with a creamy crescent moon and scattered embroidered stars. The piece is worked in horizontal rows for a dense, slightly textured fabric and finished with a neat single-crochet border. The moon is created with stranded/color-change shaping across multiple rows and the stars are embroidered on after blocking for precise placement. A sophisticated home accent that dresses a small bistro or dining table.
Progress Tracker
0% Complete
— Foundation Chain :
Round 1 :
Ch 49. This foundation chain will create 48 working stitches across the width of the runner. Turning ch counts as first hdc throughout (if you prefer, do not count turning ch and work 48 hdc into first chain instead).
Info :
Gauge note: Using worsted weight yarn and a 4.00mm hook, aim for approximately 14 hdc x 10 rows = 4 inches. Exact gauge isn't critical for this rectangular runner but affects final measurements. The pattern assumes 48 stitches across.
— Main Panel (Body) :
Round 2 :
Hdc in 2nd ch from hook and in each ch across. (48)
Round 3 :
Ch 2, turn. Hdc BLO in each st across. (48)
Round 4 :
Ch 2, turn. Hdc BLO in each st across. (48)
Info :
Work all body rows in hdc BLO to create the subtle horizontal ridges shown in the photo. The fabric will be dense and lie flat. Keep tension consistent.
Round 5 :
Ch 2, turn. Hdc BLO in each st across. (48)
Round 6 :
Ch 2, turn. Hdc BLO in each st across. (48)
Info :
The crescent moon begins at the lower end of the runner. On Round 6 you will start introducing the accent color for the earliest hints of the moon. Always carry the unused yarn along the WS and twist when changing to avoid long floats on the WS.
Round 7 :
Ch 2, turn. Hdc BLO in navy for first 9 sts, change to cream and hdc BLO in next 7 sts, change to navy and hdc BLO remaining 32 sts. (48)
Info :
Change color by completing the last hdc of the color before the change but replacing final yarn-over with the new color, so the new color is on the hook. Keep loose tails of about 8-10cm to weave in later or carry color along the WS where possible.
Round 8 :
Ch 2, turn. Hdc BLO navy 8 sts, hdc BLO cream 9 sts, hdc BLO navy remaining sts. (48)
Round 9 :
Ch 2, turn. Hdc BLO navy 7 sts, hdc BLO cream 11 sts, navy to end. (48)
Round 10 :
Ch 2, turn. Hdc BLO navy 6 sts, hdc BLO cream 13 sts, navy remainder. (48)
Info :
These rows are shaping the outer edge of the crescent. Count stitches carefully at the end of each row to ensure you still have 48 stitches. Use small stitch markers at positions where color changes occur in multiple rows to keep placement consistent.
Round 11 :
Ch 2, turn. Hdc BLO navy 5 sts, hdc BLO cream 15 sts, navy remainder. (48)
Round 12 :
Ch 2, turn. Hdc BLO navy 4 sts, hdc BLO cream 17 sts, navy remainder. (48)
Round 13 :
Ch 2, turn. Hdc BLO navy 3 sts, hdc BLO cream 19 sts, navy remainder. (48)
Info :
If you prefer a softer edge on the crescent, you can blend with a single row of slip stitches in cream along the transition on the RS. However this will add thickness; the pattern as written keeps the body flat.
Round 14 :
Ch 2, turn. Hdc BLO navy 3 sts, hdc BLO cream 21 sts, navy remainder. (48)
Round 15 :
Ch 2, turn. Hdc BLO navy 3 sts, hdc BLO cream 22 sts, navy remainder. (48)
Round 16 :
Ch 2, turn. Hdc BLO navy 4 sts, hdc BLO cream 22 sts, navy remainder. (48)
Round 17 :
Ch 2, turn. Hdc BLO navy 5 sts, hdc BLO cream 21 sts, navy remainder. (48)
Info :
Round 16-17 begin to taper the inner edge of the crescent back toward navy to create the moon 'bite'. Keep stitch count exact: when several color changes are required in one row, pause, count, and then continue to avoid misplacement.
Round 18 :
Ch 2, turn. Hdc BLO navy 6 sts, hdc BLO cream 20 sts, navy remainder. (48)
Round 19 :
Ch 2, turn. Hdc BLO navy 7 sts, hdc BLO cream 18 sts, navy remainder. (48)
Round 20 :
Ch 2, turn. Hdc BLO navy 8 sts, hdc BLO cream 16 sts, navy remainder. (48)
Round 21 :
Ch 2, turn. Hdc BLO navy 9 sts, hdc BLO cream 14 sts, navy remainder. (48)
Info :
As you complete the rows that form the moon shape, gently lay the work flat occasionally to confirm the crescent curve reads as expected. Adjust future rows by one stitch of cream if you want a slightly fuller or slimmer crescent.
Round 22 :
Ch 2, turn. Hdc BLO navy 10 sts, hdc BLO cream 12 sts, navy remainder. (48)
Round 23 :
Ch 2, turn. Hdc BLO navy 11 sts, hdc BLO cream 10 sts, navy remainder. (48)
Round 24 :
Ch 2, turn. Hdc BLO navy 12 sts, hdc BLO cream 8 sts, navy remainder. (48)
Round 25 :
Ch 2, turn. Hdc BLO navy 13 sts, hdc BLO cream 6 sts, navy remainder. (48)
Info :
Round 25-28 close out the cream shaping and return to full navy. Make sure to secure the cream yarn tail at the RS by weaving it under several stitches on the WS when you finish the last cream portions.
Round 26 :
Ch 2, turn. Hdc BLO navy 14 sts, hdc BLO cream 4 sts, navy remainder. (48)
Round 27 :
Ch 2, turn. Hdc BLO navy 15 sts, hdc BLO cream 2 sts, navy remainder. (48)
Round 28 :
Ch 2, turn. Hdc BLO in each st across in navy (48). Fasten off cream leaving a 12-15cm tail to weave in and secure later or carry inside up the wrong side where feasible. (48)
Round 29 :
Ch 2, turn. Hdc BLO in each st across in navy. (48)
Info :
From Round 28 onward the rest of the runner is solid navy. Continue working straight until you reach your desired length. The sample measures approximately 120-140 rows for a long narrow runner. Adjust length to suit your table.
Round 30-39 :
Work 10 rows: Ch 2, turn. Hdc BLO in each st across. (48)
Round 40 :
Ch 2, turn. Hdc BLO in each st across. (48)
Info :
Place your first embroidered star after you have finished at least 20-30 rows beyond the moon to allow spacing similar to the photo. Stars are embroidered later with the cream yarn; mark positions now with loose stitch markers if you like.
Round 41-59 :
Work 19 rows: Ch 2, turn. Hdc BLO in each st across. (48)
Round 60 :
Ch 2, turn. Hdc BLO in each st across. (48)
Info :
Space the runner to mimic the photo: about nine small embroidered stars scattered along the field. You can mark each star position with a removable stitch marker noting the row and approximate stitch from the left edge (RS facing).
Round 61-79 :
Work 19 rows: Ch 2, turn. Hdc BLO in each st across. (48)
Round 80-99 :
Work 20 rows: Ch 2, turn. Hdc BLO in each st across. (48)
Round 100-119 :
Work 20 rows: Ch 2, turn. Hdc BLO in each st across. (48)
Info :
At any point you can customize the spacing and number of stars. The pattern continues in all navy until you are approximately 8-10 rows shy of the desired final length, leaving enough fabric for a neat border to wrap around the edges.
Round 120-132 :
Work 13 rows: Ch 2, turn. Hdc BLO in each st across. (48)
Round 133 :
Ch 2, turn. Hdc BLO in each st across. (48)
Info :
Sample runner used in photos finished at Round 135. If you want a shorter runner, stop earlier. If longer, add rows in multiples of 2-4 until desired length. Measure as you go to fit your table.
Round 134-140 :
Work 7 rows: Ch 2, turn. Hdc BLO in each st across. (48)
Info :
Fasten off the main navy yarn leaving a long tail for the border if you plan to join the border with the same yarn. Weave in long beginning tails from the moon color along the WS, or temporarily leave them to secure later before blocking.
— Moon & Intarsia Details :
Info :
The crescent was worked inline with the main panel using color changes. No separate appliqued moon was added. If you prefer, you can crochet the moon separately as an appliqued piece and sew it on; this pattern includes the worked-into-body approach and gives a cleaner, flatter surface.
Round A :
Moon chart summary: The moon begins at Row 7 and ends at Row 28 of this pattern. The moon spans stitches 10-33 across the width (a 24-stitch span) and is shaped over 22 rows to create a stylized crescent. Keep a printed copy of the row-by-row color map for reference while working.
— Stars Embroidery Placement :
Info :
After blocking and weaving in ends, embroider nine 8-point stars using cream yarn. Mark exact positions before stitching. The coordinates below are approximate; count from the lower (moon) edge upward (RS facing) and from the left edge (RS) for stitch position reference.
Star 1 :
Place at approx Row 12, centered at stitch 6 (left of the moon, near the lower corner).
Star 2 :
Place at approx Row 18, centered at stitch 21 (above and slightly to the right of the moon).
Star 3 :
Place at approx Row 26, centered at stitch 34 (near mid-width).
Star 4 :
Place at approx Row 36, centered at stitch 10 (left side about one-third from the bottom).
Star 5 :
Place at approx Row 48, centered at stitch 28 (slightly right of center).
Star 6 :
Place at approx Row 62, centered at stitch 16 (left of center).
Star 7 :
Place at approx Row 78, centered at stitch 32 (right of center).
Star 8 :
Place at approx Row 95, centered at stitch 8 (near left edge).
Star 9 :
Place at approx Row 110, centered at stitch 40 (near right edge).
Info :
Embroider stars by bringing the needle up at the center point then making long straight stitches outward to form points (8-point star), or use a small satin stitch cluster. Anchor each star on the WS with several small stitches and trim tails closely, then weave in securely.
— Border (Edging) :
Round 141 :
Join navy at one corner with sl st, ch 1. Work 1 sc in each st along the long edge (48 sc across), when you reach the short end, work 2 sc in corner space, continue along opposite long edge, 1 sc in each st, 2 sc in corner, and across the other short end. Maintain even tension and place 3 sc in each corner to create a rounded corner effect. Total will vary slightly based on corner stitches added; keep edges even.
Round 142 :
Ch 1, turn. Sc in BLO around entire runner to create a defined ridge: 1 sc in each sc along long edges and short edges. Work 3 sc in corner sts again to keep corners round. (Edge stitch count approx equal along sides)
Info :
If you want an extra-refined edge, switch to a 3.5mm hook and work this round slightly tighter to prevent curling. Alternatively, add a second round of sc for a chunkier frame.
Round 143 :
Optional decorative round: Work a slip-stitch ridge by sl st in each st around RS for a flat, subtle finish or use crab stitch (reverse sc) for a slightly twisted edge. Finish and fasten off.
Info :
Weave in all yarn tails on WS using tapestry needle. Use small, neat stitches to hide ends inside the hdc ridges. If you carried the moon yarn along the WS, secure it now to prevent loosening.
— Finishing & Blocking :
Round 144 :
Block the runner by pinning it to measurements on a flat surface and steaming or wet-blocking according to yarn manufacturer instructions. Stretch gently to even out rows and set the moon shape. Let dry completely before embroidering stars.
Info :
Blocking is important for a project like this to make the edges straight and ensure the moon and stars sit flat on the fabric when displayed on a table.
— Optional Moon Adjustment (Applique Method) :
Round 145 :
If you prefer to work an appliqued crescent instead of intarsia, crochet a crescent by making a tapered oval; for example, ch 12, join to form ring and work hdc increasing then decreasing for shaping, finish, sew to runner with whipstitch and blanket-stitch around both edges. This approach is more forgiving but adds slight thickness.
Info :
When appliquing, press applique gently into place and stitch from the RS using matching cream yarn with small, neat stitches to create the illusion of being worked-in.
— Tips & Troubleshooting :
Info :
Always check your stitch count at the end of every 10 rows. If the count becomes off, unravel to the previous correct row and rework. Keep an extra skein of main color available in case of dye lot differences or for a second runner.
Info :
If carrying yarn for the moon causes a thicker spot on the WS, weave the carried yarn in and out across the WS every 6-8 stitches to secure it and reduce bulk. Alternatively, break the yarn and rejoin for each color block to keep the WS flatter.
Completing this Lunar Night Table Runner is such a satisfying project — the deep navy and cream contrast give a calm, sophisticated look to any small table. The clean hdc BLO texture and neat border create a refined finish, while the intarsia moon and embroidered stars add personality and charm. It makes a wonderful hostess gift or seasonal accent and is easy to adapt in scale or color. Enjoy each stitch as your own little night sky comes to life on your tabletop! 🌙✨