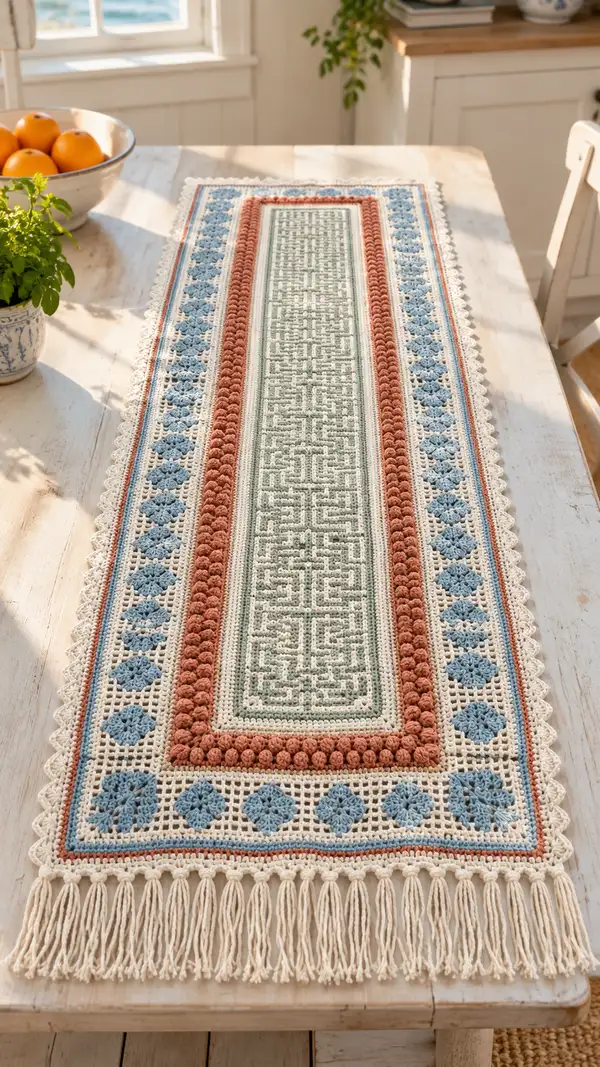
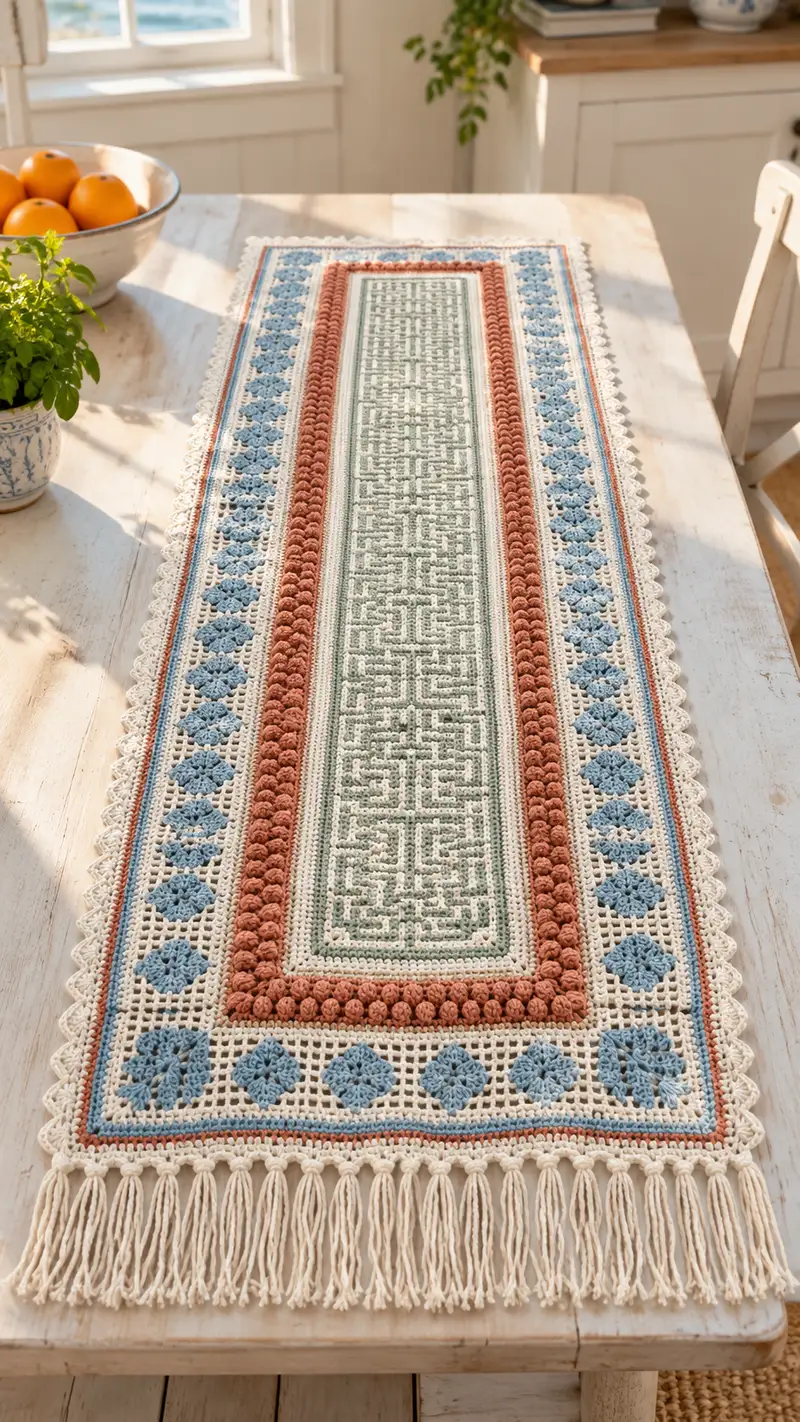
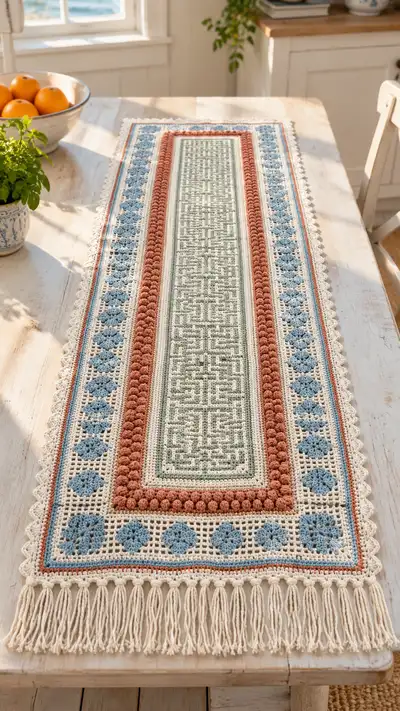
A long, elegant table runner featuring a central geometric lattice, raised bobble borders, framed granny-diamond side panels, and a delicate scalloped lace edge. Worked in soothing sage green, warm terracotta, sky blue and natural cream, this runner combines filet gridwork, popcorn texture, and classic scallops to deliver a farmhouse-chic centerpiece. Designed for an intermediate crocheter who enjoys color changes, texture stitches, and finishing techniques like fringe and blocking.
Progress Tracker
0% Complete
— Notes & Gauge :
Info :
This runner is worked flat in rows. Gauge is approximate because of mixed textures: 18 sc = 4 inches in worsted cotton using 4.0mm hook in a compact swatch. The sample runner measures approximately 14.5 inches wide and 60 inches long (including tassels) using a foundation chain of 161 stitches. You can adjust length by adding or removing repeats of the central filet motif band and the side diamond repeats.
Info :
When following the pattern, count stitches at the end of each set of 10 rows to maintain a perfectly straight edge. Place stitch markers in the first and last stitch of every row for long runs to avoid drift.
— Materials & Stitches Used :
Info :
Stitches used in this pattern: ch, sc, dc, hdc, popcorn (pop), shell (dc3 in same st), filet (dc clusters with ch spaces), and sc edging. Popcorns are used to create the bobble bands. Filet is used in the central geometric lattice and the side grid. Work with multiple colors and carry color for short distances when practical; always secure ends neatly.
— Foundation Row :
Round 1 :
Using Natural/Cream, ch 163. (This includes extra 2 chains to serve as turning chain for dc mesh. Foundation chain count = 163)
Info :
Chain loosely to avoid a tight first row. Place a marker in the first chain and keep the marker there until you have a few rows in to ensure even edge tension.
— Center Filet Lattice Panel (work across full width) :
Round 2 :
Row 1 (RS): Dc in 4th ch from hook (counts as dc), *ch 1, sk 1, dc in next ch* across to last 2 ch, dc in final ch. (Total: 81 dc with 81 ch-1 spaces; row count expressed as 81 filet blocks)
Round 3 :
Row 2 (WS): Ch 3, turn, dc in each dc and ch-1 space across, ending with dc in top of turning ch. Maintain 81 dc positions total (81 filets).
Round 4 :
Row 3: Ch 3, turn, work filet pattern for geometric grid: *dc, ch 1, sk next dc (this creates an open square), dc in next dc* repeat across to end. Follow the filet chart: in blocks where the geometric line is solid, work 2 dc in the pair of positions instead of dc-ch1-dc to create filled squares. (Total positions constant: 81)
Info :
The central geometric maze is created by following a 80-row filet chart. For simplicity in this written pattern we supply a repeat of 20-row motif blocks repeated 3 times. Charted or written mosaic instructions are recommended for exact symmetry. Each written row below refers to 'follow chart row X' — for a written-only approach follow the instructions as 'solid square' means 2 dc in adjacent positions; 'open square' means dc, ch1, skip.
Round 5-24 :
Rows 4-23: Continue following the 20-row filet motif sequence (repeating the 20-row motif once plus initial row) across the full width. Keep stitch positions consistent (81 filet units per row). Maintain Natural/Cream as background and work Sage/Muted Green for the filled squares that create the maze lines. For color changes: when switching to Sage, join at the first dc of the row with a standing dc or join with sl st and proceed. (81 positions each row)
Info :
Change color at the beginning of a row for crisp lines. Carry unused yarn along the WS by twisting with working yarn every 4-6 sts to avoid long floats. Clip and weave if spans exceed 6 stitches.
Round 25-44 :
Rows 24-43: Repeat the 20-row filet motif again to build the center panel height. The center panel now totals 44 rows of filet mesh. Keep counts consistent: 81 filet columns per row. After row 44 end with Natural/Cream for a small buffer row of dc across (Row 44: ch3, dc across in each available dc and ch-1 space to create a compact frame inside the bobble border).
Info :
If you prefer a wider or narrower center, adjust starting chain by adding/subtracting multiples of 2 chains (each filet unit equals 2 chain positions). Make sure to adjust the FILET motif repeats accordingly.
— Inner Narrow Border (Thin framed ridge) :
Round 45 :
Row 45 (RS): Change to Natural/Cream if not already. Ch 2, turn, hdc in each dc/ch-space across (81 hdc). This creates a low ridge to separate the filet center from the bobble band.
Round 46 :
Row 46 (WS): Ch 1, turn, sc in each hdc across (81 sc). Maintain a neat compact band to anchor bobbles.
Info :
Block these two inner rows lightly before beginning the bobble band if you notice curling. The hdc-to-sc transition protects the filet edges from distortion when adding heavy bobbles.
— Terracotta Bobble Band (Raised Texture) :
Round 47 :
Row 47: Join Terracotta. Ch 1, turn, sc in first 3 sts, *popcorn (pop) in next st, sc in next 3 sts* repeat across until 3 sts remain, sc in last 3 sts. Popcorn/pop definition: work 5 dc in same st, remove hook, insert hook into top of first dc of the 5, pull loop through to close popcorn, ch 1 to secure (counts as bobble). Total bobbles across: approximately 16-18 depending on spacing. Total sts across remain 81 positions (count sc spaces as sc).
Round 48 :
Row 48: Ch 1, turn, sc in each st across working behind the popcorns to secure them: sc across each sc and across the top of each pop (81 sc). This row tethers bobbles to the body.
Round 49 :
Row 49: Repeat Row 47 (another bobble pass) to create a double-row bobble band for a dramatic ridge. Join with sc buffer rows as needed to keep bobbles centered.
Info :
Popcorns pull in a lot of yarn and can change your stitch counts slightly. If your bobbles are pulling the row narrower, add an extra sc at the beginning and end of the bobble row to maintain edge straightness. Always count across after finishing a bobble row to ensure the same number of anchor sc positions (81).
Round 50 :
Row 50: Ch 1, turn, sc in each st across in Natural/Cream to frame the bobble band (81 sc). This creates a neutral frame between bobbles and the next motif band.
— Side Diamond Grid Bands (Blue Motifs in Open Mesh) :
Info :
The runner pictured has two symmetrical side panels, each constructed as 12 columns of open grid with inserted diamond motifs. We replicate this by working across the same foundation width, but creating a repeat across the row: [side mesh strip][central mesh][opposite side mesh strip]. The written rounds below instruct the full-width pass, but each side motif occupies 20 stitches across the width and is repeated along the row sides.
Round 51 :
Row 51: Change to Natural/Cream. Ch 3, turn, dc across 81 positions to create a solid band (81 dc). This row gives a sturdy base for the side diamond motif rows.
Round 52 :
Row 52: Change to Sky Blue at RS. Ch 3, turn, work open mesh for side motifs: For positions that map to the left-side motif area (first 20 positions): *dc, ch1, sk1* across the 20 positions creating 10 open squares across the motif width. For central 41 positions keep as solid dc (dc across pairs). Mirror the open mesh for the right-side motif area (last 20 positions). This creates the open grid where diamonds will be inserted. Maintain total 81 positions across.
Round 53-70 :
Rows 53-70: Work 18 rows inserting diamond motifs into the open mesh columns on each side. Diamond motif construction (per side, spanning 10 open squares vertically): follow a 10-row diamond pattern: Row A (start of diamond): in the motif area work a cluster of 3 dc separated by ch-1 spaces to create the diamond base; gradually decrease/increase the number of filled squares across successive rows to form a symmetrical diamond. Complete the 10-row diamond and then mirror or offset the next diamond/space so diamonds run along the band with small mesh passages between. The central 41 positions remain in Natural/Cream dc to frame the diamonds. Repeat diamond sequence across the full length so left and right side motifs align symmetrically.
Info :
If you prefer to make individual squared motifs (granny-diamond motifs) and join them later, work small 8-10 row diamond squares and join them to the runner with a whipstitch. The written method above keeps the runner continuous and avoids seaming.
Round 71 :
Row 71: After completing diamonds, work a Natural/Cream sc row across to lock motifs: ch 1, turn, sc in each st across (81 sc).
— Narrow Color Stripe Frames :
Round 72 :
Row 72: Join Terracotta. Ch 3, turn, dc in each st across (81 dc). Keep this thin stripe to echo the bobble color.
Round 73 :
Row 73: Change to Sage. Ch 3, turn, dc across in Sage for a narrow contrasting stripe (81 dc).
Round 74 :
Row 74: Change to Natural/Cream. Ch 1, turn, sc across for a firm base before the wide outer border (81 sc).
Info :
These narrow stripes create a visual separation between the motif bands and the border. Use consistent tension to keep stripes straight and even along the length.
— Outer Openwork Lattice Border :
Round 75 :
Row 75 (RS): With Natural/Cream, ch 4 (counts as tr + ch1), turn, *sk next st, tr in next st, ch 1* across to create tall open spaces that frame the runner. Final count will match approximate 81 tr positions with ch-1 spaces between.
Round 76 :
Row 76: Ch 3, turn, dc in each tr and ch-1 sp across to create a tidy row (81 dc). This evens the tall-tr grid and prepares for the shell scallop edge.
Info :
If you prefer a more open border, work a second tr/ch row (repeat Row 75) before continuing. The shown sample uses one tall-row lattice and a reinforcing dc row.
— Scalloped Lace Edge (Shell Scallops) :
Round 77 :
Row 77: Switch to Natural/Cream. Ch 1, turn, sc across to the first corner. At the corner work 5 sc in the corner space to create a rounded corner. Continue sc across until you reach a spacing where a scallop will form: *skip 2 sts, work shell (dc3, ch1, dc3) in next st, skip 2 sts, sc in next st* repeat across the edge. At corners work shell clusters to maintain a rounded corner. Total scallop count will be approximately 27 scallops along the long edge.
Round 78 :
Row 78: Ch 1, turn, work a second scallop pass to deepen the lace: in each shell work (dc5) across, anchored by sc in the between-spaces. This creates a fuller lace scallop and a stable base for attaching fringe.
Info :
Keep scallops even by measuring the edge and spacing shells uniformly. If your stitch count drifts, adjust by adding or subtracting single sc anchor stitches in the dc row just inside the scallops. Use pins to block scallops uniformly before adding fringe.
Round 79-82 :
Rows 79-82: Repeat the shell passes as desired (1-3 passes total) to build the lace depth. The sample uses 3 total passes (Rows 77-79) to produce intricate scallops. Finish the last scallop round with a neat sc edge: ch 1, sc in each dc of the shell across and sc across the small anchor sc spaces.
Info :
Use the smaller 3.5mm hook for final scallop passes if you want crisper, tighter loops on the edge. This gives the scallops a pronounced, lacy finish.
— End Tassel Fringe :
Info :
Before attaching tassels, prepare bundles: cut 40 pieces of Natural/Cream yarn, each 18 inches long (for a finished fringe of ~9 inches folded). For a full fringe, make bundles of 4 strands per tassel, spaced every 3 dc positions along the short edge. The sample attaches 27 tassels per short edge (54 total on both ends).
Round 84 :
Attach tassels: fold each bundle in half and use a crochet hook to pull the folded loop through the outermost scallop base between shells, pull ends through loop and tighten. Space tassels evenly and trim ends to even length. Secure tassels by knotting the looped fold inside the scallop and adding a few drops of fabric-safe glue if desired for a permanent hold.
Info :
Tip: Attach tassels after blocking the scallops to ensure each tassel hangs straight. You can vary tassel length for a modern look or create knotted tassels for extra texture.
— Finishing & Blocking :
Info :
Weave in all ends using a yarn needle, working them back through several stitches on the WS. Wet block the entire runner flat: soak in lukewarm water with mild soap, squeeze out excess (do not wring), pin to blocking mat using pins at scallop edges and straighten the sides. Allow to dry fully before trimming tassels to final length.
Info :
Final pressing: after the runner is dry, steam lightly from the WS if needed to open the lace and secure shape. Avoid direct heat on cotton yarn to prevent glossing or flattening of the bobbles.
— Alternate Size Instructions :
Info :
To shorten or lengthen the runner: add or remove full repeats of the 20-row center filet motif block. Each 20-row repeat equals roughly 8-9 inches in length depending on yarn and tension. To widen: add multiples of 2 chains to the foundation chain and include extra filet columns distributed across the center and side grids in proportion.
Info :
For a table runner intended for heavy use, consider using a sturdy cotton-blend worsted yarn and adding a non-slip fabric runner backing sewn on with an invisible stitch after completion and blocking.
— Stitch & Technique Tips Throughout :
Info :
Popcorn/pop technique refresher: Work 5 dc in the same stitch, remove hook, insert hook into top of first dc of the 5, pull loop through to close, ch1 to secure. On the following row, anchor the popcorn by working sc around the base and sc into the top with care. If your popcorns lose shape, reduce to 4 dc per pop.
Info :
Filet pattern written guidance: Each filet 'square' occupies two stitch positions across: a filled square is 2 dc (no chain between), an open square is dc, ch1, skip one. Keep careful notes of which squares are filled per row when following geometric patterns by marking a printed chart or annotating a simple grid on paper.
Info :
Carrying colors: For short color runs (up to 4 sts), carry the nonworking color behind the work. Twist colors at the color change to avoid holes. For long floats, cut and weave ends; never carry across more than 6 stitches on the inside.
Info :
Edge straightness: Because of the mix of open and dense stitches, edges can drift. Counteract with periodic edge rows of sc and by adding or subtracting single sc anchors at the ends of bobble or shell rows to keep the edge straight. If you notice slanting early, correct immediately rather than after many rows.
Info :
Tension: Use a slightly larger hook for open filet rows if you normally work tight, and a slightly smaller hook for bobble rows if your popcorns are loose. Swatch each stitch type to find a balanced hook size; the pattern sample used 4.0mm for main body and 3.5mm for scallop edges.
Info :
Counting tips: Work in 10-column chunks, using temporary loops of contrasting yarn slipped into the side space every 10 filet columns. This makes long counting easier and avoids losing track during repeat sequences.
Info :
Storing half-completed runners: Fold neatly and place in a breathable cotton bag. Avoid applying heat until completely dry. Keep bobble rows flat by placing tissue under them to prevent flattening during storage.
Finishing this textured table runner is so satisfying — every bobble, scallop and tassel adds personality and warmth to your table. The layered bands create a rich visual story that looks more complex than it is, and the cotton yarn gives the piece durability for everyday use. Enjoy the process of color changes, the quiet rhythm of filet rows, and the playful pop of the terracotta bobbles. Share it with someone special or let it become a cherished everyday accent in your own home. 🧶✨