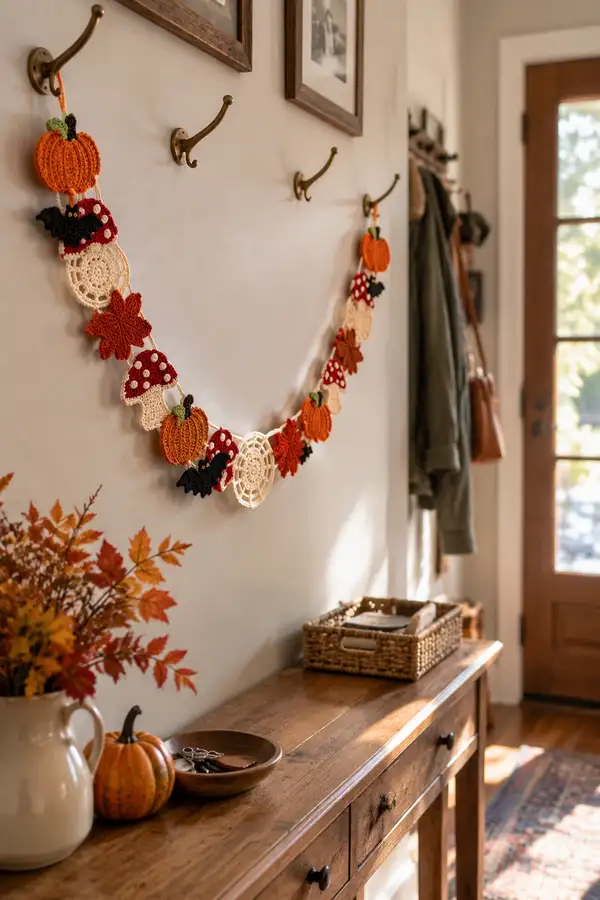
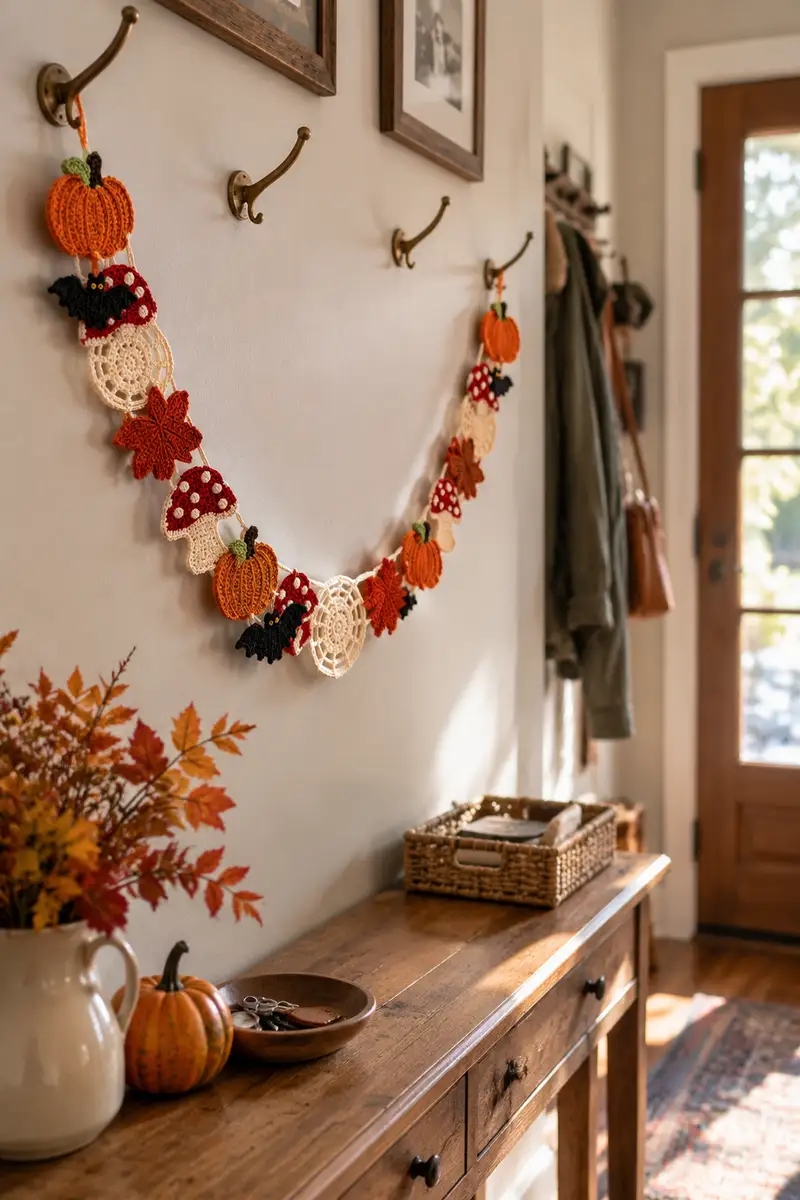
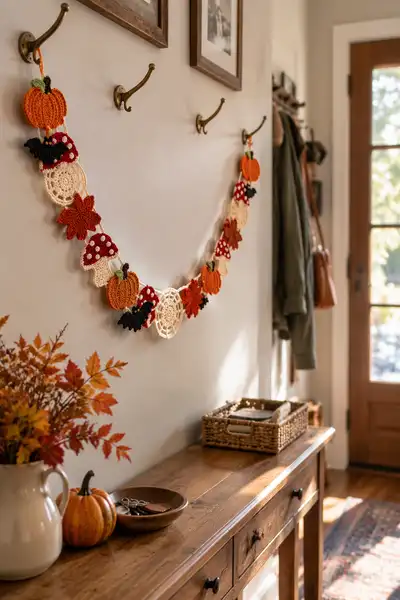
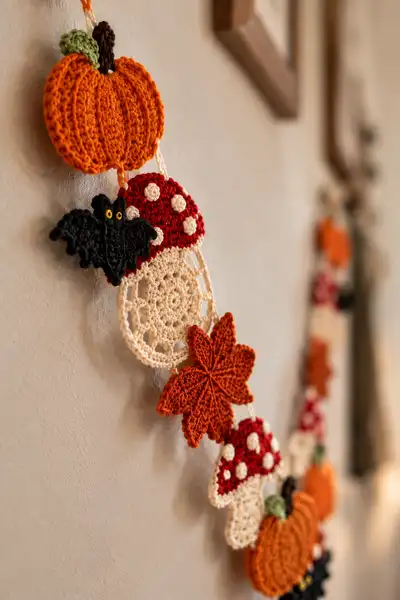
A charming autumn garland combining pumpkins, spotted mushrooms, maple leaves, little bats and lacy doilies. Works up in warm orange, cream, red and black with tiny embroidered details and a braided hanging cord. Perfect for entryways or across a mantel to bring cozy Halloween and harvest vibes to your home.
Progress Tracker
0% Complete
— General Notes :
Info :
Work motifs mostly flat in rows or rounds using a consistent tension. The motifs are crocheted individually then joined onto a crocheted cord. Use cotton or cotton-blend worsted weight yarn for crisp stitch definition. If you prefer less stiff motifs, choose an acrylic/wool blend but fibers will drape differently.
Info :
Gauge is not critical but expect each medium motif (pumpkin, doily, mushroom) to measure approximately 2.5-3.5 inches across depending on yarn and hook. Use a 3.5mm hook to match suggested finished sizes.
— Pumpkin Motif (Make 6) :
Round 3 :
(1 sc, inc) x 6 (18)
Round 4 :
(2 sc, inc) x 6 (24)
Round 5 :
(3 sc, inc) x 6 (30)
Round 6 :
(4 sc, inc) x 6 (36)
Info :
We will build a flat disc that becomes one half of the pumpkin. Keep your tension even; this disc is the base for the ribbing and will be joined to a second disc later.
Round 7 :
(5 sc, inc) x 6 (42)
Round 8 :
(6 sc, inc) x 6 (48)
Round 9-12 :
1 sc in each st around (48)
Info :
At this point your disc should lay flat. Count to ensure you have 48 sts. Mark the first stitch of Round 9 and continue moving marker up each round. The 48-count creates a good circumference for visible ribbed segments.
Round 13 :
Change to BLO. 1 sc in each st BLO (48)
Round 14 :
1 sc in each st (48)
Info :
We will now mark and create 6 vertical rib segments across the round. Use removable markers or loops of contrasting yarn to mark six equally spaced points 8 sts apart (48/6 = 8). These marks will guide surface slip-stitch ribbing that we will make later.
Round 15 :
1 sc in each st (48)
Round 16 :
1 sc in each st (48)
Info :
Fasten off leaving a 14–16 inch tail for sewing this disc to its mate later. Make a matching disc following Rounds 1-16 for the back of the pumpkin (total 2 discs per pumpkin). Keep both discs ready for assembly.
Assembly Round A :
With right sides facing, align the two discs. Join yarn at any stitch and sc through both loops around to join (48). Do not close fully yet; leave a 1.5 inch gap to add slight stuffing.
Info :
Add a thin layer of stuffing or scrap yarn to give the pumpkin very gentle dimension—this garland motifs are intended to be mostly flat with a subtle puff. Avoid overstuffing to keep the pumpkin flat enough to hang well.
Assembly Round B :
Continue sc around through both layers decreasing 4 evenly spaced stitches to create a gentle tuck (48 - 4 = 44) but maintain even join; if you prefer perfectly even edge keep (48). Fasten off and weave in ends.
Surface Ribbing Step :
Use a long tail of same-color yarn and a tapestry needle to create 6 vertical ribs. Mark the 6 segment points you placed earlier. Insert needle from center through to front at the first marker, bring needle over the disc to next edge marker across the opposite side and pull tight to create indentation. Repeat for each pair of opposite markers to form 3 pairs then repeat slightly offset to create 6 visible ribs. Secure at back and weave in ends.
Info :
Alternative: for more pronounced ribs work surface slip stitch or front post hdc in a contrasting round: join yarn at top of disc and sl st along to each marker, then work a line of surface sl st down to the center and back—repeat for each rib.
Stem and Leaf :
Using dark brown, ch 6, sl st to form a small tube: Round 1: 6 sc in magic loop created from the chain base or work 6 sc into 2nd ch from hook and continue for 3 rounds to make a short stem tube. Fasten off. Using leaf green: ch 6, work 1 sc each across, then turn and sc back along opposite side to form a small oval leaf, shaping with tiny decreases at the tip. Attach stem and leaf to center top of pumpkin with whip stitch and secure.
Info :
Make 6 pumpkins total. For slimmer pumpkins reduce initial increase rounds by one step (stop at 42 sts) if you prefer a smaller motif. Block gently if needed to flatten before joining to cord.
— Mushroom Motif (Cap) (Make 6 caps) :
Round 3 :
(1 sc, inc) x 6 (18)
Round 4 :
(2 sc, inc) x 6 (24)
Round 5 :
(3 sc, inc) x 6 (30)
Info :
Change to mushroom red yarn now for the cap if you began in cream for a center. The red cap will form a slightly domed circle that we will scallop into a mushroom edge in later rounds.
Round 6 :
1 sc in each st (30)
Round 7 :
1 sc in each st (30)
Round 8 :
(3 sc, 1 inc) x 6 (36)
Round 9 :
1 sc in each st (36)
Round 10 :
Change to cream/ivory. Work 1 sc in next 6 sts, *skip 2 sts, 5 dc in next st (shell), skip 2 sts, 1 sc in next 6 sts* repeat around to create scalloped mushroom edge. End with 1 sc in final sts; adjust to fit (36)
Info :
The shell clusters form the skirted edge of the mushroom cap. If your rounds don't align, adjust the number of sc between shells to maintain even spacing. The cap should measure about 2.5 inches across.
Round 11 :
Fasten off leaving long tail for attaching. We will place small raised spots onto the cap as separate little circles (see Spots section). If you prefer embroidered spots, use cream yarn and French knot-style stitches.
— Mushroom Stem (Make 6) :
Round 1 :
With cream, ch 7, join with sl st to form a ring (7)
Round 2 :
7 sc in ring (7)
Round 4 :
(1 sc, inc) x 2, 3 sc (9)
Round 5-6 :
1 sc in each st (9)
Info :
Flatten the stem slightly and sew the top of the stem to the center underside of the cap with the long tail, aligning so that the cap sits naturally. Stuff very lightly to keep the stem shaped but flat.
Round 7 :
Sew stem to cap; weave ends. Optionally add a small ground round of sc around the bottom edge for a finished look.
— Mushroom Spots (Make 24 small spots) :
Round 2 :
sl st in next 2 sts, fasten off leaving a long tail for sewing (6)
Info :
Sew spots onto cap in scattered pattern using long tail; press slightly so they sit raised above the cap. Alternatively, embroider raised French-knot-style spots with cream yarn if you prefer no extra motifs.
— Lacy Doily Medallion (Make 4) :
Round 3 :
(1 sc, inc) x 6 (18)
Round 4 :
(2 sc, inc) x 6 (24)
Round 5 :
1 sc in each st (24)
Round 6 :
(*ch 3, skip 2 sts, 1 sc* ) around to create small openwork (24 ch-3 sps)
Round 7 :
In each ch-3 sp: (1 sc, 3 dc, 1 sc) to form picot petals; sl st to join (24 petals)
Info :
This medallion forms a cream lace circle that adds airy contrast between the denser pumpkins and mushrooms. Block gently to shape if desired, pinning each petal to keep a uniform circle.
Round 8 :
Fasten off and weave ends; leave a long tail for sewing onto cord when assembling the garland.
— Maple Leaf Motif (Make 6) :
Round 1 :
Ch 8, sc in 2nd ch from hook, hdc in next, dc in next three, hdc in next, sc in last (this forms central petiole and point)
Round 2 :
Turn and work along opposite side of foundation chain: sc, hdc, dc x3, hdc, sc to mirror the first side; sl st to join at base.
Round 3 :
Ch 1, in each leaf point work: (sc, hdc, dc, hdc, sc) to create full leaf lobes; work mirrored series on each small point dividing chain spaces to create 5 distinct lobes. Fasten off (approx 14-16 sts across longest lobe)
Info :
After forming the base shape, use surface slip stitch veins with a 1-2 mm smaller hook and slightly darker rust yarn: draw a central vein up each lobe and smaller side veins. This adds realistic texture and defines the maple shape.
Round 4 :
With rust yarn, work 1 sc around edge to neaten and create a slight raised rim; fasten off and weave ends.
— Bat Motif (Make 6) :
Round 1 :
Ch 10, sc in 2nd ch from hook, sc across to create little arc for bat wing base (9)
Round 2 :
Turn and sc back across (9)
Round 3 :
Attach to side and 3 sc across center to form head base, ch 3 to form ear, sl st back into body, repeat ear on other side. Shape wing scallops by working (sc, hdc, dc, hdc, sc) along wing edge at three spots to create the scalloped wing tips. Fasten off (body ~20 sts across)
Round 4 :
Using yellow or gold thread, embroider two small eyes: make french-knot-like stitches and secure on the head area. Alternatively sew two tiny cream spots of 4 sc in mr as tiny eye discs before attaching to garland.
Info :
These bats are intentionally stylized and flat. Keep them small so they tuck between other motifs. You can make the wing scallops more defined by working picots at the outer tips.
— Small Accent Dots (Optional, Make 12) :
Round 2 :
sl st in next st, fasten off leaving tail for sewing (4)
Info :
Use these for extra mushroom spots, eyes or as decorative beads across the cord. Small little raised dots add charm and can be sewn on with a long tail.
— Braided Hanging Cord and Connectors :
Method A - Simple Crochet Chain Rope :
Ch 200 (or desired total length for garland). For a stronger cord, sl st in each ch back along the chain to create a tubular cord. Fasten off and knot ends; weave in tails. This creates a slim cord that motifs can be tied or sewn to.
Method B - Three-Strand Braided Cord :
Cut three equal lengths of yarn about 3 times the desired finished length. Tie ends and braid, then fold and twist into a rope, knotting ends securely. Use a little glue at the knot if desired. Attach motifs by sewing through cord or using 4 ch loops as hangers.
Info :
I recommend making the cord longer than you think you need so you can space motifs and make loops at the ends for hanging. You can also crochet small ch loops and attach them between motifs for neat spacing.
— Assembly and Spacing :
Step 1 :
Lay cord flat across your workspace and plan motif order: pumpkin, mushroom, doily, leaf, mushroom, bat, pumpkin, doily, leaf repeat until cord is full. Maintain consistent spacing: 2-3 inches between motif centers gives airy look; closer spacing creates fuller garland.
Step 2 :
Use long tails on each motif to whip-stitch through the cord. For lightweight cotton yarn motifs, a single thorough pass through the motif back and a couple of wraps on the cord will be secure. For more security, sew in an X pattern through the motif and cord at two or three attachment points.
Info :
Pin motifs in place before final stitching to check spacing and visual balance. Alternate colors and shapes to avoid clustering similar motifs together unless intentionally creating a group.
Step 3 :
After attaching, check hang: if a motif tilts, add a second stitch on the opposite side to balance. Trim and weave in all ends on the back so no loose threads show on the front.
Info :
Optional: lightly spray a starch solution and block motifs on a flat surface to keep edge shapes crisp. This is particularly useful for doilies and leaves.
— Finishing Touches :
Final :
Create 2-inch loops at each cord end for hanging. Use a secure overhand knot and wrap remaining tail around the knot, sewing into the cord to hide the end. Add small bows or tassels if you want extra decorative elements.
Info :
If motifs shift on the cord with time, a tiny dab of fabric glue on the back where the motif meets the cord will keep it from sliding while remaining easy to remove if you want to change arrangement later.
This autumn garland brings a handmade, cozy look to any entryway or mantel—each tiny motif is a little celebration of the season. From ribbed pumpkins to dotted mushroom caps, the details are what make this runner special. Hang it proudly or gift a finished strand to a friend who loves seasonal decor. 🍁🎃🖤