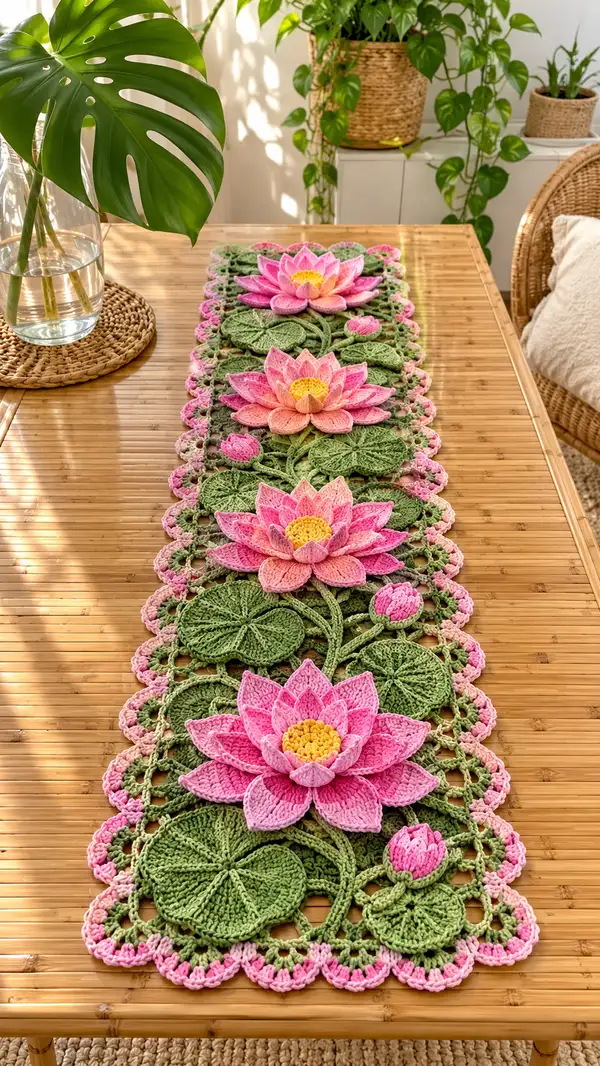
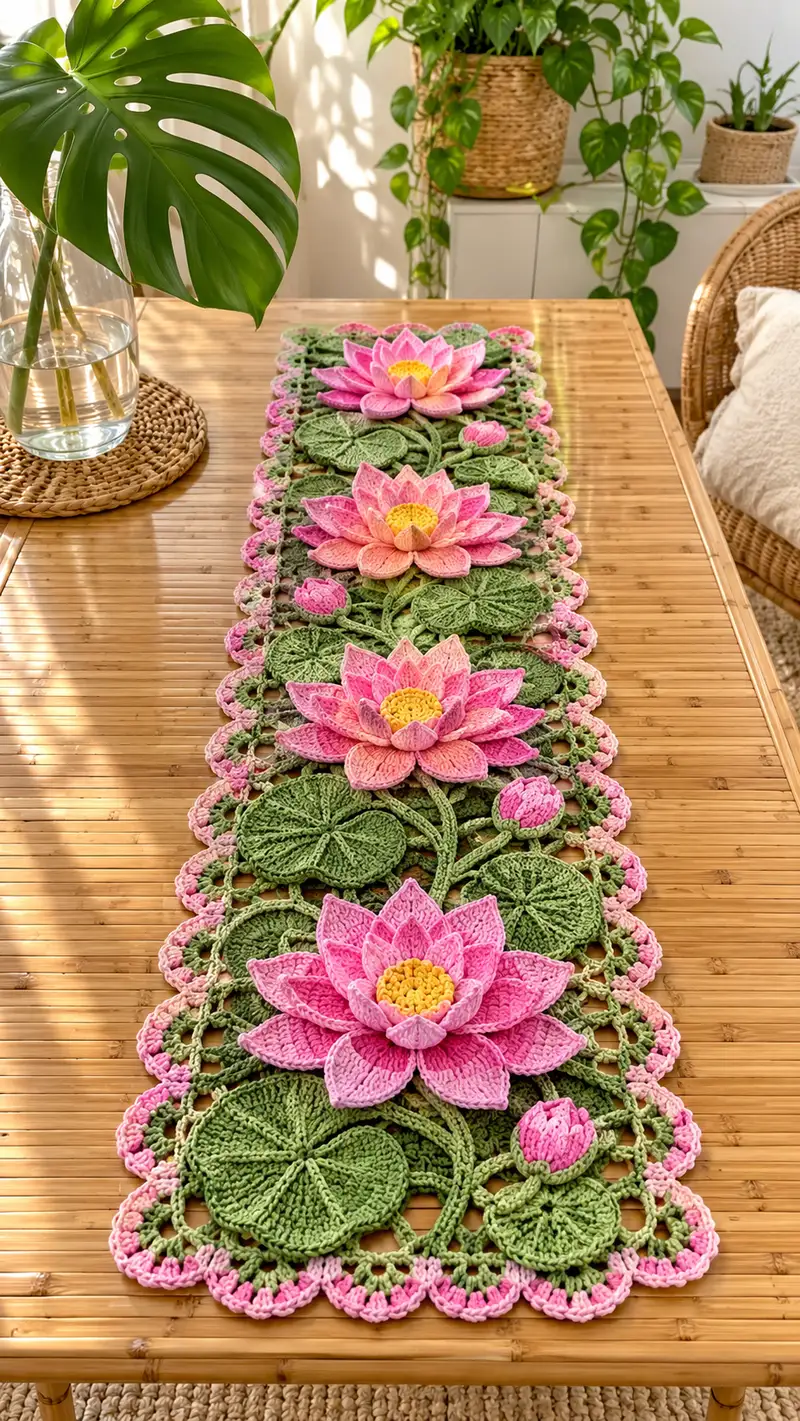
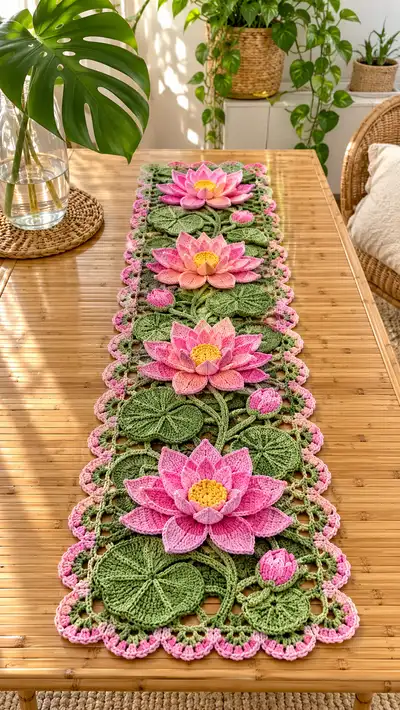
This Pink Lotus Flower Table Runner features three dimensional lotus blooms, layered petals in soft gradient pinks, bright yellow textured centers, and sculpted green lily pads connected by delicate lacework. The runner sits elegantly along a dining or console table, with scalloped pink edging that frames the motifs. Each lotus is built in layers for a realistic, raised effect, and motifs are joined with a lacy mesh for a cohesive, airy runner.
Progress Tracker
0% Complete
— Overview & Notes :
Info :
This pattern builds modular lotus motifs (flower center, three petal layers), buds, lily pads and stems, then joins them with a lacy connector and scalloped border. Make 3 full lotus motif repeats for the shown runner. Gauge is not critical but for proportion, a finished large lotus (center to outer petal edge) should measure approx 18-20 cm across using DK yarn and 3.5mm hook. Work tightly for sculptural petals; petals work best if you occasionally drop one hook size (3.0mm) when making petals. Block flat motifs before assembly for neat joins.
Info :
All rounds are worked in continuous rounds unless otherwise noted; place a stitch marker at the first stitch of each round. When working flat petals or petals in rows, directions use rows rather than rounds. Each petal is made as a separate small piece and sewn or crocheted into position around the center to form layered bloom.
— Lotus Center (Seed Pod) :
Round 1 :
With yellow, mr, 6 sc in ring (6)
Round 3 :
(1 sc, inc) x 6 (18)
Round 4 :
(2 sc, inc) x 6 (24)
Round 5 :
(3 sc, inc) x 6 (30)
Info :
Start building texture: the seed pod uses tight bobble/puff clusters to mimic lotus seeds. Keep tension firm; you want dense clusters but not so tight you can’t insert the needle for sewing later.
Round 6 :
1 sc in each st around (30)
Round 7 :
Work a sequence of clustered bobbles into the next round: *sc in next 2 sts, bobble in next st* rep around (30 sts; bobble replaces a sc in targeted stitch but count remains 30)
Round 8 :
(1 sc, dec) x 10 (20)
Info :
Begin to stuff lightly with fiberfill to give the yellow seed pod a subtle dome. Use a small amount — overstuffing will make attaching petals awkward. The pod should be firm but not hard.
Round 9 :
1 sc in each st (20)
Round 10 :
(2 sc, dec) x 5 (15)
Round 11 :
(1 sc, dec) x 5 (10)
Info :
Fasten off leaving a long tail for sewing the center to the petal base. Finish stuffing to even dome and close hole with tapestry needle if desired. You may leave the last 1-2 openings slightly open for attaching petals by crocheting around the base.
— Petal Template (Make 12 inner small petals) :
Info :
Each petal is worked flat in rows starting from the center base. Inner petals are shorter and rounder; make 12 to surround the seed pod. Use tonal pink (bright pink/pale mix). Hook 3.0-3.5mm depending on desired stiffness.
Row 1 :
Ch 8, sc in 2nd ch from hook, sc across (7)
Row 2 :
Turn, ch1, inc in first st, sc to last st, inc in last st (9)
Row 3 :
Turn, ch1, inc in first st, sc to last st, inc in last st (11)
Row 4 :
Turn, ch1, sc in each st (11)
Row 5 :
Turn, ch1, (sc2tog) at ends to shape point: dec first 2 sts across until 7 sts remain (7)
Row 6 :
Turn, ch1, sc across (7)
Row 7 :
Turn, ch1, dec at first, sc across to last 2 sts, dec (5)
Row 8 :
Turn, ch1, sc across (5)
Info :
Finish with a neat pointed tip. Fasten off leaving a 20-25 cm tail to sew to the center; make sure all 12 petals match in size. Block flat with the curved side up to shape edges slightly outward so petals will lift when sewn in place.
Row 9 :
Sewable base: fold bottom edge up slightly and mattress stitch closed to create a slight cupping at the base for better attachment. Fasten off.
— Second Petal Layer (Make 12 medium petals) :
Info :
These medium petals are slightly longer and wider than inner petals to overlap and create depth. Work each as flat piece and optionally add a FLO ridge for a vein effect.
Row 1 :
Ch 10, sc in 2nd ch from hook and across (9)
Row 2 :
Turn, ch1, inc in first st, sc across, inc in last st (11)
Row 3 :
Turn, ch1, inc in first st, sc to last st, inc in last st (13)
Row 4 :
Turn, ch1, sc across (13)
Row 5 :
Turn, ch1, dec at first and last two stitches to shape (11)
Row 6 :
Turn, ch1, sc across (11)
Row 7 :
Turn, ch1, dec at ends leaving 7 sts (7)
Row 8 :
Turn, ch1, sc across (7)
Row 9 :
Turn, ch1, sc2tog twice to taper and 1 sc (5)
Row 10 :
Fasten off leaving long tail for sewing. Block and steam lightly to open shape.
Info :
Make sure second layer petals are slightly larger than inner petals and have a gentle curve. If you want pronounced veining, add 1 sc in FLO along the center row on the right side before fastening off.
— Outer Petal Layer (Make 12 large petals) :
Info :
Outer petals are the largest and will form the visible skirt of the lotus. Work in the same method but with a wider foundation chain and additional rows. Use the palest shade of your gradient at the petal tips for a soft fade.
Row 1 :
Ch 14, sc in 2nd ch from hook and across (13)
Row 2 :
Turn, ch1, inc in first st, sc to last st, inc in last st (15)
Row 3 :
Turn, ch1, inc in first st, sc to last st, inc in last st (17)
Row 4 :
Turn, ch1, sc across (17)
Row 5 :
Turn, ch1, (sc2tog) near edges to shape into a rounded petal tip, reducing to 13 sts (13)
Row 6 :
Turn, ch1, sc across (13)
Row 7 :
Turn, ch1, dec at sides gradually to 9 sts (9)
Row 8 :
Turn, ch1, sc across (9)
Row 9 :
Turn, ch1, sc2tog twice then sc (5)
Row 10 :
Fasten off leaving long tail for sewing. Shape each outer petal over a light steam to set curve. Make 12.
Info :
For realistic shading, space color changes across the petal rows: start with darker pink at base for Rows 1-3, then switch to mid-tone for Rows 4-6, and pale for Rows 7-10. Carry yarn on wrong side or cut and weave ends neatly.
— Bud (Make 3 small buds for each motif) :
Round 1 :
With dark pink, mr, 6 sc in ring (6)
Round 3 :
(1 sc, inc) x 6 (18)
Round 4 :
1 sc in each st (18)
Round 5 :
Replace every 3rd sc with a half puff: *sc, sc, hdc&puff* rep around to texture (18)
Round 6 :
1 sc in each st (18)
Round 7 :
(2 sc, dec) x 4 (12)
Info :
Stuff lightly and fasten off leaving a tail. Sew the base of the bud to the mesh connector or to a stem, then fold petal tips outward slightly to mimic a closed bud.
— Lily Pad (Make 10-12 per runner depending on desired spacing) :
Round 1 :
With green, mr, 6 sc in ring (6)
Round 3 :
(1 sc, inc) x 6 (18)
Round 4 :
(2 sc, inc) x 6 (24)
Round 5 :
(3 sc, inc) x 6 (30)
Round 6 :
1 sc in each st (30)
Info :
To create the slight scalloped rim and subtle veins, work one round in BLO or add surface slip-stitch veins after blocking. Lily pads in the photo are textured with radiating ribs; we build ribs next.
Round 7 :
Switching to BLO: 1 sc in each st BLO (30)
Round 8 :
Slip stitch evenly around to create a neat edge (30)
Info :
To make the central vein ribs: use surface slip stitches or embroidery with doubled green yarn. From center to edge, make 8 radial lines evenly spaced by working surface sl st with yarn needle, or work raised dc ribs by post stitches starting from row 2 center to outer edge.
— Lily Pad Veins (Surface Decoration) :
Info :
Make 8 ribs: mark 8 equidistant points around the pad. With a needle and green yarn, anchor at center and run a thick surface sl st to edge; repeat for each rib. Alternatively, crochet 8 raised lines: attach yarn at center and tr in same st, then work tr back towards edge using back post technique to keep ribs raised.
Step :
Radial ribs: make 8 ribs, each approx 8-10 cm long depending on pad size. Secure ends at edge and weave tails on wrong side.
— Stems and Curved Vines (Make lengths to connect motifs) :
Round 1 :
With green, ch 60 (or desired length to connect motifs), sc in 2nd ch from hook and across to end to form a narrow tube (59)
Round 2 :
Fold tube flat and join with sl st along long edge to form cord (59)
Info :
Alternatively, work a crocheted i-cord: ch 3, sc in each ch, continue in spirals to desired length for a more rope-like stem. Slight shaping can be made by stuffing lightly or twisting the stem before attaching for natural curves.
— Mesh Connector Panel (Make rectangular panels to join three flower motifs) :
Round 1 :
With green, ch 60, join with sl st to form loop (60)
Round 2 :
Ch3 (counts as dc), *ch3, skip 2 sts, dc in next* rep around to create an open chain mesh (20 dc, 20 ch-3 spaces approx)
Round 3 :
Ch3, dc in each dc and dc into ch-3 spaces as follows: dc, ch3, dc in same space repeat to expand mesh; aim for 6 rows of mesh for strength (st count variable based on mesh size)
Info :
Mesh panels serve to place lily pads and stems on top and to join motifs together. Work multiple rows until the panel is wide enough to fill the space between flowers. Block firmly to square and stabilize the mesh before assembly.
Round 4-12 :
Repeat mesh pattern, increasing or decreasing ch-3 spaces to match desired width. End with a round of sc to create a firm edge for attaching motifs.
— Joining Motifs into a Single Runner Strip :
Info :
Layout plan: Three full lotus motifs spaced evenly with lily pads and mesh panels between them. For the photo we show a runner composed of 3 lotus with two mesh panels between them; adjust as you wish. Pin all elements in place on a blocking mat and baste lightly with a few long tacking threads to maintain placement before final joining.
Step 1 :
Place central lotus motif, then align mesh panel to one side and pin lily pads and stems onto the mesh where you want them to lay. Use the stems to connect from center base of the lotus to adjacent pads or next lotus.
Step 2 :
Sew lily pads and stems to the mesh with small mattress stitches, catching only the right side of both pieces so stitches are invisible from the front. Ensure ribs on pads face upward and stems are curved naturally.
Info :
When attaching petals and seed pod: first sew inner petals around the seed pod base, securing each petal base into the last yellow round or into a narrow crocheted round around the pod so the petal appears to emerge from under the pod. Next add the medium and outer petals offset by half a petal to create layered look.
— Petal Attachment Sequence :
Step 1 :
Arrange 12 inner petals evenly around the seed pod, pinning at base every 30 degrees. Using long yellow tail or matching pink tail, whip stitch each petal base to the pod and a small number of stitches into an adjacent small round of green that forms the petal base.
Step 2 :
With medium petals, offset them between inner petals and sew bases to the base round that encircles the seed pod, anchoring also to the mesh if needed. Ensure each petal stands slightly above inner layer to create depth.
Step 3 :
Attach outer petals, offset again so they sit between medium petals and slightly below inner petals to give a dome shape. Secure well but avoid flattening petals; a few anchoring stitches at the base suffice.
Info :
Use pins and a small amount of blocking spray to set petal curves before final sewing. If you wish to make petals stiffer, press and apply a light fabric starch on wrong side, then reblock.
— Outer Scalloped Border :
Round 1 :
With gradient pink, join at corner of runner (or at desired starting point), sc evenly along all outer edges of mesh and pads to create a uniform edge (st count variable)
Round 2 :
*Skip 2 sc, 5 dc in next sc, skip 2 sc, sl st in next sc* rep around to create scallops
Round 3 :
Work a picot or single crochet edging into each scallop peak for definition: *sl st into 2nd dc of 5-dc shell, ch3, sl st into same st* rep around
Info :
For the soft variegated border in the image, use a gradient or hand-dyed ombre yarn and avoid abrupt color joins. Carry the yarn along the outside edge when possible to keep a tidy back.
— Finishing Touches & Blocking :
Info :
Once all elements are joined, pin the entire runner to blocking mat in desired rectangular shape. Gently spritz with water and leave to dry. Check that petals are positioned correctly and adjust while damp. When dry, weave in all ends and hide any remaining tails on the wrong side. Reinforce joins under heavy stress areas with extra invisible whip stitches.
Step :
Optional final stiffening: if you want a slightly more rigid tabletop piece, use watered-down fabric glue sparingly on the underside of outer petals and pads. Test on a scrap first to check for discoloration.
— Alternative: Single-Flower Repeat and Size Variations :
Info :
If you prefer a shorter runner, make a single lotus motif with two half mesh panels on either side and add a border. To make a table runner wider, make additional columns of motifs and join them with mesh panels. Adjust the number of chain stitches in connector panels to scale length.
Step :
To change the bloom size: use sport weight yarn and 2.75 mm hook for a smaller flower, or worsted weight and 4.0 mm for a larger, looser bloom; adjust petal rows proportionally.
— Additional Info & Tips :
Info :
Keep a consistent stitch marker practice for all round work. Label each piece as you complete it: 'inner petal 1-12', 'medium petal 1-12', etc. This prevents mismatching pieces when assembling multiple motifs. When sewing, use small, even stitches and avoid pulling too tight; you want secure but invisible seams.
Info :
Color management: If using multiple shades for petals, plan color transitions before you begin to avoid odd banding. A single gradient cake yarn often gives the soft blended look shown in the photo. For stronger color transitions, change yarn at the start of a new petal row and weave ends invisibly into bases.
This Pink Lotus Table Runner brings handmade garden beauty to your table—layered 3D petals, bright yellow centers, and sculpted lily pads make a stunning visual statement. The modular approach means you can resize for any table and customize colors to match your decor. Each finished piece feels special and tactile, perfect as a centerpiece or a heartfelt gift. Enjoy the slow rhythm of making each petal and watch your tabletop bloom! 🧶🌸