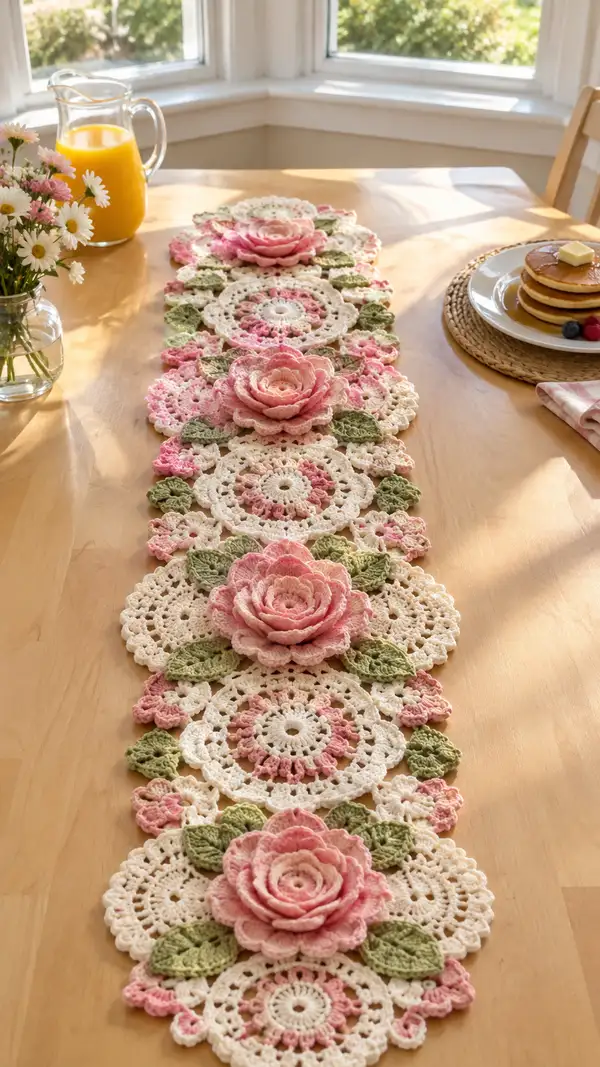
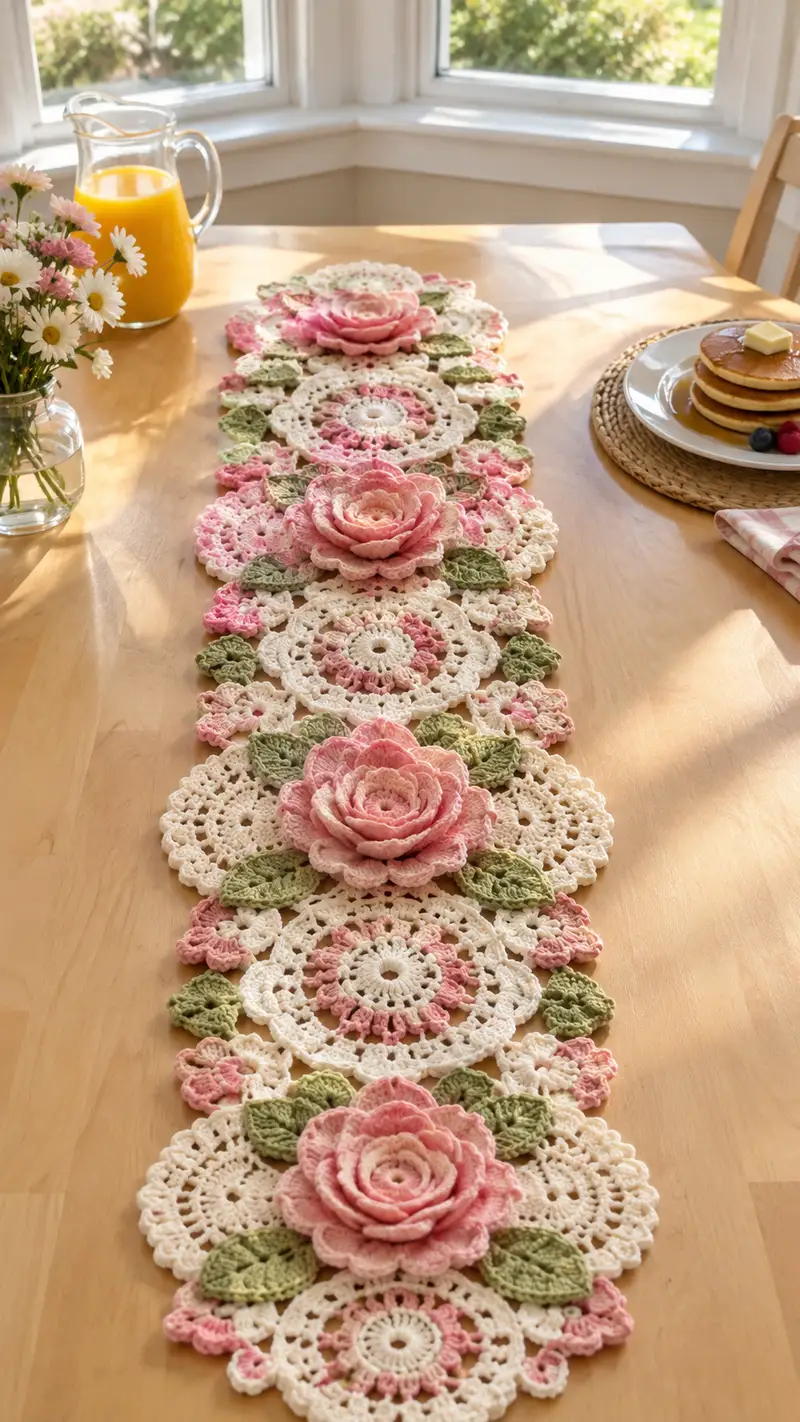
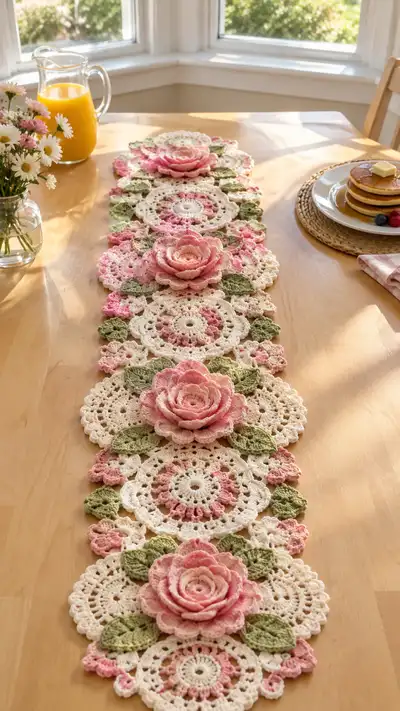
Create an elegant, romantic table runner made from repeating lace doily motifs, soft cream backgrounds, dusty pink layered roses and sage green leaves. This pattern recreates the vintage-inspired look shown: scalloped circular motifs joined with delicate picot edging and three-dimensional roses that sit proudly in the center of alternate motifs. The finished runner is perfect for a brunch table, gift, or a special seasonal display.
Progress Tracker
0% Complete
— Large Lace Doily Motif (Make multiple) :
Round 1 :
6 sc in magic ring (6)
Round 3 :
(1 sc, inc) x 6 (18)
Round 4 :
(2 sc, inc) x 6 (24)
Round 5 :
(3 sc, inc) x 6 (30)
Info :
Switch to cream yarn if not already using cream. Join rounds with a slip stitch and work in continuous rounds or join-and-turn method depending on preference.
Round 6 :
(4 sc, inc) x 6 (36)
Round 7 :
1 sc in each st (36)
Round 8 :
*Ch 4, skip 2 sts, sl st in next st; rep from * around to create chain loops (12 ch-4 loops total). If needed, adjust to make loops sit evenly (36 sts base)
Info :
These ch-4 loops form a base for later shell clusters. Keep tension even so loops are not too loose or too tight.
Round 9 :
Working into each ch-4 loop: (sc, ch2, 4 dc, ch2, sc) in each loop, sl st to join at end (12 shells; stitch count variable due to chains)
Round 10 :
Ch1, sc in each dc and sc around and 3 sc in each ch-2 space to maintain round; approximate count 84 (varies by tension)
Round 11 :
*Ch3 (counts as dc), 2 dc in next 3 sts, ch2, skip seme, sl st in next base point; rep to form small arches between shells; join with sl st
Info :
Round 9-11 create the first lacy ring. Keep track of shell counts; pin motif flat to check shape before proceeding.
Round 12 :
Switch to dusty pink for accent rounds. (Info: Change color by completing last stitch of previous round with new color.) Ch1, sc in each st and then *ch3, skip 2, sc in next* around to make small picot arches. Total sc placements around should be approximately 84.
Round 13 :
Into each ch-3 arch: (2 dc, ch2, 2 dc) to form shell arches; sl st to join (12 larger shells)
Round 14 :
Ch1, sc in each stitch and place 3 sc in each ch-2 space of shells to maintain width. Approximate count 96.
Round 15 :
Switch back to cream. Work 1 sc in each st for one even round (96).
Round 16 :
(5 sc, 1 inc) x 16 (112)
Info :
Rounds 12-16 create the fuller lace field. Check that motif lays flat; if cupping occurs, block and adjust tension or add another sc round to flatten.
Round 17 :
*Ch 5, sl st into next designated chain arch space to create long picot loops between motifs; rep around to form 16 ch-5 loops; join with sl st
Round 18 :
In each ch-5 loop: sl st, ch1, (sc, hdc, 3 dc, hdc, sc) to build a petal-like scallop (16 scallops).
Round 19 :
Ch1, sc in each stitch, placing 2 sc in the center dc of each scallop to anchor petals; approximate count 160 (varies by stitch counts in scallops)
Round 20 :
Edge round: *Ch3, picot, sl st in next st; rep around to create delicate picot edging. Finish and fasten off; weave in ends. Motif diameter approx 7.5-9 in depending on yarn/tension.
Info :
Make as many large motifs as you want lengthwise. The sample runner uses an alternating sequence of 7 large motifs with roses placed on every other motif. Block each motif while finishing to set shape.
— Layered Rose (Large 3D Flower) :
Round 1 :
Using dusty pink (lighter shade if available). 6 sc in magic ring (6)
Round 3 :
(1 sc, inc) x 6 (18)
Round 4 :
(2 sc, inc) x 6 (24)
Info :
This small disc will be the flower base. Keep rounds 1-4 fairly tight to form a firm center. Do not stuff—petals are crocheted in relief around this disc.
Round 5 :
Ch1, sc in each st around (24). Sl st to join.
Round 6 :
Switch to slightly darker dusty pink for the first petal layer. Ch3 (counts as dc), *skip next st, (3 dc, ch2, 3 dc) in next st (creates a raised petal cluster), skip next st, sl st in next st; rep around to form 8 petals. Join.
Round 7 :
Ch1, working behind the petal clusters: sc in the base stitches to close gaps and anchor petals (24 sc evenly placed)
Info :
When creating first petal layer, keep petals slightly curved by blocking or pinning while damp. Use a small amount of starch or water to shape if desired.
Round 8 :
Second petal layer (larger): join yarn behind first row of petals at every other base point. *(ch4, 5 dc in next st, ch4, sl st in base) rep around to form 8 larger petals overlapping first layer
Round 9 :
Anchor behind second petal layer: sc around base to secure (approx 32 sc depending on extra stitches)
Round 10 :
Third petal layer - make fuller, ruffled petals. Using front loops only to make petals sit forward: join yarn at front of motif, *(ch5, (tr, tr, 3 dc, tr, tr) in next designated st, ch5, sl st) repeat for 8 large petals. Do not fasten off.
Round 11 :
Fold and shape each petal: working into petal base, sc along to create petal curvature. Optionally add a picot at petal tip (ch3 sl st into first ch) for delicate detail.
Info :
Petal counts depend on desired fullness. This rose is intentionally dense — use smaller hook if you want tighter petals or larger hook for looser petals. Wet-block petals and cup them with fingers to make a natural rose form.
Round 12 :
Fasten off leaving a long tail for sewing. Using yarn tail, sew center disc to top of a large lace doily motif at the central ring. Use small stitches through the base of the rose, anchoring evenly in 8-10 points.
Round 13 :
Optional second rose size: For a slightly smaller inner row of petals, work a second inner spiral rose using rounds 1-8 above but with fewer repeats (6 petals) and attach into center under the main rose to create a tighter center.
Round 14 :
Info: For color shading, alternate two similar pink shades between petal rounds (light then slightly darker) to create depth. Weave ends and shape petals by pinning and lightly misting with water. Let dry fully before assembly.
— Leaf (Make many) :
Round 1 :
Using sage green. Ch9. In 2nd ch from hook: sc, hdc, dc, tr, dc, hdc, sc to end (7 stitches across chain) — leave chain base open (leaf shape begins)
Round 2 :
Working on opposite side of foundation chain: sc in first st, hdc in next, dc in next, tr in center top, dc in next, hdc in next, sc in last (mirror row). Sl st to join at tip if desired. Total 14 sts (7 each side mirrored)
Round 3 :
Edge shaping: *ch1, sl st in same st, ch3, sl st in next st* around leaf edge to create slight curl. Fasten off leaving long tail for sewing.
Info :
For more realistic leaves work BLO on the second row (Round 2) to create a raised central vein. Optionally embroider vein with a contrasting darker sage yarn using backstitch.
Round 4 :
Alternate leaf size: Ch11 foundation for a larger leaf; work same increases to create fuller leaves. Make multiples: sample runner uses 2 leaves per rose plus 12 smaller leaves scattered between motifs.
— Small Filler Flower (Make several) :
Round 1 :
Using pale pink. 6 sc in magic ring (6)
Round 3 :
Change to dusty pink. *(ch3, sl st in base) around to make 6 tiny loops; join
Round 4 :
In each ch-3 loop: (sc, hdc, dc, hdc, sc) to form tiny petals. Fasten off leaving long tail for attaching. Approx diameter 1.25-1.5 in.
Info :
These tiny flowers fill gaps between large motifs and soften the runner silhouette. Make a mix of pale pink and cream filler flowers for contrast.
— Joining Motifs and Arrangement :
Info :
Decide on runner length first. The sample runner alternates large lace motif, plain motif, large motif with rose, plain motif, etc. Pin motifs in final arrangement before joining to check alignment and spacing. Block all motifs flat prior to assembly.
Round 1 :
Place two large motifs right sides together at their joining points (choose the ch-5 loop points used in Round 17 of motifs). With cream yarn and a size 3.5mm hook, join by slip-stitch through each paired loop: into loop on first motif: sl st, into matching loop on second motif: sl st; rep across the join points to link motifs securely. Repeat joining for all motifs in sequence.
Round 2 :
Info: For a nearly invisible join, use mattress stitch with a yarn needle and matched yarn color, stitching through the very base of loops and pulling gently to avoid puckering. For sturdier join that reads as decorative, use visible slip-stitch joins as described above.
Round 3 :
After connecting primary motif edges, attach smaller filler flowers and leaves in the gaps using whip stitch: position leaf base under rose and stitch through flower base and motif at 6-8 anchor points for security. Add 2-3 small filler flowers between each large motif join to soften transition points.
Round 4 :
Spacing guide: Leave approximately 1/2 in (or 1-2 base loop spaces) between rose centers along runner for airy look. If you want a denser runner, reduce gap by shifting motif joins tighter.
Info :
Always pin and check symmetry on both sides of runner before making final sewing passes. Sew in one direction first, then secure with a second pass to prevent slippage.
— Runner Edge & Scalloped Border :
Round 1 :
With cream yarn and motifs assembled, work an edging round around the entire runner. Pick up stitches evenly across raw edges: *sc evenly along edge for 3-5 stitches, (5 dc, ch2, 5 dc) in next gap to form large scallop; continue around runner to create balanced shell scallops*
Round 2 :
Ch1, sc in each st across scallops; in center of each large scallop place: (sc, ch3, picot, sc) to add delicate interior picot detail. Fasten off and weave in ends.
Round 3 :
Optional second edge: For an extra-lacy finish, add a final round of mini-picots between large scallops: *ch5, sl st in 3rd ch to create small loop, sl st to base* around.
Info :
Keep your edging consistent in tension to avoid wavy or bunched edges. If edging pulls, block again with pins to shape perfectly.
— Finishing Touches and Blocking :
Round 1 :
Wet block each rose and motif individually: pin to shape with petals cupped and scallops evenly spread. Let dry fully. Press lightly with steam where needed, taking care not to flatten petals.
Round 2 :
Lightly shape leaves by pinning them with a small central crease to create a vein. Optionally tack a single stitch through the leaf center to hold curve after drying.
Info :
Use rust-proof pins. If motifs shift during drying, re-pin and re-wet lightly. Blocking is essential for lacework to open up the stitch pattern and create the delicate appearance shown in the photo.
Round 3 :
Final inspection: weave in any remaining ends, trim closely, and inspect joins for gaps. Reinforce any loose joins with a few extra stitches worked invisibly.
Round 4 :
For extra longevity, press the runner under a clean cloth on low heat after blocking to set shape. Avoid high heat on synthetic fibers.
Info :
Consider adding a lightweight non-slip fabric under the runner for table protection and to prevent sliding if placing on varnished surfaces.
— Alternative Sizes and Modular Notes :
Info :
To lengthen: add two more large motifs and proportional filler flowers. To shorten: remove motif pairs to keep symmetrical ends. Motif counts join best when runner uses odd-number sequences so rose positions align centrally.
Round 1 :
To make a smaller runner (for a side table) scale down: use sport weight yarn and 3.0mm hook and reduce shell repeats in each motif by 2; this will keep the lace proportion while reducing diameter of motifs.
Info :
Color variations: replace dusty pink with deep coral or blush for different seasonal looks. Use variegated yarn for roses to create natural color shifts across petals.
This Pink Rose and Cream Lace Table Runner combines classic lacework with sculptural blooms to create a stunning handmade centerpiece. Each motif and rose layer is carefully blocked and joined for a beautiful, heirloom-quality finish. Whether for a gift or a special brunch, this project brings delicate charm to your table. Enjoy the meditative rhythm of lace and petal-making—happy crocheting! 🌸🧶