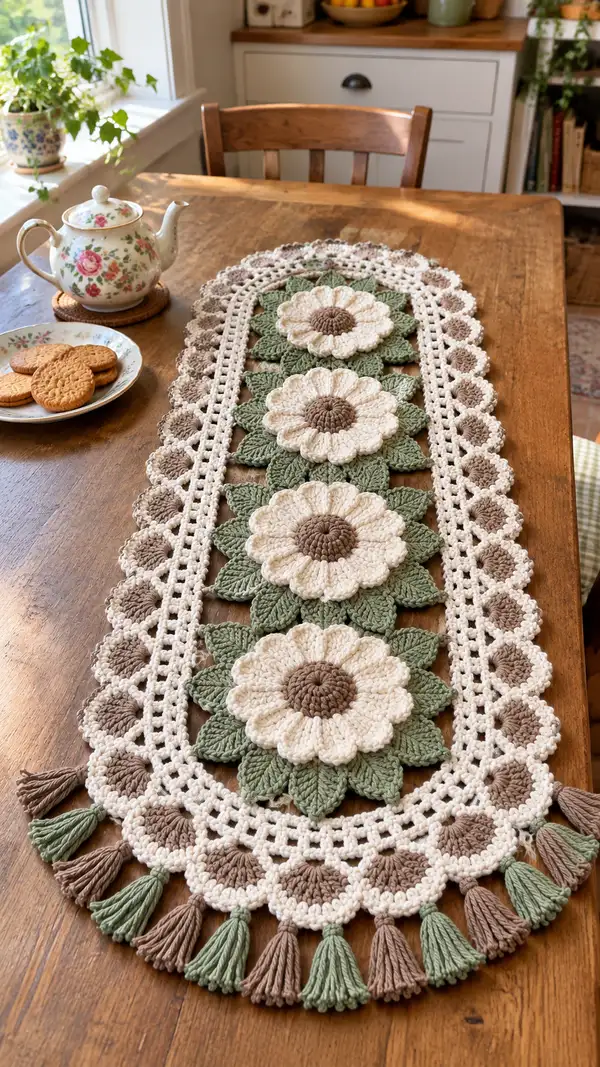
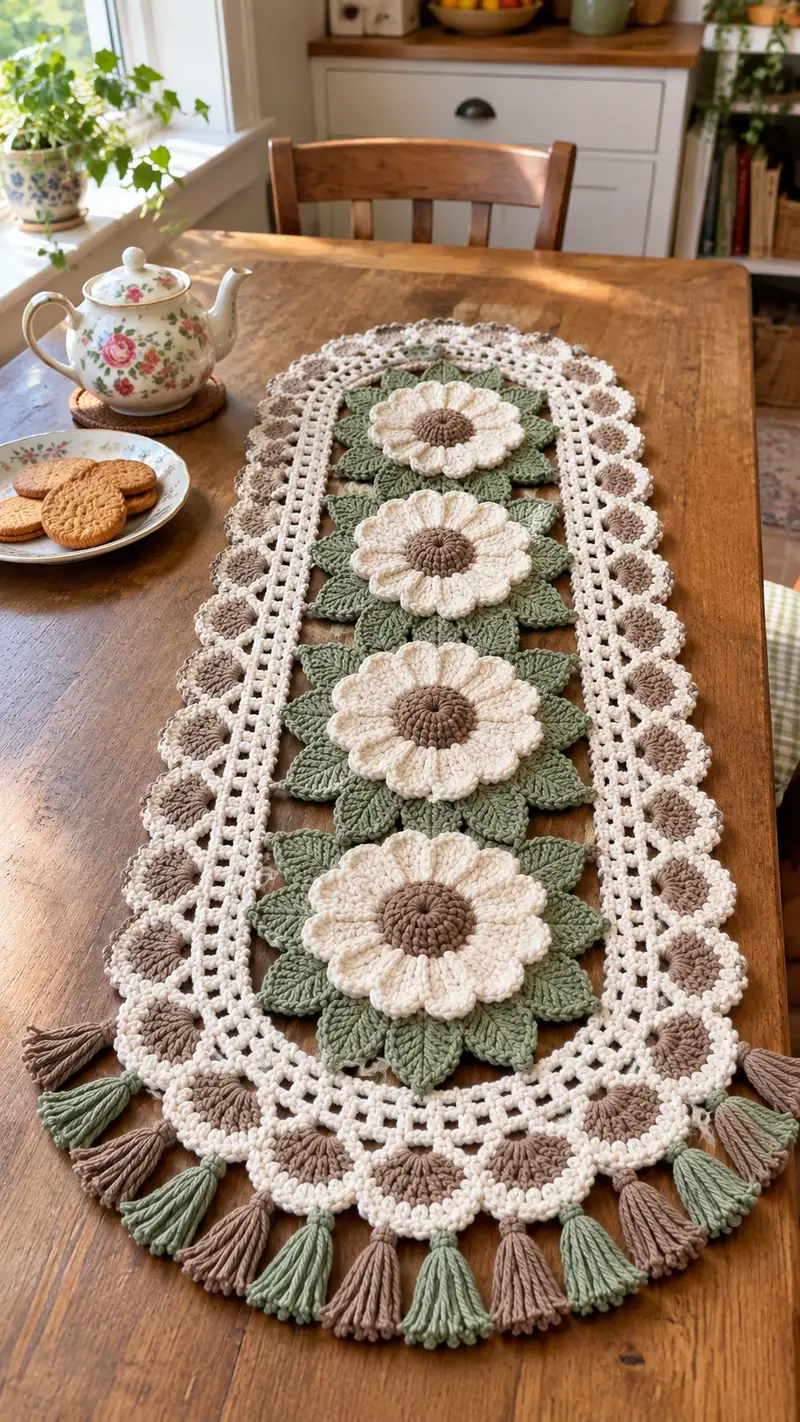
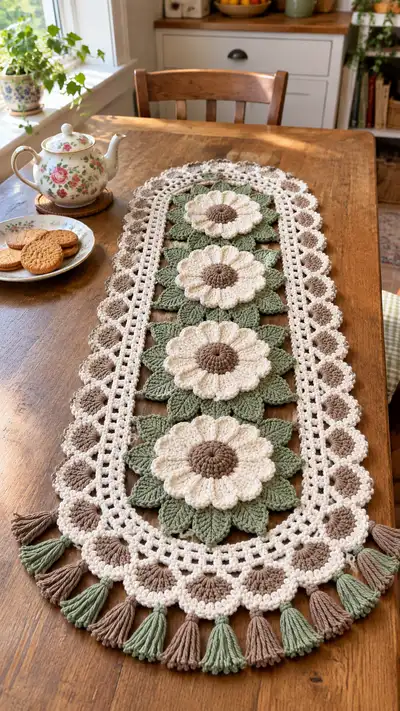
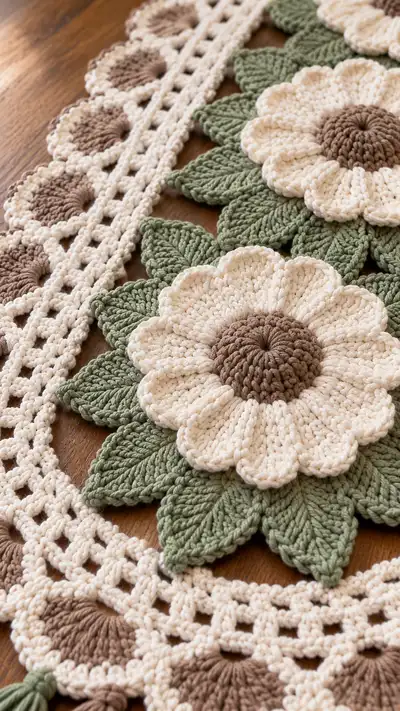
Create a vintage-inspired sunflower table runner featuring three large layered floral medallions, textured sage leaves, a lacy filet mesh center strip, scalloped edging and tassel trim. Worked in neutral cream, warm taupe and soft sage, this runner adds handcrafted charm to your table. The pattern uses simple motifs joined into an elegant long runner — perfect for gifting or seasonal decor.
Progress Tracker
0% Complete
— Flower Center (make 3) :
Round 1 :
6 sc in magic ring (6)
Round 3 :
(1 sc, inc) x 6 (18)
Round 4 :
(2 sc, inc) x 6 (24)
Round 5 :
(3 sc, inc) x 6 (30)
Info :
Use taupe yarn for the center. Work tightly and close the magic ring firmly to form a compact, slightly domed center that will sit up under the petals.
Round 6 :
(4 sc, inc) x 6 (36)
Round 7 :
(5 sc, inc) x 6 (42)
Round 8 :
(6 sc, inc) x 6 (48)
Info :
At 48 sts the circle is large enough to provide a broad base for the petal row. If you prefer a taller center, you can add an extra round of sc (48) to build height before shaping the dome.
Round 9 :
1 sc in each st BLO (48)
Round 10 :
(6 sc, dec) x 6 (42)
Info :
Work Round 9 in BLO to create a subtle ridge where the petals will attach. Begin shaping the dome in Round 10 by decreasing evenly. Keep tension tucked so the center remains firm.
Round 11 :
(5 sc, dec) x 6 (36)
Round 12 :
(3 sc, dec, 2 sc) x 6 (30)
Info :
Fasten off leaving a 20-25 cm tail for sewing to the petal base. We will mount petals around the outer 48-st anchor row so keep the last two rounds neat for easy joining.
— Petal Layer (make 3 sets, one per flower) :
Round 1 :
With cream yarn, join with sl st to any BLO ridge from Round 9; ch1, *sc in next 3 base stitches, ch1, skip 1, sc in next st; rep around to create evenly spaced anchors (48 anchor positions)
Round 2 :
Now we will create 12 large petals. Each petal is worked over 4 anchor positions. *Sc in next 2 anchors, ch2, (hdc, 2 dc, tr, 2 dc, hdc) all in next anchor (petal shell), ch2, sc in next 2 anchors; rep around to make 12 petals (anchor count remains 48)
Round 3 :
Turn petals into a more three-dimensional shape by working into the front loops of the petal shell: join cream at base of first petal, *(sc, hdc) across base of petal shell, 6 dc evenly across petal body in FLO to create puff, (hdc, sc) at petal tip; rep for 12 petals
Info :
Use your fingers to cup each petal as you work the 6 dc in the FLO — this encourages the petal to fold slightly upward for the layered look. Keep consistent repeat pattern for each petal so petals match in size.
Round 4 :
Working behind the petal row (into next available anchor), sl st to base between petals, ch1, *sc in the space between petals, ch3, sl st in the base between next petals; rep around (this creates a tidy join row) (48)
Round 5 :
In cream, form a raised ridge for petal texture: *(sc in next 2 anchors, FLO 3 sc across petal ridge) x 12 (48)
Round 6 :
Work a decorative surface ridge by making front post dc (fpdc) around the post from the previous petal dc stitches: *fpdc around the central dc cluster of each petal, sc in the anchor sts between petals; rep around (12 fpdc, 36 sc)
Info :
If you want fuller petals, add an additional round of 6 dc across each petal body before finishing. Make sure your gauge keeps petals sitting flat and not flaring excessively.
Round 7 :
Work a scalloped edge around each petal: *ch1, (sc, hdc, dc, hdc, sc) in outermost loop of each petal; rep for 12 petals (forms gentle scallops but does not change anchor count)
Round 8 :
Finish petal surface: 1 sc in each stitch around petals to neaten edges; slip stitch to join and fasten off leaving long tail for assembly
Info :
Weave the long tail under the petal bases to create a flat seam for sewing the petal layer to the leaf layer. Keep petals oriented so their tips point outward evenly.
— Leaf Layer (make 3 sets of 8 leaves under each flower) :
Round 1 :
Leaves are made in rows (worked flat). With sage yarn, ch12. Turn, sc in 2nd ch from hook and next 2 ch, hdc in next, dc in next 2, tr in next 2, dc in next 1, hdc in next, sc in last — shaping into a tapered leaf (11 sts across)
Round 2 :
Work return row along opposite side: ch1, rotate to work down foundation chain, sc in first st, hdc, dc, tr, dc, hdc, sc across; do not turn — you have created a closed leaf loop (11)
Round 3 :
Shape leaf tip by decreasing: ch1, sc, hdc, (dc2tog) over next 2 sts, tr, (dc2tog), hdc, sc (9)
Round 4 :
Work a decorative ridge down the center by using BLO: ch1, *sc in next 9 sts BLO across; fasten off, leaving long tail for sewing (9)
Info :
Make 8 leaves per flower. On each leaf work a central raised vein by making 3 front post dc stitches down the center on Row 3 before fastening off. Block leaves slightly to a pointed shape before assembly.
Round 5 :
Optional: Add a second decorative bar of surface slip stitches along each leaf edge: attach yarn to base, sl st up edge at 3 evenly spaced points; fasten off (visual detail)
Round 6 :
Sew leaves in overlapping circle under petals: using the long tails, position 8 leaves evenly spaced under petal layer, with tips aligned between petals; tack each leaf securely with whip stitch
Info :
When tacking leaves, place one leaf tip between every one or two petals depending on how dense you want the foliage to appear. Pin before sewing to keep symmetry consistent across all three flowers.
— Small Round Motif (make 12 for scalloped border) :
Round 1 :
With taupe, 6 sc in mr (6)
Round 3 :
(1 sc, inc) x 6 (18)
Round 4 :
1 sc in each st (18)
Round 5 :
Switch to cream yarn; ch2, *(sc in next 2, ch3, sl st in 3rd ch to create a small scallop across outer round) rep to make pretty scalloped small motif edge; fasten off retaining long tail for joining
Info :
These small round motifs will sit inside the scalloped shells of the outer border. Make 12 for each side (24 total) depending on your runner length — pattern photos show 12 per long side for a three-flower runner.
— Connecting Filet Mesh Strip (center strip that holds the three flowers) :
Round 1 (foundation):
With cream yarn ch 150 (this number will determine final length — adjust to suit your table and number of motifs; 150 gives a runner approx. 90-100 cm long when blocked)
Round 2 :
Row 1 filet: sc in 4th ch from hook, *ch3, skip 3 ch, sc in next ch; rep across — this forms a base row of open squares (approx. 36 filet boxes across)
Round 3 :
Turn, ch3 (counts as dc), *dc in next sc, ch1, skip 1 dc, dc in next sc; rep across to form light grid — adjust repeat so three large flower bases will fit centered along the strip
Round 4 :
Repeat Round 3 for 8 rows total to create a sturdy, open filet band (rows 2-9 = 8 rows of mesh). Keep edge stitches consistent to maintain straight sides
Info :
Mark the center point of the strip and mark the three flower placement points with stitch markers. The flowers will be attached to the mesh with a few anchoring stitches through the mesh squares so plan spacing accordingly (equal distances between flowers and ends).
Round 5 :
In cream, continue filet rows for another 6 rows (total 14 rows) to give ample height under petals. Fasten off ends but leave long tails to help join to outer border later.
Round 6 :
Optional reinforcement: work one round of 1 sc in each st around both long edges of the strip to strengthen joining areas (approx. 150 sc per side)
Info :
If your runner is narrower than you'd like, revise foundation ch count. The mesh is forgiving — increasing ch by multiples of 6 will keep filet squares consistent.
— Outer Border and Scalloped Shells :
Round 1 :
With cream yarn attach to one long edge of the mesh with sl st; ch1, sc evenly along edge to cover previous reinforcement row (approx. 150 sc) — this creates base for scallop shells
Round 2 :
*Ch5, skip 4 sc, sl st into next sc to form arches across edge; rep across (forms chain arches used for scallops) (approx. 30 arches)
Round 3 :
Work scallop shells: in each chain arch: sl st, ch1, (sc, hdc, 3 dc, hdc, sc) all into arch; rep across to create visible rounded scalloped edge (shell count equals arch count)
Info :
Small taupe round motifs will sit inside each scallop. Align shells with arch spacing so each shell has a centered small round motif. Adjust number of arches if you need more precise alignment with flower medallions.
Round 4 :
Decorative row between shells and mesh: join cream at inner shell base, ch3, *dc in next 3 sc, ch2, skip 2 sc; rep around to form inner decorative arches (this gives the pretty lattice seen in the photos)
Round 5 :
Work a second row of small shells: *in space between outer shells, sl st, ch1, (sc, hdc, 3 dc, hdc, sc); rep to form balanced double-scallop border
Round 6 :
Sew taupe small rounds into center of each outer scallop: position taupe small round motifs inside each outer shell and sew through the base and a few shell stitches to lock in place. Make sure the small round sits slightly raised.
Info :
On short rounded ends of the runner, continue border in a curved fashion. To curve correctly, decrease arches gradually and shorten scallop shells into smaller clusters of 3-4 shells to round the end neatly.
Round 7 :
Work an extra decorative picot row along outer scallop tips if desired: in each shell tip, (sl st, ch3, sl st) creating small picots between tassel anchors
Round 8 :
Fasten off and weave ends. Block border lightly to even scallops before attaching tassels.
— Tassels and Finishing Touches :
Round 1 :
Make tassels using 10-12 strands of yarn approx. 18 cm long for each tassel (fold in half to 9 cm finished length). Alternate sage and taupe tassels around the short rounded ends and along outer scallops every second shell.
Round 2 :
Secure tassels by looping the folded end through the scallop tip and knotting or wrapping with a small length of yarn; tuck and glue/secure the wrap if desired for longevity.
Info :
Arrange tassels alternating colors for the visual rhythm seen in the photo. Trim tassels to even length and comb them lightly for a soft finish. Optionally add a small bead inside the wrapped top for extra weight and drape.
— Assembly and Joining (attaching flowers to mesh and border) :
Round 1 :
Place the center flower medallions onto the marked points on the mesh. Center the first flower at the center stitch marker, then measure equal spaces to the next two positions. Pin each flower in place using sewing pins through inner mesh squares to keep them steady while sewing.
Round 2 :
Using long tails from flower centers and a yarn needle, sew the center brown circle to the mesh by passing the tail through the mesh squares at four cardinal points (top, bottom, left, right) and then back into the center to hide tail. Secure with multiple passes to keep centre stable (no visible stitch count change on mesh).
Round 3 :
Sew petal layer and leaf layer to the mesh around the central anchoring: use mattress stitch or whip stitch from petal backing into the mesh rows; make sure petal tips slightly overlap the mesh edge so petals appear to float above the mesh.
Info :
Reinforce the heavy points under each flower with a few extra passes of stitching to keep the motif from sagging. If necessary, add small scrap fabric or felt behind the center to distribute stress when the runner is in use.
Round 4 :
Attach small round motifs to outer scallops by sewing through the small round base into the shell center — use hidden stitches through the back of the shell to avoid visible sewing on front face.
Round 5 :
With yarn needle weave in all ends from motifs, strips, and border into adjacent stitches, hiding tails within the structure of the runner. Block entire runner to flatten motifs and even scallops; steam or wet-block carefully for cotton yarn.
Info :
Blocking after assembly helps motifs sit perfectly together. Pin the runner to shape on a blocking board and spray lightly with water then let dry overnight — this will flatten the filet mesh and open shell stitches just like the photos.
— Final Quality & Care :
Round 1 :
Trim any stray fibers and tidy tassel ends. Apply a small amount of fabric starch lightly if you want a more structured table accent that lays flat.
Round 2 :
Spot clean or hand wash in cool water with mild soap. Lay flat to dry. Avoid high heat when pressing; if necessary, press through a damp cloth on low heat to reshape scallops.
Info :
Label the runner with care instructions and ribbon for gifting. Cotton will soften and drape more after washing and use, so plan for a slightly stiffer first look prior to laundering.
Completing this sunflower table runner is a wonderfully satisfying project — each layered medallion pops against the open mesh, and the scalloped border and tassels add the final flourish. The neutral palette keeps this piece versatile for many seasons while the dimensional petals and leaves give a handcrafted, cozy look. Display it proudly at your next gathering or gift it to someone who loves handmade home décor! 🧶🌼