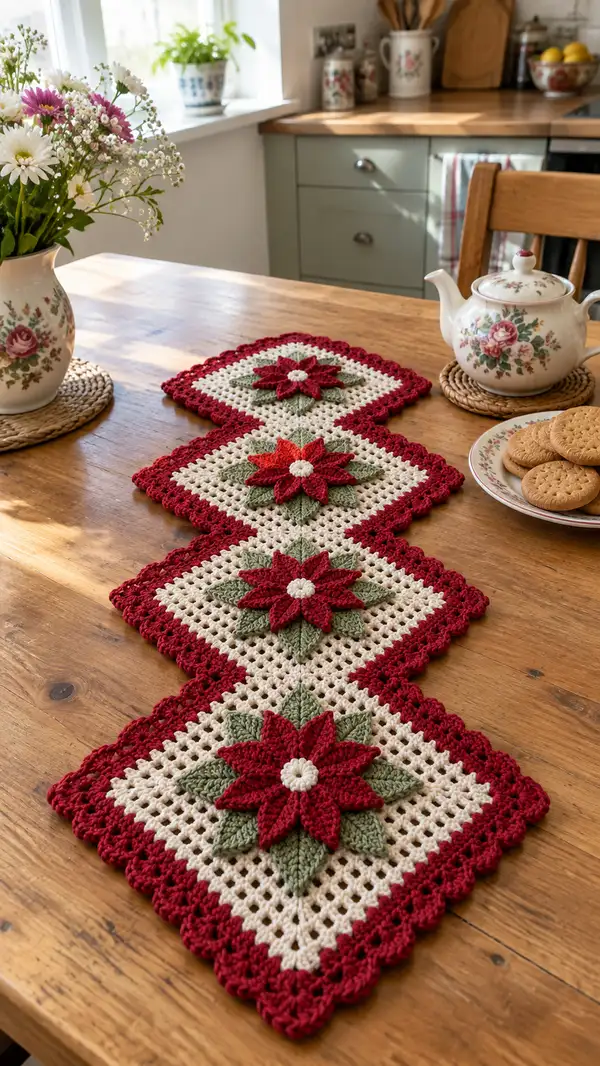
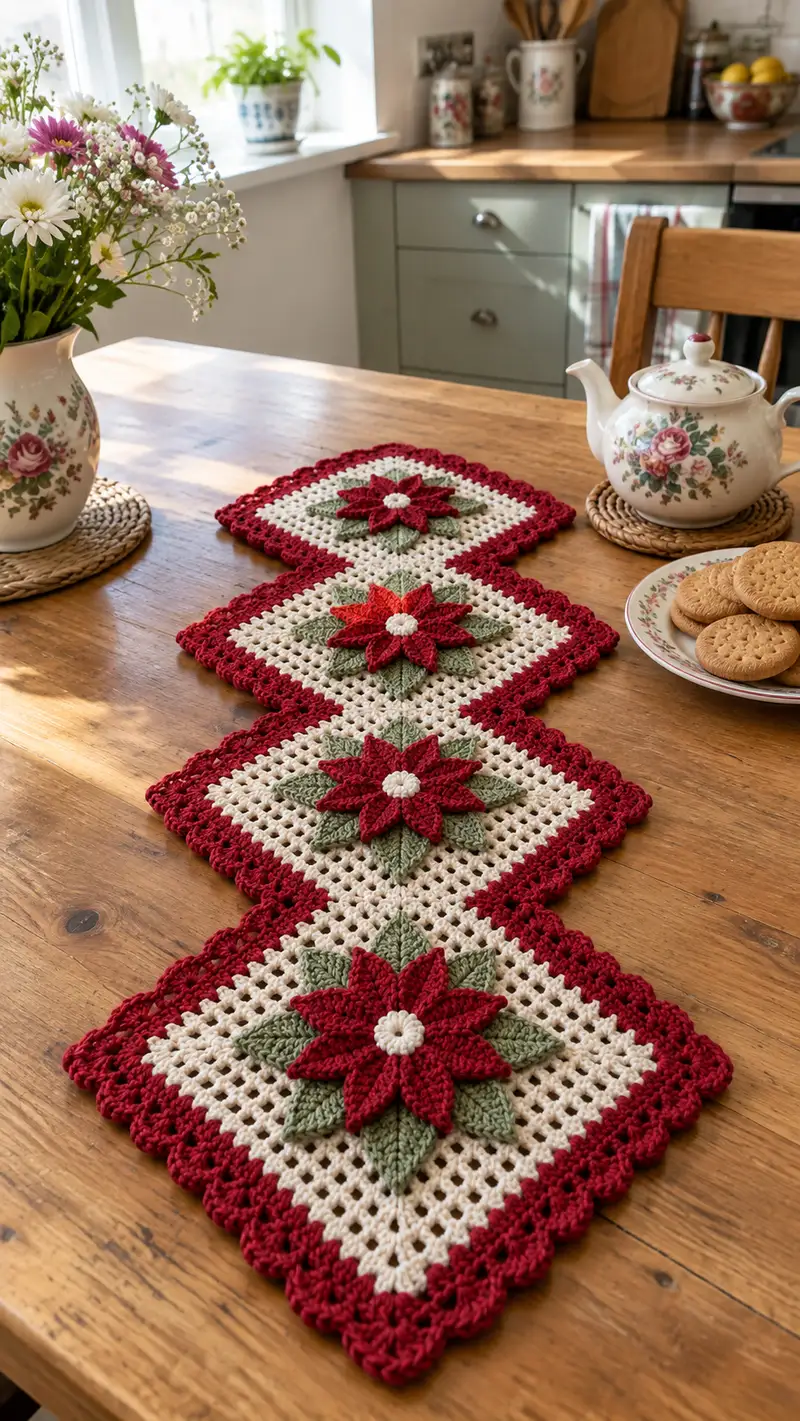
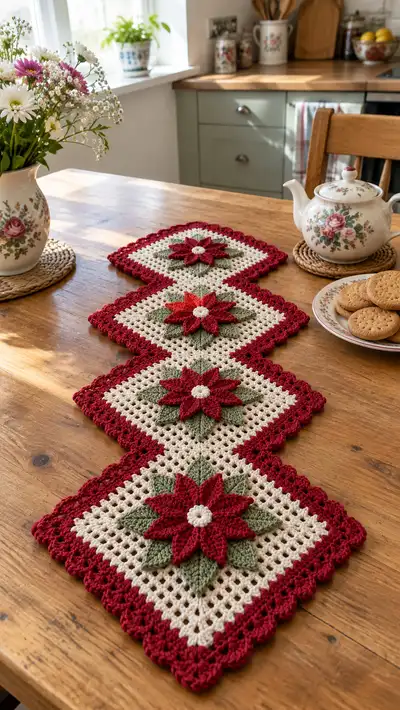
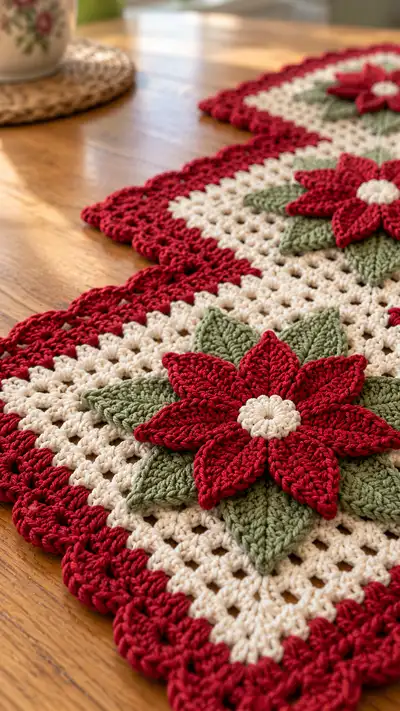
Create a festive poinsettia table runner made from four lacy cream squares joined in a zig-zag runner with layered 3D poinsettia flowers. The runner uses an open mesh square, two-tone layered leaves and petals, a textured center, and a scalloped red border for a classic holiday look. Worked in worsted weight yarn, this project combines simple motifs into an elegant seasonal home accent. Suitable for gifting or as a holiday centerpiece, the design is modular and highly customizable.
Progress Tracker
0% Complete
— Materials & Gauge :
Info :
Gauge is not critical for this decorative runner but for reference: using worsted weight yarn and a 4.0mm hook, each finished square measures approximately 7.5" (19cm) across after blocking. Runner shown has four joined squares in a zig-zag arrangement, finished length approx 30-32" (76-81cm) and width approx 7.5" (19cm). Adjust hook or rounds to change size.
— Notes Before You Start :
Info :
Working in rounds: each round begins with a standing stitch or ch that counts as the first stitch indicated (I will note when the ch counts as a stitch). Use stitch markers to mark the first stitch each round and the corner chain-2 spaces. When the pattern says 'make 4 squares' you will repeat the square base and flower assembly four times. Flower pieces are made separately and sewn on. Block squares before joining for best alignment.
— Square Base (Make 4 identical squares) :
Round 1 :
With cream yarn make a ch4 and join with a sl st to form a ring. Ch3 (counts as first dc), work 3 dc into ring, ch2, *work 3 dc into ring, ch2* repeat from * to * two more times. Join with a sl st to top of beginning ch3. (12 dc clusters, 4 corner ch-2 spaces)
Round 2 :
Slip into next ch2 corner space. Ch3 (counts as first dc), 2 dc, ch2, 3 dc in same corner space (corner made). *Move to next corner space: 3 dc, ch2, 3 dc* repeat for remaining 3 corners. Join to top of beginning ch3. (24 dc, 4 corner ch2 spaces)
Round 3 :
Slip to the space between corner shells along any side (that is the gap between the corner cluster and next corner cluster). Ch3, 3 dc into that side space (creating the first side cluster), ch1, *3 dc into the next side space, ch1* repeat across the side until you reach the corner; in the corner space work 3 dc, ch2, 3 dc. Continue around working 3-dc clusters in each side chain-1 space separated by ch1; corners remain (3 dc, ch2, 3 dc). Join. (36 dc clusters, sides now have one 3-dc group between corners)
Info :
Each new round increases the number of 3-dc groups along each side by one. Count groups rather than single dc when tracking progress. Use a stitch marker to mark the first cluster of each round so you don't lose your place.
Round 4 :
Repeat work as round 3: in each side chain-1 space work 3 dc, ch1 between side clusters. Corners remain 3 dc, ch2, 3 dc. Join. (48 dc clusters total)
Round 5 :
Repeat the established pattern: add a new 3-dc cluster into the space between side clusters from previous round, ch1 between clusters, corners unchanged. Join. (60 dc clusters total)
Round 6 :
Repeat pattern as round 5. At this point square measures roughly 6.5-7" inches. Join. (72 dc clusters total)
Info :
If you prefer a larger or smaller square, continue one or two more rounds repeating the same increase rule (one additional 3-dc cluster per side each round) until desired size. The pattern used for the pictured runner uses rounds through Round 8 for a generous square; adjust as needed. Always count cluster groups to verify consistency: Round number x12 = total dc clusters (e.g., Round 6 = 72).
Round 7 :
Repeat pattern. Join. (84 dc clusters total)
Round 8 :
Repeat pattern. Join. (96 dc clusters total). Fasten off cream and weave in ends if not adding border immediately.
Info :
Before adding the border, block each square gently to open the mesh and square the corners. Pin to desired measurements and lightly spray with water or blocking spray; allow to dry completely. Proper blocking ensures neat joins and an even scalloped border.
— Optional Narrow Edge in Cream (to even edge before layering flower) :
Round 9 :
With cream yarn roughly at the outermost round: Join with a sl st to any side space. Ch1, sc in same space and in each stitch and ch-space around, placing 3 sc in each corner ch2 space to maintain square shape. (Sc around, total depends on rounds taken; example with 96 dc clusters results approx 96 sc around plus corner increases). Join and fasten off. This neatens the edge prior to attaching the flower.
Info :
If you plan to attach the scalloped red border immediately, you can skip this neat edge and work border rounds directly from the outermost mesh round. This optional round smooths uneven edges and gives a consistent foundation for sewing the flower center.
— Flower Center (Make 4 per square) :
Round 1 :
With cream yarn make a magic ring. Ch1 (does not count), work 8 hdc into magic ring. Pull ring closed. Join with sl st to first hdc. (8 hdc)
Round 2 :
Ch1, inc in each hdc around (2 hdc in each st) (16 hdc). Join.
Round 3 :
Ch1, *1 hdc in next st, inc in next st* repeat around. (24 hdc). Join. Fasten off leaving a long tail for sewing center to the square; weave tail through the back to hide.
Info :
This tight little center forms the raised center of the poinsettia and provides a secure anchor to sew petals around. Use a slightly smaller hook (3.5mm) for a firmer center if you prefer.
— Red Petal (Make 8 per flower; make 4 flowers per runner = 32 petals total) :
Round 1 :
With red yarn ch6. 2nd ch from hook sc, hdc in next, dc in next, tr in next, dc in next, hdc in next, sc in last, sl st to first sc to form an elongated petal chain foundation. (This foundation row shapes the petal length). Leave tail for later if using standing stitch alternatively begin with standing sc and continue.
Round 2 :
Turn work and work along the opposite side of the starting chain: sc in first st, hdc in next, dc in next 2 sts, tr in center top (work 2 tr into the same top stitch for a fuller peak), dc in next 2 sts, hdc next, sc last. (Petal row creates symmetrical shape). Fasten off and leave long tail for sewing.
Round 3 :
To give the petal more body, rejoin red yarn at the base and work in BLO around the petal edge: ch1, sc around petal edge working 2 sc in top center stitch to build a slight ridge, sl st to join. (Edge defines shape)
Round 4 :
Optional: for a more 3D petal, rejoin at base and make a short picot or puff at the top: ch3, 3 dc in top center stitch, ch1, sl st back in base. This creates slight lift when attached.
Info :
Each petal is worked flat and then lightly stiffened by working around the edge or adding a few extra stitches at the peak. Make eight petals per flower. Block petals slightly pinning them into a gentle curve if you want a cupped effect before assembly.
Variation :
For a more sculpted petal work increases on rounds: Row 1 foundation ch6, Round 2: 1 sc, 1 hdc, 2 dc in next, 2 tr in center, 2 dc, 1 hdc, 1 sc. Round 3: sc around repeating increases at peak as needed for fuller petal.
— Green Leaf (Make 8 per flower) :
Round 1 :
With sage green ch8. Work along the chain: sc, hdc, dc, 2 tr in next, dc, hdc, sc to the tip; working back along the other side of the chain work sc, hdc, dc, tr in top, dc, hdc, sc and sl st to join at base. (A pointed leaf shape with a central peak). Fasten off leaving long tail for sewing.
Round 2 :
Rejoin at base and work 1 sc around the leaf in BLO to create a slightly raised vein along the central ridge. Add 1-2 surface slip stitch veins if desired along the leaf center for texture.
Info :
Leaves sit beneath petals in an alternating layout (leaf, petal, leaf, petal) so make sure shape and size balance with red petals. Block leaves flat so they lie correctly beneath the petal layer when sewn.
— Petal and Leaf Shaping Tips :
Info :
When all petals and leaves are complete, pin them on a flat surface around the flower center to check placement: the typical arrangement is 8 leaves (outer layer) and 8 petals (inner layer) arranged so the leaves fill the gaps between petals. Work from the center outwards when sewing: tack the cream center to the square first, then sew leaves, then sew petals on top of leaves. Use short, neat stitches from tail yarn to secure each piece.
— Flower Assembly (Make 4 flowers) :
Step 1 :
Place the cream center at the desired center point of a blocked square. Using center tail, sew through the square and center several times to secure; tie a small knot on the back and weave in the tail.
Step 2 :
Pin the eight green leaves evenly around the center, spacing them at 45 degree intervals. Using leaf tails, sew leaves to the square through the base and into the cream center area for stability. Sew only a few stitches at the base of each leaf to allow the tips to remain free and slightly lifted.
Info :
Alternate leaf placement so a leaf tip sits between every pair of adjacent petals (once petals are sewn). Keep stitches small and hidden behind the base of the leaf; avoid sewing through the visible tip area.
Step 3 :
Pin the red petals on top of the leaves, staggering so that petals overlap the leaf edges slightly. Sew each petal at its base with the red tail, taking small stitches through the petal base, the leaf base, and the square. Continue until all eight petals are attached and the flower looks full and even.
Step 4 :
Adjust petals and leaves with your fingers to create a pleasing 3D effect; add a few extra tacking stitches under petal tips if you want them to hug the square more closely. Hide all tails by weaving them into the underside of the square.
Info :
For extra stability, add a few stitches from the underside of the square capturing the inner edge of the petals and leaves to anchor them without being visible from the top.
— Joining Squares Into Runner (Zig-Zag Layout) :
Info :
Layout your four completed squares on a flat surface in the zig-zag pattern shown in the photo: squares joined corner to corner so that each square is rotated relative to the next, forming an elongated diamond-runner. You can expand the runner by adding more squares following the same join method.
Round 1 (Join Preparation) :
With cream yarn, position two adjacent squares with right sides up and match the outermost stitch rows to align mesh. Starting at one corner, use a whip stitch or mattress stitch with a long tail to seam the squares together along the edge where they touch. Work through corresponding loops to create a nearly invisible join. Sew until the desired seam length between the two squares is complete. Fasten off and weave in ends.
Round 2 :
Join the second and third squares the same way, then join the third and fourth. You will have three seams connecting the four squares in a zig-zag layout. For a more decorative seam, use a slip stitch join from the right side: align squares wrong sides together and sl st through corresponding loops along the seam, working from corner to corner. This creates a neat visible seam; choose based on preference.
Info :
Pin squares thoroughly before sewing to keep edges even and corners aligned. If your squares stretched slightly during blocking, use small tucks or extra stitches to even out lengths when joining so the runner lays flat.
— Red Scalloped Border (Work around entire runner after joining) :
Round 1 :
With red yarn pick up at any outermost stitch on the runner: join with sl st. Ch1, sc evenly around the entire outer edge of the runner working 3 sc into each corner to keep corners square and even. Join with sl st. (Stitch count varies depending on runner size; count approx 4 sc per side cluster from outermost square and 3 sc in each corner.)
Round 2 :
Ch3 (counts as dc), *skip next st, 5 dc into next st (shell), skip next st, sl st into next st* repeat across side edges placing shells evenly. At the corners work a shell that spans the corner adding ch1 between shells if necessary to keep edges even. Join at end of round. This creates the first scalloped shell row.
Round 3 :
Work another shell round to deepen scallop: sl st into center of each shell from previous round, ch3, 4 dc in same space, ch1, 5 dc in same center (this creates a larger scallop). For corners work an expanded shell that wraps slightly around the corner point. Join and fasten off. Weave in tails securely.
Info :
Spacing for scallops looks best when shells fall over the mesh holes rather than in the middle of a dense cluster. Move shells slightly if necessary to align scallops consistently along the runner's length. Use pins to hold scallops in place while working if edges shift.
— Final Finishing Rounds & Trimming :
Round 1 :
Inspect the runner for stray tails. Weave all ends securely on the underside and trim. If any petals or leaves look loose re-tack them from the back with small hidden stitches. Press lightly or block again if needed to set scallops and petals into a gentle curve.
Round 2 :
Optional: add small decorative slip-stitch border in cream along inner edge of red scallop for a delicate contrast. With cream yarn join at an inside edge and sl st evenly in each stitch around, working 3 sl st in the center of each red scallop to emphasise the scallop pattern. Fasten off and weave in ends.
Info :
Lightly steam the runner (do not press directly with iron on acrylic blends) to set shapes. Wooden table surfaces may benefit from a thin felt pad underneath to protect both runner and table finish.
— Care Instructions :
Info :
Hand wash cold or machine wash on delicate inside a laundry bag. Reshape while damp and air dry flat. Avoid tumble drying for best longevity. Acrylic or acrylic-blend worsted yarns typically hold up well with gentle care; wool blends may felt if agitated.
This poinsettia squares table runner brings a classic holiday flourish to any table! Each square is a small, satisfying project with a dramatic 3D flower that pops off a soft cream mesh. Whether you make one square as a trivet or a full runner as shown, the result is elegant and handmade with love. I hope this project brings you calm stitching moments and a beautiful centerpiece to enjoy all season. 🌹🧶✨