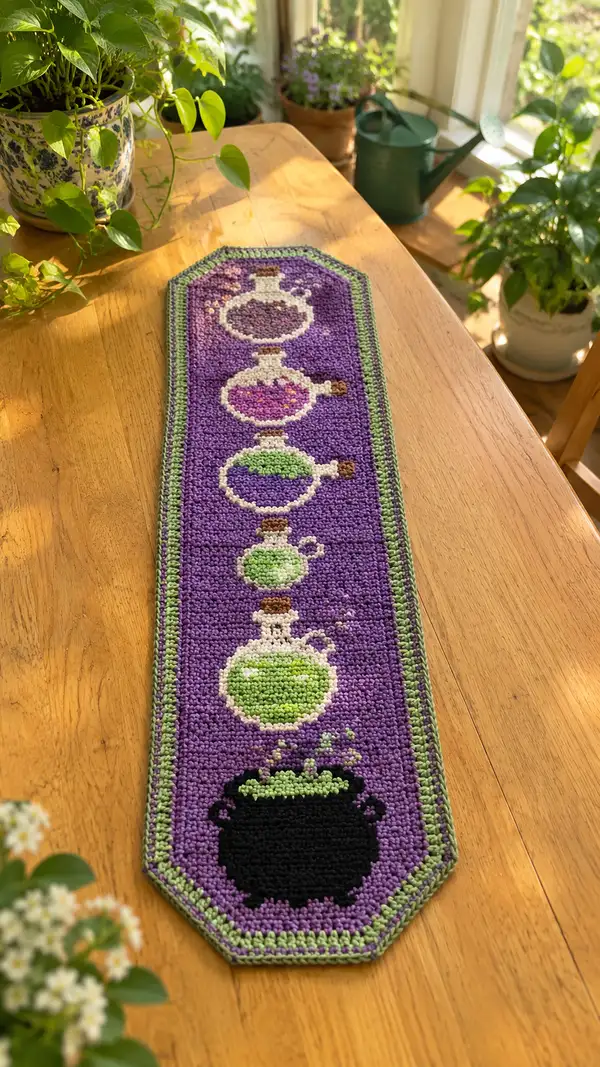
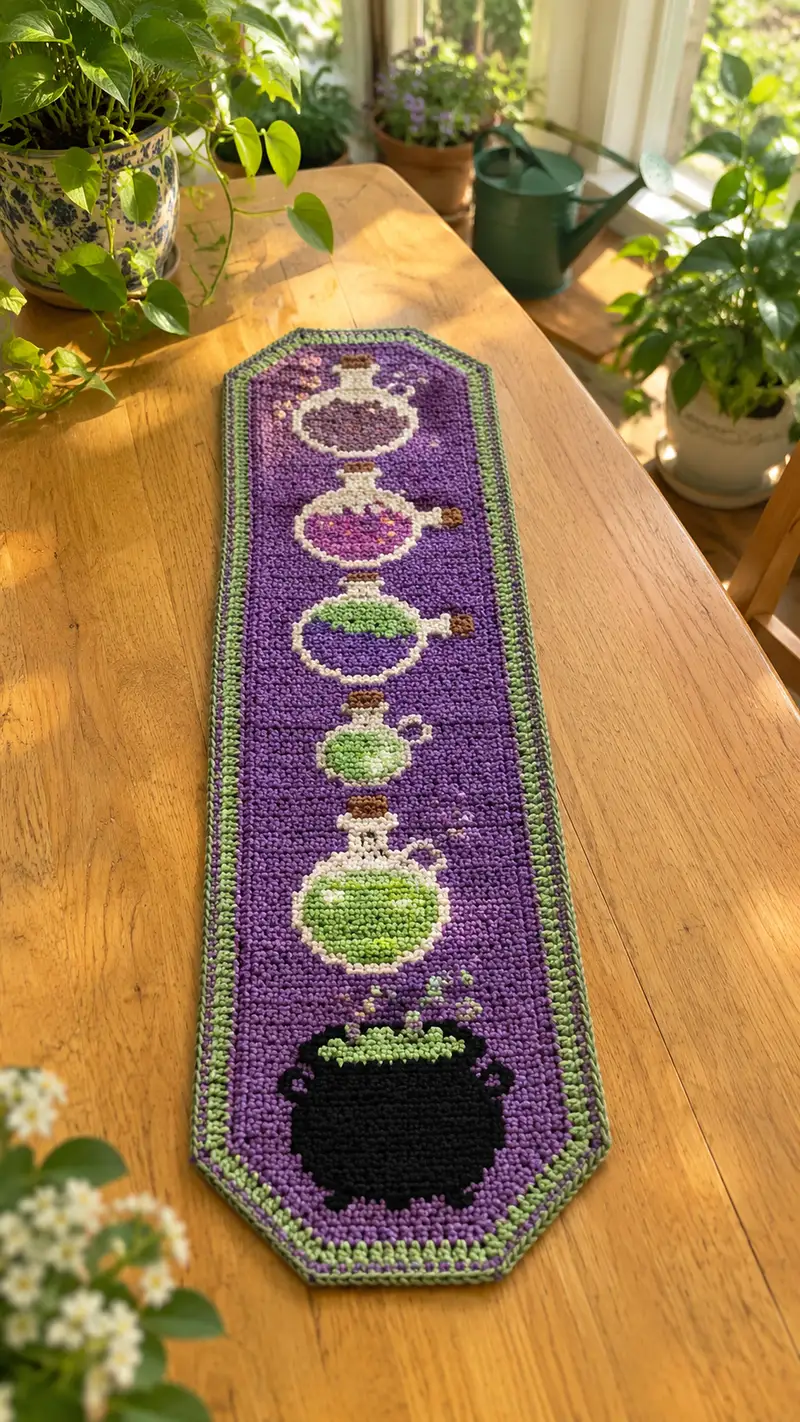
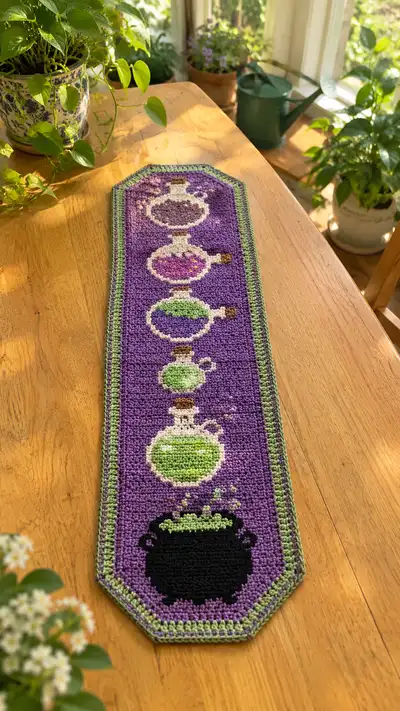
A long, whimsical table runner featuring a row of potion bottles and a bubbling cauldron on a rich purple background. Worked primarily in single crochet with tapestry colorwork, this runner has a neat green double-border and octagonal shaped ends for a polished finish. Perfect for seasonal decor or a charming everyday accent, the pattern includes step-by-step row instructions, color change guidance, and finishing details for a professional look.
Progress Tracker
0% Complete
— Notes & Gauge :
Info :
This runner is worked flat in rows using single crochet and tapestry colorwork. Gauge is not critical for motif clarity, but approximate gauge with worsted weight yarn and 3.5mm hook: 16 sc x 20 rows = 10 cm (4 in) before blocking. Block to finish. Keep tension consistent to avoid puckering when carrying colors.
Info :
All rows are worked left-to-right on the RS and right-to-left on the WS. At the end of each row, ch1 and turn (unless otherwise noted). Carry unused colors along the WS, catching floats every 4-6 stitches by twisting the working yarn around the carried yarn. Float length should not exceed 6 stitches to keep backs tidy.
— Materials & Setup :
Row 0 :
Foundation: Ch 64. This creates 63 sts across (count each chain from the 2nd ch from hook). Optional: make foundation single crochet (fsc) 63 to avoid initial row seam.
Info :
We will work across 63 stitches for the full length of the rectangular central panel. Motifs are positioned centered across these 63 sts. Keep the middle stitch as your vertical center for aligning motifs.
— Color Key :
Info :
MC = Deep Purple (background); ACC1 = Lime/Green (liquids and border); ACC2 = White/Cream (bottle outline/highlights); ACC3 = Black (cauldron, accents); ACC4 = Pink/Magenta (one potion); ACC5 = Brown (corks); ACC6 = Dark Purple (speckles).
— Main Panel (worked from bottom cauldron upward) :
Row 1-6 :
Working in MC, 1 sc in each st across (63) — establish base of runner and prepare for cauldron motif. Ch1, turn after each row. (Rows 1-6)
Info :
Keep these first rows flat and relaxed. Use a stitch marker at the first stitch of each row to avoid losing the row beginning when carrying colors.
Row 7 :
1 sc in MC across until stitch 16, 15 sc ACC3 (black) across stitches 16-30, then 1 sc MC to end (63). (i.e., 15 black centered starting at st16). Ch1, turn.
Row 8 :
1 sc MC x15, 15 sc ACC3, 1 sc MC x (remain) — keep black area consistent: (63)
Row 9 :
1 sc MC x14, 17 sc ACC3, 1 sc MC rest (63) — widen cauldron base slightly. Maintain color float carry on WS.
Info :
When working ACC3 across multiple stitches, twist the ACC3 into MC at color change to anchor floats on WS. Keep floats tidy, and if the float gets longer than 6 sts, catch it by twisting the yarns to secure.
Row 10 :
1 sc MC x13, 19 sc ACC3, 1 sc MC rest (63)
Row 11 :
1 sc MC x12, 21 sc ACC3, 1 sc MC rest (63)
Row 12 :
1 sc MC x11, 23 sc ACC3, 1 sc MC x(remaining) (63)
Row 13 :
1 sc MC x10, 25 sc ACC3, 1 sc MC rest (63)
Info :
These rows form the cauldron belly. Keep tension slighty firmer when working ACC3 (black) to ensure opacity. If you see background showing, add a second round of black over the same area later in the border stages to deepen color.
Row 14 :
1 sc MC x10, 25 sc ACC3, 1 sc MC rest (63)
Row 15 :
1 sc MC x11, 23 sc ACC3, 1 sc MC rest (63)
Row 16 :
1 sc MC x12, 21 sc ACC3, 1 sc MC rest (63)
Row 17 :
1 sc MC x13, 19 sc ACC3, 1 sc MC rest (63)
Row 18 :
1 sc MC x14, 17 sc ACC3, 1 sc MC rest (63)
Info :
Now we will add 'bubbling' accents for the cauldron (small green dots). These are single stitches of ACC1 placed on the RS; plan placement centered above the cauldron region.
Row 19 :
1 sc MC x12, 3 sc ACC1 (placed as bubbles) at sts 20-22, 15 sc MC, 3 sc ACC1 at sts 40-42, 1 sc MC to end (63). (Use ACC1 for tiny bubbles.)
Row 20-24 :
1 sc MC in each st across (63) — work 5 rows of purple to separate cauldron from first bottle motif. (Rows 20-24)
Info :
Use these plain rows to check your tension and tidy any floats on the WS. If any carried yarns are loose, twist them gently along the back of the work to secure.
Row 25 :
Start small potion bottle motif (bottommost bottle). To place this bottle centered, count from left edge: 63 sts total. Bottle width spans 21 sts centered: start at st22 to st42.
Row 25 (motif detail) :
1 sc MC x21, 21 sc ACC2 (cream) across sts 22-42 to begin bottle outline, then 1 sc MC to end (63)
Row 26 :
1 sc MC x20, 3 sc ACC2, 15 sc ACC1 (liquid green), 3 sc ACC2, 1 sc MC rest (63)
Row 27 :
1 sc MC x20, 5 sc ACC2, 11 sc ACC1, 5 sc ACC2, 1 sc MC rest (63)
Row 28 :
1 sc MC x19, 7 sc ACC2, 9 sc ACC1, 7 sc ACC2, 1 sc MC rest (63)
Info :
These rows create the bottle's round body using ACC2 as the rim and ACC1 as the liquid. Keep stitches tight over color changes to minimize gaps. If you prefer, carry ACC1 across the inside of the bottle only and float ACC2 around.
Row 29 :
1 sc MC x18, 9 sc ACC2, 7 sc ACC1, 9 sc ACC2, 1 sc MC rest (63)
Row 30 :
1 sc MC x18, 9 sc ACC2, 7 sc ACC1, 9 sc ACC2, 1 sc MC rest (63)
Row 31 :
1 sc MC x19, 7 sc ACC2, 9 sc ACC1, 7 sc ACC2, 1 sc MC rest (63)
Row 32 :
1 sc MC x20, 5 sc ACC2, 11 sc ACC1, 5 sc ACC2, 1 sc MC rest (63)
Row 33 :
1 sc MC x20, 3 sc ACC2, 15 sc ACC1, 3 sc ACC2, 1 sc MC rest (63)
Row 34 :
1 sc MC x21, 21 sc ACC2, 1 sc MC rest (63)
Row 35-38 :
1 sc MC across (63) — separation rows after bottle. (Rows 35-38)
Info :
At this point we have one small bottle. We will repeat larger bottles centered along the runner. Keep track of vertical spacing: allow 4 rows of MC between each bottle group for breathing room.
Row 39-42 :
1 sc MC across (63) — prepare for second bottle motif. (Rows 39-42)
Row 43 :
Second potion bottle (medium, ACC4 pink liquid): Start at st19 to st45 (width 27 sts). Work 18 rows total for this bottle motif.
Row 43 (motif detail) :
1 sc MC x18, 27 sc ACC2 (cream) across, 1 sc MC rest (63)
Row 44 :
1 sc MC x17, 5 sc ACC2, 17 sc ACC4 (pink), 5 sc ACC2, 1 sc MC rest (63)
Row 45 :
1 sc MC x17, 6 sc ACC2, 15 sc ACC4, 6 sc ACC2, 1 sc MC rest (63)
Row 46 :
1 sc MC x16, 8 sc ACC2, 13 sc ACC4, 8 sc ACC2, 1 sc MC rest (63)
Info :
Use ACC5 (brown) to add a cork at the top center of the bottle later. To make the bottle look round, slightly change the counts across the center rows like above to emulate curvature.
Row 47 :
1 sc MC x16, 9 sc ACC2, 11 sc ACC4, 9 sc ACC2, 1 sc MC rest (63)
Row 48 :
1 sc MC x15, 11 sc ACC2, 9 sc ACC4, 11 sc ACC2, 1 sc MC rest (63)
Row 49 :
1 sc MC x15, 11 sc ACC2, 9 sc ACC4, 11 sc ACC2, 1 sc MC rest (63)
Row 50 :
1 sc MC x16, 9 sc ACC2, 11 sc ACC4, 9 sc ACC2, 1 sc MC rest (63)
Row 51 :
1 sc MC x16, 8 sc ACC2, 13 sc ACC4, 8 sc ACC2, 1 sc MC rest (63)
Row 52 :
1 sc MC x17, 6 sc ACC2, 15 sc ACC4, 6 sc ACC2, 1 sc MC rest (63)
Row 53 :
1 sc MC x17, 5 sc ACC2, 17 sc ACC4, 5 sc ACC2, 1 sc MC rest (63)
Row 54 :
1 sc MC x18, 27 sc ACC2, 1 sc MC rest (63)
Row 55-58 :
1 sc MC across (63) — separation rows between bottles. (Rows 55-58)
Info :
If you would like to change the color of the middle bottle to green instead of pink, substitute ACC1 for ACC4 in Rows 44-53. Keep ACC2 as the bottle outline.
Row 59-62 :
1 sc MC across (63) — ready for third potion bottle (larger). (Rows 59-62)
Row 63 (motif start) :
Third potion bottle (large, with two-tone liquid ACC1 and ACC6): width 29 sts spanning st18-st46, total 20 rows for this bottle.
Row 63 :
1 sc MC x17, 29 sc ACC2, 1 sc MC rest (63)
Row 64 :
1 sc MC x16, 7 sc ACC2, 15 sc ACC1 (green), 7 sc ACC2, 1 sc MC rest (63)
Row 65 :
1 sc MC x16, 8 sc ACC2, 13 sc ACC1, 8 sc ACC2, 1 sc MC rest (63)
Row 66 :
1 sc MC x15, 9 sc ACC2, 11 sc ACC1, 9 sc ACC2, 1 sc MC rest (63)
Row 67 :
1 sc MC x15, 10 sc ACC2, 9 sc ACC1, 10 sc ACC2, 1 sc MC rest (63)
Info :
To create a two-tone liquid, begin incorporating ACC6 (dark purple speckles) as isolated stitches within the ACC1 area: place single ACC6 stitches on alternating rows to create a speckled effect (example placements detailed below).
Row 68 :
1 sc MC x14, 12 sc ACC2, 7 sc ACC1 with 2 single ACC6 speckles (place at the center of the liquid), 12 sc ACC2, 1 sc MC rest (63)
Row 69 :
1 sc MC x14, 12 sc ACC2, 7 sc ACC1, 12 sc ACC2, 1 sc MC rest (63)
Row 70 :
1 sc MC x15, 10 sc ACC2, 9 sc ACC1 with 1 ACC6 speckle, 10 sc ACC2, 1 sc MC rest (63)
Row 71 :
1 sc MC x15, 9 sc ACC2, 11 sc ACC1, 9 sc ACC2, 1 sc MC rest (63)
Row 72 :
1 sc MC x16, 8 sc ACC2, 13 sc ACC1, 8 sc ACC2, 1 sc MC rest (63)
Row 73 :
1 sc MC x16, 7 sc ACC2, 15 sc ACC1, 7 sc ACC2, 1 sc MC rest (63)
Row 74 :
1 sc MC x17, 29 sc ACC2, 1 sc MC rest (63)
Row 75-78 :
1 sc MC across (63) — separation rows. (Rows 75-78)
Row 79-86 :
Work 8 rows in MC alone to create space (Rows 79-86)
Info :
At this point you have three bottles plus a cauldron — the largest bottle and top bottle will follow similar shaping but can be scaled. Keep written notes of which rows you placed corks (ACC5) so you can add cork details on the RS later by embroidering or working small short rows.
Row 87-90 :
1 sc MC across (63) — prepare for smaller topmost bottle motif. (Rows 87-90)
Row 91 (motif start) :
Topmost small potion bottle: width 21 sts centered between st22-st42; work 14 rows to form this bottle.
Row 91 :
1 sc MC x21, 21 sc ACC2, 1 sc MC rest (63)
Row 92 :
1 sc MC x20, 3 sc ACC2, 15 sc ACC1, 3 sc ACC2, 1 sc MC rest (63)
Row 93 :
1 sc MC x20, 5 sc ACC2, 11 sc ACC1, 5 sc ACC2, 1 sc MC rest (63)
Row 94 :
1 sc MC x19, 7 sc ACC2, 9 sc ACC1, 7 sc ACC2, 1 sc MC rest (63)
Row 95 :
1 sc MC x19, 7 sc ACC2, 9 sc ACC1, 7 sc ACC2, 1 sc MC rest (63)
Row 96 :
1 sc MC x20, 5 sc ACC2, 11 sc ACC1, 5 sc ACC2, 1 sc MC rest (63)
Row 97 :
1 sc MC x21, 21 sc ACC2, 1 sc MC rest (63)
Row 98-102 :
1 sc MC across (63) to create top margin and prepare for end octagon shaping or separate end panel attachment. (Rows 98-102)
Info :
At this point the full rectangular panel is complete. Block the panel flat before attaching the octagon end panels or working the border to ensure edges are even. If you plan to work octagonal ends separately, measure the width at the center and top, both ends, to ensure the end panel sizes match.
— Octagon End Panels (Make 2) :
Info :
Each octagon end plate is worked flat as a trapezoid with angled corners to create the trimmed ends shown in the photo. We make two identical pieces and sew them to the short edges of the main panel.
Row 1 :
Ch 20, 1 sc in 2nd ch from hook and across (19). Ch1, turn.
Row 2 :
1 sc in each st across (19)
Row 3 :
Dec at beg and end of row (slip first 2 sc together?); 1 sc in remaining across so row count becomes 17. (17)
Row 5 :
Dec at beg and end (15)
Row 7 :
Dec at beg and end (13)
Row 9 :
Dec at beg and end (11)
Info :
These 10 rows form one half of the tapered end. Make two identical halves and sew them to the main rectangular panel short edge, then join the outer edges to create an octagon. Alternatively, work a single trapezoid that tapers on both sides if you prefer to attach as one piece.
Row 11-12 :
Fasten off long tail and leave for sewing. Repeat for second end panel. Block both octagon panels to match the short edge length of the main panel.
— Border & Finishing :
Info :
Once main panel and end panels are joined, we add a three-round border: MC row to tidy, ACC1 row for the inner green stripe, and ACC1/MC contrasting round for an outer ridge. Use 3.5mm hook; slip-stitch join is neat or you may single crochet around the edge for a raised border.
Round 1 (Border) :
With MC and RS facing, join with sl st at any corner. Work 1 sc evenly around entire perimeter, placing 3 sc in each corner to keep edges flat. (Count will vary depending on perimeter; aim to keep corner increases consistent.)
Round 2 (Border) :
Change to ACC1 (lime green). 1 sc in each st around. At corners, work 3 sc to maintain shape. This creates the inner green stripe.
Round 3 (Border) :
Change to MC or contrasting darker green: 1 sc in BLO across to create a subtle ridge. Work evenly. Fasten off and weave in ends.
Info :
If you prefer a decorative finish, work an additional round of crab stitch (reverse sc) in ACC1 or ACC2 for a twisted edge. For a flatter finish, use slip stitch and weave ends on the WS.
Row (Embellishments) :
Embroider bottle corks with ACC5 (brown) by making 1-2 small short horizontal sl st or surface sc stitches at each bottle neck (note their row numbers: bottome bottle around Rows 25-34, second bottle Rows 43-54, third bottle Rows 63-74, top bottle Rows 91-97). Add white highlight stitches with ACC2 to mimic glass reflections.
Info :
Weave in all yarn ends on the wrong side using a tapestry needle. When carrying colors, weave tails into the carried floats on the back, or use duplicate stitch on the RS for small corrections after blocking.
— Tips for Tapestry Colorwork :
Info :
Always change color on the last yarn-over of the previous stitch so the new color is ready for the next stitch. When changing color for a single stitch, drop the old color and pick up the new color, and pick the old color up again when needed. Keep tension even - practice on a small swatch before starting the runner if you are new to tapestry crochet.
Info :
If your floats on the WS become long, consider adding a small catch: every 4 stitches on the WS twist the carried color under the working yarn to secure it. This prevents snagging and keeps the back tidy for blocking.
— Blocking & Final Assembly :
Info :
Block the main panel and end panels flat. Pin to measurements on a blocking mat and spray lightly with water or use a steam iron at a distance. Allow to dry fully. Use mattress stitch or slip stitch to join end panels to the main panel; pin first to ensure correct fit and that motifs align centrally. Sew slowly and evenly, matching stitch tension to avoid puckering.
Info :
After joining, add the border rounds as described. Press lightly if needed. Your runner is now finished and ready to be displayed!
Final Notes :
Adjust overall length by adding additional plain MC rows between motifs if you want a longer runner. To change width, adjust foundation chain in multiples of 1 stitch (63 used here) but remember motif centering will shift, so recalculate motif start positions to keep them centered.
You've just completed a charming potion bottle table runner that brings color and personality to your tabletop! The stacked bottles and bubbling cauldron make a playful focal point, while the green double-border gives the runner a clean, finished edge. This piece is fun to make and even more satisfying to display — perfect for gifting or seasonal decor. 🧶✨ Place it on your favorite table and enjoy the handmade magic it adds to your home! 🎃