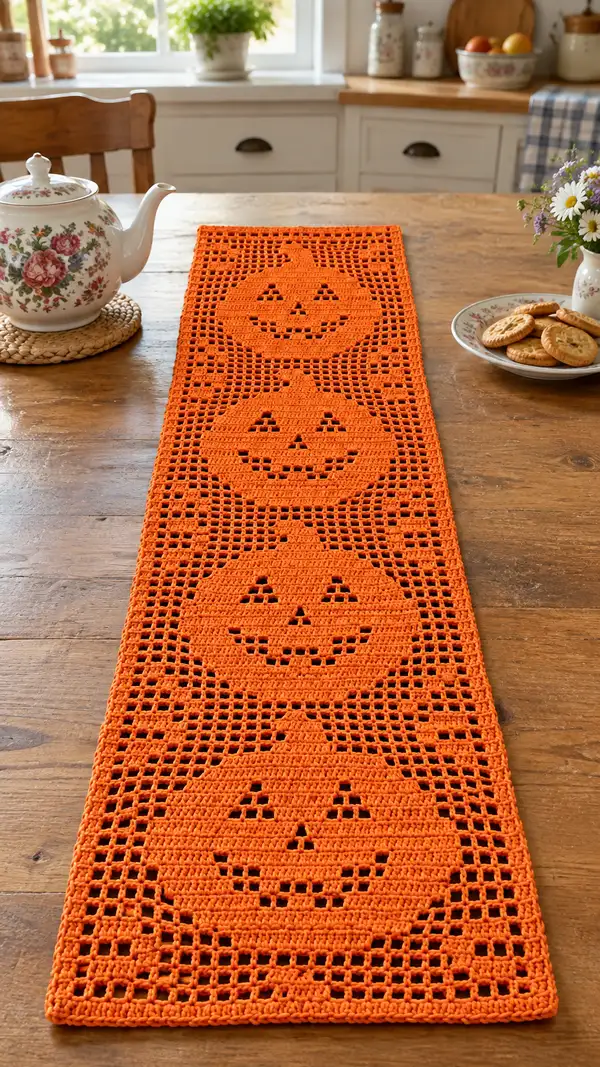
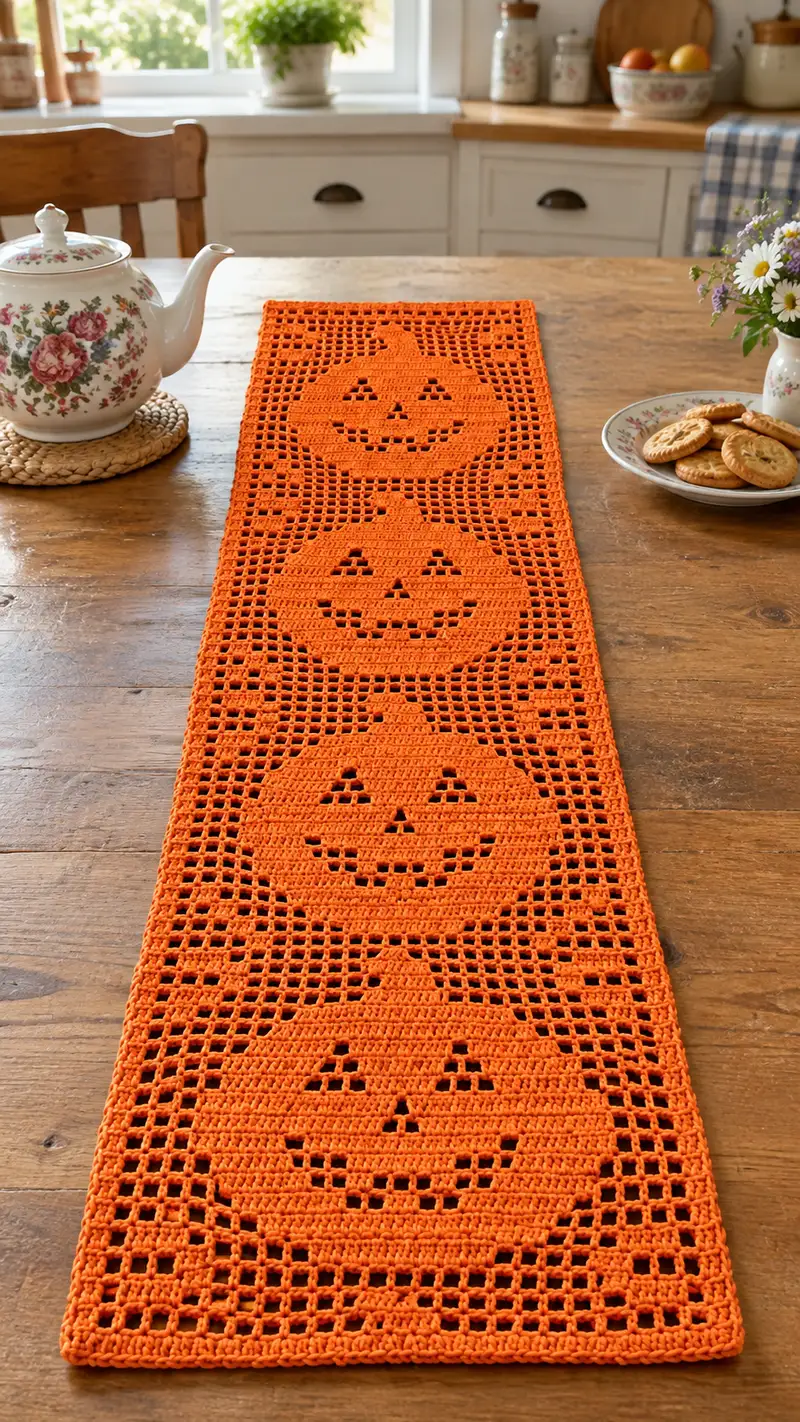
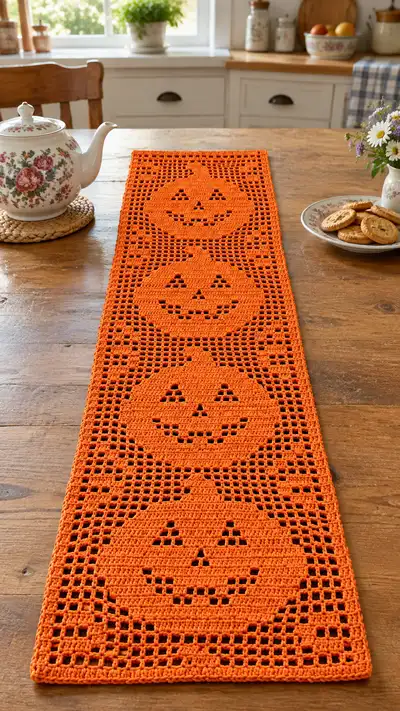
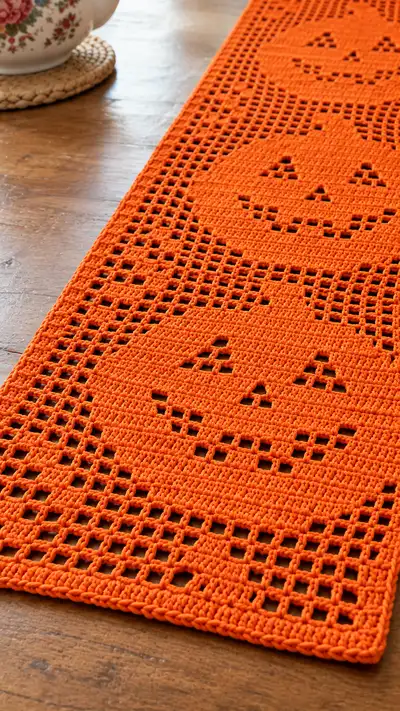
Bright, cheery and perfect for Halloween or autumn tables, this pumpkin filet table runner features four stacked jack-o'-lantern faces worked in classic filet crochet. The runner is made in a single warm orange tone with a neat solid border and repeating pumpkin motifs for a vintage-modern look. Worked in filet mesh (filled and open meshes) it produces crisp pumpkin silhouettes and a lovely lightweight drape for tabletops. Ideal for seasonal displays, mantelpieces, or as a festive centerpiece accent.
Progress Tracker
0% Complete
— Notes & Techniques :
Info :
This runner is worked in filetcrochet using dc and ch2 open meshes. Each mesh = 1 block; an open mesh is worked as 'dc, ch2, skip 2' and a filled mesh is worked as '3 dc' across the width of one mesh. Foundation chain is (multiple of 3) + 2. In the written rows below I list meshes as 'Open xN' or 'Filled xN' where N is count of meshes; total dc count for a row = 41 + 2*F where F = number of filled meshes in that row (mesh width = 41).
Gauge/Size :
Using 3.5mm hook and worsted cotton, one mesh measures approximately 0.6cm wide. With foundation chain 125 (41 meshes) the finished runner as shown measures approximately 12.5cm wide and ~120-130 cm long (four motifs plus borders). Adjust number of pumpkin repeats to change the length.
Abbreviations :
Open mesh = dc, ch2, skip 2 (counts as 1 mesh). Filled mesh = 3 dc in the space for that mesh. Ch3 at start counts as dc (1st dc of the row).
— Foundation & Border Start :
Row 0 :
Ch125 (this is (41 meshes x 3) + 2). This foundation chain sets a width of 41 meshes across. Do not twist chain.
Row 1 :
Ch3 (counts as first dc), turn. Work 3 dc in each mesh across (i.e., work (3 dc) x 41 = 123 dc). (This is a full filled row to create a solid border) (123 dc)
Row 2 :
Ch3, turn. Work (3 dc) in each mesh across (3 dc x 41) = 123 dc. (123 dc)
Row 3 :
Repeat Row 2 for a solid header, ch3, turn, (3 dc) x 41 = 123 dc. (123 dc)
Row 4 :
Ch3, turn. (3 dc) x 41 = 123 dc to complete the top solid border. (123 dc)
Row 5 :
Ch3, turn. Start transitioning to filet ground: Work 1 dc in first mesh (ch3 counted as first dc), then *ch2, skip 2, dc in next mesh* — work Open mesh across for a clean open border row: Open x41. (Open x41; F=0 → 41 dc total)
Info :
From this point forward rows are counted as 'Row #' and use 'Open xN' and 'Filled xN' to indicate mesh sequences across the 41-mesh repeat. Always begin each row with ch3 (counts as the first dc) unless otherwise noted; align meshes by working into previous row's dc or chain spaces as indicated.
— Main Panel : (Pumpkin motifs and spacing)
Row 6 :
Ch3, turn. Open x41 across (full open mesh row, blank grid) — F=0 → 41 dc
Row 7 :
Ch3, turn. Open x41 (blank spacer row) — F=0 → 41 dc
Row 8 :
Ch3, turn. Open x41 (blank spacer row) — F=0 → 41 dc
Info :
These first open rows after the border set the negative space above the first pumpkin. If you prefer the pumpkins closer together, reduce the number of spacer rows accordingly. Keep stitch markers at mesh 1 and mesh 21 (center) to help align motifs as you work long repeats.
Row 9 :
Ch3, turn. Open x18, Filled x5, Open x18 — center small top of pumpkin/stem start. F=5 → dc = 41 + 2*5 = 51
Row 10 :
Ch3, turn. Open x17, Filled x7, Open x17 — widening pumpkin. F=7 → 55 dc
Row 11 :
Ch3, turn. Open x16, Filled x9, Open x16 — further widening. F=9 → 59 dc
Row 12 :
Ch3, turn. Open x15, Filled x11, Open x15 — beginning of round pumpkin shape. F=11 → 63 dc
Info :
At this stage the pumpkin is expanding. Keep tension consistent: filled meshes (3 dc) make the row denser than open; if you notice puckering, try the slightly larger hook for filled rows or relax tension on filled clusters.
Row 13 :
Ch3, turn. Open x13, Filled x15, Open x13 — middle of upper pumpkin bulge. F=15 → 71 dc
Row 14 :
Ch3, turn. Open x12, Filled x17, Open x12 — widening to near maximum width. F=17 → 75 dc
Row 15 :
Ch3, turn. Open x10, Filled x21, Open x10 — pumpkin near widest point. F=21 → 83 dc
Row 16 :
Ch3, turn. Open x9, Filled x23, Open x9 — full roundness building. F=23 → 87 dc
Info :
When working consecutive filled meshes (x21, x23 etc.) keep yarn tails out of the way and make sure you place the 3 dcs spaced evenly across the previous row's chain spaces or dc posts to maintain a smooth filled surface.
Row 17 :
Ch3, turn. Open x8, Filled x25, Open x8 — maximum belly for the pumpkin. F=25 → 91 dc
Row 18 :
Ch3, turn. Open x7, Filled x27, Open x7 — rounded center of motif. F=27 → 95 dc
Row 19 :
Ch3, turn. Open x9, Filled x21, Open x11 with openings for facial features to be added next rows. (F=21 → 83 dc)
Row 20 :
Ch3, turn. Open x9, Filled x21, Open x11 — continue shaping and prepare for eye/nose placement. F=21 → 83 dc
Info :
Mark the center mesh (mesh 21) with a removable marker — this helps you place the nose and the smile centered on the pumpkin. Facial features are created by substituting filled meshes with open meshes where noted below.
Row 21 :
Ch3, turn. Open x9, Filled x13, Open x3, Filled x5, Open x3, Filled x11, Open x? (patterned to create two open spaces where the eyes will sit). Pattern placed symmetrically across mesh center. For clarity: treat this as F=21 → 83 dc (approximate filled distribution as above)
Row 22 :
Ch3, turn. Open x9, Filled x10, Open x3 (left eye), Filled x7 (center), Open x3 (right eye), Filled x9, Open x? — overall F around 25 for this row, count = 91 dc
Row 23 :
Ch3, turn. Open x9, Filled x11, Open x1, Filled x1, Open x1, Filled x11, Open x7 — small triangular eye shapes formed by single open meshes; F=25 → 91 dc
Info :
Eyes and nose are formed by replacing filled meshes with open meshes. If you prefer larger eyes, omit some filled-blocks to increase open area; if you want embroidered details, keep meshes filled and embroider over the filled area afterwards.
Row 24 :
Ch3, turn. Open x9, Filled x23, Open x9 — return to a filled row to shape around facial holes. F=23 → 87 dc
Row 25 :
Ch3, turn. Open x9, Filled x21, Open x11 — descending toward the pumpkin base. F=21 → 83 dc
Row 26 :
Ch3, turn. Open x10, Filled x19, Open x12 — begin narrowing below the mouth. F=19 → 79 dc
Row 27 :
Ch3, turn. Open x11, Filled x17, Open x13 — narrowing under the cheeks. F=17 → 75 dc
Row 28 :
Ch3, turn. Open x12, Filled x15, Open x14 — further tapering. F=15 → 71 dc
Info :
At these narrowing rows you begin to close the pumpkin silhouette. Maintain consistent spacing so the pumpkin looks symmetrical left to right; if you lose symmetry, rip back to last known symmetric row and realign with markers.
Row 29 :
Ch3, turn. Open x13, Filled x13, Open x15 — approaching base of pumpkin. F=13 → 67 dc
Row 30 :
Ch3, turn. Open x14, Filled x11, Open x16 — base forming. F=11 → 63 dc
Row 31 :
Ch3, turn. Open x15, Filled x9, Open x17 — more base taper. F=9 → 59 dc
Row 32 :
Ch3, turn. Open x16, Filled x7, Open x18 — closing under the pumpkin belly. F=7 → 55 dc
Row 33 :
Ch3, turn. Open x17, Filled x5, Open x19 — last round of the pumpkin motif top/bottom transition. F=5 → 51 dc
Row 34 :
Ch3, turn. Open x18, Open x23 across (full open mesh zone) to separate motifs: Open x41 — F=0 → 41 dc (this begins the spacer between pumpkins)
Info :
Rows 9 through 33 define one pumpkin motif of 25 rows (including eye/mouth rows). The exact distribution of filled vs open meshes within eye and mouth rows can be adjusted to change facial expression; the counts listed produce a balanced, smiling jack-o'-lantern centered at mesh 21. If you want the face smaller or larger, shift the open meshes inward or outward accordingly.
Row 35 :
Ch3, turn. Open x41 (spacer) — F=0 → 41 dc
Row 36 :
Ch3, turn. Open x41 (spacer) — F=0 → 41 dc
Row 37 :
Ch3, turn. Open x41 (spacer) — F=0 → 41 dc
Info :
Repeat the motif sequence below (Rows 9–33) to produce the second pumpkin. For clarity and to keep the row-by-row record, the pattern lists each row again, but you may choose to chart the motif once and repeat it X times.
Row 38 :
Repeat Row 9: Ch3, turn. Open x18, Filled x5, Open x18 — F=5 → 51 dc
Row 39 :
Repeat Row 10: Ch3, turn. Open x17, Filled x7, Open x17 — F=7 → 55 dc
Row 40 :
Repeat Row 11: Ch3, turn. Open x16, Filled x9, Open x16 — F=9 → 59 dc
Row 41 :
Repeat Row 12: Ch3, turn. Open x15, Filled x11, Open x15 — F=11 → 63 dc
Row 42 :
Repeat Row 13: Ch3, turn. Open x13, Filled x15, Open x13 — F=15 → 71 dc
Info :
Working repeating motifs in a long panel can be easier if you place temporary paper clips or removable markers at the ends of each motif so you can visually check spacing as you progress down the runner.
Row 43 :
Repeat Row 14: Ch3, turn. Open x12, Filled x17, Open x12 — F=17 → 75 dc
Row 44 :
Repeat Row 15: Ch3, turn. Open x10, Filled x21, Open x10 — F=21 → 83 dc
Row 45 :
Repeat Row 16: Ch3, turn. Open x9, Filled x23, Open x9 — F=23 → 87 dc
Row 46 :
Repeat Row 17: Ch3, turn. Open x8, Filled x25, Open x8 — F=25 → 91 dc
Row 47 :
Repeat Row 18: Ch3, turn. Open x7, Filled x27, Open x7 — F=27 → 95 dc
Info :
At the widest rows you will have many consecutive filled meshes; watch for any twisting at the edges — if it happens, ease tension by pulling a little looser in the edge meshes for that row and the runner will sit flat after blocking.
Row 48 :
Repeat Row 19: Ch3, turn. Open x9, Filled x21, Open x11 — F=21 → 83 dc
Row 49 :
Repeat Row 20: Ch3, turn. Open x9, Filled x21, Open x11 — F=21 → 83 dc
Row 50 :
Repeat Row 21: Ch3, turn. Open x9, Filled x13, Open x3, Filled x5, Open x3, Filled x11 — F≈21 → 83 dc
Row 51 :
Repeat Row 22: Ch3, turn. Open x9, Filled x10, Open x3, Filled x7, Open x3, Filled x9 — F≈25 → 91 dc
Info :
If you get lost in facial rows, place a removable marker at your center mesh and count meshes left and right from center to ensure symmetry. Keep a printed copy or charted grid next to you for reference when making eyes and mouth shapes.
Row 52 :
Repeat Row 23: Ch3, turn. Open x9, Filled x11, Open x1, Filled x1, Open x1, Filled x11, Open x7 — F≈25 → 91 dc
Row 53 :
Repeat Row 24: Ch3, turn. Open x9, Filled x23, Open x9 — F=23 → 87 dc
Row 54 :
Repeat Row 25: Ch3, turn. Open x9, Filled x21, Open x11 — F=21 → 83 dc
Row 55 :
Repeat Row 26: Ch3, turn. Open x10, Filled x19, Open x12 — F=19 → 79 dc
Info :
When repeating motifs, it helps to check the underside of the work occasionally to ensure you are working into the correct ch-spaces from the previous row; in filet a misaligned stitch is most often cause of misplaced faces later on.
Row 56 :
Repeat Row 27: Ch3, turn. Open x11, Filled x17, Open x13 — F=17 → 75 dc
Row 57 :
Repeat Row 28: Ch3, turn. Open x12, Filled x15, Open x14 — F=15 → 71 dc
Row 58 :
Repeat Row 29: Ch3, turn. Open x13, Filled x13, Open x15 — F=13 → 67 dc
Row 59 :
Repeat Row 30: Ch3, turn. Open x14, Filled x11, Open x16 — F=11 → 63 dc
Row 60 :
Repeat Row 31: Ch3, turn. Open x15, Filled x9, Open x17 — F=9 → 59 dc
Info :
Halfway down the runner you may want to check total length and decide if you'd like an extra spacer row before the next motif. It's easy to add/remove blank rows to adjust final length without changing motif proportions.
Row 61 :
Repeat Row 32: Ch3, turn. Open x16, Filled x7, Open x18 — F=7 → 55 dc
Row 62 :
Repeat Row 33: Ch3, turn. Open x17, Filled x5, Open x19 — F=5 → 51 dc
Row 63 :
Repeat Row 34: Ch3, turn. Open x41 (spacer) — F=0 → 41 dc
Row 64 :
Ch3, turn. Open x41 (spacer) — F=0 → 41 dc
Row 65 :
Ch3, turn. Open x41 (spacer) — F=0 → 41 dc
Info :
Now repeat the full motif sequence for the third pumpkin (Rows 9–33) and then for the fourth pumpkin to produce four stacked pumpkins. For brevity the instructions below continue the repeat set explicitly; keep center markers to ensure consistent alignment of faces.
Row 66 :
Repeat Row 9 (pumpkin start): Ch3, turn. Open x18, Filled x5, Open x18 — F=5 → 51 dc
Row 67 :
Repeat Row 10: Ch3, turn. Open x17, Filled x7, Open x17 — F=7 → 55 dc
Row 68 :
Repeat Row 11: Ch3, turn. Open x16, Filled x9, Open x16 — F=9 → 59 dc
Row 69 :
Repeat Row 12: Ch3, turn. Open x15, Filled x11, Open x15 — F=11 → 63 dc
Row 70 :
Repeat Row 13: Ch3, turn. Open x13, Filled x15, Open x13 — F=15 → 71 dc
Info :
Keep an eye on the runner width as you go — if you notice elongation or skewing, unpick to the last nicely aligned row and rework; small errors early become more obvious after many repeats.
Row 71 :
Repeat Row 14: Ch3, turn. Open x12, Filled x17, Open x12 — F=17 → 75 dc
Row 72 :
Repeat Row 15: Ch3, turn. Open x10, Filled x21, Open x10 — F=21 → 83 dc
Row 73 :
Repeat Row 16: Ch3, turn. Open x9, Filled x23, Open x9 — F=23 → 87 dc
Row 74 :
Repeat Row 17: Ch3, turn. Open x8, Filled x25, Open x8 — F=25 → 91 dc
Row 75 :
Repeat Row 18: Ch3, turn. Open x7, Filled x27, Open x7 — F=27 → 95 dc
Info :
If you want a sturdier runner, work these widest filled rows with a slightly tighter gauge (smaller hook) but be consistent to avoid rippling; blocking will still be needed to even everything out.
Row 76 :
Repeat Row 19: Ch3, turn. Open x9, Filled x21, Open x11 — F=21 → 83 dc
Row 77 :
Repeat Row 20: Ch3, turn. Open x9, Filled x21, Open x11 — F=21 → 83 dc
Row 78 :
Repeat Row 21: Ch3, turn. Open x9, Filled x13, Open x3, Filled x5, Open x3, Filled x11 — F≈21 → 83 dc
Row 79 :
Repeat Row 22: Ch3, turn. Open x9, Filled x10, Open x3, Filled x7, Open x3, Filled x9 — F≈25 → 91 dc
Row 80 :
Repeat Row 23: Ch3, turn. Open x9, Filled x11, Open x1, Filled x1, Open x1, Filled x11, Open x7 — F≈25 → 91 dc
Info :
At the end of the third motif set you are approaching the final pumpkin. Keep spare yarn on hand as long runs of filled meshes use yarn quickly; check remaining yardage to ensure you have enough to finish the last motif and border.
Row 81 :
Repeat Row 24: Ch3, turn. Open x9, Filled x23, Open x9 — F=23 → 87 dc
Row 82 :
Repeat Row 25: Ch3, turn. Open x9, Filled x21, Open x11 — F=21 → 83 dc
Row 83 :
Repeat Row 26: Ch3, turn. Open x10, Filled x19, Open x12 — F=19 → 79 dc
Row 84 :
Repeat Row 27: Ch3, turn. Open x11, Filled x17, Open x13 — F=17 → 75 dc
Info :
When nearing the final motifs, re-check edges and unworked chains on the foundation to make sure you haven't missed a stitch — missed foundation chains are a common cause of right-edge drift.
Row 85 :
Repeat Row 28: Ch3, turn. Open x12, Filled x15, Open x14 — F=15 → 71 dc
Row 86 :
Repeat Row 29: Ch3, turn. Open x13, Filled x13, Open x15 — F=13 → 67 dc
Row 87 :
Repeat Row 30: Ch3, turn. Open x14, Filled x11, Open x16 — F=11 → 63 dc
Row 88 :
Repeat Row 31: Ch3, turn. Open x15, Filled x9, Open x17 — F=9 → 59 dc
Row 89 :
Repeat Row 32: Ch3, turn. Open x16, Filled x7, Open x18 — F=7 → 55 dc
Info :
You're now on the last motif — savour these rows and keep tension steady; after finishing motif rows you'll add the bottom border and then block flat for a crisp finish.
Row 90 :
Repeat Row 33: Ch3, turn. Open x17, Filled x5, Open x19 — F=5 → 51 dc
Row 91 :
Repeat Row 34: Ch3, turn. Open x41 (spacer) — F=0 → 41 dc
Row 92 :
Ch3, turn. Open x41 (spacer) — F=0 → 41 dc
Row 93 :
Ch3, turn. Open x41 (spacer) — F=0 → 41 dc
Row 94 :
Ch3, turn. Open x41 (spacer) — F=0 → 41 dc
Info :
Transition rows between final motif and border: make at least 3–6 open rows before the final solid border so the border sits evenly and the pumpkin motifs have breathing room at the runner ends.
Row 95 :
Ch3, turn. (3 dc) in each mesh across — Full filled row to begin bottom solid border: (3 dc) x 41 = 123 dc (123 dc)
Row 96 :
Ch3, turn. (3 dc) x 41 = 123 dc (123 dc)
Row 97 :
Ch3, turn. (3 dc) x 41 = 123 dc (123 dc)
Row 98 :
Ch3, turn. (3 dc) x 41 = 123 dc (123 dc)
Row 99 :
Ch3, turn. (3 dc) x 41 = 123 dc (123 dc)
Row 100 :
Ch3, turn. (3 dc) x 41 = 123 dc (123 dc)
Row 101 :
Ch3, turn. (3 dc) x 41 = 123 dc (123 dc)
Row 102 :
Ch3, turn. (3 dc) x 41 = 123 dc (123 dc)
Info :
The bottom border has 8 solid filled rows to mirror the top and give visual weight. If you prefer a lighter border, reduce to 4 rows; if you want a more substantial frame, add more solid rows.
Row 103 :
Sl st to finish edge, fasten off and weave in ends securely. Trim any stray tails and prepare to block.
Finishing Info :
Blocking: Wet-block or steam-block the runner flat; pin edges straight and square, pulling gently to square meshes. Allow to dry fully before removing pins. If you want a slightly stiffer runner, use a light starch spray while blocking and allow to dry completely.
Care Info :
Hand wash or gentle machine wash in cool water; lay flat to dry. Avoid harsh detergents or high heat to preserve cotton sheen and color.
This pumpkin filet table runner brings seasonal magic to your table with bold silhouettes and classic filet construction. Each smiling jack-o'-lantern is revealed stitch-by-stitch, making the pattern meditative and rewarding to work. Block it flat for flawless pumpkin faces and a polished finish — perfect for cozy autumn afternoons and festive gatherings. 🧡🎃