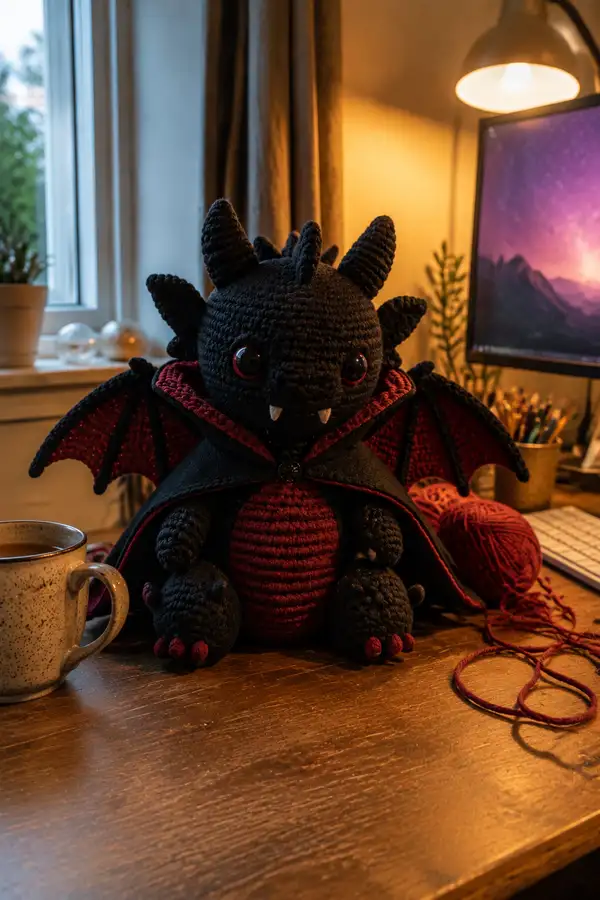
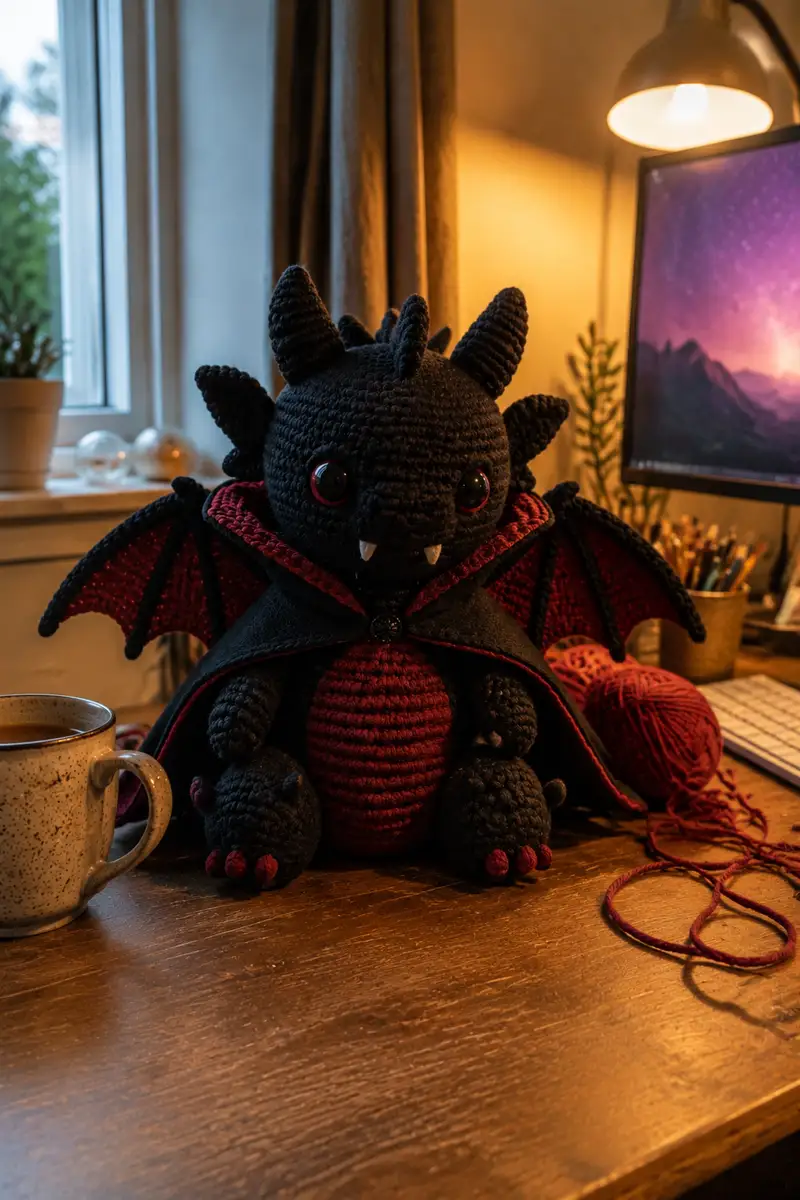
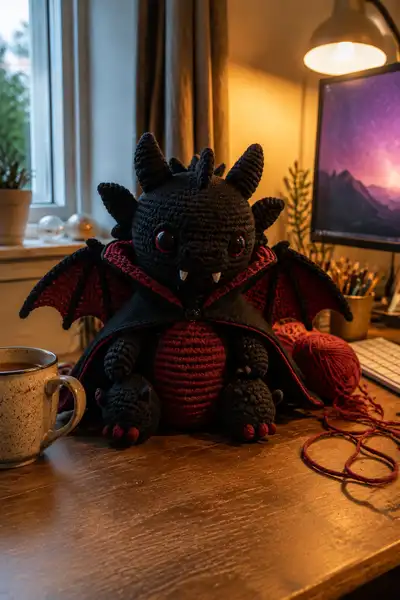
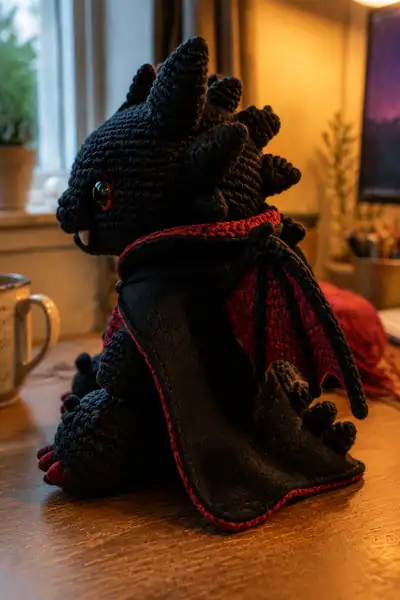
Create a lovable plush vampire dragon with dramatic black-and-red details. This pattern includes a rounded chubby body, textured belly, multiple horn spikes, articulated wings, tiny white fangs and a removable felt-lined cape. The finished toy has glossy red‑rimmed eyes, chunky claws and richly textured stitches for a collectible, huggable character.
Progress Tracker
0% Complete
— Head :
Round 1 :
6 sc in magic ring (6)
Round 3 :
(1 sc, inc) x 6 (18)
Round 4 :
(2 sc, inc) x 6 (24)
Round 5 :
(3 sc, inc) x 6 (30)
Round 6 :
(4 sc, inc) x 6 (36)
Round 7 :
(5 sc, inc) x 6 (42)
Round 8 :
(6 sc, inc) x 6 (48)
Info :
Place safety eyes between rounds 13-15. For a similar look, space eyes approximately 10-12 sts apart measured between centers on this size head. Mark each eye stitch with a scrap of yarn before locking the back washer in place.
Round 9-12 :
1 sc in each st (48)
Round 13 :
1 sc in each st BLO (48)
Info :
The BLO round creates a subtle ridge across the forehead that helps the eye set look deep-set; keep tension even so ridge remains neat.
Round 14-16 :
1 sc in each st (48)
Round 17 :
(6 sc, dec) x 6 (42)
Round 18 :
(5 sc, dec) x 6 (36)
Info :
Begin stuffing head firmly now but leave room to manipulate spikes. Add small amounts of stuffing frequently so head remains rounded without lumps.
Round 19 :
(4 sc, dec) x 6 (30)
Round 20 :
(3 sc, dec) x 6 (24)
Round 21 :
(2 sc, dec) x 6 (18)
Round 22 :
(1 sc, dec) x 6 (12)
Info :
Fasten off leaving a long tail for sewing to body if you prefer to close the head later after attachment; otherwise finish stuffing fully and close with a weave-through and tighten method.
Round 24 :
Leave head open for neck formation and do not fasten off if you will continue to make neck rounds joined to body later (optional). This pattern treats head as a separate piece for ease of stuffing and eye placement.
Info :
Mark the top center and bottom center of the head with pins or yarn for consistent placement of horns and mouth.
— Snout & Mouth :
Round 1 :
6 sc in magic ring (6)
Round 3 :
(1 sc, inc) x 6 (18)
Round 4 :
1 sc in each st (18)
Round 5 :
(2 sc, dec) x 4, sc 1 (14)
Info :
Sew snout to the lower front of the head centered between the eyes. Place tiny white triangle fangs either sewn into the seam below the snout or inserted into the snout seam between rounds 2-3. Use embroidery thread to secure fangs if needed.
Round 6 :
Fasten off leaving a tail for sewing. Stuff lightly to keep snout shape.
— Fangs (Make 2) :
Round 1 :
3 sc in magic ring (3)
Round 2 :
1 sc in each st (3)
Round 4 :
sc 2 (2). Fasten off leaving long tail for sewing into mouth seam (white yarn)
Info :
Position fangs so they peek below snout; tighten long sewing tail and weave through head stitches to secure. Add a small dab of fabric glue inside for extra hold if needed.
— Head Spikes / Horn Cones (Make 7 total: 3 centerline smaller, 4 larger)
Spike A (larger cone) Round 1 :
6 sc in magic ring (6)
Round 3 :
(1 sc, inc) x 6 (18)
Round 4 :
(2 sc, inc) x 6 (24)
Round 5 :
1 sc in each st (24)
Round 6 :
(3 sc, dec) x 6 (18)
Round 7 :
(2 sc, dec) x 6 (12)
Round 8 :
(1 sc, dec) x 6 (6)
Round 9 :
sc in each st (6) - Fasten off leaving long tail for sewing; stuff lightly for firm cones
Info :
Make 4 larger cones and 3 smaller cones by stopping growth at Round 6 or 7 for the smaller ones. Place the largest cones along the top center of head and smaller cones along the back-of-head base for a staggered ridge.
— Body :
Round 1 :
6 sc in magic ring (6)
Round 3 :
(1 sc, inc) x 6 (18)
Round 4 :
(2 sc, inc) x 6 (24)
Round 5 :
(3 sc, inc) x 6 (30)
Round 6 :
(4 sc, inc) x 6 (36)
Round 7-9 :
1 sc in each st (36)
Info :
If you plan to make the belly a different color, change to deep red yarn at the beginning of Round 10. Carry the black yarn along the inside if you prefer stripes; otherwise finish off black and join red.
Round 10 :
Change to deep red yarn. 1 sc in each st (36)
Round 11-14 :
1 sc in each st (36)
Round 15 :
(4 sc, inc) x 6 (42)
Round 16-20 :
1 sc in each st (42)
Info :
Begin stuffing body moderately at Round 18, leaving room to sew head and close neck later. The body should be firm but still squeezable so it sits well on a shelf.
Round 21 :
(4 sc, dec) x 6 (36)
Round 22 :
(3 sc, dec) x 6 (30)
Round 23 :
(2 sc, dec) x 6 (24)
Round 24 :
(1 sc, dec) x 6 (18)
Round 25 :
1 sc in each st (18)
Round 26 :
(1 sc, inc) x 6 (24) - This round forms the neck flange for sewing the head
Round 27 :
1 sc in each st (24)
Round 28 :
Fasten off leaving a long tail to sew the head. Finish stuffing completely before joining.
Info :
Check the sit of the body: add extra stuffing to the base if toy tips forward. The red belly should be nicely centered on the front-facing section of rounds 10-20.
— Belly Panel (worked separately, sew to front) :
Round 1 :
6 sc in magic ring (6) using deep red yarn (6)
Round 3 :
(1 sc, inc) x 6 (18)
Round 4 :
(2 sc, inc) x 6 (24)
Round 5 :
(3 sc, inc) x 6 (30)
Round 6-10 :
1 sc in each st (30) - Fasten off leaving a long tail to sew to the body between rounds 10-20 centered vertically.
Info :
Use a mattress stitch or whip stitch to sew the belly panel to the body, aligning the widest part of the panel with rounds 15-16 of the body to achieve the pictured proportions.
— Arms (Make 2) :
Round 1 :
6 sc in magic ring (6)
Round 3 :
(1 sc, inc) x 6 (18)
Round 4-6 :
1 sc in each st (18)
Info :
Shape wrist by tightening a bit on Round 6; you can work in BLO for one round to create a slight cuff before the hand rounds.
Round 7 :
(2 sc, inc) x 6 (24)
Round 8-11 :
1 sc in each st (24)
Round 12 :
(2 sc, dec) x 6 (18)
Round 13 :
1 sc in each st (18)
Round 14 :
(1 sc, dec) x 6 (12)
Round 15 :
1 sc in each st (12) - Fasten off leaving long tail for sewing
Info :
Stuff the hand area fairly firmly and the upper arm more lightly so arms drape naturally when attached. If using wire for poseability, insert thin floral wire before final stuffing; bend ends to form a small loop and wrap with yarn so ends do not poke out.
— Hand Claws (Make 6 small pads total, 3 per hand) :
Round 1 :
4 sc in magic ring (4)
Round 2 :
1 sc in each st (4)
Round 3 :
dec, sc 1 (3) - Fasten off leaving tail for sewing with deep red yarn for claw tips
Info :
Sew three claws to the front of each hand, spacing them equally across the hand tip. Pull claws slightly forward for a grabbing look.
— Legs (Make 2) :
Round 1 :
6 sc in magic ring (6)
Round 3 :
(1 sc, inc) x 6 (18)
Round 4 :
(2 sc, inc) x 6 (24)
Round 5-7 :
1 sc in each st (24)
Round 8 :
(2 sc, dec) x 6 (18)
Round 9-12 :
1 sc in each st (18)
Round 13 :
(1 sc, dec) x 6 (12)
Round 14 :
1 sc in each st (12)
Round 15 :
Working in deep red, join yarn and 1 sc in each st for 2 rounds (12)
Round 16 :
Change back to black and 1 sc in each st (12)
Round 17 :
Fasten off leaving long tail for sewing. Shape foot so that it sits flat: press the front rounds slightly and sew a short seam across the toe area if needed to flatten.
Info :
Stuff feet firmly to help the toy sit upright. Add three red claw pads to the front of each foot in the same way as hand claws and sew tightly so they do not shift.
— Tail :
Round 1 :
6 sc in magic ring (6)
Round 3-6 :
1 sc in each st (12)
Round 7 :
(2 sc, dec) x 3 (9)
Round 8-11 :
1 sc in each st (9)
Round 12 :
Fasten off leaving long tail for sewing; stuff tail moderately. Add a small spike cone to tail tip using the smaller spike instructions (stop after Round 6) and sew on securely.
Info :
Pin tail in place on the back lower rounds of body (rounds 4-8 of the body center back) to ensure correct curvature and balance before sewing.
— Wings (Make 2) :
Wing Inner Panel Round 1 :
8 sc in magic ring with deep red yarn (8)
Round 3 :
(1 sc, inc) x 8 (24)
Round 4 :
(2 sc, inc) x 8 (32)
Round 5 :
1 sc in each st (32)
Round 6 :
Using black yarn, join at edge and work 1 sc in each st around (32) creating a black border
Round 7 :
Ch 1, BLO: (1 sc BLO in next 4 sts, ch 2) across the top edge to create scalloped valley (work 8 shallow valleys). Fasten off.
Info :
These inner panels form the red membranes; black ridge bones will be crocheted separately and sewn on as ribs. Optionally insert thin wire inside the black ribs for slight poseability (wrap wire ends in yarn before inserting).
Wing Ribs (Make 4 per wing) Round 1 :
6 sc in magic ring with black yarn (6)
Round 2-6 :
1 sc in each st (6) - Fasten off leaving long tail for sewing. Make 4 ribs per wing and arrange them evenly along inner panel, curving outward.
Assembly Info :
Sew ribs to the top side of the red inner panel aligning the base of each rib to the inner wing base. Add 1 sc border in black around the entire wing to create the pictured crisp edge and a stitched seam look.
— Wing Finishing Decorative Edge :
Round 1 :
Join red yarn to the black border and sc in each st for one round to create a red trim contrast (32)
Info :
For a very crisp edge, block lightly by pinning wings to a flat surface and spraying with a little water; allow to dry fully before assembly.
— Cape (Felt body with crocheted edge) :
Info :
Cut a cape body from medium-weight black felt in a semicircular shape sized to drape from the neck flange to just beyond the feet. Cut inner lining from red felt slightly smaller to allow the red to peek when the cape opens. Sew felt lining and outer layer together around curved edge, leaving neckline open.
Round 1 :
With deep red yarn and 3.5mm hook, join at neckline edge and sc evenly around the neckline, placing approximately 1 sc per cm—aim for 36 sc around depending on your cape size (36)
Round 2 :
1 sc in each st BLO to create a rolled neckline ridge (36)
Round 3 :
(2 sc, inc) x 9 across the curved hem to make a slightly scalloped hemline (54) - fasten off and weave ends
Info :
Sew a small button or attach a decorative snap at the neckline to secure cape closed. For the pictured look, add a short hand-crocheted cord loop to one side of the neckline to button through a small vintage-style button at the other side.
— Collar Detail (crocheted band that peaks) :
Round 1 :
Ch 20, join with sl st to form a ring (20)
Round 2 :
1 sc in each ch around (20)
Round 3 :
1 sc in each st BLO (20)
Round 4-6 :
1 sc in each st (20) - Fold band and tack to cape neckline at the seam so it stands up slightly like a vampire collar
Info :
Use black felt for rigidity and stitch the collar band to the felt cape near the neckline seam. Add a red crochet trim along the outer edge using sc slip stitch combination for accent.
— Eyes :
Info :
Use 14mm glossy safety eyes with deep red washer. Place eyes between Head rounds 13-15; ensure they sit slightly forward to achieve the wide-eyed expression seen in the photo. If you prefer embroidered eyes, use satin stitch in dark red with a black center.
— Extra Decorative Spikes (back of body, make 4 small) :
Round 1 :
6 sc in magic ring (6)
Round 3 :
(1 sc, inc) x 6 (18) - Fasten off after Round 4 or 5 depending on desired height; stuff lightly and sew along spine from body round 8 up to round 16
Info :
Stagger these small spikes between the larger head spikes to create a natural ridge down the neck and upper back, as in the photos. Use small stitches and secure each spike with several whip stitches into the body so they remain upright.
— Assembly & Sew-On Guide :
Info :
Sew head to body aligning bottom center of head to neck flange round 26 of body. Use mattress stitch or whip stitch with the long tail from the body to achieve a flat, seamless join. Reinforce with 8-10 passes evenly spaced.
Info :
Attach arms to body between Body rounds 14-17 on either side, spacing them about 6-8 stitches from the center front line for the pictured position. Sew through several rounds of both body and arm to secure.
Info :
Sew legs to the bottom of the body centered on the base, with the toes pointing slightly outward. The feet should be aligned so the dragon sits upright; test placement before sewing fully by pinning and balancing on a flat surface.
Info :
Pin wings to upper back at Body rounds 8-12; angle ribs to show the inner red membranes. Sew along the base of each wing to the back body stitches and reinforce with several passes. Tuck a small amount of extra stuffing under the wing base for a natural shoulder mound.
Info :
Sew all spikes in a symmetrical fashion: large cones on top of head (3 center, two slightly smaller behind) and remaining cones along the upper back. Balance by spacing 6 to 9 stitches apart depending on head circumference.
Info :
Attach cape by stitching only at the neckline seam so it remains removable. Add button loop and button as described in cape section. Ensure cape does not impede wings or arms.
Round Final :
Weave in all ends, fasten off, and trim excess yarn. Shape facial features by lightly embroidering nostrils and a faint mouth line with black or darker grey yarn for subtle definition.
Info :
Optional: lightly brush the finished surface with a soft toothbrush to soften the stitches or leave as-is for a crisp textured finish. Add a tiny dab of white embroidery thread to each eye as a catchlight if the safety eyes do not have reflective highlights.
This dramatic little vampire dragon brings together classic amigurumi shaping with theatrical styling—tiny fangs, a sculpted ridge of spikes, red-ribbed wings and a removable felt-lined cape make it a show-stopping handmade friend. Each careful stitch builds personality and charm into a piece you'll love to display or gift. 🧶 Add your own color choices for endless variations and enjoy the cozy, creative process. Happy stitching and don’t forget to share your finished dragon! 🖤🩸