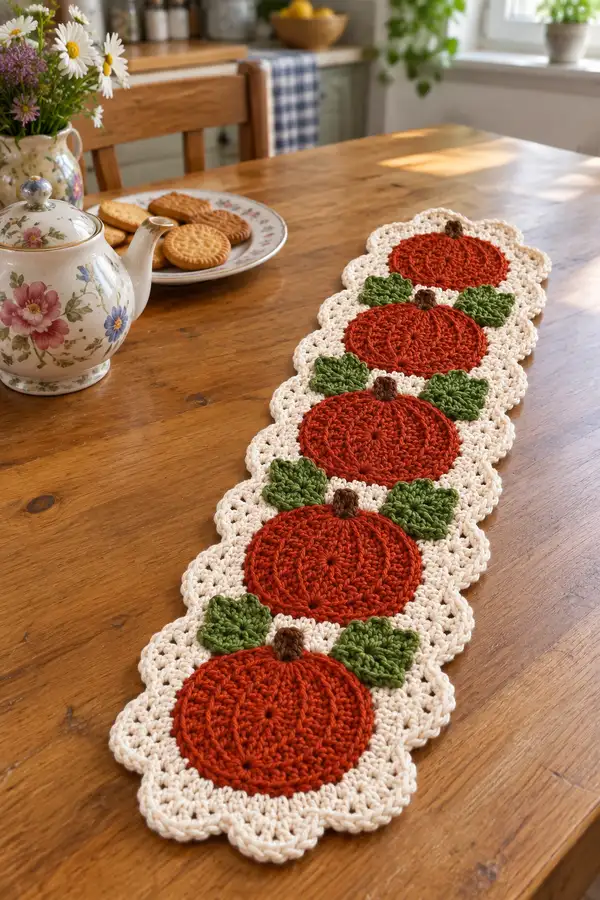
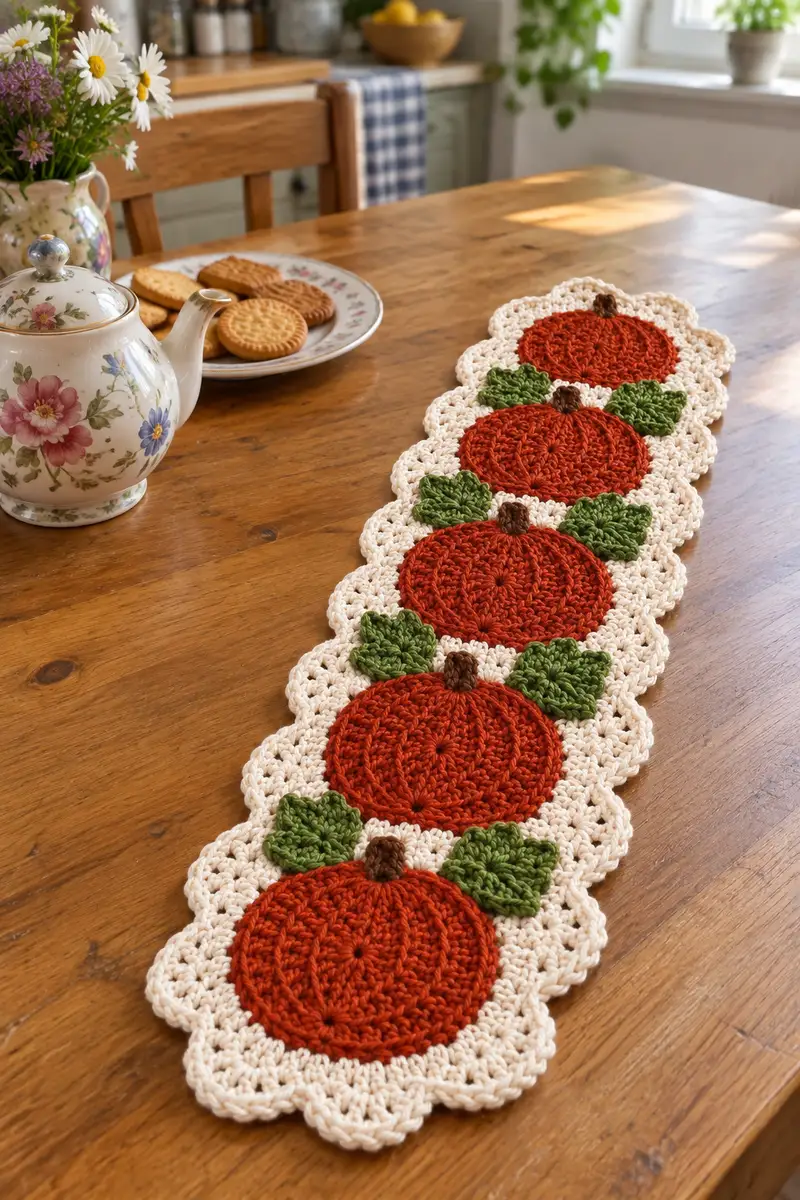
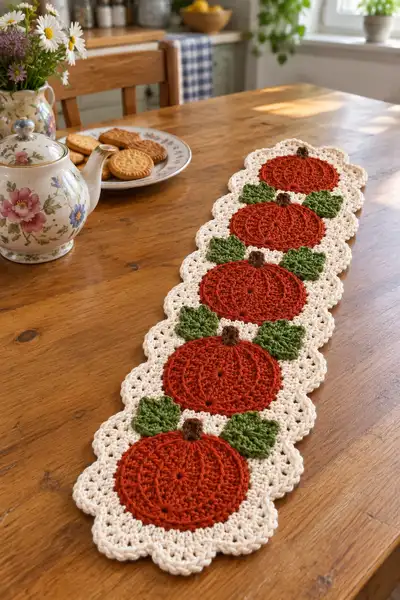
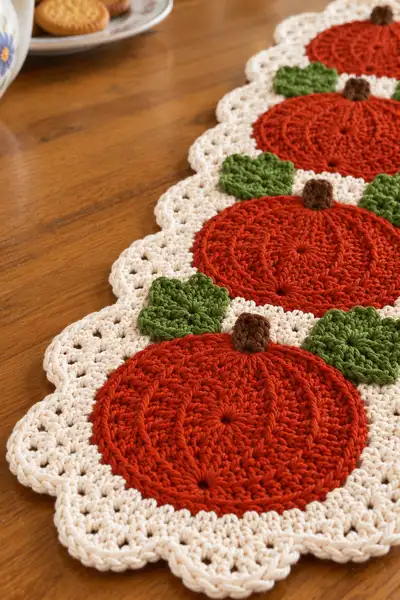
Create a cozy autumn table runner featuring a row of plump crochet pumpkins, leafy accents, and a scalloped cream border. This pattern uses textured pumpkin discs, small brown stems, and paired green leaves linked by an openwork connecting panel. Perfect for seasonal decor, the runner sits flat on a table and showcases neat stitches and a delicate scalloped edge.
Progress Tracker
0% Complete
— Notes, Gauge & Prep :
Info :
Gauge: One completed pumpkin disc (worked through Round 12 of the pumpkin section) measures approximately 4.5"-5" across when working with worsted weight yarn and 4.0mm hook. Gauge will vary; adjust hook size for desired finished size. Recommended finished runner length with five pumpkins and connecting panels is approximately 34-38" depending on spacing.
Info :
Puff stitch note: Yarn over, insert hook into stitch, yarn over and pull up a loop (repeat this step through same stitch 4 times to have 5 loops on hook), yarn over and pull through all loops, ch1 to close the puff if desired. Puff is worked as a single stitch and counts as one stitch in repeats unless otherwise noted.
— Pumpkin Motif (Make 5) :
Round 1 :
6 sc in magic ring (6)
Round 3 :
(1 sc, 1 inc) x 6 (18)
Round 4 :
(2 sc, 1 inc) x 6 (24)
Round 5 :
(3 sc, 1 inc) x 6 (30)
Round 6 :
(4 sc, 1 inc) x 6 (36)
Round 7 :
(5 sc, 1 inc) x 6 (42)
Round 8 :
(6 sc, 1 inc) x 6 (48)
Info :
Rounds 1-8 form a flat disc. Keep tension even and avoid working too loosely — you want a firm disc that will sit flat when later attached to the background panel. Place a stitch marker at the start of Round 9 and move it each round.
Round 9 :
1 sc in each st around (48)
Round 10 :
1 sc in each st around (48)
Round 11 :
1 sc in next 3 sts, puff in next st, rep from * around (3 sc, puff) x 12 (48 total counted as 36 sc + 12 puffs) (48)
Info :
Puff placement: The puff stitches create subtle vertical ribs when finished. Space your puffs evenly; the repeat (3 sc, puff) x12 divides the 48 stitches evenly so ribs will be symmetrical. Make sure your puffs are all approximately the same height and tension.
Round 12 :
1 sc in each stitch and puff around (48) - work into the top of each puff as a single stitch
Round 13 :
1 sc in next 2 sts, (sc2tog) in next 2 sts? No - follow decrease pattern for slight bowl shaping: (6 sc, 1 dec) x 6 (42)
Info :
Begin subtle shaping: the decrease rounds bring a slight concave shape to the pumpkin so it looks plump rather than perfectly flat. Stuffing is not used for table runners — keep motifs flat. You will join pumpkins to the background panel later; leave the pumpkin disc flat but slightly cupped.
Round 14 :
(5 sc, 1 dec) x 6 (36)
Round 15 :
(4 sc, 1 dec) x 6 (30)
Round 16 :
1 sc in each st around (30)
Round 17 :
1 sc in each st around (30)
Round 18 :
Fasten off, leaving long tail for sewing to background (30)
Info :
Make total of 5 pumpkin discs. After making each disc, weave the tail under several top loops to reduce bulk near join area and leave a 12-16" tail to sew into the connecting panel. If preferred, place a small round of lightweight interfacing or felt on the back for extra stability before joining (optional).
— Pumpkin Vertical Ribs (Optional Emphasis) :
Round 1 :
With same pumpkin color, join yarn at top center or where desired. Work 8 evenly spaced post columns to emphasize ribs. Join with sl st at chosen point (counts will align with puff placement)
Round 2 :
*fpdc around next 3 dc-depth area for 4 stitches to create raised column, sl st into next base stitch* rep to create 8 ribs (visual and spacing dependent). This round does not change stitch count; maintain 30 sc anchor stitches when working post stitches
Info :
These post stitches are worked around existing stitches and do not add to the edge stitch count if you work them as surface/between-row stitches. They create vertical texture that echoes real pumpkin ribs. Work consistently around each pumpkin to maintain uniform look.
— Stem (Make 5) :
Round 1 :
6 sc in magic ring (6)
Round 2 :
1 sc in each st around (6)
Round 3 :
(1 sc, inc) x 3 (9)
Round 4 :
1 sc in each st around (9)
Round 5 :
Work 2 rounds of hdc in each st around to give a short thick stem: 1 hdc in each st around (9)
Round 6 :
Fasten off leaving long tail for attaching to top center of pumpkin; do not stuff (9)
Info :
Stems are worked in brown and are small, flat tubes. They remain unstuffed and are sewn flat to the top center of each pumpkin. Use your long tail to stitch securely through the top rounds of the pumpkin disc.
— Leaf (Make 10: two leaves per pumpkin) :
Round 1 :
Ch 6, sc in 2nd ch from hook, hdc in next, dc in next, tr in next (center peak), dc in next, hdc in next, sc in last stitch; now work along opposite side of foundation ch: sc, hdc, dc, tr, dc, hdc, sc; sl st to first sc to join. (14 stitches across both sides, worked in an oval leaf shape)
Info :
Note :
The leaf is worked in a short foundation chain mirrored to create a heart/leaf shape. Adjust number of chains for a larger or smaller leaf. Use the green yarn — work with a slightly looser tension than pumpkins to allow gentle curve.
Round 2 :
Ch 1, sc evenly around the leaf working 2 sc in the tr peaks (2 sc in each of the two central tr stitches) to keep the leaf flared (approx 16-18 sc around depending on your joins).
Round 3 :
Ch 2, *skip next st, 5 dc shell in next st, skip next st, sl st into next st*; rep once across the opposite side to create two decorative lobes. Work shells into the two central top points so leaf has three rounded lobes (this is decorative, stitch counts should remain even).
Round 4 :
Ch 1, sc around to neaten edges, placing 2 sc in each shell apex. Count total sts to ensure symmetry; fasten off leaving tail for sewing (leaf will be flat) (approx 20-22)
Info :
Make two leaves for each pumpkin; when attaching, position them slightly off-center on either side of the stem and angle them outward for a natural look. Use the tail to sew through both leaf base and the cream background to secure in place (do not attach directly to pumpkin first — sew through background and pumpkin for a secure sandwich join).
— Background Connector Panel (Make 4 panels to connect pumpkins) :
Info :
Each connector panel is worked in cream and is an openwork rectangle sized to space pumpkins evenly across the runner. Panels are the same width as the pumpkin motif plus seam allowances. The following produces a gentle open shell grid that both frames pumpkins and provides scallop anchor points for edging.
Round 1 :
Ch 31, dc in 4th ch from hook (counts as first dc + ch2 space), *ch 2, skip 2 ch, dc in next ch* across to make openwork chains across foundation (approx 27 dc spaces)
Round 2 :
Ch 3 (counts as dc), turn, dc in same st, *ch 2, skip next ch-space, (2 dc, ch 2, 2 dc) in next dc (shell made), ch 2, skip next ch-space, dc in next st* rep across to form alternating shells and dc columns
Round 3 :
Ch 3, turn, dc in same st, *dc in each dc across until shell is reached, work (2 dc, ch2, 2 dc) in the shell, dc across to next shell* finish row; fasten off if desired, making the panel long enough to space pumpkins evenly (repeat rows as necessary to match the height of pumpkin discs for a flush join)
Info :
Create four identical panels (or enough to form spacing between five pumpkins) — each panel length determines spacing between pumpkins. Measure as you go and block panels flat to ensure consistent join edges.
— Joining Pumpkins to Background & Layout :
Round 1 :
Lay out pumpkins on a flat surface in a straight line, spacing them evenly. Place one background panel between each adjacent pumpkin so that pumpkins sit centered across the panel width. Use pins to secure placement.
Info :
Sewing technique: Use the tails left on each pumpkin and a yarn needle. Align the last round of the pumpkin (Round 16-17 area) to the background panel's dc rows so the pumpkin "sits" into a wide area of the openwork. Whip stitch through both layers (pumpkin and cream panel) using the tail, catching 2-3 stitches of the panel per stitch for a secure join. Make sure pumpkin edges are flat and seams are hidden underneath the pumpkin body.
Round 2 :
Sew leaves so their base catches both pumpkin edge and background panel stitches; stitch stems on top center of each pumpkin, overlapping the leaf seams slightly to hide ends. Repeat for all 5 pumpkins.
Info :
When attaching leaves and stems, stagger leaf pairs so that each pair overlaps slightly with the previous pumpkin's leaves for a continuous visual flow. Secure all pieces firmly to prevent shifting during use or washing.
— Middle Joining Strip and Reinforcement :
Round 1 :
With cream yarn, work a single crochet row along the top and bottom edges of the entire connected strip to create a stable edge: 1 sc in each st around the entire perimeter to prepare for scalloped edging (count will depend on assembled width; maintain even stitch placement).
Info :
This reinforcing round evens out the outer edge, fills small gaps between pumpkin discs and the background, and prepares consistent anchor points for the scalloped border. Use smaller hook if your edge looks loose.
— Scalloped Border and Final Edging :
Round 1 :
With cream yarn, join at any outer edge point and ch 3 (counts as dc), *skip 2 sts, (5 dc) in next st, skip 2 sts, sl st in next st*; rep around to form scallops. Adjust number of skipped stitches to position scallops over pumpkin outer curves and between pumpkins (shell count and spacing will vary with your assembled width)
Info :
Scallops are easiest when you work from the outside edge created by the reinforcement row. Place shells around each pumpkin curve to echo the circular shapes. Pin scallops when wet-blocking to make sure they are even and symmetrical.
Round 2 :
Ch 1, sc around to neaten the base of each scallop, placing 2 sc in the center dc of each 5-dc shell to stabilize (this provides a neat underside and ensures scallops hold shape) (stitch count varies)
Round 3 :
Optional picot row for delicate tip: *in center of each scallop work (3 dc, ch 3, sl st into top of 3rd dc)* — this creates a small decorative point. Fasten off and weave in ends.
Info :
For a firmer scallop edge, after finishing all rows, wet-block the runner pinned to desired shape and allow to dry thoroughly. Blocking evens scallops and flattens any slight warping from joins.
— Alternate Joining Method (Join-as-you-go) :
Info :
If you prefer join-as-you-go (JAYG), work the last round of each pumpkin disc using slip-stitch connections into the background panel instead of leaving long tails. On the final round of the pumpkin, when you reach join points, insert hook into corresponding stitch on background panel, sl st to join, then continue pumpkin round. This method eliminates sewing tails but requires careful alignment while assembling.
— Final Finishing Touches :
Round 1 :
Weave in all loose ends using yarn needle. Trim any long tails close to the fabric after weaving in a few inches back into the work.
Round 2 :
Wet block the finished runner by pinning to a blocking mat in the desired scalloped shape, stretching gently to even the edges, and allow to dry completely.
Info :
If desired, press lightly with steam from an iron at low setting while protecting the piece with a damp cloth. Do not press harshly — use steam to set scallops and flatten seam allowances if necessary. Store flat when not in use to preserve shape.
Info :
Optional embellishments: embroider small veins on leaves with contrast green, add a few tiny seed beads to stem base for sparkle (secure well), or add a contrasting narrow crocheted border in a rust color for extra definition.
This pumpkin patch table runner brings instant fall charm to any table with handmade details and soft textures. Each pumpkin and leaf is carefully constructed to sit flat and look plump while the scalloped cream edge adds vintage-inspired elegance. The modular design makes this a satisfying multi-step project that’s great for gifting or home display. Harvest memories one stitch at a time! 🎃🧶