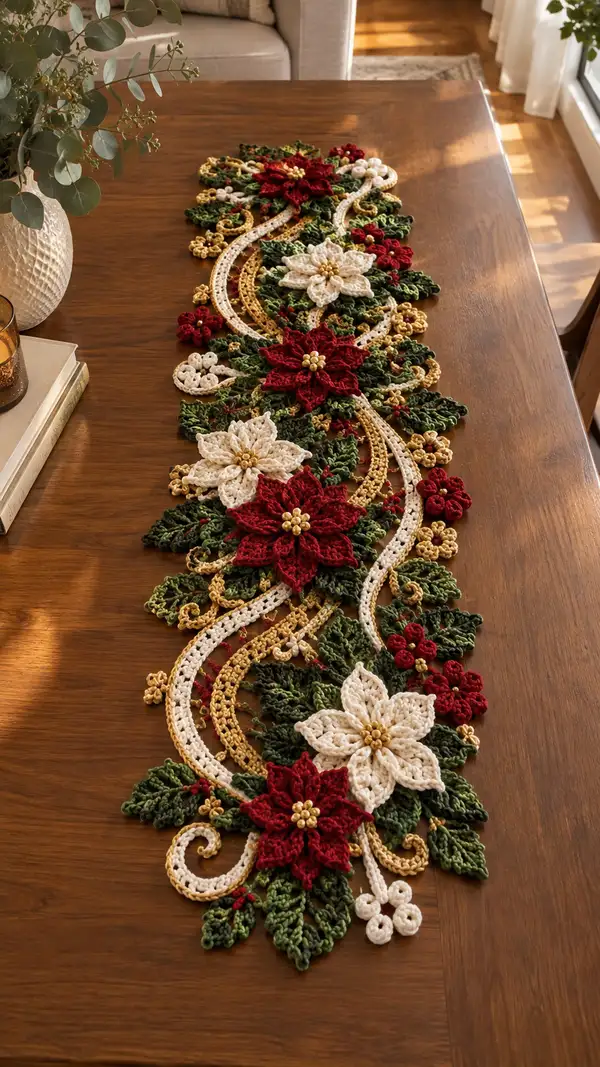
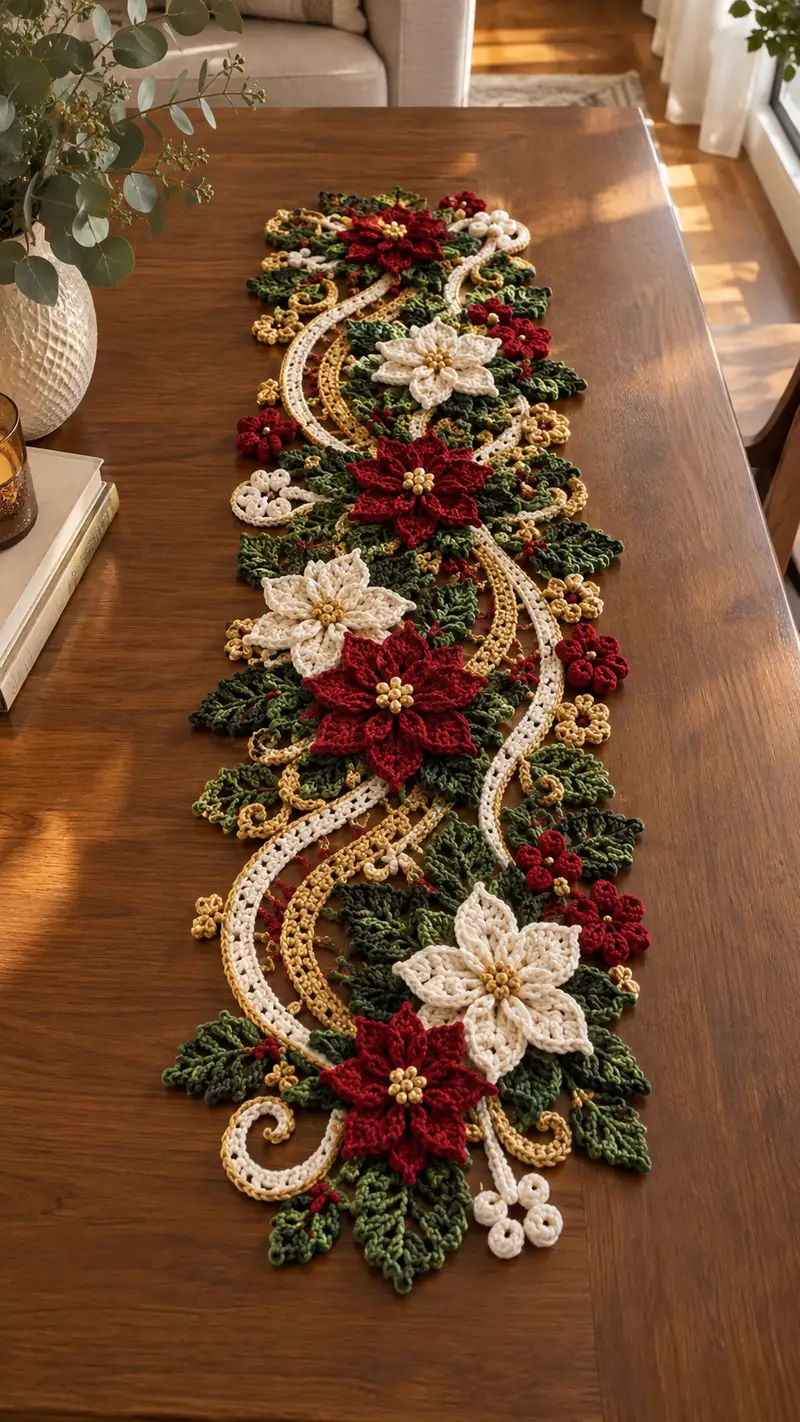
Create a stunning poinsettia lace table runner in festive red, cream, gold and green. This pattern recreates layered poinsettia flowers, leafy lace, delicate gold loops and cream swirls for an elegant holiday centerpiece. Modular motifs are crocheted individually and joined to form a long, flowing runner that sits beautifully on dining tables and sideboards. Includes beadwork accents, detailed joining instructions and finishing tips for a polished heirloom piece.
Progress Tracker
0% Complete
— Overview :
Info :
This runner is built from repeatable modules: large poinsettia flowers (6 petals each), layered leaves, small cluster flowers and decorative spirals. You will make a set number of flower motifs in red and cream, multiple leaf motifs in two greens, small gold flower clusters, and long S-shaped connecting bands in cream and gold. Motifs are blocked, then joined with slip-stitch and surface crochet to create the flowing runner. The pattern below breaks each motif into many rounds for clarity and mathematical consistency.
— Poinsettia Flower (Make 6 or desired number in deep red, and 4 in cream) :
Round 1 :
MR, ch1, 6 sc in ring, sl st to first sc to join (6)
Round 2 :
Inc in each st around (12)
Round 3 :
(1 sc, inc) x6 (18)
Round 4 :
(2 sc, inc) x6 (24)
Round 5 :
(3 sc, inc) x6 (30)
Info :
These first five rounds form the small circular base the petals will attach to. Keep tension even so the base lays flat. Change to cream for alternating flower color as directed by layout plan.
Round 6 :
Ch2 (counts as hdc), *hdc in next 4 sts, ch2, skip next 2 sts* repeat around to create 6 ch-2 petal arches, sl st to top of starting ch2 (6 arches)
Info :
Each arch will form one petal. If you want fuller petals, make arches larger by adding 1-2 hdc; adjust subsequent petal instructions proportionally.
Round 7 :
Work petals into each ch-2 arch as follows: in first arch work (sc, hdc, 3 dc, tr, picot, tr, 3 dc, hdc, sc) sl st into next arch to move to position (creates tall pointed petal)
Round 8 :
Repeat Round 7 into each arch to form 6 tall petals; after last petal sl st to join and fasten off leaving 10-12" tail for sewing if desired
Info :
Petal stitch counts per petal: sc(1)+hdc(1)+dc(3)+tr(1)+picot(1)+tr(1)+dc(3)+hdc(1)+sc(1) = 12 stitches worked into arch space. Overall counts will vary because these are clusters into spaces, not round totals.
Round 9 :
Optional second petal layer: Join yarn at base between two petals, ch3, work (dc, ch2, dc) forming a fan that will sit behind main petal; repeat between each petal (6 fans)
Round 10 :
Stitch over fan bases with a slip-stitch loop securing each fan to the petal base to create layered depth. Fasten off and weave ends.
Info :
For cream poinsettias, use the same petal construction but block petal points slightly flatter before joining for a softer look. You may also reduce tr height to tr to dc for a lower profile petal.
Round 11 :
Embellish petal surface with surface slip-stitch veins: With contrasting slightly darker yarn, surface sl st from base of petal to tip in 3-4 spaced veins per petal. Secure ends on wrong side (this adds texture only; not counted in stitch totals)
Round 12 :
Attach bead cluster center: Thread 6 small gold beads on yarn end and sew through middle of base, pull beads snug to form center bud, secure with several stitches on back (Info: place beads now before final joining)
Info :
Make the total number of large poinsettia motifs you need following your chosen runner length. In the pictured runner there are alternating red and cream large flowers spaced along the length, six to eight large flowers depending on runner length.
— Small Gold Cluster Flower (Make many for filler) :
Round 1 :
MR, ch1, 6 sc in ring, sl st to join (6)
Round 2 :
Ch2, (2 dc, ch1) in each st around making 6 small loops, sl st to base (12 mini petals)
Round 3 :
In each ch1 space work sc, picot, sc to create small cluster petals. Fasten off leaving tail to tack in place (this makes compact little gold rosettes)
Info :
These small clusters are used as accents around the poinsettia centers and to fill negative space between leaves and swirls. Make 12-20 depending on runner length.
— Leaf Motif (Make multiple in two greens — Dark Green Leaf and Lighter Filler Leaf) :
Round 1 :
Ch9; Row 1 (foundation): sc in 2nd ch from hook and across (8 sc)
Round 2 :
Ch1, turn, sc in each st across (8)
Round 3 :
Shape tip: ch1, sc in next 2, hdc in next 2, dc in next 2, tr in last st; rotate work to work down other side of foundation chain: dc, dc, hdc, sc, sc (total stitches mirrored) — leaf length formed (14-16 stitches total)
Round 4 :
Edge picots and ridges: Working around entire leaf edge, *sc, picot, sc, hdc in next 2, dc in next 2, dtr at tip, dc in next 2, hdc in next 2* repeat; sl st to join at base (approx 28-32 edge stitches depending on picots)
Info :
For layered leaves use dark green for the larger base leaf and lighter green for a slightly smaller leaf finished with fewer picots so it nests under the larger one. Make 30-40 leaves overall to create dense foliage under and between flowers.
Round 5 :
Add central vein: With contrasting darker green, surface sl st down center from base to tip, then make small sl st branches angled toward each side following the natural leaf shape (this is decorative)
Round 6 :
Optional curl: At base of leaf, ch4, sl st back into base to create a small curled tendril for decorative joining points; fasten off and weave in ends.
Info :
Make leaves in pairs for each poinsettia placement: usually 3-4 leaves under each large flower, layered for fullness. Use smaller leaves as fillers between large clusters.
— Cream Swirl Bands (Long S-shaped connecting strips — Make 2 long bands) :
Round 1 :
Ch120 or desired length for runner half-curve (this will form the long foundation chain for one S band)
Round 2 :
Working back along chain: 1 sc in 3rd ch from hook, *ch2, skip ch2, 1 sc in next ch* repeat across forming openwork chain (approx 60 sc + chain spaces)
Round 3 :
Turn, ch2, 2 dc in each sc across to create a slightly raised cord, sl st to end (if you used 60 sc this will be about 120 dc across)
Info :
These bands are intentionally long and flexible; you will steam or block them into an S-curve later. Make two identical cream bands and two identical gold bands (see gold spirals below). Keep counts consistent between bands so they sit evenly when joined to flowers.
Round 4 :
Optional decorative edge: With reverse side facing, join yarn and work 1 sc in each dc across in BLO to create a subtle ridge that will catch light when blocked (approx same dc count)
Round 5 :
Edge picots: *sc, ch3, sl st in 3rd ch (picot), sc next 4 dc* repeat across to create small scallops along the band edge. Fasten off and weave ends.
Info :
Make sure both cream bands are identical in stitch count and length; they will be layered: cream band on top and gold spiral layered slightly offset underneath to create the double ribbon effect seen in the photo.
— Gold Spiral Band (Make 2 matching gold ribbons) :
Round 1 :
Ch110 (slightly shorter than cream band by about 8-12 ch to create offset), Row: sc in 2nd ch from hook across (109 sc)
Round 2 :
Ch2, turn, (dc in each sc across) approx 109 dc — this creates a flat ribbon
Round 3 :
Edge rope: Join at one edge and work 1 sc in each dc BLO to make a raised border that will give the band body; fasten off (counts mirror dc count)
Round 4 :
Make decorative gold loops: Every 8th dc make a picot cluster: (ch5, sl st into 2nd ch from hook, sl st into next ch, sl st into next ch, sl st back to ribbon) creating looped flourish. Repeat along band length (approx 13-15 loops depending on length)
Info :
Gold bands are narrower and slightly shorter so that when layered under cream bands they peek out and add warm shimmer. Make sure loops are evenly spaced to create visual rhythm along runner.
— Decorative Connecting Pieces and Fillers (Tiny red 5-petal flowers and cream triple loops) :
Round 1 :
MR, ch1, 5 sc in ring, sl st to join (5)
Round 2 :
Ch3, in next sc work (2 dc, ch1, sl st) for petal; repeat in each sc for 5 petals, sl st to first ch. Fasten off leaving tail for tacking (forms tiny 5-petal filler flower)
Round 3 :
Triple cream loops: ch6, sl st back into base to make a tight loop; make three loops close together and fasten off; these are used to anchor ends of cream bands and as decorative caps (work as many as needed)
Info :
Create many small red and cream filler flowers and triple loops to tuck between leaves and spirals — these soften negative spaces and echo the runner's color palette.
— Joining and Assembly (Large section with many rounds devoted to accurate placement and joining) :
Round 1 :
Block all motifs to shape: dampen and pin petals and leaves to papers/mat in desired shapes; allow to dry fully. This ensures repeatable, flat motifs for seamless joining (Info: blocking is essential)
Round 2 :
Lay out layout plan: Place long cream and gold bands in S formation down table center, spacing large poinsettia motifs equidistant so petals overlap bands slightly (Info: alternate red and cream flowers per layout)
Round 3 :
Pin first large poinsettia to cream band intersection at desired spot, making sure bead center faces up and petals are arranged for even overlap across band edges; pin leaves under flower (Info: position 3-4 leaves under each flower)
Round 4 :
Sew flower to band: Using long tail from flower base and tapestry needle, run whip stitch through band and flower base evenly around base circle - 12-16 stitches distributed to secure (Info: avoid visible stitches on right side by inserting needle from back of band)
Round 5 :
Attach leaves: Overlap dark green large leaf first under flower base and tack down at three points using small neat whip stitches through leaf base and band (approx 3 stitches per leaf). Layer lighter green leaf on top offset slightly and tack similarly.
Info :
Repeat pinning, sewing and leaf layering for each large flower. Keep consistent spacing between flowers so the runner appears balanced. Typically place flowers every 18-22cm depending on your chain lengths.
Round 6 :
Place gold ribbon beneath each cream band so it peeks out; tack gold ribbon at three anchor points near each flower using tiny slip-stitches sewn through both bands and glued inside to make invisible joins if necessary (3-4 stitches per anchor)
Round 7 :
Add small gold clusters and red filler flowers: Position small flowers in gaps between leaves and near band curves; tack securely with single stitches, then add bead accents by sewing a bead into flower centers (Info: use embroidery needle for beads)
Round 8 :
Join adjacent leaf edges to leaf edges with small chains: Use matching green yarn to surface crochet short slip-stitch connectors between overlapping leaves to create continuous foliage. Each connector is approx ch6 and sl st back into both leaf bases in 3 places to anchor (counts flexible)
Info :
Surface crochet joins are preferable to sewing because they are visually delicate and maintain the lace character. Work slowly and only make joins where leaves overlap to preserve airy look.
Round 9 :
Secure ends: Where the cream band finishes at the runner ends, add triple cream loops and small rosettes to create decorative curlicues; sew these on with 4-6 stitches each to ensure durability.
Round 10 :
Edge finishing: With matching thread, work a neat edging around entire runner by single crocheting through both front and back layers where motifs overlap, maintaining an even tension. This will close small gaps and tidy raw edges (stitch count varies widely — aim for uniform spacing)
Info :
Work edging slowly and count edge loops periodically to ensure runner sits flat. This step is where the piece truly comes together; neatness matters more than speed.
— Edge Finishing Details :
Round 1 :
Sc edging around outer perimeter: Join cream yarn at one end and sc evenly around outermost loops of motifs with picot edging every 6 sc for a delicate scalloped look (approx 180-260 sc around entire runner depending on size)
Round 2 :
Gold bead accent row: With embroidery needle, sew single gold beads at centers of small gold flower clusters and at every other picot on the outer edge to catch light. Secure with small knot and hide tail on wrong side.
Info :
Edge picots should be consistent in size: ch3 picot is standard. If your picots look uneven, adjust ch length to ch2 or ch4 depending on yarn thickness.
Round 3 :
Final pass: Using contrasting thread the same hue as background band, slip-stitch across any visible join seams to hide them and to unify surface texture. Keep stitches small to remain invisible from top view.
Info :
Weave in all ends on wrong side and secure with a few drops of fabric glue only if necessary (test glue on scrap first). Trim tails close to work after securing to prevent lumps when blocking.
— Blocking & Final Shaping :
Round 1 :
Wet-block runner: Lightly spray runner until damp, pin to blocking mat following S-curve design with bands anchored and petals spread in desired orientation. Pin bead clusters out of pin path. Allow to dry fully overnight.
Round 2 :
Steam finish: Optionally, after dry, use steam iron held above surface (do not press directly on beads) to relax any remaining uneven stitches and set curves. Re-pin if necessary and leave to cool.
Info :
Proper blocking dramatically improves finishing: petals become crisp, bands lay flat, and all motifs sit in a cohesive plane. Take time here for best results.
— Optional Variation Rounds (for extra texture and fullness) :
Round 1 :
Add a second petal layer under each main petal using slip-stitch fans and smaller tr heights to create shadowed depth between petals (repeat for each poinsettia, about 6-8 extra rounds per flower if applied)
Round 2 :
Create tiny bead ropes: Crochet a thin cord (i-cord style) of ch80, sl st back across chain and sew along band edges to create a neat raised trim that absorbs light like metallic piping (counts flexible)
Info :
Use these optional rounds sparingly — they increase time and yarn usage but add luxe detail. They are excellent when making a showpiece or a runner intended as a focal holiday decoration.
— Troubleshooting and Tips :
Info :
If your bands curl excessively, steam lightly and pin more broadly when blocking. If petals are too floppy, reduce hook by one size for petal rounds to tighten fabric. Maintain workshop notebook to track number of motifs and placement so the final join is symmetrical.
This poinsettia lace table runner is a festive labor of love that brings holiday warmth and handcrafted elegance to your table. Each flower, leaf and spiral is worked with care, blocking and joining to form a harmonious, flowing centerpiece. The gold bead accents and layered petals catch the light and create a beautiful seasonal display. I hope you enjoy every stitch while making something you'll treasure each holiday season! 🎄✨