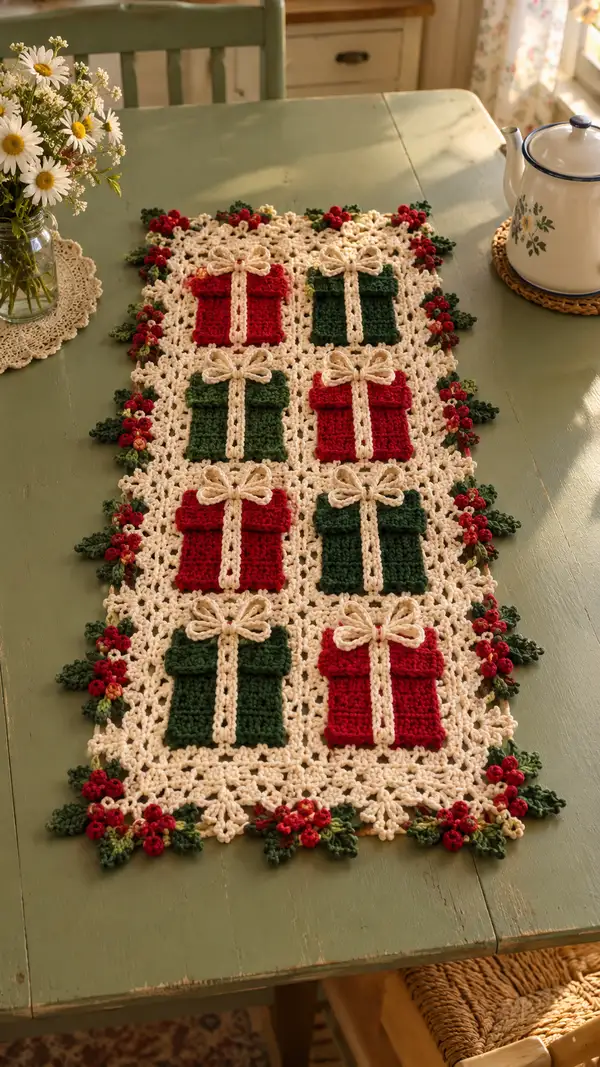
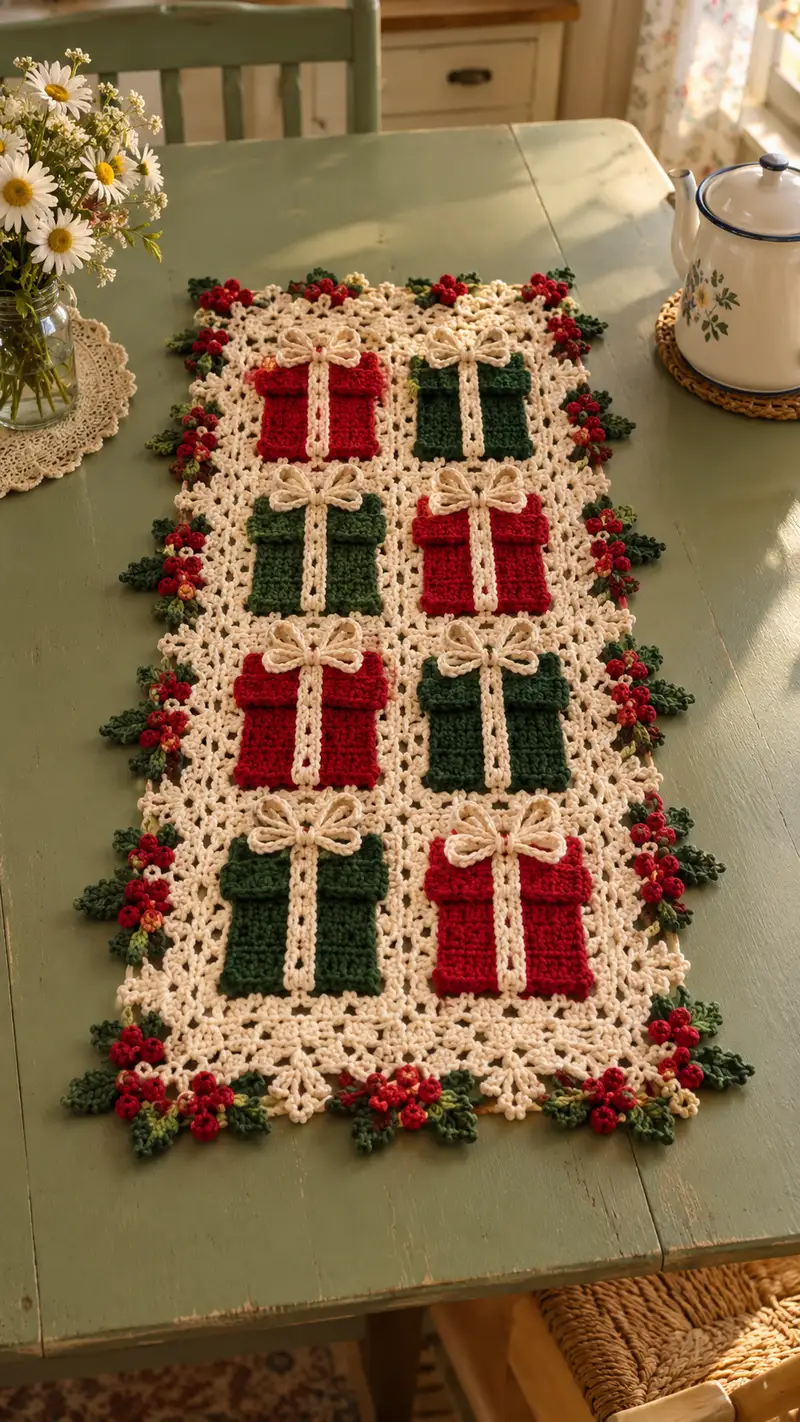
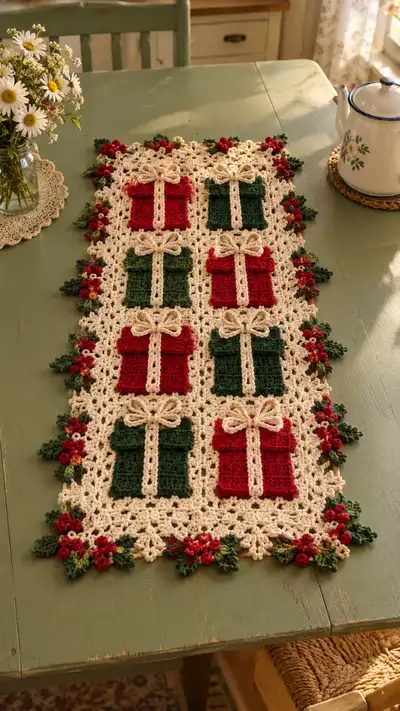
A festive table runner featuring eight 3D present motifs in alternating red and green with cream lacy squares and a holly-edge border. Each present has a raised lid, cream ribbon, and a looped bow, while the surrounding lacy panels create an airy, vintage look. Perfect as a holiday centerpiece for a narrow table or sideboard, this runner combines raised textured presents with delicate crochet lace and botanical edging.
Progress Tracker
0% Complete
— Materials & Gauge :
Info :
Gauge is not strict for a decorative runner, but to achieve consistent motif sizes, 18 sc and 12 rows = 10 cm in sc using 4.0mm hook and worsted yarn. Work tightly enough so the lace keeps shape but not too tight to distort joins.
— Present Square (Make 8) :
Note :
Each present square is worked in the main present color (red or green) in the round to produce a slightly raised, textured 3D block when paired with a small lid flap. The square will measure approximately 10cm x 10cm after blocking.
Round 1 :
6 sc in magic ring (6)
Round 3 :
(1 sc, inc) x 6 (18)
Round 4 :
(2 sc, inc) x 6 (24)
Round 5 :
(3 sc, inc) x 6 (30)
Round 6 :
(4 sc, inc) x 6 (36)
Round 7 :
(5 sc, inc) x 6 (42)
Round 8 :
(6 sc, inc) x 6 (48)
Info :
At this stage you have a small circular disc. We will now begin to square up the disc; the method uses corner increases every 12 stitches to encourage subtle squareness so the finished block sits well on the lacy background.
Round 9 :
(8 sc, inc, 8 sc, inc, 8 sc, inc, 8 sc, inc) [work in groups to form four gentle corners] (56)
Round 10 :
1 sc in each st (56)
Round 11 :
(10 sc, inc) x 4 (60)
Round 12 :
1 sc in each st (60)
Info :
From rounds 9-12 you are building a wide flat disc; keep tension even. If your piece is becoming too ruffled, try one fewer increase repeat in the next rounds.
Round 13 :
(2 sc, inc, 10 sc) x 4 (64)
Round 14 :
1 sc in each st (64)
Round 15 :
(3 sc, inc, 11 sc) x 4 (68)
Round 16 :
1 sc in each st (68)
Round 17 :
(4 sc, inc, 12 sc) x 4 (72)
Round 18 :
1 sc in each st (72)
Info :
Rounds 13-18 establish the working surface large enough for the present face. If you prefer a slightly smaller present, stop after round 14 and move to lid instructions earlier. Block each finished present gently to flatten and shape before assembling.
Round 19 :
(6 sc, dec, 12 sc) x 4 (68)
Round 20 :
1 sc in each st (68)
Round 21 :
(5 sc, dec, 11 sc) x 4 (64)
Round 22 :
1 sc in each st (64)
Round 23 :
(4 sc, dec, 10 sc) x 4 (60)
Round 24 :
1 sc in each st (60)
Info :
Rounds 19-24 gently bring the present body to a stabilized size that will be comfortable under the lid flap. Do not stuff these pieces; they are flat decorative panels. We will add texture and surface ridges to mimic ribbing by working a few rounds in back loops only next.
Round 25 :
1 sc in each st BLO (60)
Round 26 :
1 sc in each st (60)
Round 27 :
1 sc in each st BLO (60)
Info :
Fasten off leaving a long tail for sewing to the lacy background. Make 8 present squares total—alternate red and green as in the layout photo (start top-left with red, top-right green, then alternate down the runner).
— Lid/Flap (Make 8) :
Note :
The lid is a small rectangular flap placed across the top third of each present square to create a 3D lid illusion. Worked flat in rows then sewn on so it can be folded slightly upward.
Row 1 (Round 1) :
Ch 24, turn. (24)
Row 2 :
1 sc in 2nd ch from hook and across (24)
Row 3 :
Ch 1, turn, 1 sc across (24)
Info :
Work 6 rows total to create a flap approximately 6 rows high; adjust if you prefer a taller lid. The flap will be folded and sewn along its lower edge about one third across the present face.
Row 5 :
Ch 1, turn, 1 sc across (24)
Row 6 :
Ch 1, turn, 1 sc across. Fasten off leaving long tail for sewing (24)
Info :
When sewing the lid, align it across the top third of the present square and sew along the bottom row only so the top of the lid can fold up slightly for a realistic look.
— Ribbon Strip (Make 8) :
Note :
Ribbon strips are narrow strips worked in cream to be sewn vertically and horizontally over each present to mimic a wrapped ribbon. Each strip is worked flat and ends sewn in place under the lid and behind the present square.
Round 1 :
Ch 6, join to form a loop with sl st, ch 1 (6)
Round 2 :
1 sc in each ch around (6)
Round 3 :
Ch 1, 1 sc in each st (6)
Round 4 :
Rep Round 3 to make a strip approximately 12-14 cm long (6)
Info :
Make two strips per present (one vertical, one horizontal). When sewing, position the vertical strip first centered on the present face, then the horizontal strip under the lid so they cross at mid-height of the square.
Round 5 :
Fasten off leaving long tails for sewing. Make 16 strips total (2 per present).
— Loop Bow (Make 8) :
Note :
Loop bows are worked in cream. They are constructed of chain loops anchored to a small wrapped center to create a dimensional bow. Bow dimensions about 4cm across when finished.
Round 1 :
Ch 20, sl st to join to form a loop, leave a 20cm tail for wrapping the center (20)
Round 2 :
Fold loop in half and work 4 sc through both layers across center to join and stabilize (4)
Round 3 :
Using long tail, wrap tightly around center 8-12 times to create bow knot, secure and hide tail; shape loops into an even bow (Info)
Info :
For a fuller bow, make ch 28 in Round 1. You can also work a narrow hdc band into the loop before wrapping for extra definition. Sew bow to top center of present where vertical and horizontal ribbons cross.
Round 4 :
Optional: tack each loop to the present with a couple of small stitches across the underside for security
Round 5 :
Make 8 bows total and block lightly on cardboard to shape if desired
— Lacy Background Square (Make 8) :
Note :
The lacy square is worked in cream and provides the openwork lattice that frames each present. Squares are worked in rounds creating corner picots and chain-lace motifs that give the runner its airy appearance.
Round 1 :
Ch 6, sl st to form ring. Ch 3 (counts as dc), 11 dc into ring, sl st to top ch-3 (12 dc) (12)
Round 2 :
Ch 3, dc in same st, ch 2, *2 dc in next dc, ch 2* rep around to form 12 clusters, sl st to top (24 dc clusters)
Round 3 :
Slip into next ch-2 sp, ch 3, 2 dc, ch 2, 3 dc in same ch-2 sp (this creates corner shell). *Work 3 dc in each ch-2 sp with ch 2 between shells for side shells* rep across (12 shells with 4 corners) (see Info)
Info :
Round 3 shapes the square by increasing in the 4 corners; ensure your corner shells are worked exactly at four equidistant points to form a square. Use markers to mark corners on first repeat if needed.
Round 4 :
Ch 1, sc into first dc, *ch 5, skip next 3 dc, sc into next dc* repeat to create chain loops along each side with ch-5 spaces at each shell corner (maintain 4 corner ch-2 areas) (approx 48 loops)
Round 5 :
In each ch-5 loop: work (sc, hdc, 3 dc, hdc, sc) to make a fan. At corners work (sc, hdc, 5 dc, hdc, sc) in the corner ch-2 to keep square shape
Round 6 :
Ch 3 (counts as dc), dc into next st, *ch 3, dc into center top of next fan to create lattice arches* rep to form a secondary arching row around the square. Maintain 4 corners with ch-2 spaces.
Info :
From rounds 4-6 you are building openwork arches that will visually frame the present. Keep stitch counts consistent across all 8 squares so joins will align later.
Round 7 :
Ch 1, sc in each dc and sc across to stabilize arches; at corner shells work 3 sc into corner to hold shape (approx 72 sc)
Round 8 :
Ch 4 (counts as tr), *sk next 2 sts, tr in next, ch 1* rep around creating small open treble mesh. At corner, ch 2 between treble groups to maintain square (approx 64 tr)
Round 9 :
Ch 1, sc around in each st and in each ch-sp to even out (approx 80 sc)
Round 10 :
Ch 3, dc in same st, ch 2, *dc cluster in next side center, ch 2* rep to create larger corner loops. Maintain symmetry to create corners for joining (approx 24 clusters)
Info :
Work slowly through these open rounds — keeping counting will ensure your outer joins match when placing motifs in the runner layout. Use stitch markers at corner loops to align squares later for join-as-you-go.
Round 11 :
In each ch-2 corner sp: (sc, ch 3, sc) to make corner picot loop. Along sides, ch 5 picot loops worked into center points to create a delicate frame (approx 32 loops)
Round 12 :
Ch 1, sc around securing each loop; at picots work sc into picot top to anchor (approx 96 sc)
Round 13 :
Ch 3, dc in next 3 sts, ch 1, *skip next st, dc in next 4, ch 1* rep across sides to create a taller lattice work (approx 96 dc)
Round 14 :
Ch 1, sc in each st and ch-sp around (approx 110 sc)
Info :
At round 14 your lacy square is near final size. Block one square to test shape; if you need a tighter openwork, substitute ch-1 spaces for ch-3 in the lattice to reduce openness slightly.
Round 15 :
Ch 1, sc across to last corner, at corner ch 5, (sc into corner), repeat to emphasize corner loops (approx 110 sc)
Round 16 :
Work a decorative scallop: *5 dc in next sp, sl st in next sp* repeat around to create small scalloped edge (approx 24 scallops)
Round 17 :
Ch 1, sc into each scallop top and picot to anchor; fasten off leaving tail for sewing present square to this lacy background
Info :
Make 8 lacy background squares. Block all squares while slightly stretching to perfect the square shape and align corner loops. Blocking allows joining rounds to match neatly.
— Berry Cluster (Make many) :
Note :
Berry clusters are small three-dimensional clusters placed along the outer border. Work them using small puff clusters or bobbles to create plump berries; minimal stuffing may be used.
Round 1 :
With bright red, ch 3 and join to form ring, ch 1, 8 sc into ring (8)
Round 2 :
Bobbles: *(yarn over, insert hook, pull up loop) 4 times into same st, yarn over and pull through all 5 loops, ch 1 to close bobble*, sc in next st; rep to make cluster of 3 bobbles alternating with sc (approx 3 bobbles)
Round 3 :
Ch 1, sc around to stabilize cluster. Add a tiny dot of wrapped gold or tan yarn on one or two bobbles for highlight (optional)
Info :
Make 24 berry clusters to decorate the outside edge (3 per long side plus ends). Use minimal fiberfill only if you want them even plumper—usually the bobble stitch gives good volume without stuffing.
Round 4 :
Fasten off leaving long tail for sewing. When sewing, cluster berries in small groups of 3-4 with slight overlap and angle toward leaves to mimic natural holly clusters.
— Leaf (Make many) :
Note :
Leaf motifs are worked in a darker and lighter green to give depth. Each leaf is a pointed crochet leaf built from a central spine with increases and decreases to create shape. Make 24-32 leaves to place around runner edge and berries.
Round 1 :
Ch 8, sc in 2nd ch from hook, hdc, dc, tr, dc, hdc, sc (creates pointed leaf shape) (7)
Round 2 :
Turn and work along opposite side of foundation chain: sc, hdc, dc, tr, dc, hdc, sc to complete leaf. Fasten off leaving tail for sewing
Info :
For fuller leaves, work two slightly different-sized leaves and sew one on top of the other offset. Use two green shades to create a natural look, and use a slightly smaller hook for crisper points.
— Join-As-You-Go Assembly (Layout & Join) :
Note :
The runner layout in the photo shows 2 columns of 4 present squares (total 8 squares). We'll join squares row by row using join-as-you-go (JAYG) along the lacy edges to make a long runner without bulky seams.
Info :
Arrange squares in 2 columns x 4 rows with alternating present colors. Pin squares together on a flat surface, matching corner loops and side picot loops. Begin joining along long edges first (join columns into vertical strips), then join rows to connect the two columns into a runner.
JAYG Round 1 :
With RS facing, join cream yarn at a side picot of the left square, ch 1, sc across first side to next corner picot. When you reach the middle of the side that matches the adjacent square, insert hook into corresponding ch-sp of adjacent square and sl st to join, then continue sc across current square. Repeat along entire side, joining at each matching ch-sp with sl st. Fasten off at end (approx stitch count varies; maintain symmetry)
Info :
When joining, use a single crochet join with sl st into adjacent square at matching points; this yields a neat seam and keeps the lacy look. Avoid pulling too tightly—seams should lie flat.
JAYG Round 2 :
Repeat join on the opposite side if building columns, making two vertical strips of four squares. Once two strips are complete, join the long center seam between the two columns using the same JAYG method, aligning center-chains and corner loops carefully.
Info :
After joining, check that the runner lies flat; gently steam-block if necessary, pinning slightly at corners and blocking to a rectangular shape. This step ensures the outer border will look even.
— Outer Border & Edge Motifs :
Round 1 :
With cream yarn, join at any corner picot and ch 1, sc evenly around the entire runner, working sc into every outer loop and picot to create a base edge (approx 240 sc; your count will depend on exact join points)
Round 2 :
*Ch 3, skip next 2 sc, sl st in next sc* repeat to create airy scallops around entire perimeter. At corners work ch 5 to preserve corner points.
Round 3 :
In each ch-3 scallop: (sc, hdc, 3 dc, hdc, sc). In corner ch-5: (sc, hdc, 5 dc, hdc, sc)
Info :
This round produces the decorative scalloped edge that serves as base for attaching berry clusters and leaves. Make sure scallops are evenly spaced—adjust spacing by adding or subtracting a skipped sc if needed to keep an even number of scallops across each side.
Round 4 :
Ch 1, sc in each st across scallop tops and corners to anchor (approx 260 sc)
Round 5 :
Work a decorative pointed star: *Ch 6, sl st into next scallop top to form a pointed loop* repeat around. These pointed loops will serve as anchor points for leaves and berry clusters (approx 40 points)
Round 6 :
Sc around to reinforce pointed loops, and fasten off. Place berry clusters and leaves in alternating groupings along longer sides: cluster of 3 berries with 2-3 leaves at each third scallop grouping.
Info :
Sew berry clusters at points where scallops meet cluster anchors. Use small neat stitches from the back to secure each berry cluster and hide ends on the wrong side. Arrange leaves around clusters for natural effect, sewing through center vein only to allow leaves to lift.
— Sewing Presents to Lacy Squares :
Info :
Position each present square centered onto its lacy background square. Pin the present lightly to the cream square, aligning center and ensuring ribbon placement aligns visually with the lid. Use mattress or whip stitch along the lower half of the present only so that the lid can overlap naturally.
Step :
Sew presents in place using matching yarn in the present color through the back loops only at the junction to minimize visible stitches on the front face. Secure ends by weaving tails several centimeters into the back of the cream square.
Info :
Sew ribbon strips next: position vertical strip first centered, tack down at top and bottom under the present edges. Then add horizontal strip under lid and tack ends behind the present. Sew bows centered over the cross of the ribbons and tack at a couple of spots underneath for stability.
— Final Finishing Touches :
Info :
Once all motifs are joined and the outer border finished, perform final blocking to shape runner to a perfect rectangle. Steam lightly or wet-block and pin to required dimensions. Ensure all small pieces (berries, leaves) are firmly sewn and weave in any remaining ends on the wrong side.
Step :
Trim any small visible tails and inspect the runner on a flat surface for symmetry. Add a discreet backing (optional) if you want to protect your table surface; this can be a length of felt pinned in place beneath the runner.
Info :
For washing, hand wash gently in cool water then lay flat to dry. Do not wring; reshape while damp to maintain lace shape. Consider storing the runner flat or gently rolled to avoid creases in the lace.
Completing this festive table runner is immensely satisfying—each present and holly cluster adds personality and vintage charm to your holiday table. The lacy cream background offers a beautiful contrast to the bold red and green boxes, while the 3D bows and berries give delightful texture. Display it as a centerpiece or gift it to someone who appreciates handmade details. 🎁🧶 Your home will feel cozier and more festive with this lovingly stitched accent!