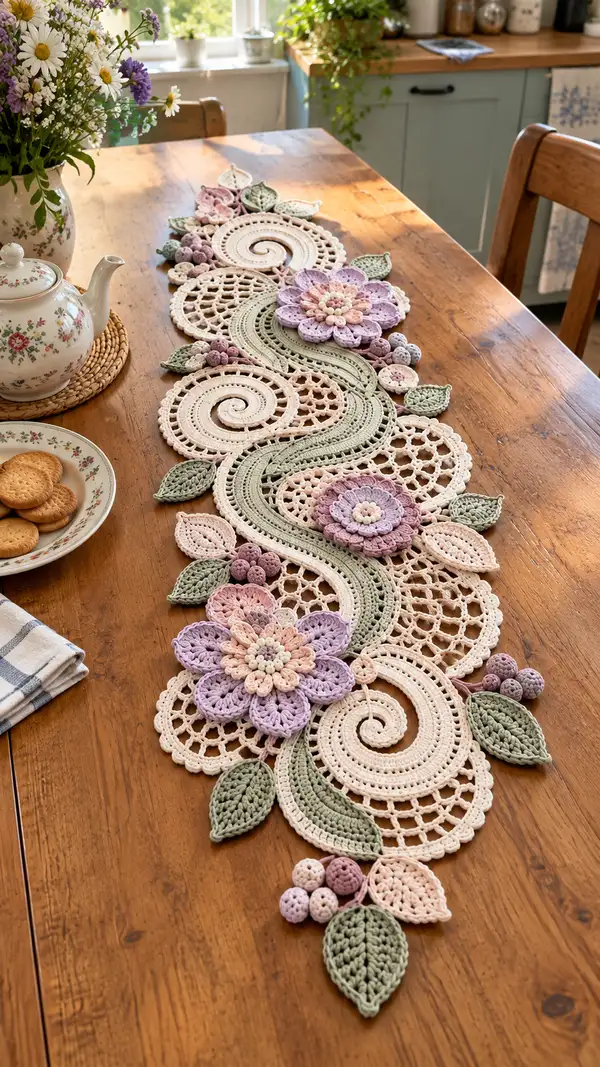
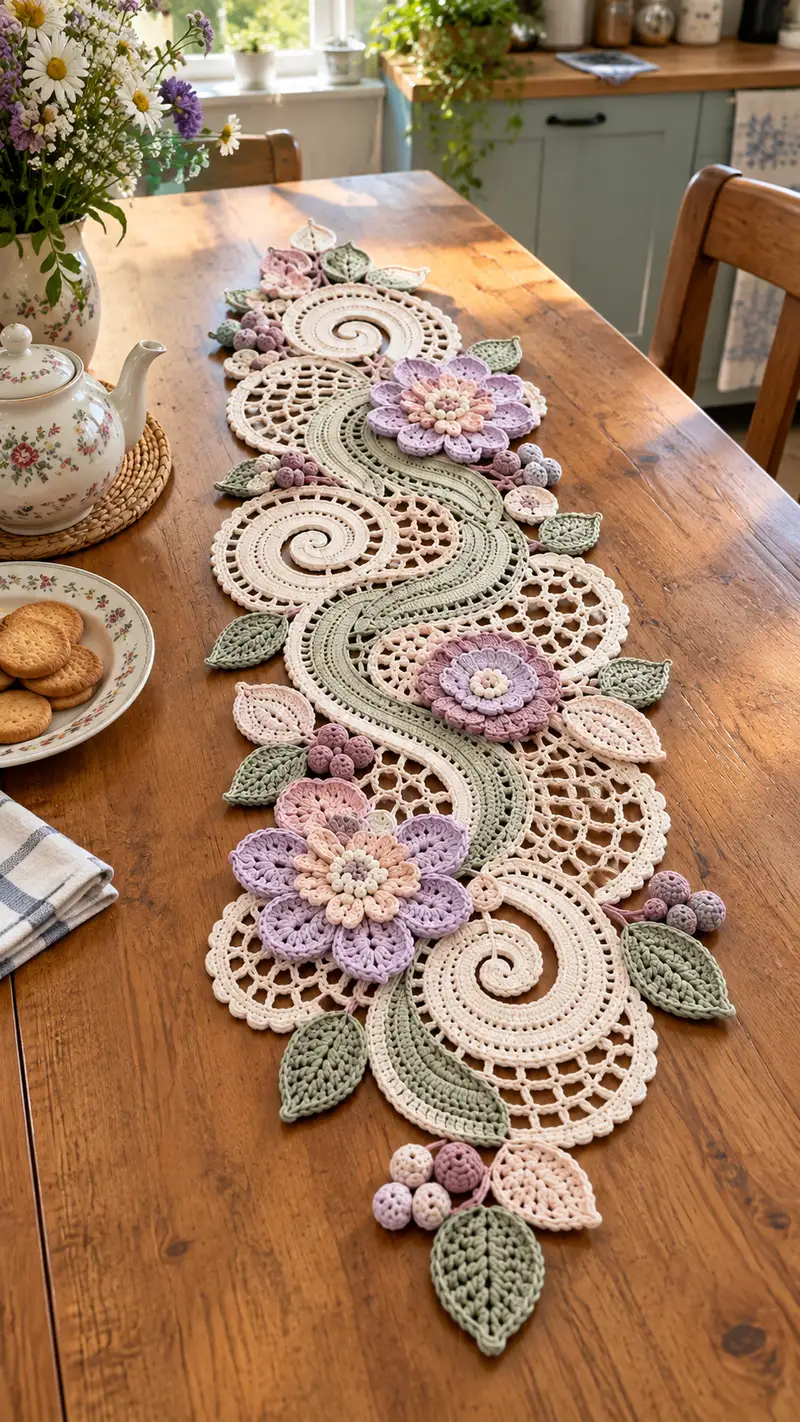
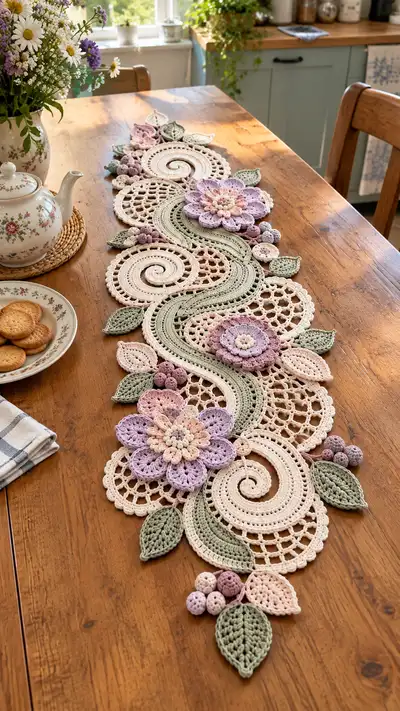
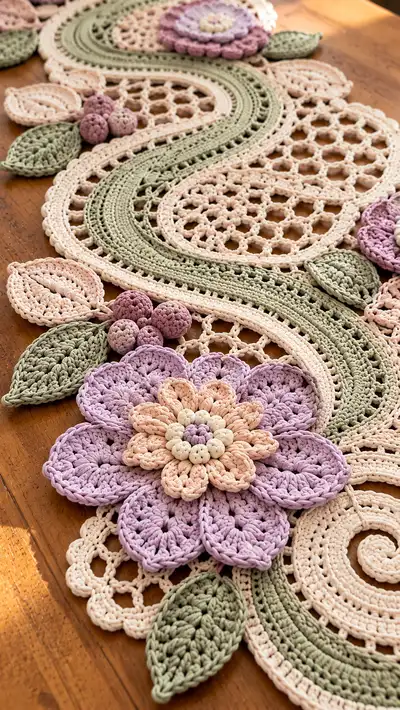
Create a romantic vintage-inspired table runner made from layered crochet medallions, lace mesh circles, flowing S-shaped bands, layered flowers, leaves and berry clusters. This pattern uses soft pastel cotton yarns in cream, blush, sage and lavender to create a decorative centerpiece with a delicate lacy feel. Detailed, step-by-step rounds and assembly instructions guide you through each motif and the final join-as-you-go placement for a polished finished runner.
Progress Tracker
0% Complete
— Materials & Gauge :
Info :
Gauge is not critical for an accessory but maintaining consistent tension will keep motifs flat and join nicely. Using worsted cotton and a 3.5mm hook will give motifs similar scale to photographed runner. If you prefer a firmer fabric, drop to 3.0mm.
— General Notes :
Info :
All motifs are worked in continuous rounds unless specified. Use a stitch marker to mark the first stitch of each round except where rounds end with a sl st to join; sl st joins will be specified. Weave ends as you go to keep pieces tidy for assembly. Block each completed motif flat before final joining for best results.
— Small Round Connector Disc (Make 6-10) :
Round 1 :
6 sc in magic ring (6)
Round 3 :
(1 sc, inc) x 6 (18)
Round 4 :
(2 sc, inc) x 6 (24)
Round 5 :
(3 sc, inc) x 6 (30)
Round 6 :
1 sc in each st (30)
Info :
These small discs act as connector pods between medallions and flowers. Make slightly smaller or larger to suit aesthetics by adjusting hook or rounds.
— Mesh Circle Medallion (Make 6-8) :
Round 1 :
6 sc in magic ring (6)
Round 3 :
(1 sc, inc) x 6 (18)
Round 4 :
(2 sc, inc) x 6 (24)
Round 5 :
(3 sc, inc) x 6 (30)
Round 6 :
(4 sc, inc) x 6 (36)
Round 7 :
(5 sc, inc) x 6 (42)
Round 8 :
1 sc in each st (42)
Info :
Switch to cream color here for airy mesh medallions. Carry color or fasten off and join — fasten off gives cleaner joins for lace.
Round 9 :
*ch 5, skip 4 sts, sl st in next st* around to create even chain spaces (8 ch-5 sps) (42)
Round 10 :
Join in ch-5 sp, *(sc, ch 4, sc) in same sp, sc in next sl st location* repeat around (8 clusters and 8 sc) - maintain 42 foundation points
Round 11 :
Working into chains: *ch 5, sl st in previous sc between cluster and next cluster* repeat to form larger mesh ring (approx 32 ch-5 loops)
Round 12 :
Work sc evenly around working 2 sc in larger loops to maintain flatness (approximately 48 sc total) recount if necessary
Info :
After Round 12 block medallion gently to open the mesh. Pin to shape and steam or wet-block allowing to dry fully. These will become the airy backgrounds for flowers and spiral discs.
— Spiral Medallion Base (Make 4-6) :
Round 1 :
6 sc in magic ring (6)
Round 3 :
(1 sc, inc) x 6 (18)
Round 4 :
(2 sc, inc) x 6 (24)
Round 5 :
(3 sc, inc) x 6 (30)
Round 6 :
(4 sc, inc) x 6 (36)
Round 7 :
(5 sc, inc) x 6 (42)
Round 8 :
(6 sc, inc) x 6 (48)
Round 9 :
1 sc in each st (48)
Round 10 :
*(3 sc, ch 1) in next st, skip 1 st* around to create subtle texture (48 base points)
Round 11 :
1 sc in each st working into both loops to even out (48)
Info :
This base will receive a spiral coil overlay worked separately then sewn on. Block base flat to keep center slightly raised to support spiral.
— Spiral Coil Overlay (Make 4) :
Round 1 :
Make a foundation chain of 6, join with sl st to form loop, 6 sc in loop (6)
Round 3 :
(1 sc, inc) x 6 (18)
Round 4 :
(2 sc, inc) x 6 (24)
Round 5 :
(3 sc, inc) x 6 (30)
Round 6 :
Work continuous spiral: do not join rounds. After Round 5 continue by working 1 sc in each stitch while gradually increasing spacing at desired spiral edge using chain-1 picots every 8-10 stitches to keep coil flat; work until coil measures needed diameter to overlay the spiral center (approx 6 more spiral turns ~ rounds 6-12 result approx 60-80 sts)
Info :
To create the visible raised spiral, stuff lightly between rounds with a thin strand of yarn or tiny amounts of fiberfill and sew spiral overlay onto the spiral base in a shallow spiral path. Sew with small whip stitches to hold shape without flattening.
— Wavy S-Band (Main Central Band, Make 1 long) :
Info :
This S-band is worked as a long oval strip built in rounds to create a double-faced band that curves. Work in sections and join as you go to create the long S shape. The instructions below create one repeat section; repeat to the desired runner length.
Round 1 :
Make a foundation chain of 36, join without twisting to work in rounds, ch 1, sc in each ch around (36)
Round 2 :
1 sc in each st around, sl st to join (36)
Round 3 :
Working along side edges to form oval: ch 3, (2 dc, ch1, 2 dc) into end st to create rounded end, then work back along opposite side sc in each st, create rounded end same way – final total approx 44 sts around perimeter
Round 4 :
1 sc in each st around to even out (44)
Round 5 :
*(2 sc, inc) repeat around the long sides to widen band slightly and create curvature shaping; scatter increases at ends to keep oval shape (approx 52 sts)
Round 6 :
1 sc in each st BLO to create a firm ridged line on one side of the band (52)
Round 7 :
1 sc in each st (52)
Round 8 :
BLO 1 sc in each st to reinforce curve edge (52)
Round 9 :
Switch to sage green now if you want the contrast for the central wave. 1 sc in each st (52)
Round 10-14 :
1 sc in each st maintaining 52 to build band height (52)
Info :
Work several repeat sections (each 14 rounds or until band height matches medallion scale). To shape the S curve, create narrow tapered ends by decreasing 2 sts per end across two rounds where you want the band to curve and join between medallions.
Round 15 :
(6 sc, dec) x 6 across each long side to create gentle taper on one end (approx 46)
Round 16 :
1 sc in each st (46)
Round 17 :
At the tip of the taper, close tightly: (4 sc, dec) x 6 (approx 39) depending on where taper placed
Round 18 :
Build back into full width by reversing decreases: (4 sc, inc) x 6 to regain width (approx 45)
Round 19-24 :
Continue even rounds in sage to build height and allow for next medallion join (approx 45-52 depending on shaping)
Info :
Make as many S-band repeat sections as needed to span your table. The band is intentionally slightly narrower in the middle and wider near medallion joins to tuck lace medallions into the curve.
— Large Layered Flower (Make 2-3) :
Round 1 :
6 sc in magic ring (6)
Round 3 :
(1 sc, inc) x 6 (18)
Round 4 :
(2 sc, inc) x 6 (24)
Round 5 :
sl st into next st, ch 3, *2 dc in same st, ch 1, sl st in next st* repeat to make 12 small petal bases around center (24 foundation points)
Round 6 :
Work petals: in each ch-1 sp do (sc, hdc, 3 dc, hdc, sc) to form a rounded petal (12 petals)
Info :
First petal round produces a single layer of wider petals (use lavender for outer petals). Block each petal gently to shape if desired.
Round 7 :
Fasten off lavender and join pale blush color behind each petal to work a second, smaller petal layer. Into space behind first petal: ch 2, (hdc, 3 dc, hdc), sl st into base; repeat behind each petal (12 smaller petals)
Round 8 :
Join dusty rose for central bobbles: ch 1, *make 5 bobble sts in next center space (yarn over twice, insert, pull up loop etc) to create textured center* repeat around to form cluster (approx 12 bobbles)
Round 9 :
Secure and finish center with sc rounds around bobbles to anchor (24 sc) - weave ends through back to secure
Info :
These layered flowers are three-dimensional. If you want a flatter look, work smaller stitch counts on petal rounds or use fabric stiffener. Leave long tails for sewing to runner.
Round 10 :
Optional edging: sl st around outer petal edges adding picots every 3 sts for delicate edging (approx 36 picots)
— Flower Petal Detail Variation (Make extra petals as needed) :
Round 1 :
ch 6, sl st to form loop, ch 1, 8 sc into loop (8)
Round 2 :
*(sc, hdc, 3 dc, hdc, sc) into same base to create thick petal edge* repeat to make 8 petals (8 foundation points)
Info :
These small petals can be added between larger petals to increase fullness. Attach by sewing between petal bases to create lush clusters.
— Leaf (Make 12-18) :
Round 1 :
ch 6, sl st to join, sc in each ch across to create small oval base (6)
Round 2 :
Work around foundation: 2 sc in first st, hdc in next, dc in next two, hdc in next, 2 sc in last; continue on opposite side sc to form symmetrical leaf (approx 14 sts)
Round 3 :
1 sc in each st around to firm up shape (14)
Round 4 :
Work central vein: join in center base, ch 1, sc, (ch 2, sc) along center line to create raised vein; on back work 1 sc in each st to secure (14)
Info :
Use sage green. For a pronounced vein, work FLO 1 sc in center line to make ridge. Block leaves gently to flatten edges while keeping curved midline.
Round 5 :
Optional edging: picot around leaf edge every 4 sts for delicate scallop (approx 3-4 picots)
— Berry (Small Crocheted Spheres, Make many clusters of 3-5) :
Round 1 :
6 sc in magic ring (6)
Round 3 :
(1 sc, inc) x 6 (18)
Round 4 :
1 sc in each st (18)
Round 5 :
(1 sc, dec) x 6 (12)
Info :
Stuff very lightly between Round 4 and Round 5 so sphere holds shape but remains squashable. Fasten off leaving long tail for sewing. Make clusters of 3-5 berries and sew together in small bunches before attaching to runner.
— Small Rounded Pod (Make 6-8) :
Round 3 :
1 sc in each st (12)
Round 4 :
(1 sc, dec) x 4 then sc around (8)
Round 5 :
sc around and finish with sl st to close; leave tail for sewing (8)
Info :
These small pods are decorative elements that nestle beside leaves and flowers. Make them in blush or cream colors and assemble in little triple clusters with berry spheres for visual interest.
— Large Lace Shell (Edge Filler Medallion, Make 4) :
Round 1 :
6 sc in magic ring (6)
Round 3 :
(1 sc, inc) x 6 (18)
Round 4 :
(2 sc, inc) x 6 (24)
Round 5 :
*(ch 4, skip 3) repeat around to create lacy scallops* (24 loops)
Round 6 :
In each ch-4 sp: (sc, hdc, 5 dc, hdc, sc) to make shell points (24 shells)
Round 7 :
Work sl st edging around shells to tidy and create firm join points (approx 120 sl sts)
Info :
These large shells tuck under flowers and act as lacey backgrounds; block them to fan shells open before assembly.
— Joining & Repeat Layout :
Info :
Arrange medallions, spiral discs, S-band sections, flowers, leaves and berries on blocking mat following a serpentine (S) layout similar to photo. Alternate mesh medallions and spiral medallions on either side of the S-band. Use small connector discs to fill gaps and balance composition.
Round 1 :
When joining medallions to the S-band, align the medallion edge over the band and use slip stitch through both pieces at evenly spaced points: *sl st through medallion edge and into corresponding st of S-band, ch 1* repeat around join points. Use 6-10 join points per medallion depending on size.
Info :
For a flat join, use sl st from the wrong side when possible. For a decorative raised join, use whip stitch to sew medallion to band from the front. Ensure motifs are pinned in place before final attachment.
— Assembly Sequence (Recommended Layout) :
Info :
1) Block and dry all motifs. 2) Lay out the S-band sections lengthwise where runner will sit. 3) Position medallions alternating sides to create layered curves. 4) Place large flowers where you want focal points — preferably two or three spaced evenly. 5) Fit leaves and berry clusters into gaps to balance shape.
Round 2 :
Use a combination of sl st join-as-you-go and sewing: for lace edges, join with sl st to avoid visible seams; for 3D flowers, sew with matched-colour yarn and use hidden stitches into back loops for secure attachment.
Info :
Weave tails through several stitches and knot securely on the back side of the runner. Tuck ends inside open spaces when possible for neatness. Trim all ends close after weaving.
— Finishing Touches & Blocking :
Info :
After assembly, pin the whole runner on blocking mats to ensure edges are even and medallions lie flat. Lightly steam or wet-block per yarn instructions. If you prefer stiffer petals, apply fabric stiffener to flower petals only and allow to dry flat.
Round 3 :
Optional: add a narrow sc border around entire runner by working 1 sc in each available edge st, working neat corners with (sc, ch1, sc) to follow curves. This frames the runner and hides join irregularities.
Info :
Final runner length will depend on number of S-band repeats; the pictured runner is approximately 120-130cm long using 4 S-band repeats and 6 large medallions. Adjust repeats to fit your table.
Finishing this vintage floral runner is such a joyful process — each medallion, leaf and flower becomes part of an elegant whole. Block, join and add the final clusters of berries and leaves to watch the S-shaped composition come alive. The soft pastels and lace-like mesh create a romantic focal point for any table. 🧶 Pin in place, steam gently, and enjoy the floral centerpiece you made by hand. Share a photo of your completed runner — I love seeing how makers personalize the layout! 🌸