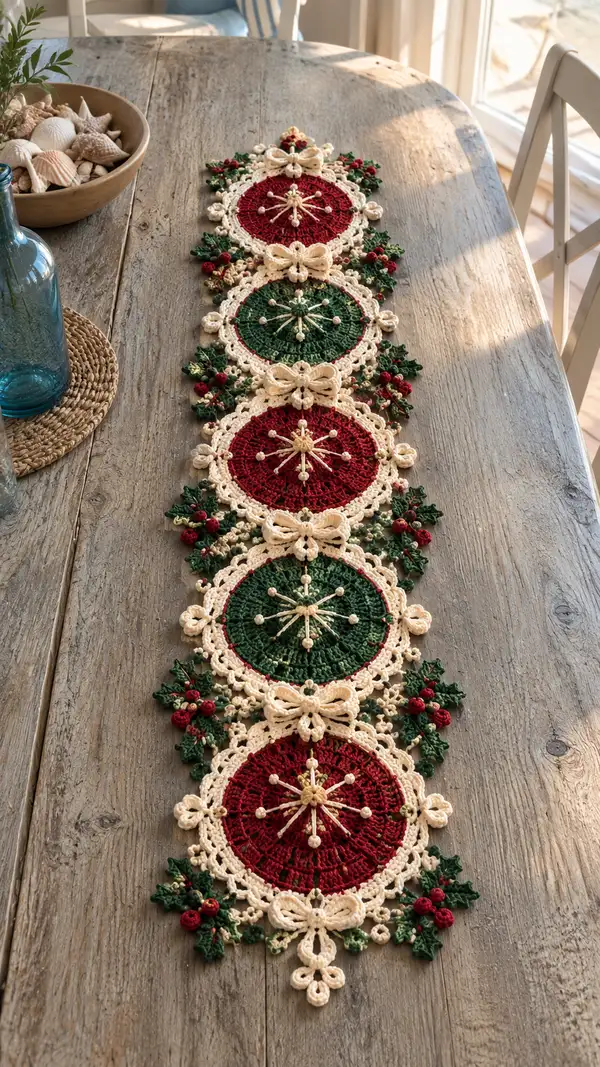
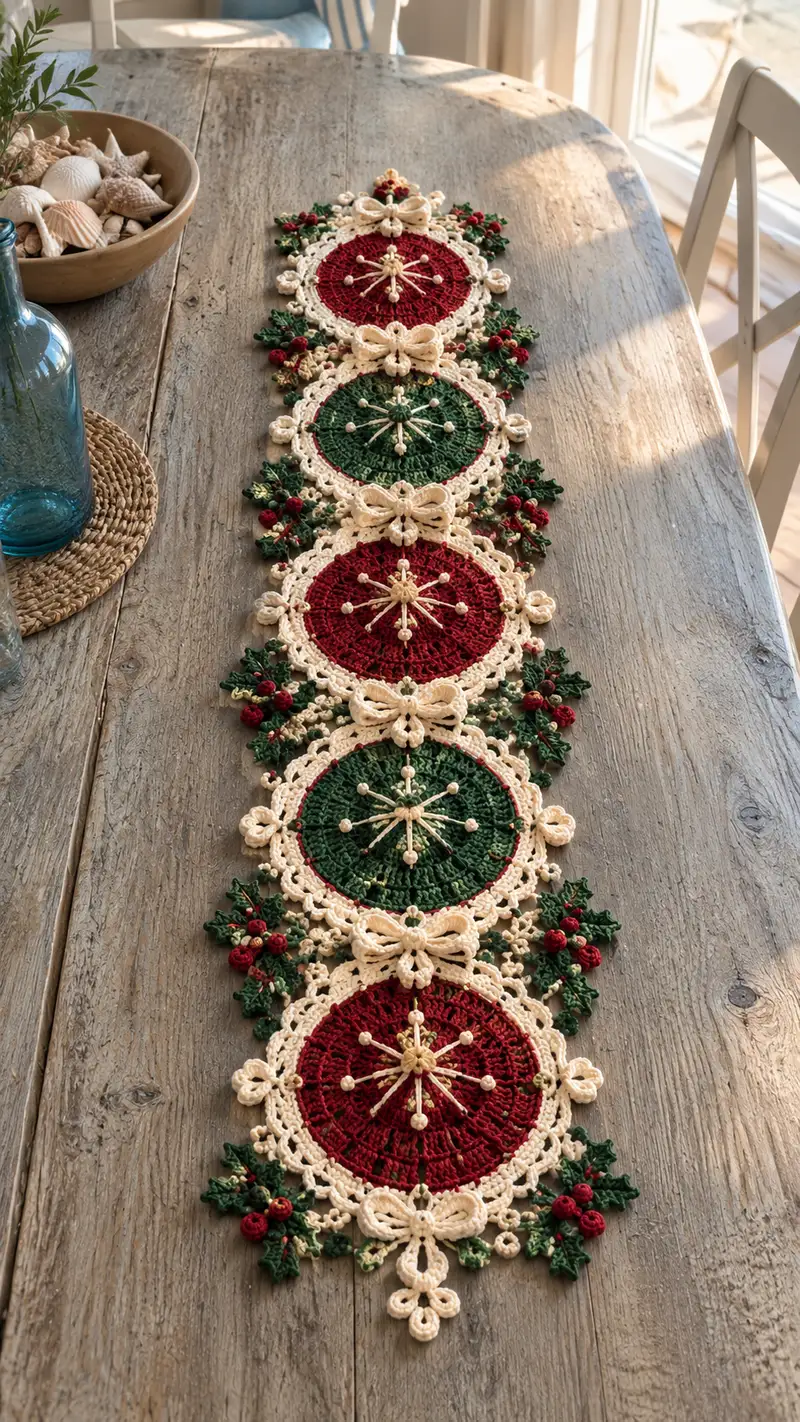
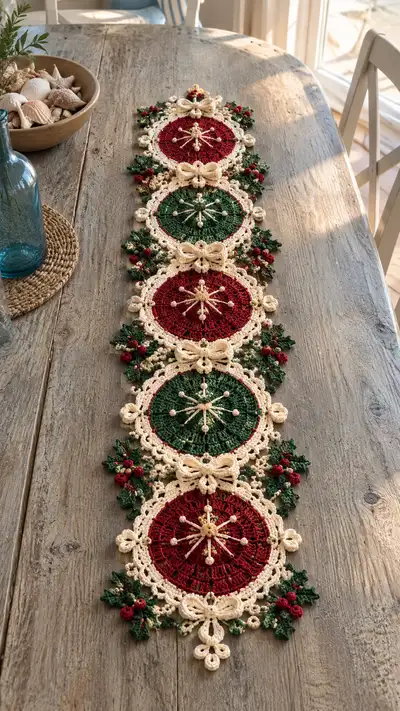
A festive, vintage-inspired crochet table runner featuring alternating red and green starburst medallion motifs with delicate cream lace borders, bows, holly leaves and clustered berries. Each medallion is richly textured with openwork rounds and a starburst center accented with tiny beads. Four medallions link together with ornate lace connectors for an elegant, heirloom-quality runner perfect for holiday tables or mantel displays.
Progress Tracker
0% Complete
— Overview :
Info :
This pattern creates a table runner built from four round starburst medallions alternating red and green, each framed with a cream lacy edge. You will crochet the medallion centers, add starburst bead decorations, make separate bows, holly leaves and berries, then join motifs with ornate lace connectors. Work all motifs flat. Block pieces before assembly for crisp edges. Adjust hook size if needed to match gauge and ensure motifs lie flat.
Gauge :
One completed medallion (center + lace) measures approximately 18-20 cm (7-8 in) across when using DK yarn held single with a 3.5mm hook. Blocking will increase diameter slightly. Adjust yarn or hook to change final motif size.
— Central Starburst Medallion (Make 4; 2 red, 2 green) :
Round 1 :
mr, 6 sc in ring. Pull tight. (6)
Round 3 :
(1 sc, inc) x 6 (18)
Round 4 :
(2 sc, inc) x 6 (24)
Round 5 :
(3 sc, inc) x 6 (30)
Info :
Switch to your medallion color now (red or green). Carry the cream yarn along for later rounds if preferred or weave it in and join later for a crisper color break.
Round 6 :
(4 sc, inc) x 6 (36)
Round 7 :
(5 sc, inc) x 6 (42)
Round 8 :
(6 sc, inc) x 6 (48)
Round 9 :
1 sc in each st around (48)
Round 10 :
(6 sc, inc) x 6 (54)
Round 11 :
1 sc in each st around (54)
Info :
Work two even rounds to build a stable, slightly domed center. If your fabric is cupping upward, switch to a slightly larger hook for the next round or add 1-2 stitches evenly distributed to flatten.
Round 12 :
(8 sc, inc) x 6 (60)
Round 13 :
1 sc in each st around (60)
Round 14 :
(3 sc, ch2, skip 1, sc) x around to begin openwork arches. For this round work 1 sc in next st, *ch2, skip 1 st, sc in next 3 sts* rep to end. This creates small spaces for later lacy rows — maintain 60 base points but arch count will be 60/4 ≈15 arches depending on tension.
Info :
Count your arches after Round 14. For stitch math below we'll use 15 arches around as the working number. Adjust repeats evenly if your count differs — aim for symmetrical spacing between starburst anchor points.
Round 15 :
Into each arch: *(sc, hdc, 3 dc, hdc, sc) in same ch2-sp forming a fan/shell* rep around (15 shells). Keep shell centers aligned with earlier increases for symmetry.
Round 16 :
Sl st into center dc of first shell to begin. *Ch3 (counts as dc), 2 dc in same space, ch1, 3 dc in center of next shell, ch1* rep around connecting shells with ch1 spaces. End with sl st to top of initial ch3. This forms a lacy rondelle. Count total dc clusters: 15 clusters of 3 within each shell area.
Info :
At this stage place a stitch marker at the start of the next round to keep your round starts aligned while you work repetitive lacy stitches. This is the last round in solid medallion color before cream border — fasten off and weave ends or carry cream to join next.
Round 17 :
Change to cream (or join cream now). *Ch4, sl st into next ch1 space between shell clusters, ch4, sl st into next ch1 space* rep around to create loop-points for decorative starburst anchors. You should create 30 small ch4 loops (two per shell). Adjust if needed – keep evenly spaced.
Round 18 :
Into each ch4-loop: *(sc, ch2, sc) in loop (a small picot arch)* rep around. This builds a delicate lattice base for the scalloped edging (30 small arches).
Round 19 :
*(sc in next arch, ch3, 3 dc cluster in next arch, ch3, sc in next arch)* connecting groups to create deeper open scallops. Work evenly around— total scallops = 15 larger scallops.
Round 20 :
Edge finish: Into each large scallop: *sl st, ch3, 5 dc, ch3, sl st* to form full scallop picot shell. Finish with sl st to join. Weave ends and block flat. (15 scallops)
Info :
Block each medallion after finishing to open the lace shells and set a firm, even diameter. Pin to desired size and mist with water; allow to dry fully before removing pins. Blocking makes joining and assembly much easier and keeps motifs flat on the table.
— Starburst Embellishment (Make 4 per medallion) :
Round 21 :
Using pale gold/beige, cut a 50-60 cm length of yarn for embroidery-style starburst. Alternatively crochet thin chains and attach. We'll describe a crocheted spoke method: With 3.0mm hook and gold yarn, ch 10, sl st into central hole of medallion center and fasten; repeat to make 8 spokes evenly spaced through center.
Round 22 :
Info: Place the first spoke by bringing the chain across the medallion center and securing with a small sl st to the cream round directly opposite the entry, forming a taut spoke. Repeat to make 8 evenly spaced spokes (every ~7-8 stitches depending on your count). Keep tension firm so the star is slightly raised.
Round 23 :
At each spoke tip, knot on a small bead or sew on a glass/wood bead. Secure knot on WS with a few backstitches then trim yarn tail. For a fuller star, double each spoke by repeating chains then add a small picot near each bead for accent. Trim excess tails and weave ends to the back.
Info :
If preferred, make the spokes from embroidered yarn using a yarn needle instead of crocheted chains. This offers more control on spacing and reduces bulk on the medallion surface.
— Lace Bow (Make 3 large bows for outer joins + 2 small bows for ends) :
Info :
The bows are worked in cream and are slightly dimensional. Make three large bows to sit between medallions and two smaller bows for the two ends of the runner. Work one bow as written then adjust scale by adding/subtracting repeats.
Round 24 :
With cream and 3.0mm hook, ch 16. Row 1 (foundation): sc in 2nd ch from hook and across (15 sc). Turn. (This is worked back and forth; bows are flat strips then folded and secured)
Round 25 :
Row 2: ch1, sc across in BLO (15). Turn.
Round 26 :
Row 3: ch1, sc across in BLO (15). Repeat Rows 2-3 for a total of 6 rows to create a firm band (6 rows total). Fasten off leaving long tail for wrapping center.
Round 27 :
Info: Fold the strip into a bow shape by creating two loops and securing the center with the long tail by wrapping several times around the middle, then sew the wrapped section to the back of the bow so it retains shape. For extra fullness, make two strips and stack them offset before wrapping.
Round 28 :
Make a small decorative picot loop for the back of the bow: ch6, sl st back into first ch to create loop. Sew loop to back of bow to create hanging point for attaching to medallion edge.
Info :
Make 3 large bows and 2 small bows (for ends): small bows use ch10 base and 4 rows, wrapped center. Secure each bow with several whipstitches to prevent unwrapping and weave in ends neatly.
— Holly Leaves (Make 8-12 clusters — 2 per medallion side) :
Round 29 :
With dark green and 2.75mm hook, ch7. In 2nd ch from hook: sc, hdc, 2 dc, hdc, sc — this forms a small pointed leaf. Sl st into base to finish. (leaf width ~6 sts)
Round 30 :
Info: For more dimension work a second round: *sc, hdc, (3 dc in center st), hdc, sc* across the reverse side to create a slightly cupped leaf. Fasten off and block gently on tip to shape. Make 4 leaves per short cluster (3 small leaves for tighter clusters).
Round 31 :
Variation (veined leaf): ch7, sc in 2nd ch, (hdc in next, dc in next, hdc next, sc last), ch1, turn and work sl st/backstitch along center to create vein, pull slightly to give curvature, fasten off.
Round 32 :
Info: Assemble leaves into clusters with tiny stitches: sew leaves together at bases using matching green thread, arranging leaves to fan out. Make 2 clusters per medallion side, alternating small and medium leaves for natural appeal.
— Berries (Make 6-10 small berries per medallion area) :
Round 33 :
With bright red and 2.25-2.75mm hook, mr, ch1, 6 sc in ring, pull tight, sl st to first sc. (6)
Round 34 :
Round 2: (inc) x 6 (12)
Round 35 :
Round 3: 1 sc in each st around (12). Fasten off leaving tail for sewing and add a tiny bit of fill to shape into a small firm berry.
Round 36 :
Info: Use French knots or small seed beads for extra sparkle on berries if desired. Sew berries into clusters (group of 3 or 4) overlapping slightly and stitch to the cream lace border at designated positions.
— Small Decorative Rings and Loops (for outer edges) :
Round 37 :
With cream and 2.75mm hook, ch6, sl st into first ch to form small ring. *ch3, sl st into ring* repeat 6 times to create a small circular loop cluster. Make 12-16 to place at medial join points and ends.
Round 38 :
Info: These small rings tuck neatly under bows and help stabilize sewn connections between medallions. Block them flat and sew through the center for secure attachment.
— Lace Connectors & Joining Edge (Work between medallions) :
Round 39 :
With cream and 3.5mm hook, join cream at scallop peak of first medallion with sl st. Ch6, sl st into scallop peak of second medallion to create a long connecting chain. Repeat creating 6 connecting loops across the seam to create an openwork bridge (6 loops per seam).
Round 40 :
Into each connecting ch6-loop: *(sc, ch3, 3 dc, ch3, sc)* to make matching mini scallops bridging the medallions. End by sl st to medallion scallop of second motif. This creates a strong yet decorative connector.
Info :
For sturdier join, sew through adjacent rounds on the back as well. Pin motifs in place before sewing to keep spacing even. These connectors are repeated between each pair of medallions (three joins for four medallions).
— Outer Edge Finishing (Add decorative drop loops and end medallions) :
Round 41 :
Along the outer rim (ends of runner) add ornamental drop loops: join cream at edge, *ch5, sl st into point, ch3, picot, sl st back into same point* rep around end sections to form a decorative tassel-like pointwork (3-4 drops per end medallion).
Round 42 :
Info: For a symmetrical decorative finish, place the large bow centered between medallions where motifs join. Sew small rings beneath the bows to stabilize and then attach leaf and berry clusters around the bow sides to form a festive bouquet effect.
— Optional Back Reinforcement (stability for flat table use) :
Round 43 :
Info: For table-runners that will see frequent use, you may reinforce the back with a lightweight cotton fabric cut to match the runner length and shape. Use small hand-stitches near outer edges only so fabric does not show. This will help protect the lace and prevent stretching.
— Small Accent Motifs (Tiny roses and pods) :
Round 44 :
Tiny rosebud: With red, ch6, sl st into 2nd ch, [sc in next 2, hdc in next, dc in next], finish and curl strip around itself, tack with stitches to form a rose. Make 8-12 for clusters near each bow area.
Round 45 :
Info: Rosebuds can be made by crocheting a narrow strip then rolling and sewing through the base. Use small stitches to maintain compact shape and apply a tiny dot of glue inside to secure if desired.
— Detailed Round-by-Round Expansion for Additional Decorative Depth :
Round 46 :
To deepen the lace between scallops add a ridge row: join cream, *sc through back loops only around entire medallion edge (this forms a continuous ridge)*. Work evenly around to maintain count (15 scallops = 15 ridge points).
Round 47 :
Round 2 of ridge: *Work fpdc around previous ridge at every second sc to create raised ribs linking scallops* keep even tension and count to preserve symmetry.
Info :
Raised ribs provide a stable base to sew bows and leaf clusters without distorting scallop shapes. Use a few backstitches through ribs when attaching heavy beads or clusters.
Round 48 :
Decorative chain fringe: join cream at underside of each scallop sl st, *ch7, sl st back into same stitch* repeat under each scallop point to form subtle fringe loops (15 loops).
Round 49 :
Info: These fringe loops are decorative and optional. They provide small anchor points for attaching leaf clusters and tiny bead dangles if desired. Trim loops if you prefer a cleaner edge.
— Assembly Preparation and Placement :
Round 50 :
Info: Lay out your four blocked medallions in the desired order on a flat surface with RS up: medallion 1 (red), medallion 2 (green), medallion 3 (red), medallion 4 (green). Position three large cream bows centered between medallions and two small bows at each runner end. Arrange leaf clusters (two on each side of each bow) and groups of 3 berries near clusters. Take a photo of layout for reference before sewing.
Round 51 :
Pin each component in place, checking that bows are centered and clusters mirror each other on both sides. If using beads on starbursts, ensure beads face up and spokes are tensioned evenly. Re-adjust pin positions until symmetry is achieved.
Info :
Use your blocking pins to hold lace edges while sewing. A tapestry needle with long cream yarn is recommended for attaching cream-on-cream so stitches blend. For colored elements, use matching thread to create near-invisible joins.
— Joining Medallions (Sewing Method) :
Round 52 :
Place medallions RS facing up. Working from the top and bottom scallop peaks, sew corresponding picot points and connector loops together using whipstitch or mattress stitch through the back loops of each scallop. Use doubled cream yarn for strength. Sew 6-8 stitches per connector loop and check alignment frequently.
Round 53 :
Info: When sewing, catch the back loops (BLO) of the scallops and the foundation ridge row for a nearly invisible seam. Remove pins as you sew. Use tiny stitches along the seam; large stitches will be visible from the right side.
Round 54 :
For added security, reinforce the seam by sewing a second pass a quarter-inch inside the first seam line, particularly near bows and cluster attachments where tension is higher when moving the runner.
— Attaching Bows, Leaves and Berries :
Round 55 :
Sew each large bow to the seam join at the center using the wrapped tail. Position bows so loops face outward and tails hang just over adjacent scallops. Use small, hidden stitches through the back of the bow wrap to anchor it to the lace base.
Round 56 :
Sew leaf clusters on each side of bows: align leaves so they fan slightly outward. Tack leaves with a few stitches through the leaf base and the lace ridge to secure. Add berry clusters atop leaf clusters using the long tail from berry pieces; sew through the lace and knot securely on WS.
Info :
Arrange leaf clusters asymmetrically within each side of a bow for a more natural, handmade look. Keep cluster densities similar across the runner for balance.
— Finishing Touches and Extra Accents :
Round 57 :
Add tiny cream picot flowers: ch4, sl st in 2nd ch to make a small ring and 5 sc into ring to create a tiny flower. Sew flowers sporadically into gaps in the lace using small stitches. These tiny details fill open areas and add a delicate finish.
Round 58 :
Weave in all ends: with tapestry needle weave each long tail into adjacent stitches across at least 3-4 cm to secure. Trim close to the fabric. For any bead threads, stitch back through beads and tie off with small knots and weave into seam allowances to hide them.
Round 59 :
Final press: steam-block the assembled runner lightly if needed, avoiding direct contact with beads. Lay flat to dry overnight to ensure all joins set and lace relaxes into its final shape.
Info :
During the final steam-block avoid pressing bows flat — place a small rolled towel under them to support their shape while blocking the rest of the runner flat.
— Alternate Smaller/Longer Versions :
Round 60 :
Info: To shorten the runner, make only two medallions and mirror the connectors and bows. To lengthen, repeat additional medallions and join as described. When repeating, alternate medallion colors to keep the visual rhythm shown in the photo (red, green, red, green, etc.).
Round 61 :
Tip: If you want a denser runner for heavier use, work the central medallion in two strands held together and adjust hook up one size; this will produce a thicker, warmer lace with the same stitch logic.
Round 62 :
Info: For an heirloom-quality finish, sew a lightweight cotton backing to the assembled runner, matching color near the cream edging so the backing discreetly supports the lace. Use basting stitches along the inner ridge only to minimize visibility.
Completing this Red and Green Starburst Lace Table Runner is a rewarding project — each medallion, bow and berry adds a small moment of delight as you stitch! The finished runner brings a warm, handmade holiday elegance to your table and makes a beautiful heirloom to pass on. Enjoy the blocking and assembly process — it’s where the lace really comes alive. 🧶🎄✨