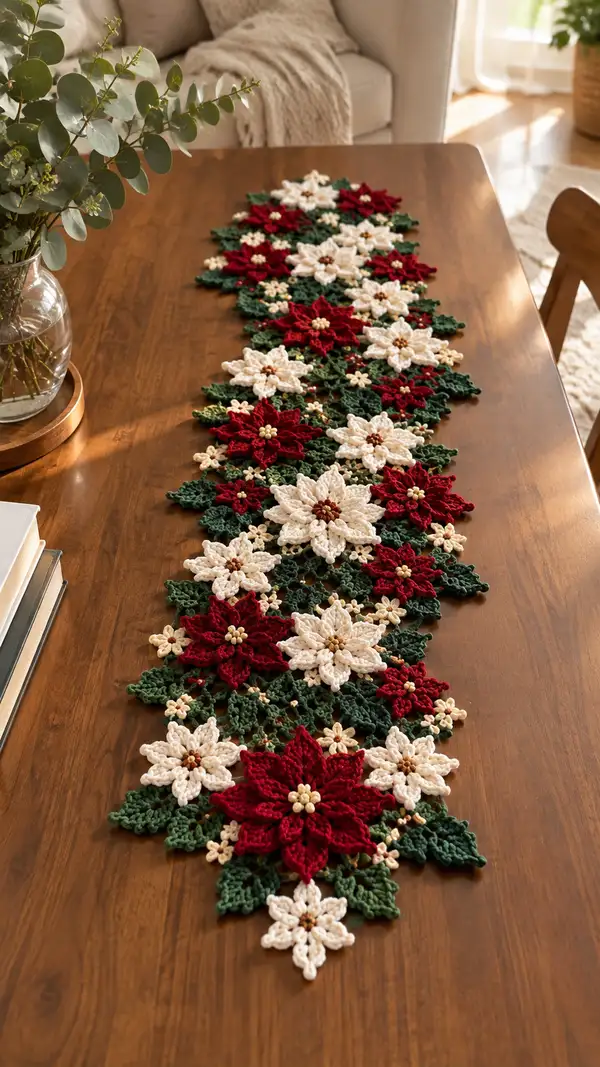
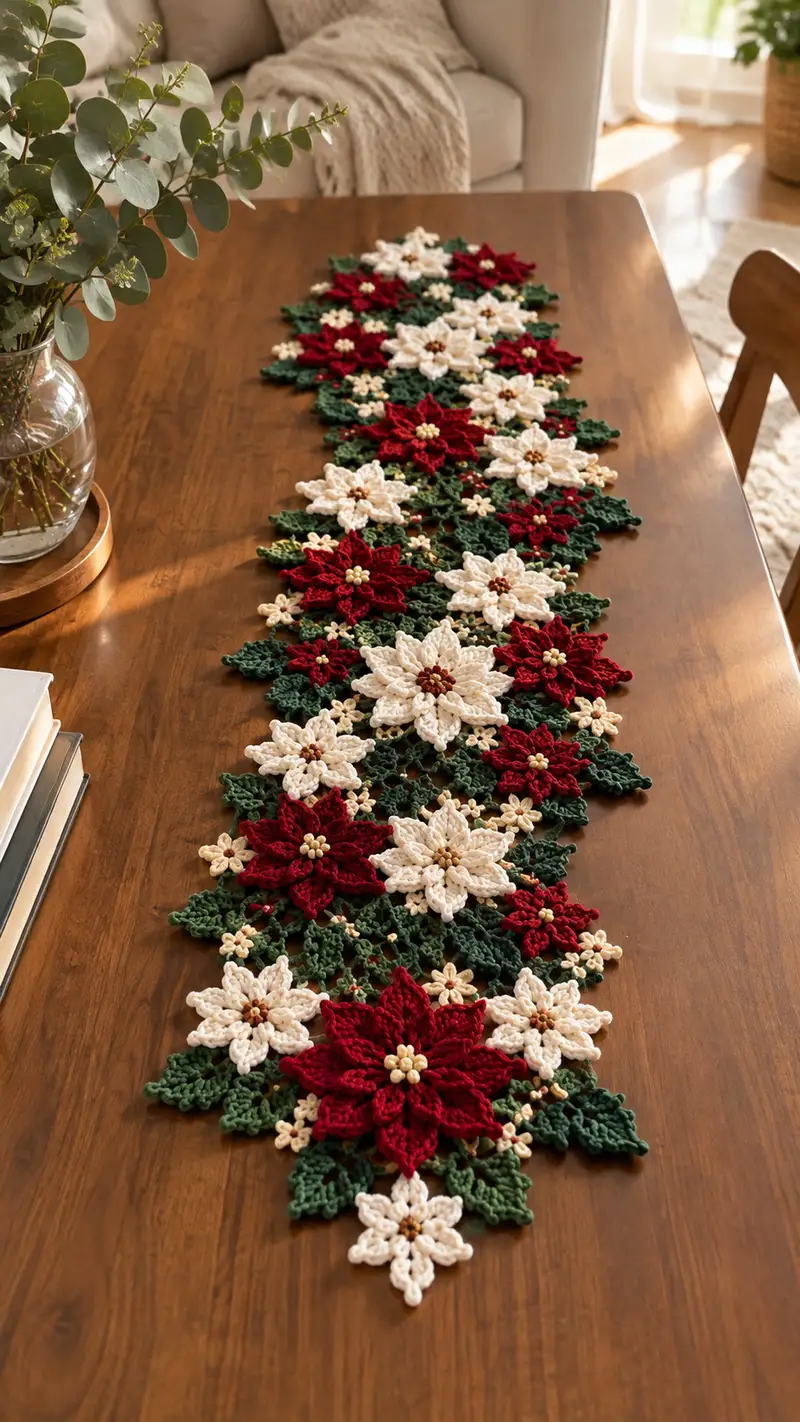
Create a festive poinsettia table runner made from interlocking crochet motifs in deep red, cream and evergreen green. This pattern uses layered floral motifs (large and small poinsettias), leafy connector motifs and tiny star flowers for a dense, lacy holiday look. Finished runner pictured is richly textured with beaded centers and layered petals for a 3-dimensional effect—perfect for holiday tables and seasonal décor.
Progress Tracker
0% Complete
— Overview & Gauge :
Info :
This table runner is modular — made from three primary motif sizes: Large Poinsettia (dominant flower), Medium Poinsettia (secondary flower), and Small Star Flower (filler) plus Leaf connector motifs. Block each motif before assembly for best results. Gauge is not strict for motifs but use 3.5mm hook with worsted yarn to match sample texture; motifs will be crisp and 3D.
Info :
Finished sample measures approximately 12-14 inches wide at widest poinsettia and about 60-70 inches long in the photographed layout. Exact length depends on motif count and spacing—you can add or subtract motifs to fit table length.
— Materials & Prep :
Info :
Prepare beads and thread before starting. Pre-thread a yarn needle with a short length of matching yarn for attaching beads if you are sewing bead centers. Keep a small tray of motif pieces as you go for easy assembly.
— Large Poinsettia (Make 7-9 depending on runner length) :
Round 1 :
6 sc in magic ring (6)
Round 3 :
(1 sc, 1 inc) x 6 (18)
Round 4 :
(2 sc, 1 inc) x 6 (24)
Round 5 :
(3 sc, 1 inc) x 6 (30)
Round 6 :
(4 sc, 1 inc) x 6 (36)
Round 7 :
(5 sc, 1 inc) x 6 (42)
Round 8 :
(6 sc, 1 inc) x 6 (48)
Round 9-11 :
1 sc in each st (48)
Info :
These rounds form a flat base. If making a red flower, change to red yarn at the end of round 11. For cream flowers work the same rounds in cream. Carry unused yarn inside motifs if you plan to embroider later, otherwise fasten off and weave in tails to the back.
Round 12 :
*Sc in next 3 sts, ch 6, skip next 3 sts, sc in next 3 sts; rep from * around to create 8 ch-6 loops evenly spaced (48)
Info :
Each ch-6 loop will anchor a petal. Count carefully: with 48 base stitches you will get 8 loops at 6 base sts per loop—this gives evenly spaced petals for a large 8-petal poinsettia.
Round 13 (Inner Petal Base) :
Work petals into each ch-6 loop: join yarn in first loop, ch1, (sc, hdc, dc, hdc, sc) into loop; sl st to base to secure. Repeat around to make 8 inner petals (petal count: 8; base rounds still 48)
Round 14 :
1 sc in each st (48)
Round 15 (Inner Petal Puff Detail) :
Working in BLO of round 14, *sc 2, ch2, puff in FLO spanning next 2 sts (yarn over, insert, pull up loop 3 times, yarn over and pull through all loops), ch2, sc 2; rep from * around (48)
Info :
Puff stitches in FLO raise the petal detail. Gently block petals open with pins while they are still slightly damp for best 3D form.
Round 16 (Outer Petal Anchor) :
Ch 1, *sc in next 4 sts, ch 8, skip next 4 sts; rep from * around to make 6 ch-8 loops evenly (48)
Info :
We are creating larger outer petals. A final outer layer of 8 petals around the inner 8 will create fullness; with a base of 48 stitches you will get 6 loops if you span 8 sts per loop; to keep symmetry use 8 loops by altering spacing to ch 6 and using 6-base-stitch loops instead of 8 if you prefer. The photographed large poinsettias have 8 strong outer petals; we continue with 8 by using slightly smaller loops—adjust by placing petals every 6 base sts. For mathematical symmetry here we'll make 8 outer petals by making ch-6 anchors in next round.
Round 17 (Outer Petal Anchor Revised) :
Ch1, *sc in next 3 sts, ch6, skip next 3 sts; rep from * around (48)
Round 18 (Outer Petal Row) :
Into each ch6 loop work: (sc, hdc, 2 dc, tr, 2 dc, hdc, sc) to create full outer petal; sl st to base. Repeat for all 8 petals (petal count: 8; base 48)
Round 19 :
1 sc in each st (48)
Round 20 (Outer Petal Edge) :
Working in FLO of round 19, *sc 1 in next st, picot (ch3, sl st in 3rd ch) on petal tip, sc 1; rep around to form a scalloped edge (48)
Info :
Pin outer petals into desired shape and steam lightly to set. If you want a firmer, crisper petal, block them pinning each petal tip outward to create the classic poinsettia spread.
Round 21 (Center Bead Base) :
Join pale gold/beige yarn to center: ch1, work 8 sc evenly in center hole (8)
Round 22 :
Slip stitch around to tidy center, fasten off and weave tails. Sew 8 small beads over these 8 stitches or embroider bead cluster using tapestry needle and brown/gold yarn. (Center bead cluster)
Info :
If using beads, sew each bead securely through motif with doubled thread and knot on the back. Apply a tiny dab of fabric glue on the knot for extra security if beads will be handled frequently.
Round 23 :
Finishing pass: weave in ends to the back and trim. Block motif flat, pinning out each petal to 2.5-3 inches wide for the pictured size.
— Medium Poinsettia (Make 8-12) :
Round 1 :
6 sc in magic ring (6)
Round 3 :
(1 sc, 1 inc) x 6 (18)
Round 4 :
(2 sc, 1 inc) x 6 (24)
Round 5-6 :
1 sc in each st (24)
Info :
This medium flower will be slightly flatter and serve as the secondary size in the runner. Change color to cream for contrast if desired at the end of round 6.
Round 7 :
*sc in next 2 sts, ch5, skip next 2 sts; rep from * around to make 6 ch-5 loops (24)
Round 8 (Petals) :
Into each ch5 loop work: (sc, hdc, 2 dc, hdc, sc); sl st to base; repeat for 6 petals (6 petals; base 24)
Round 9 :
1 sc in each st (24)
Round 10 (Petal Puff Detail) :
Working in FLO of round 9: *sc, puff (yarn over, insert, pull up loop 3 times, yarn over pull through all), sc; rep around (24)
Round 11 (Center) :
Join gold/beige yarn, 6 sc in magic ring style into center or work 6 sc evenly in the center hole (6). Sew either 6 small beads or embroider 6 seed clusters into center.
Info :
Medium poinsettias are a good contrast and sit slightly under the large motifs when assembled. Block to about 2.0-2.5 inches diameter for a pleasing layered look.
Round 12 :
Weave in ends and flat-block. Fasten off.
— Small Star Flower (Make many as fillers; approx 18-25) :
Round 1 :
6 sc in magic ring (6)
Round 3 :
(*sc in next st, ch 4, sl st in next st*); rep around forming 6 ch-4 pointed loops (12)
Round 4 (Star Petals) :
Into each ch4 loop: (sc, hdc, dc, sl st) to form small 6-petal star; repeat for all 6 loops (6 petals; base stitch count 12)
Round 5 :
Weave in ends and sew a single small bead or French knot center with contrasting brown/gold yarn
Info :
These small stars fill gaps and add visual rhythm between poinsettia motifs. Make in pale gold or cream for contrast. They are quick and require minimal yarn.
— Leaf Motif (Make many; approx 30-40) :
Round 1 :
6 sc in magic ring (6)
Round 3 :
(1 sc, 1 inc) x 6 (18)
Round 4 :
1 sc in each st (18)
Round 5 (Leaf Spine) :
Ch1, sc in next 3 sts, ch6, sl st in next st to shape the tip, turn and work on opposite side of foundation: sc in next 3 sts; fasten off to form one leaf. (Leaf count: 1; stitches used: 18)
Round 6 (Leaf Edge Detail) :
Rejoin yarn at base of leaf, work picot edging along ch6 loop: *sc 1, ch3, sl st in 3rd ch* across the loop to create serrated edge; repeat on opposite side if desired. Fasten off and weave in ends.
Info :
Use BLO or FLO selectively on round 4 to create a raised vein down the leaf if you want more dimension. Block leaves gently to keep their shape.
— Bead & Center Treatments :
Info :
Centers are small clusters of beads or embroidered French knots in beige/gold/brown. For each large poinsettia sew 8-10 beads in a tight circular cluster. For medium flowers sew 6 beads. Use a doubled thread and knot on the back, then secure with fabric glue if beads feel loose. Optionally use small stuffing to make a slightly raised center before applying beads.
— Join-As-You-Go Connector Rounds :
Info :
We recommend a join-as-you-go (JAYG) technique for a clean, flat runner. You can alternatively sew motifs together later. The JAYG instructions below use slip stitches or single crochet joins worked into the edge picots of completed motifs.
Round 1 (First Motif Placement) :
Place the first large poinsettia on your working surface as the anchor. Work a decorative edging round around it in green if desired: join green at any outer petal base, ch1, *sc across petal base 6 sts, ch3, sl st into petal tip picot; rep around until full (48)
Round 2 (Joining Second Motif) :
When you reach a joining point with an adjacent motif, instead of ch3 sl st into the corresponding picot on the neighbor motif to lock them together. Continue working the edging round around the active motif and join to previously placed motifs where edges meet. (Keep counts consistent: 48)
Info :
Work slowly during the first row of joins so each connection sits flat. Pin motifs to the layout with many pins to hold them during joining. If using beads, avoid sewing through bead areas when joining to prevent stitching over beads.
Round 3 (Connector Chains) :
Between larger joins, create small chains of green connecting stitches: ch4, join with sl st to next motif picot, ch4, sl st to following picot to create triangular openwork. This will give the runner its leafy lattice look and provide consistent spacing between large and medium motifs.
Round 4 (Reinforcement) :
Once a row of motifs (lengthwise) is joined, go back and reinforce inner joins with single crochet: into each join sl st, work 3 sc across the seam to strengthen. This preserves flatness and secures edges for laundering. (Counts vary by seam)
Info :
If you prefer discrete joins, use a blunt yarn needle and mattress stitch to sew motifs edge-to-edge; however JAYG will look seamless and is faster for larger projects.
— Wide Border / Lace Edge (Optional, 8-12 rounds) :
Round 1 :
With green yarn, join at a corner motif base then ch1, sc evenly around the outer perimeter of the assembled runner making sure to place 2 sc at each outer petal tip to prevent curling. (Stitch count will vary based on assembled size)
Round 2 :
Work a decorative openwork round: *ch5, skip 2 sc, sc in next sc; rep around to make a lacy chain edge*
Round 3 :
Work into each ch5 loop: (sc, hdc, 3 dc, hdc, sc) to create scalloped shells around the perimeter. Repeat around. Fasten off and weave ends. (Edge scallop count varies)
Info :
Adjust the lace edge to taste—use smaller or larger loops depending on how ornate you want the finish. For the photographed runner the edge is subtle with gentle scallops so as not to distract from the flowers.
— Alternate Large Poinsettia Variation (For extra depth) :
Round 1 :
Start as Large Poinsettia R1-R8 to 48 sts base
Round 2 (Layered Mid Petal) :
After inner petals, work a mid-layer: join yarn at base between inner and outer petals, ch1, *sc in next 2 sts, ch4, sc in next 2 sts; rep around (48)
Round 3 (Mid Petal Sculpt) :
Into each ch4 loop make (sc, hdc, dc, hdc, sc) then sl st to base for small stubby petals that sit between inner and outer petals, adding extra fullness (8 mid petals)
Round 4 :
1 sc in each st (48)
Info :
This variation adds an extra layered ring giving a luxuriously full bloom similar to the deepest red flowers pictured. Use the same color yarn or a slightly lighter/darker shade for shadowing.
— Assembly Plan & Layout Notes :
Info :
Lay out motifs on a large flat surface in the desired staggered arrangement—alternate large red and cream poinsettias with medium cream and red motifs bridging gaps. Place leaf motifs to create a natural triangular lattice beneath flowers. Small star flowers fill any remaining open spaces and add light highlights across the runner.
Info :
For the sample layout, motifs were joined in a central serpentine line with alternating clusters radiating outward, producing a narrow, elongated runner. Count motifs before joining and create a rough map of positions so you know where each join should occur.
— Final Finishing Rounds (Flatness & Reinforcement) :
Round 1 :
Work a final round of single crochet in matching green along all seams on the back side only to hide fringe and reinforce joins. Work slowly and evenly so the front remains flat. (Counts vary)
Round 2 :
Trim any stray fibers and steam-block the entire runner. Lay the runner flat on a dry towel and use gentle steam; do not press directly—pin shape as needed until fully dry to maintain shape and petal spread.
Info :
After blocking, examine seams and re-enforce any loose joins by hand-sewing with matching yarn and an invisible mattress stitch to prevent gaps forming in regular use.
— Care Instructions :
Info :
Spot clean when possible. For hand washing, use cool water and gentle detergent, reshape while damp, and dry flat. If beads are used, remove runner before washing or place in a fine mesh laundry bag and hand wash only with very gentle agitation.
Info :
Store flat or rolled in tissue to protect petals and beads; avoid folding to prevent creases in petals.
— Tips & Troubleshooting (multiple Info blocks) :
Info :
If your petals curl, block them more widely, pinning each tip further from the center. If the runner curls at seams, tighten join slip stitches or add an extra reinforcement row of sc along seams on the back. If beads pull at crochet stitches, use a longer reinforcing thread and anchor under adjacent stitches before knotting.
Info :
To alter size, change the number of motifs lengthwise. Add or subtract one large poinsettia and the corresponding connectors to increase or decrease length by roughly 7-9 inches per large motif added/removed depending on spacing.
Completing this poinsettia table runner is such a rewarding project—beautiful layered petals, delicate bead centers, and a lush green lattice come together into a festive heirloom piece. The runner adds an elegant holiday touch to any table and makes a thoughtful handmade gift. Enjoy the meditative rhythm of motif-making and the satisfying moment when you join the last bloom. 🧶✨🌿