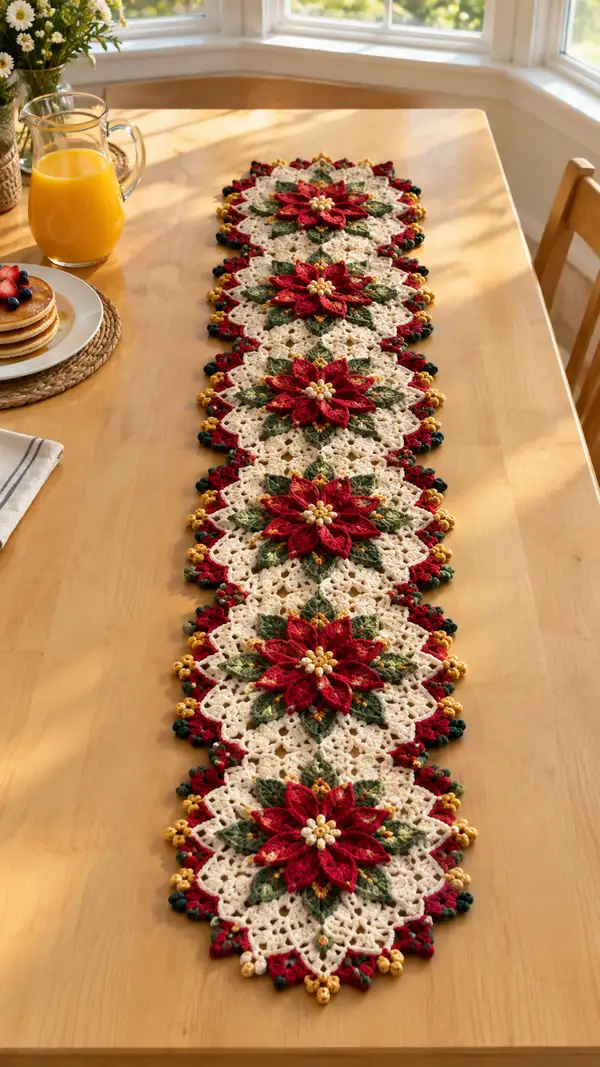
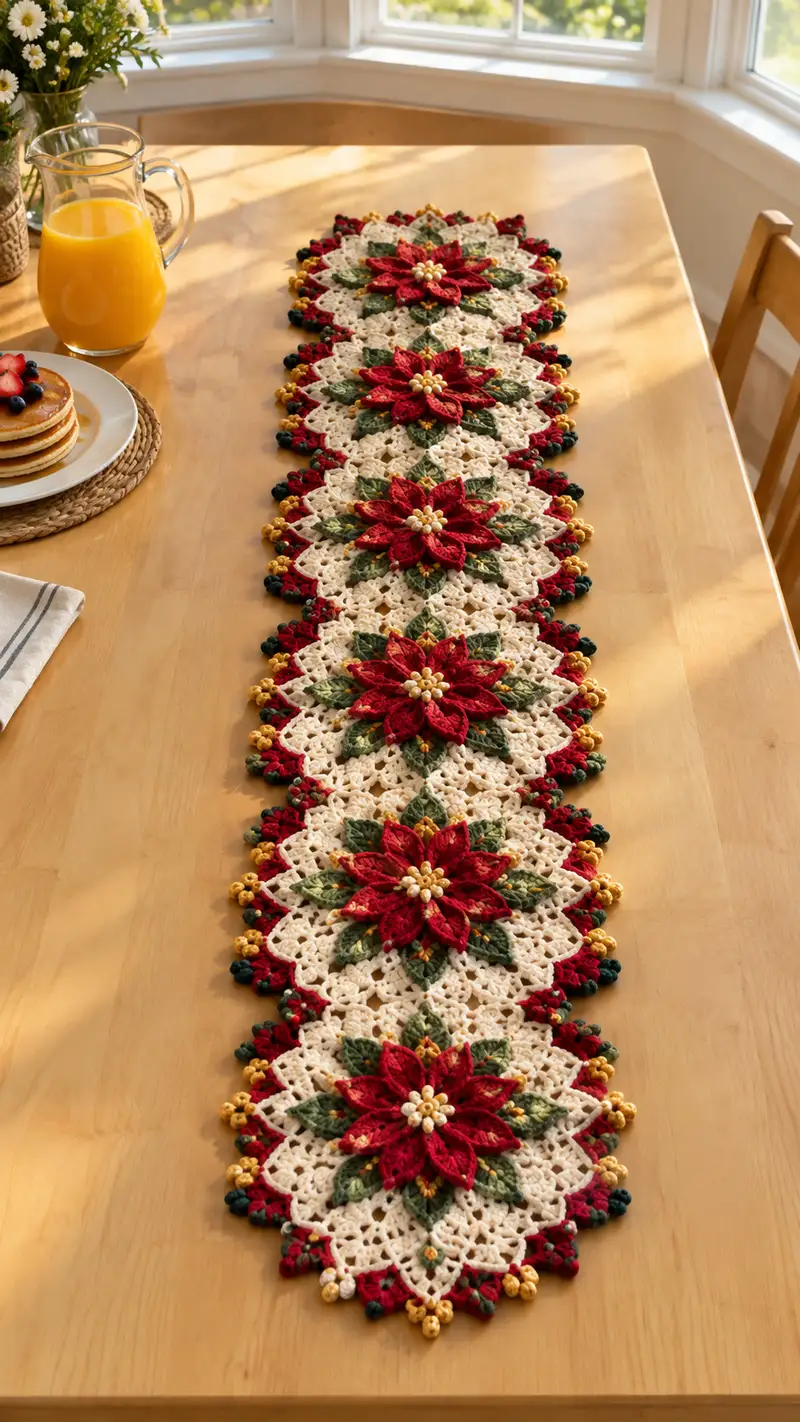
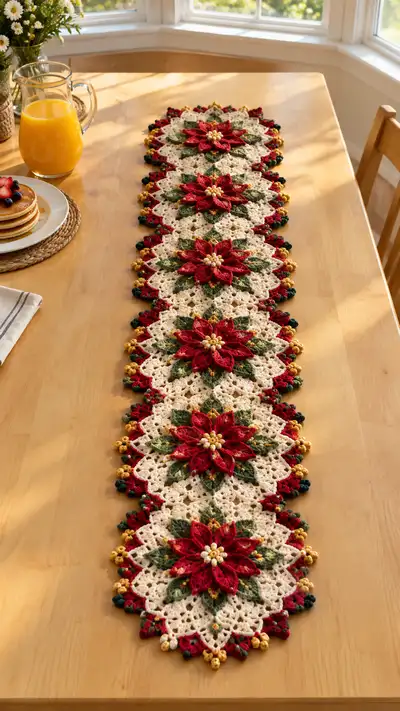
Create a festive Red Poinsettia Cream Lace Table Runner with layered 3D poinsettia motifs joined into a long lace runner. Each motif features deep red petals, variegated green leaves, gold bead clusters and a delicate cream lace background. The pattern includes join-as-you-go instructions and a scalloped multi-color border for a polished holiday centerpiece. Suitable for intermediate crocheters who enjoy color changes and texture work.
Progress Tracker
0% Complete
— Overview :
Info :
This table runner is worked as repeating poinsettia medallions (make 5 or as many as your table requires) joined-as-you-go. Each medallion consists of a cream lace base, a ring of green leaves, layered red petals built in two to three tiers, and a beaded gold center. After motifs are joined, a multi-color scalloped border is worked around the entire runner edge to finish. Read all the instructions before starting and check the 'Materials' and 'Abbreviations' sections. Blocks/adjusts: the pattern describes making 5 motifs; increase or decrease motifs to lengthen/shorten runner.
— Motif Base (Make 5) :
Round 1 :
mr, ch 3 (counts as dc), 11 dc into mr, join with sl st to top of ch-3 (12)
Round 2 :
ch 3, dc in same st, 2 dc in each st around, join with sl st to top of ch-3 (24)
Round 3 :
ch 3, (dc, ch 1, dc) in next st, *skip next st, (dc, ch 1, dc) in next st; rep from * around, join (12 ch-1 sps, 24 dc)
Info :
This round begins to form an open lace ring that will later accept leaf joins. Keep your ch-1 spaces uniform and use a stitch marker at the first ch-1 to locate motif points.
Round 4 :
sl st into next ch-1 sp, ch 4 (counts as tr), 2 tr in same ch-1 sp, ch 2, *3 tr in next ch-1 sp, ch 2; rep from * around, join with sl st to top of ch-4 (12 groups of 3 tr, 12 ch-2 sps)
Round 5 :
sl st into first ch-2 sp, ch 3, (2 dc, ch 2, 3 dc) in same ch-2 sp, *(3 dc, ch 2, 3 dc) in next ch-2 sp; rep around; join (12 shells)
Round 6 :
ch 1, sc in same st, ch 3, *sc in center dc of next shell, ch 3; rep around to form 12 ch-3 loops; join (12 ch-3 loops for petal/leaf anchors)
Info :
These ch-3 loops are anchor points for leaves and petals. Count loops and adjust tension so loops are evenly spaced. If any loop is much larger or smaller, frog back and re-work to maintain symmetry.
Round 7 :
Working in BLO: attach cream yarn in first ch-3 loop, ch 1, 8 sc evenly distributed around loop, sl st to first sc (8)
Round 8 :
ch 3, dc in same st, (2 dc in next st) x 3, ch 2, *(2 dc in next 4 sts) in next loop to create a petal foundation; rep for each loop, join (12 petal foundations, approx 48 dc plus ch-2 corners)
Info :
Round 8 creates a broad base that fills the lace and gives body behind the leaves. Keep stitch counts even for each loop so petals and leaves align perfectly when added.
Round 9 :
sl st to first ch-2 corner, ch 1, sc into corner, ch 4, *sc into next corner, ch 4; rep around to make 12 ch-4 points (12 ch-4 loops)
Round 10 :
sl st into first ch-4 sp, ch 1, 10 sc in ch-4 sp, sl st to join (10), *move to next ch-4 sp and repeat; complete for all 12 loops (12 x 10 sc = 120 sc)
Info :
Round 10 creates a dense ring that will be the foundation for leaves. If your 10 sc per point is tight, consider using a 3.75mm hook for this round only, then switch back for lace rounds.
Round 11 :
ch 3, dc around front loops of the 10 sc in each point to create ridged petal bases: (1 dc in each st) x 120, join (120)
Round 12 :
*ch 5, sc in next 10th st along dc ring to place spacing; rep around to create 12 ch-5 loops, join (12 ch-5 sps)
Round 13 :
In each ch-5 loop: join green yarn, ch 1, sc, hdc, 3 dc, hdc, sc across loop to form leaf base; sl st to join; rep for all 12 loops (12 leaves foundation)
Info :
These green leaf foundations will be worked into fully shaped leaves (see Leaves section). Do not fasten off the green yarn yet if you plan to crochet leaves and then petals without changing yarn tails excessively; carry yarn to next point if comfortable carrying 6-8 stitches only.
Round 14 :
ch 1, sc around outside edge of entire motif in cream, placing 2 sc in the tip of each green leaf foundation to create neat join points; work 120-130 sc evenly spaced, join (approx 128)
Round 15 :
ch 4, (tr, ch 2, tr) in every 10th sc to create 12 elevated points; in between work 3 dc clusters to fill; join (12 points)
Info :
At the end of Round 15 the motif base should measure roughly 10-11 cm (4-4.5 in) across depending on tension. Block each motif lightly after completing to open lace before attaching petals.
Round 16 :
ch 1, sc evenly around motif edge in cream to prepare attachment points for petals and outer joining; join (approx 140 sc)
Round 17 :
ch 1, work picot edging: *sc in next 4 sts, (ch 3, sl st into last ch), sc in next 4 sts; rep around for slightly decorative edge, join
Info :
Finish motif base by weaving in any long tails except where petals or leaves will be sewn on; leave green yarn tails for leaf work and red yarn tails for petal layers. Light blocking now will make the rest of the work easier.
— Leaves (Make 8 leaves per motif; 8 leaves shown) :
Round 1 :
With variegated/forest green, ch 8, sc in 2nd ch from hook, hdc, dc, 3 tr in next st, dc, hdc, sc in last ch (leaf length ~7-8 sts) (8)
Round 2 :
Turn and work on opposite side of foundation chain: sc, hdc, dc, 3 tr, dc, hdc, sc to mirror round 1; join with sl st at base forming single leaf
Round 3 :
ch 1, sc around leaf edge placing 18-20 sc total to shape edge (18-20)
Info :
Work evenly to create symmetrical leaves; slip stitch the base of each leaf to the green leaf foundation points on the motif base (Round 13/14 anchors). Place 8 leaves around the motif, spaced to alternate with petal anchors.
Round 4 :
FLO: ch 1, 1 sc in each st across top edge only to create a subtle ridge (18-20)
Round 5 :
ch 1, working back along the leaf, dec twice evenly to taper the tip: (sc2tog) x 2, sc to end, fasten off leaving tail for sewing
Info :
Sew leaves in position using the tail left from Round 5. Place one leaf in each green foundation point formed on Motif Base Round 13, and stitch securely with small invisible stitches. Pin before stitching to ensure consistent spacing.
Round 7 :
Repeat Rounds 1-6 to make remaining leaves; for eight leaves: repeat 7 times more (8 leaves total)
Info :
After all leaves are attached, check that each leaf lays flat and curves slightly outward. If a leaf flips or twists, unpick a couple of stitches and resew with a few extra securing stitches to flatten.
— Petal Layer 1 (Make 8 petals per motif) :
Round 1 :
With Accent Red, ch 6, sc in 2nd ch from hook, hdc, 3 dc, hdc, sc (5-6 st tall petal foundation)
Round 2 :
Turn and mirror foundation across opposite side of chain: sc, hdc, 3 dc, hdc, sc; sl st to base to close (petal formed)
Round 3 :
ch 1, 1 sc around petal edge (approx 12 sc), sl st to join (12)
Round 4 :
ch 3, (dc, ch 1, dc) in top center of petal to add height, sl st into base to anchor; repeat for each petal foundation (8 petals per layer)
Info :
Place these first-layer petals into every other ch-3 anchor created on Motif Base Round 6 (or alternate placement depending on your arrangement). Pin petals in place and adjust overlap slightly so each petal sits neatly above the leaf tips.
Round 5 :
Edging: ch 1, sc evenly around each petal, placing 2 sc at the base where petal meets motif to ensure secure join; fasten off leaving long tail for sewing (approx 12 sc per petal)
Round 6 :
Repeat Rounds 1-5 to make all 8 first-layer petals (8 petals)
Info :
When sewing petals down, overlap the base slightly over the lace ring so the cream background is still visible between petals. Use small whip stitches with matching red yarn for an invisible seam. Do not pull too tight or the motif will pucker.
— Petal Layer 2 (Make 8 larger petals per motif) :
Round 1 :
With Accent Red, ch 8, sc in 2nd ch, hdc, 3 dc, 5 tr in center, 3 dc, hdc, sc in last ch to shape a larger, fuller petal (approx 14-16 sts)
Round 2 :
Turn and work along opposite side of chain mirroring Round 1, sl st to base forming petal; leave base tail for joining (one petal made)
Round 3 :
ch 1, sc around petal edge placing 18-20 sc to give a neat finish (18-20)
Round 4 :
Work surface texture: FLO, ch 1, sc in FLO across front ridge to create a raised line on petal; join and fasten off
Info :
These second-layer petals should be slightly offset from the first layer so that petals nest between lower petals. Arrange them so the tips fall between the lower petal tips to create a dense flower shape.
Round 5 :
Make the remaining seven petals following Rounds 1-4 (8 total)
Round 6 :
Attach each second-layer petal over top of and slightly behind its corresponding first-layer petal with whip stitch at the base. Use two to three passes of the yarn tail per petal for a secure hold without bunching (Info below)
Info :
To keep petal curvature, sew through the base only, not through the petal top. If you wish for a more three-dimensional petal, add a small amount of fiberfill at the petal base and stitch around to enclose the filler before attaching.
Round 8 :
Optional Decorative Stitch: add a small embroidered vein along each second-layer petal with contrasting darker red thread using a tapestry needle.
— Petal Layer 3 (Optional, Make 8 small top petals for denser flower) :
Round 1 :
With Accent Red or Deep Burgundy, ch 5, sc, hdc, 3 dc, hdc, sc to create smaller central petals (8 small petals)
Round 2 :
Edging: ch 1, sc around petal, then sl st to base and leave tail for sewing; repeat for 8 petals
Info :
Place these small top petals clustered in the center of the larger petals to give the poinsettia a natural layered look. Sew using hidden stitches and add a touch of gold embroidery thread at petal tips for subtle sparkle if desired.
Round 4 :
Sew all top petals into the central area of the flower leaving space for the bead cluster.
Round 5 :
Optional: Block each petal briefly to shape tips and flatten seams slightly before final assembly onto motif base.
— Center Bead Cluster & Bobbles :
Round 1 :
With Gold yarn, ch 6 and join into ring with sl st, ch 1
Round 2 :
Make 6 small bobbles: *ch 2, 5 dc into ring, sl st into base to secure a bobble; rep 6 times to form cluster (6 bobbles)
Round 3 :
Weave in gold seed beads: using beading needle, thread 6-9 small seed beads on a short length of upholstery thread/yarn, place into center, and tack down with strong stitches; or sew individual beads into center using beading needle and thread per bead
Info :
Use small seed beads to mimic poinsettia pistils. Place 6 beads in a circular cluster in the center of the flower and secure each bead with a small knot on the back side of the motif. If making a baby-friendly runner, substitute embroidered French knots instead of beads.
Round 4 :
Sew bead cluster in the absolute center of the layered petals and secure with multiple small stitches carried through the petal bases into the motif center to anchor firmly (Info)
Round 5 :
Fasten off all yarn ends used for center cluster and weave tails into the motifs tightly to avoid bead loss.
— Assemble Poinsettia to Motif Base :
Round 1 :
Position first petal layer evenly around motif base using the ch-3 anchors (Motif Base Round 6 points). Pin each petal base then tack with red yarn using small whip stitches through the motif base and petal base; secure with knot and weave in ends
Round 2 :
Attach second-layer petals so they nest between the first-layer petals and slightly overlap leaf tips. Use the same method: pin, tack, and finish with hidden stitches at petal bases
Round 3 :
Sew small top petals and attach bead cluster in center. Double-check symmetry and re-position any petals that look off-center. Repeat for all motifs (Make 5 motifs total)
Info :
Before fully securing petals, place motifs side by side to plan join locations so petals and leaves interlock cleanly. Slight adjustments in petal placement at this stage save rework later during joining.
— Join-As-You-Go Motif Joining (Join motifs in row) :
Round 1 :
Work motifs in sequence; after completing Motif 1 fully, begin Motif 2 through Motif Base Rounds. When you reach the outer edge round where ch-4 or ch-5 loops are created (Motif Base Round 9-12), align Motif 2 next to Motif 1, then join-as-you-go:
Round 2 :
When you reach the corresponding ch loop on Motif 2, slip-stitch into the loop on Motif 1 instead of chaining or working into a free loop; continue work on Motif 2 as instructed. Make 1 join per adjacent point so motifs are linked at 6-8 points per side depending on motif layout
Round 3 :
For accurate alignment: lay the second motif over the first motif slightly overlapping so that one petal of the second sits snugly behind a petal of the first (this creates a continuous row of petals with no gap). Use pins to secure and count join points before slip-stitching
Info :
Join-as-you-go method keeps the back of the runner neat and eliminates long sewing seams. Ensure your tension while slip-stitching is relaxed so joins are not too tight and motifs can sit flat. If a join pulls, unpick and rework with slightly looser tension or add an extra chain between join points to relieve stress.
Round 5 :
Continue joining Motif 3, 4, and 5 in the same manner until the desired runner length is achieved (for this project, make 5 motifs and join edges to form a straight row)
Round 6 :
After joining final motif, work one round of sc around the full outer edge of the joined motifs in cream to even out the edge and fill any small gaps. Work 1 sc in each st and sl st joins as needed; join (approx 400-480 sc depending on motifs joined)
Info :
At this stage, lightly block the joined row of motifs flat, pinning points and edges evenly. Blocking encourages the lace to sit flat and provides a cleaner edge for the final border rounds.
— Decorative Border & Scalloped Edging (Work around joined motif row) :
Round 1 :
With Cream yarn, join at any outer sc on the long edge, ch 3 (counts as dc), dc in next 2 sts, *sk 2 sc, (5 dc in next sc) to form shell across scallop anchor; rep along the long edges and around ends to create scallop foundations (approx 40-50 shells total for entire runner)
Round 2 :
ch 1, sc in first dc, work sc across the peaks of shells to shorten and refine scallops: sc in first 2 dc, 3 sc across shell center, sc in last 2 dc; rep for each shell; join (approx 3-4 sc per shell, total 120-200 sc)
Info :
This creates a cleaner scalloped edge on which to add color bobbles and finishing clusters. Work loosely on these rounds to keep scallops soft and flexible; too tight will distort the runner edge.
Round 4 :
With Deep Burgundy (or contrasting dark red), attach yarn at every second shell peak: ch 1, (sc, ch 3, sc) in shell peak to create a tiny looped accent; repeat across long edges and around ends (approx 40-50 accent loops)
Round 5 :
With Gold yarn, in each ch-3 loop, make 3 dc bobble cluster: (yo, insert, pull up, yo pull through 2, repeat 3 more times to create 4 partial dcs on hook, yo pull through all loops), sl st to secure into loop. This gives small gold bobbles at regular intervals (approx 40-50 gold bobbles)
Info :
Info :
Make sure bobbles are anchored through both the border stitch and one or two stitches of the motif edge to keep them stable. If using beads, sew one bead into the center of each bobble after they are anchored for extra shimmer.
Round 6 :
Alternate small dark green bobble clusters between gold bobbles by making picot clusters in the small loops created with Deep Burgundy: (ch 3, sl st into base) to make tight bobbles; join and fasten off
Round 7 :
Final scalloped trim: with Cream yarn, work one final round of sc and picots around entire runner to tidy edges. Work *sc 3, picot (ch 3 sl st into top chain), sc 3; rep across scallops; fasten off and weave in ends
Info :
At the ends of the runner, ensure points are mirrored so the runner looks symmetrical. Add or remove an extra picot or shell at the ends if necessary to balance the pattern visually.
— Extra Decorative Surface Stitches & Embellishments :
Round 1 :
Optional surface embroidery: with dark green yarn, stitch subtle veins onto large leaves using long satin stitches that follow the center fold of each leaf; use 3-4 stitches per leaf to mimic natural veins
Round 2 :
Optional: add metallic embroidery thread highlights to petal edges with small couching stitches to add sparkle
Round 3 :
Final blocking: pin entire runner flat, shape scallops and points, and mist with water or steam. Allow to dry fully before removing pins for best flattening and polished finish
Info :
Care: hand-wash gently in lukewarm water and reshape while damp; lay flat to dry. Remove beads with weak threads and re-secure bead clusters periodically if runner receives heavy use.
— Finishing Touches & Variations :
Round 1 :
Optional fringe: attach loops of cream yarn between scallops and trim to even length for a light fringe border (not pictured but a nice variation)
Round 2 :
Color swaps: work petals in variegated reds or pinks for a modern twist or use ivory petals and burgundy leaves for a muted palette
Round 3 :
Scale: use a smaller yarn and hook to produce a narrower runner or larger yarn and hook for an oversized table centerpiece. Adjust bead counts proportionally.
Info :
Info :
This completes the step-by-step instructions. The pattern intentionally includes multiple Info sections with tips on tension, blocking and joining. Follow the rounds closely and pin motifs frequently during assembly for best results.
Your finished Red Poinsettia Cream Lace Table Runner will bring classic holiday elegance to your table with a handmade charm that's impossible to resist. Each layered poinsettia medallion creates depth and sparkle, and the scalloped border ties everything together for a refined finish. Enjoy the slow, meditative process of color changes, shaping, and beadwork, and be proud to display your creation each season. 🧶✨🌿