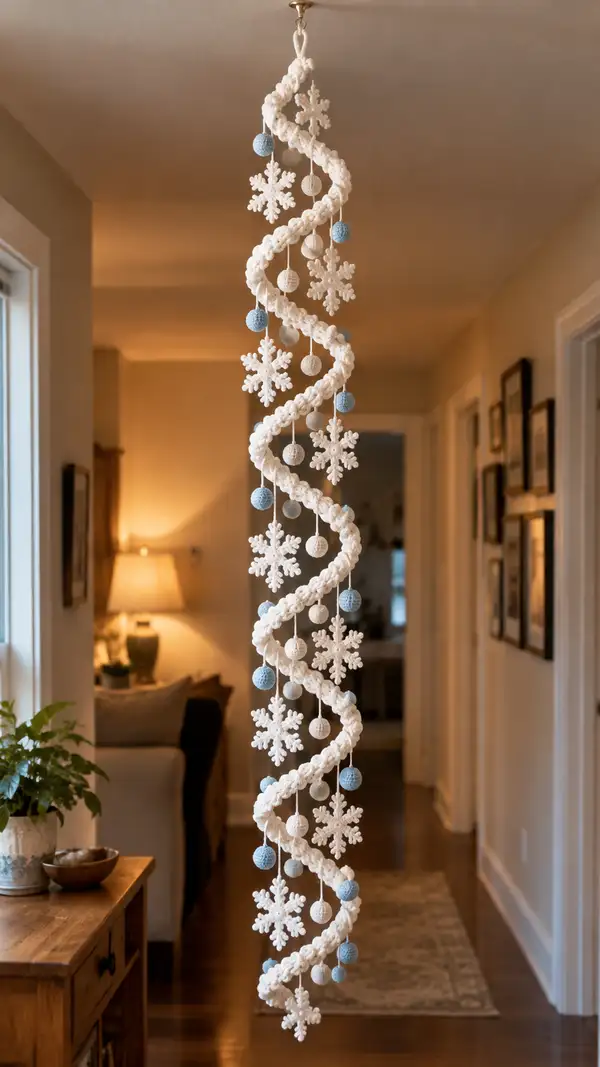
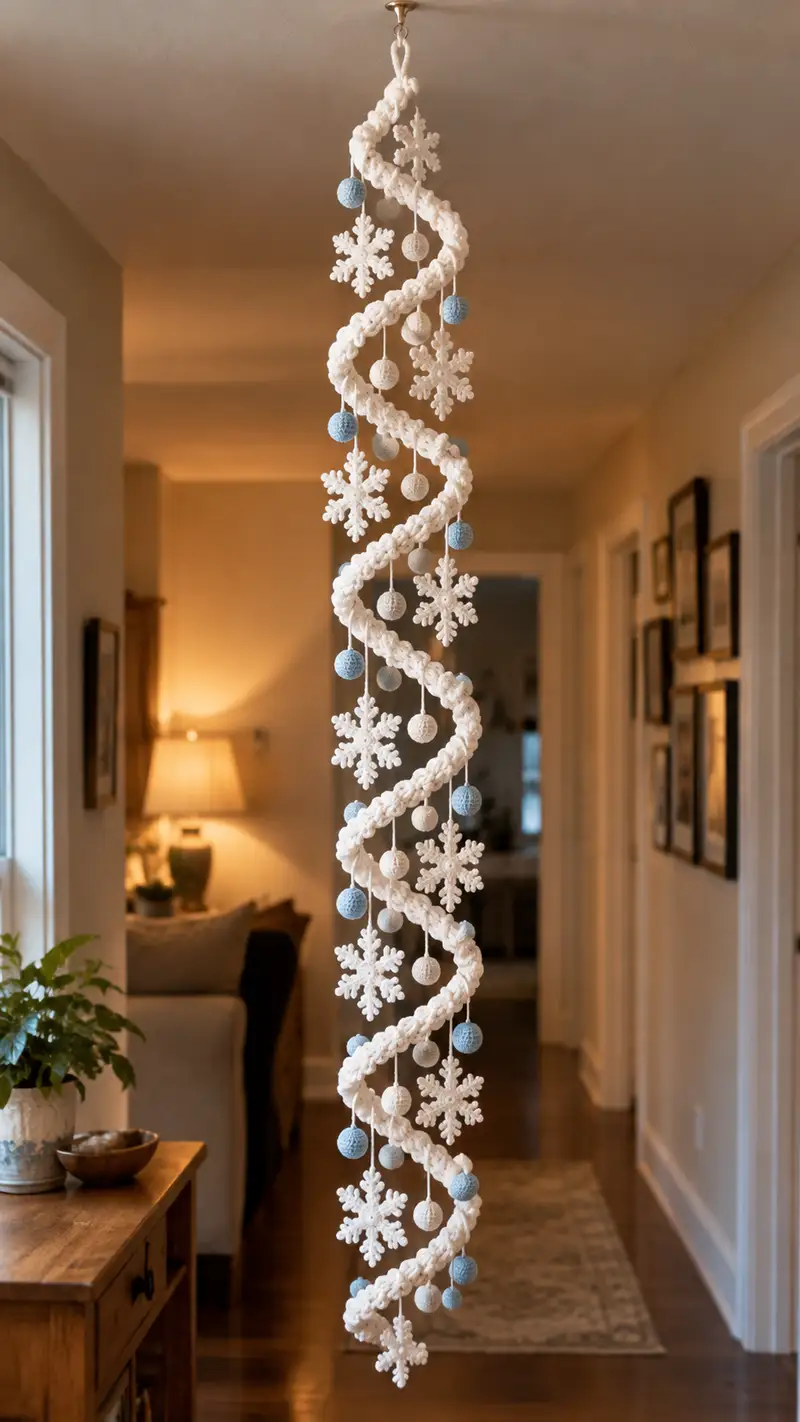
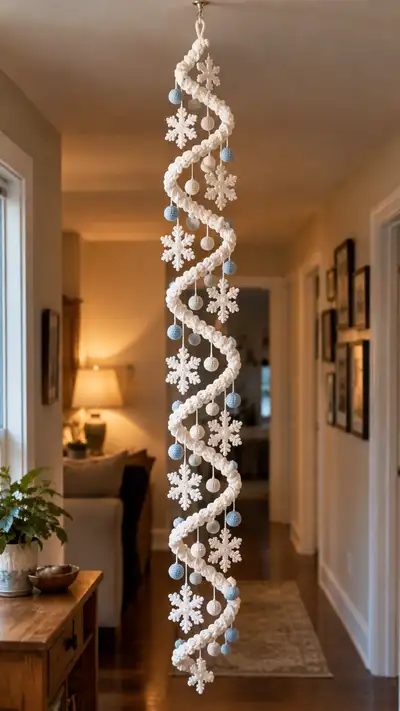
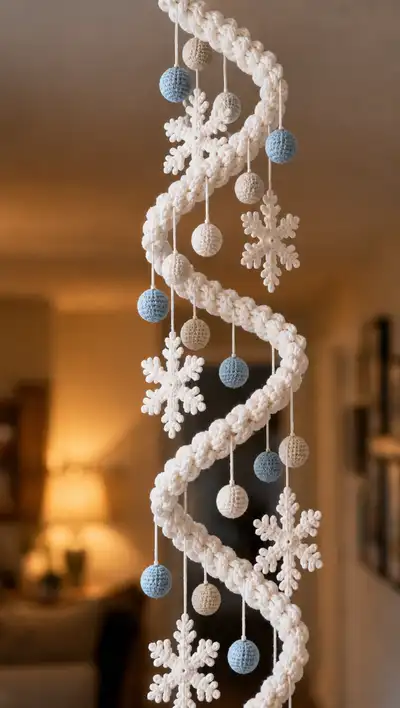
A tall, elegant spiral hanging garland featuring chunky twisted rope, delicate crocheted snowflakes and tiny crocheted balls in soft white, dove blue and natural beige. This versatile decor piece drifts and twirls as it hangs, perfect for a winter entryway, mantel or stairwell. The pattern uses basic amigurumi rounds for the ornaments and a long tubular textured spiral for the main body, with clear assembly and hanging instructions.
Progress Tracker
0% Complete
— Materials & Gauge :
Info :
Use bulky (#5) yarn for the main spiral rope to achieve a chunky, chunky look. A 6.0mm hook will give a dense but pliable tube. Gauge is not critical for overall length but affects bulk and number of coils: approximately 12 sc rounds = 10 cm of tube length when worked with 36 sc around. Adjust counts if your gauge differs.
— Main Spiral Rope :
Round 1 :
6 sc in magic ring (6)
Round 3 :
(1 sc, 1 inc) x 6 (18)
Round 4 :
(2 sc, 1 inc) x 6 (24)
Round 5 :
(3 sc, 1 inc) x 6 (30)
Round 6 :
(4 sc, 1 inc) x 6 (36)
Info :
We now have a stable tube circumference of 36 sts. If your yarn is much thinner or thicker, adjust to 30 or 42 to keep the tube proportionate. From here onward rounds will build length rather than width.
Round 7 :
1 sc in each st (36)
Round 8 :
1 sc in each st (36)
Round 9 :
1 sc in each st (36)
Info :
To create the chunky twisted appearance, we will alternate worked rounds of sc with textured puff/bobble rounds. The puff stitch round does not change the stitch count if each puff is worked into a single stitch and closed with a sl st or sc.
Round 10 :
(puff in next st, sc in next 2 sts) x 12 (36) — Puff: yarn over, insert hook, yarn over, pull up loop, repeat 3 times total creating 5 loops on hook, yarn over and pull through all loops, ch1 to close puff if desired
Round 11 :
1 sc in each st around (36)
Round 12 :
(1 sc, puff, 1 sc) in next 3 sts, 1 sc in next 3 sts; rep across to total 36 sts (36)
Info :
Keep your puff stitches consistent in size. If puffs close too large, pull the final drawthrough snug but not tight; this keeps the tube flexible. If you need a denser look, use a slightly smaller hook for puff rounds only.
Round 13 :
1 sc in each st (36)
Round 14 :
(sc in next 2 sts, puff in next st) x 12 (36)
Round 15 :
1 sc in each st (36)
Round 16 :
1 sc in each st (36)
Info :
Work in continuous rounds (spiral) without joining and without chain at the start of rounds to keep the tube seamless. Use a removable stitch marker to mark the first stitch each round and slide it up as you work around.
Round 17 :
(puff, sc, sc) x 12 (36)
Round 18 :
1 sc in each st (36)
Round 19 :
(sc in next st, puff, sc in next 2 sts) x 12 (36)
Round 20 :
1 sc in each st (36)
Info :
Continue alternating textured rounds with plain sc rounds. This builds a stable tube that still has the chunky braided look. Work in sets of 2–3 sc rounds then one puff-textured round to keep a regular repeat that makes the tube look like a spiral.
Round 21 :
(puff in next st, sc in next st) x 18 (36)
Round 22 :
1 sc in each st (36)
Round 23 :
1 sc in each st (36)
Round 24 :
(sc, sc, puff, sc) x 9 (36)
Info :
At this stage you have about 12–14 cm of tube length depending on your gauge. Repeat this pattern of 3–4 rounds to build the full length of your hanging spiral. For the pictured garland, aim for a finished rope length (uncurled) of approximately 120–140 cm. If your room has a higher ceiling, make your rope longer.
Round 25-60 :
Repeat Rounds 21–24 sequence three times, then repeat Rounds 10–20 sequence once more. Continue working in pattern until tube length (flat, uncurlled) measures approximately 120–140 cm or desired length. Maintain 36 sts each round (36)
Info :
When you reach your desired length, create the top loop by folding back 10 cm of the tube and sewing through both layers, or work additional rounds to make a firm loop. Fasten off and weave in ends. Optionally, you may insert a thin cord or flexible wire inside the tube at this point for structural support: see the 'Optional Internal Support' section.
— Optional Internal Support (Cord or Wire) :
Info :
If you want the spiral to hold a defined corkscrew shape, insert a thin cotton cord or craft wire inside the tube before completely closing both ends. Cut cord/wire at least 10 cm longer than the finished tube to fold into the hanger loop. Secure cord/wire to the top hanger (metal ring or wooden bead) with strong knots or by wrapping with yarn and gluing. Be sure to fold and cap wire ends to avoid sharp points.
— Hanger Loop / Top Finish :
Round 1 :
Fold the last 8–12 rounds back to form a small loop. Using your yarn needle and a length of yarn, sew through both layers around the folded edge with 12–16 evenly spaced whip stitches to anchor the loop. Fasten off and weave ends through at least 6 rounds to secure.
Info :
Attach a small metal ring or wooden bead at the top for hanging. If using an internal cord, tie the cord to the ring before tacking the fold closed so the cord holds the garland weight directly.
— Small Ornament Balls (Make 20 - mix of colors) :
Info :
Use worsted weight (#4) yarn and a 4.0mm hook to make small stuffed balls about 2.5–3 cm diameter. These are crocheted in continuous rounds. Make approximately twenty balls in the color mix shown (ivory, dove blue, natural beige). Stuff lightly.
Round 1 :
6 sc in magic ring (6)
Round 3 :
(1 sc, 1 inc) x 6 (18)
Round 4 :
(2 sc, 1 inc) x 6 (24)
Round 5 :
1 sc in each st (24)
Round 6 :
1 sc in each st (24)
Info :
Begin stuffing the ball lightly but evenly starting at this round so you can shape it smoothly. Use small amounts of fiberfill and push in with a blunt tool for an even interior.
Round 7 :
(2 sc, 1 dec) x 6 (18)
Round 8 :
(1 sc, 1 dec) x 6 (12)
Info :
Fasten off leaving a long tail for sewing. Close the opening by threading tail through remaining 6 sts and pulling tight. Weave tail into the ball to secure. Make a hanging loop by threading a length of yarn through the center and tying a knot; leave a 12–15 cm tail for attaching to the spiral rope so it dangles freely.
— Snowflake Motif (Make 8–10) :
Info :
The snowflake is a flat, 6-armed motif worked in rounds. Use the same bulky yarn for a chunky white snowflake or a smaller hook (3.5–4.0mm) for crisp points. Block each snowflake to shape and flatten before assembly. Make 8–10 snowflakes for the pictured density.
Round 1 :
6 sc in magic ring, pull tight and join with sl st to first sc (6)
Round 2 :
Ch3 (counts as dc), 1 dc in same st, ch2, sl st in next sc; rep around to create 6 loops (12 loops total) — join with sl st (6 picot loops)
Round 3 :
Work into each ch2 loop: (sl st, ch1, 3 sc, ch1, sl st) across all 6 loops to form base petals — join with sl st (6 petals)
Info :
Round 2 creates the foundation points for each arm. If you prefer more delicate snowflakes use ch2 between arms instead of ch3. Make sure to keep tension even around the ring to avoid warping.
Round 4 :
Into each petal: ch3, tr (treble) in center of petal, ch2, sl st into base to form extended arm. Repeat for each of the 6 arms (6 arms)
Round 5 :
Working on the outside edge of each arm: (sl st, ch3, sc in top of tr, ch3, sl st) to add small forks on each arm (6 arms)
Round 6 :
For each arm: ch5, sl st in arm base 2 sts down to create a small point; rep twice on each arm to make three small points per arm. Fasten off leaving tail for weaving (6 arms)
Info :
After finishing, block each snowflake firmly using pins on a blocking mat and a spray of water or steam. Pin points evenly to ensure symmetry. Allow to dry fully before removing pins. Use a small dab of matchstick-head size glue behind the center if needed to keep the snowflake flat.
Round 7 :
Optional: Embellish centers with a single sc bead: join yarn to center, ch1, 6 sc around center forming a small raised ring, pull tight and secure with sl st, fasten off (6)
Info :
Use a contrast or a tiny pearl bead at the center for a refined look. Sew bead in place by hand, then catch a couple of stitches behind it to hide thread.
— Alternate Snowflake (Finer Detail) :
Round 1 :
8 sc in magic ring (8)
Round 2 :
(1 sc, inc) x 8 (24)
Round 3 :
Ch4, sl st in next st across to make 6 central loops (6 loops)
Round 4 :
Into each loop: (sc, ch3, picot, ch3, sc) to create ornate points — join and finish. Block flat and stiffen lightly with craft starch or fabric stiffener if desired.
Info :
Make a mix of chunky and delicate snowflakes for visual interest. The alternating sizes create depth as the garland hangs and rotates.
— Finishing Snowflakes & Balls for Hanging :
Info :
For each snowflake, attach a 12–16 cm length of matching yarn by passing yarn through the center on the back side and knotting tightly. Leave the yarn tail long enough to attach to the spiral tube. For balls, attach the hanging tail used when closing the ball (see 'Small Ornament Balls') and trim to 12–15 cm length for consistent dangle.
— Placement & Spacing Guide :
Info :
Mark positions along the spiral rope every 12–15 cm along the length. Alternate snowflakes and balls — for the pictured garland we used 8 snowflakes spaced roughly 12–14 cm apart, with 2–3 balls hanging between each pair of snowflakes. Vary the lengths of the hanging cords so ornaments sit at different depths within the spiral.
— Assembly & Attaching Ornaments :
Info :
Pin each ornament to its marked spot on the spiral using sewing pins before sewing to confirm spacing. The spiral hangs vertically; ornaments should dangle inside the spiral. Use the hanging tail from each ornament to sew through the tube wall several times to secure, then tie and weave in the remaining tail inside the tube so no knots are visible from the outside.
Step :
Thread the ornament tail through the center of the spiral tube by using a blunt needle to pierce the tube wall, pulling the tail through and tying a knot on the inside layer. Repeat for each ornament.
Info :
For extra security, add a tiny dab of fabric glue on the inside knot. If your tube has an internal cord, loop the ornament yarn around the cord and tie, then secure with a couple of stitches through the tube wall to prevent sliding.
Step :
Trim and weave all tails inside the tube and through several inner rounds to hide them. Ensure all ornaments hang freely and do not catch on neighboring ornaments; adjust lengths if necessary.
— Final Blocking & Optional Stiffening :
Info :
Lightly steam the completed spiral at a safe distance to even out any minor bumps. Block snowflakes flat if you haven't already. If you want the snowflakes to be more rigid, use a washable fabric stiffener per manufacturer instructions applied before attaching to the spiral.
Info :
Before hanging, check the top loop and internal cord/wire for strong secure knots. Hang momentarily to test balance; slide ornaments slightly if the garland leans to one side to redistribute weight evenly.
This handmade spiral garland is a joyful winter accent that pairs chunky texture with delicate snowflakes and tiny ornaments — a piece to make and treasure! 🧶 Hang it in an entryway or stairwell and watch it twirl with every breeze. The modular construction invites creativity: change colors, lengths or ornament types for endless variations. Happy stitching and may your home feel a little cozier with each handmade loop! ❄️✨