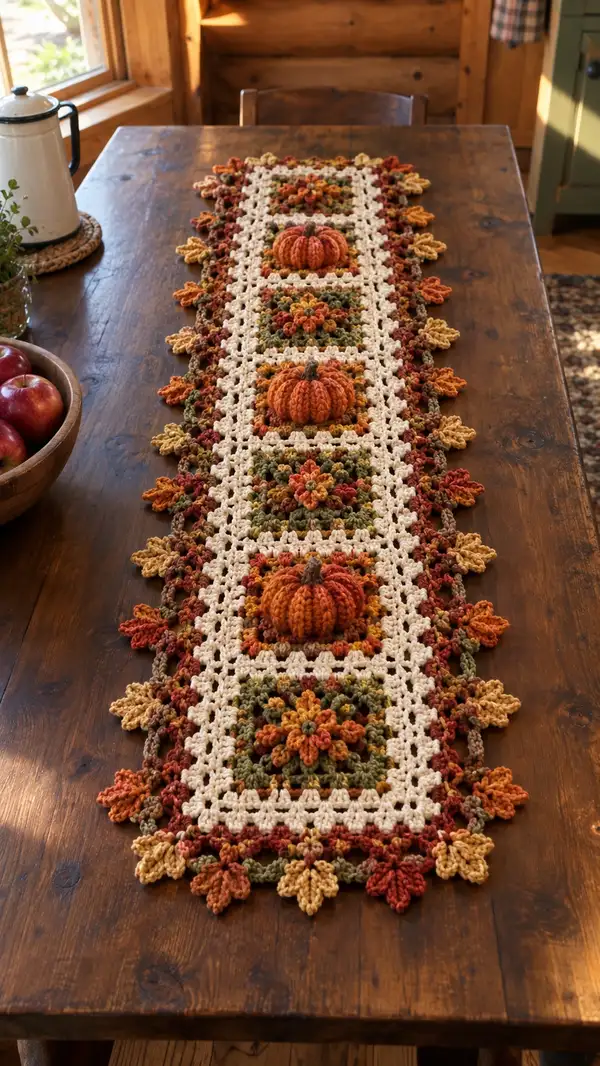
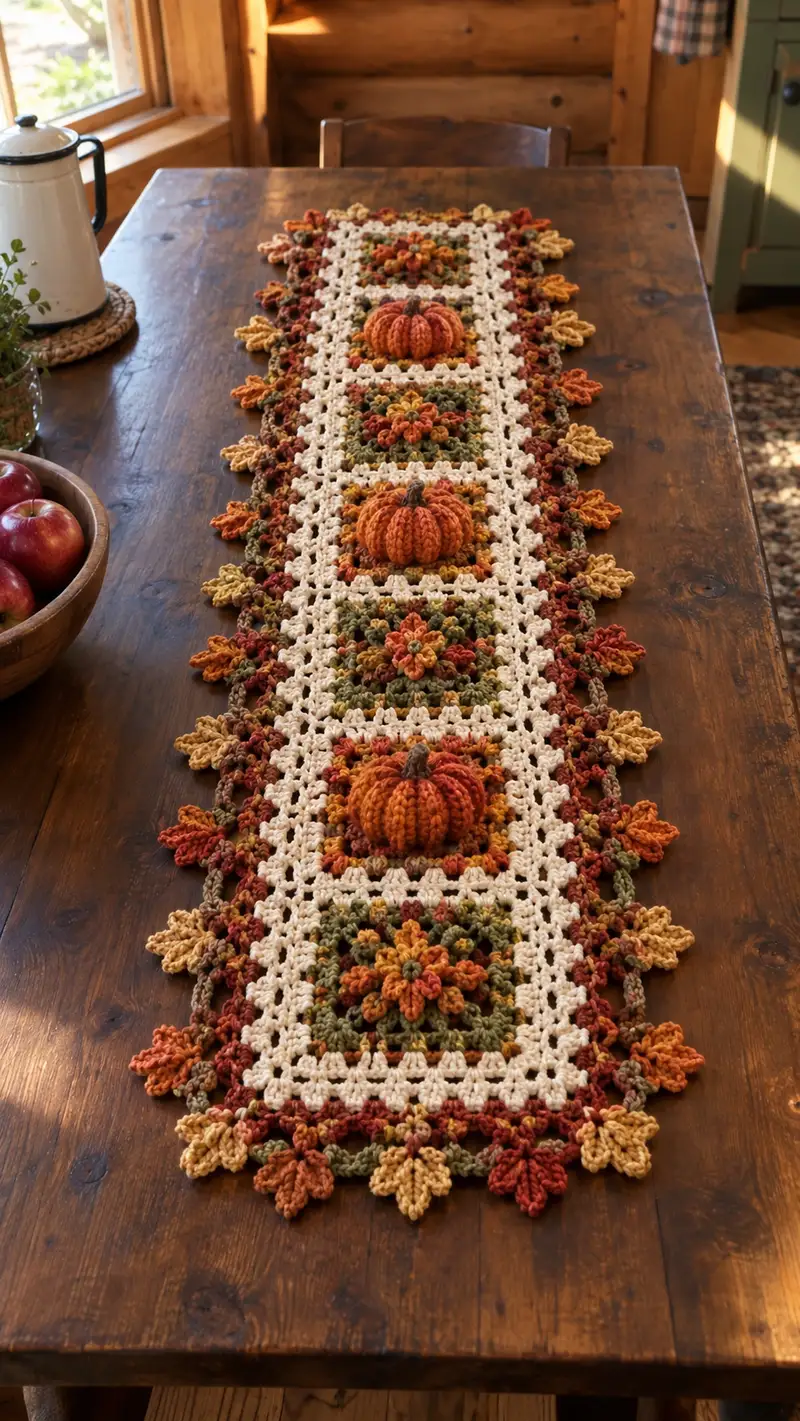
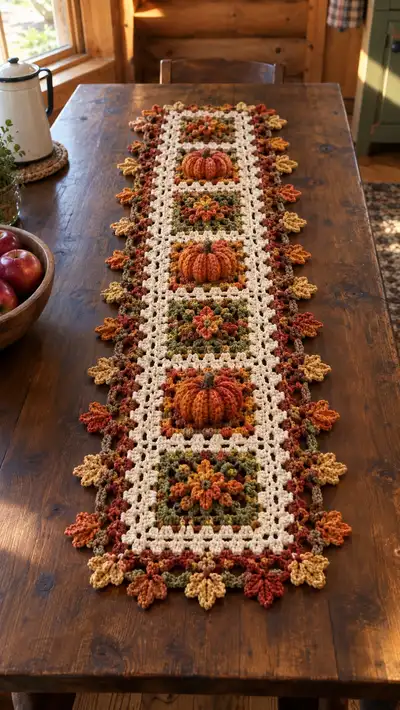
Bring autumn warmth to your table with this rust orange pumpkin and leaf table runner pattern. The runner features four textured floral-granny motifs, three plush 3D pumpkins, and a scalloped leaf border in fall tones. Worked in worsted-weight yarn with layered clusters and puff stitches for depth, it’s a cozy seasonal centerpiece that looks hand-crafted and heirloom-ready.
Progress Tracker
0% Complete
— Center Floral Granny Square (Make 4) :
Round 1 :
Using mustard/gold, make a magic ring. Ch3 (counts as dc), 11 dc in ring, join with sl st to top of ch3 (12)
Round 2 :
Change to olive green. Ch3, dc in same st, *ch2, skip 2 dc, (2 dc, ch2, 2 dc) in next dc* rep 3 times to form 4 corner clusters, join with sl st (4 corner ch2-sps)
Round 3 :
Switch to rust orange. Sl st into first ch2 sp, ch3, (2 dc, ch2, 3 dc) in same ch2 sp, *sk next corner, (3 dc, ch2, 3 dc) in next ch2 sp* around, join (4 corner ch2-sps, 3-dc clusters on sides)
Round 4 :
Remain rust orange. Work into each side space between clusters: (ch1, 3 dc) in side spaces, and in each corner work (3 dc, ch2, 3 dc). Join (square now approx 20 dc per side including corners)
Info :
Maintain consistent tension; this central motif will later house the pumpkin. Block lightly to square before continuing if needed
Round 5 :
Change to mustard. Ch1, sc evenly around entire square working 3 sc in each corner ch2 space and roughly 1 sc in each dc across sides to create a solid base (edge count ~56)
Round 6 :
Change to olive. Ch3, *dc cluster in each side sc group to create raised center texture: (dc, ch1, dc) in corner sc, and (3 dc) evenly in side spaces. Join (square more defined)
Round 7 :
Switch to rust orange. Work a puff-stitch floral round: into each 3-dc side group make a 5-loop puff stitch, ch1 between puff stitches, and in corners work (3 dc, ch2, 3 dc) to maintain shape (puff clusters create a small flower petal texture)
Round 8 :
Change to mustard. Ch1, sc in each st around, placing 3 sc in corner ch2 spaces. This evens the square for the next rounds (approx 64 sc)
Round 9 :
Change to cream. Ch3, dc in next 2 sts, *ch1, skip 1, dc in next 3; when you reach each corner work (dc, ch2, dc) to preserve corner spacing. Join (creates airy lattice)
Round 10 :
Remain cream. Work a second round of lattice: ch3, dc in each dc and ch1 sp around, corners (dc, ch2, dc). Square now measures approximately 10.5-11 cm after blocking depending on gauge
Info :
If you want a slightly larger framed field to sit pumpkin into, add an extra round of cream lattice here before continuing
Round 11 :
Switch to rust. In every ch1 space along center of square make a 3-dc cluster (cluster = dc, dc, dc) separated by ch1; in corners keep (3 dc, ch2, 3 dc) (total clusters ~24 across square)
Round 12 :
Change to olive. Ch1, sc in each st around; place 4 sc in corners. This will create a firm base to sew pumpkin to later (approx 72 sc)
Round 13 :
Switch to mustard for a decorative inner border. Ch3 (counts as dc), dc in next 3 sts, *ch1, skip 1, dc in next 4*; corners (3 dc, ch2, 3 dc). Join (creates a slightly raised frame)
Round 14 :
Change to cream. Ch1, sc in each st around placing 4 sc in corner ch2 spaces. This completes the framed square center that will cradle the pumpkin (approx 80 sc)
Info :
Make four identical squares. Block lightly to the same dimensions so joins sit flat. The pumpkin will be sewn to the cream framed center later
— Square Outer Frame & Joining Border :
Round 1 :
With cream, join one square at a corner with sl st, ch3, dc in next 3 sts, ch2 in corner, continue across periphery working dc clusters into side spaces until full round completed around combined squares (work continuously if joining multiple squares)
Round 2 :
Ch1, sc evenly around the joined squares to create a uniform frame. At every corner work 4 sc into corner ch2 space. This round evens any size differences between squares (st around ~200-260 depending on number of squares joined)
Info :
When joining squares, slip-stitch through only the front loops of the outermost round to allow a neat seam if you plan to add a decorative back later
Round 3 :
Switch to rust. Work a decorative round of 3-dc clusters separated by ch1 along the long edges to emphasize the runner length. Corners keep (3 dc, ch2, 3 dc)
Round 4 :
Change to cream. Ch1, sc around entire joined piece, placing 5 sc in each corner for a firm joining base. This frame is the anchor for later leaves (sc count varies)
Round 5 :
Remain cream. Work one round in BLO: ch1, sc in each st BLO around. The ridge created will help anchor the leaf edging stitches
Info :
At this point the joined motif will measure approximately the width of a standard table runner; add more squares or extra rounds to lengthen to your desired measurement
— 3D Pumpkin Applique (Make 3) :
Round 1 :
With rust orange and 4.0mm hook, MR, ch1, 6 sc in MR (6)
Round 3 :
(1 sc, inc) x 6 (18)
Round 4 :
(2 sc, inc) x 6 (24)
Round 5 :
(3 sc, inc) x 6 (30)
Round 6 :
(4 sc, inc) x 6 (36)
Round 7 :
(5 sc, inc) x 6 (42)
Round 8 :
(6 sc, inc) x 6 (48)
Info :
These increases form the round base for the pumpkin. Use a slightly smaller hook if you want a tighter fabric to hide stuffing later
Round 9-12 :
1 sc in each st (48)
Info :
Work 3-4 even rounds to build height; stuffing will be added after a few more rounds
Round 13 :
(6 sc, dec) x 6 (42)
Round 14 :
(5 sc, dec) x 6 (36)
Round 15 :
(4 sc, dec) x 6 (30)
Info :
Begin stuffing the pumpkin firmly but gently through the opening; use small pieces of fiberfill to avoid lumps
Round 16 :
(3 sc, dec) x 6 (24)
Round 17 :
(2 sc, dec) x 6 (18)
Round 18 :
(1 sc, dec) x 6 (12)
Info :
Fasten off leaving a long tail. With your yarn needle, sew through remaining 6 sts and pull tight to close. Secure and weave in tail inside the pumpkin
Round 20 :
To create ribs: Thread a length of brown or darker rust yarn onto a tapestry needle and run it from top to bottom across the pumpkin making 6-8 evenly spaced gathers. Pull gently to form lobes and tie securely on the bottom. Repeat stitching around to deepen ridges
Round 21 :
Optional surface: With contrasting rust or deep red, surface-slip-stitch down the center of each lobe to emphasize definition. Add a small stuffed stem: with brown, MR, ch1, 6 sc in MR, sl st to close and sew to top center
Info :
Make three pumpkins. Stuff lightly if you want a flatter pumpkin or more firmly for a rounder plush effect. Keep sizes consistent for a balanced runner
— Attaching Pumpkins to Squares :
Round 1 :
Place a pumpkin centered inside the cream framed center of a square. Pin in place with 3-4 pins to center and prevent shifting
Round 2 :
Using matching rust yarn and yarn needle, sew around the base of pumpkin to the cream round using small whip stitches through the pumpkin base and into the cream border. Make 10-12 evenly spaced stitches around to hold firmly
Info :
Sew a few extra reinforcing stitches at four cardinal points (top, bottom, left, right) because pumpkins will be handled as part of the runner centerpiece
Round 3 :
Weave any remaining tails into the underside of the square and weave ends through multiple stitches to secure
— Join Squares Into Long Runner :
Round 1 :
Layout 4 squares in desired order (pumpkin square, floral square alternating). Join squares using whip stitch or mattress stitch through outermost cream rounds. Match stitch counts edge to edge. Join across long edges first to form the strip
Round 2 :
After joining, join short edge squares if needed to make a continuous strip. Secure all join seams by making a second pass of slip stitches on the RS with cream to create a neat ridge
Round 3 :
Work one round of cream sc all around the entire joined rectangle to create a single continuous frame; place 5 sc in each corner to smooth
Info :
Ensure joins are flat and seams face the underside; press lightly with a damp cloth or block gently if necessary
Round 4 :
Change to rust and work one round of 3-dc clusters separated by ch1 across the long sides (clusters align with motif centers). Corners: (3 dc, ch2, 3 dc)
Round 5 :
Change to cream. Ch1, sc around entire piece working in BLO for this round to create the ridge that will anchor the leaf edging (sc count varies based on joined squares)
Info :
Count stitches along long edges and note total. The leaf edging uses a repeat that will be worked evenly across these stitches; adjust by adding or omitting small sc groups to keep repeats even
— Leaf Scallop Border (Work around entire runner) :
Round 1 :
With olive green, join in a long-side BLO ridge with sl st. Ch3 (counts as dc), dc in next 2 sts, *ch1, skip 1, dc in next 3* along long edge. Corners: work (3 dc, ch3, 3 dc) to allow wide turn (counts flexible)
Round 2 :
Change to deep rust. Ch1, sc in each st around, working 5 sc into the ch3 corner space to make corners smooth. This stabilizes the edge for the leaf repeats
Info :
Measure the number of dc groups across the long side to plan evenly spaced leaves. Aim for a leaf every 6-8 stitches depending on runner width
Round 3 :
Switch to mustard. For leaf base: *ch4, (sc in 2nd ch from hook, hdc in next, dc in next), ch2, sl st into the base space to anchor leaf*; repeat along long edges creating small leaf loops; in corners make 2 leaves close together
Round 4 :
Change to olive. Work a decorative picot and sc round: sc around anchoring each leaf base; in each ch2 leaf top work (sc, picot, sc) to lift and define leaves. This creates small layered leaves all around
Round 5 :
Change to rust-gold variegated (or alternate mustard/rust every other leaf). Work a leaf puff round: into each leaf top make a 5-loop puff stitch, ch1 between puffs. This creates bold scalloped leaves that sit off the runner (puff count equals number of leaves)
Info :
Work slowly around curves—corners often require extra leaves or smaller leaves to keep the scallop even. Use pins to position each leaf before stitching if needed
Round 6 :
With brown, add little stem tips between leaf bases: sl st to a base point, ch2, sl st back, fasten off. This small accent completes the autumn look
Round 7 :
Final pass: With cream, sc around entire runner through both loops to tidy the back of leaves and unify the edge. Weave in all ends to the WS
Info :
The leaf border can be scaled up by adding extra chains per leaf or increasing puff loops to make larger leaves; sample one leaf then edge the whole runner
— Final Finishing Rounds :
Round 1 :
Check all joins for loose tails; re-sew any pumpkin base stitches if required. Trim stray ends and weave through underside at least 5 cm to secure
Round 2 :
Block the runner lightly on a flat surface: pin into shape and mist with water or steam lightly; allow to dry to set leaf shape and flatten centers
Round 3 :
Optionally apply small bits of fabric glue to hold leaf points if you want them permanently stiffened. Allow to dry completely
Info :
For a reversible runner, use the same assembly method but hide pumpkin attachments with a sewn fabric backing instead of visible whip-stitching
Round 4 :
Final quality check: confirm pumpkins secure, leaves even, and runner lies flat. Your table runner is complete and ready to decorate
This rustic runner brings autumn to your table with handcrafted pumpkins and a leafy scallop edge. Every stitch layers texture and color for a cozy seasonal vibe. It’s a warm, heirloom-feeling piece that’s fun to make and lovely to display. 🧶🍁✨