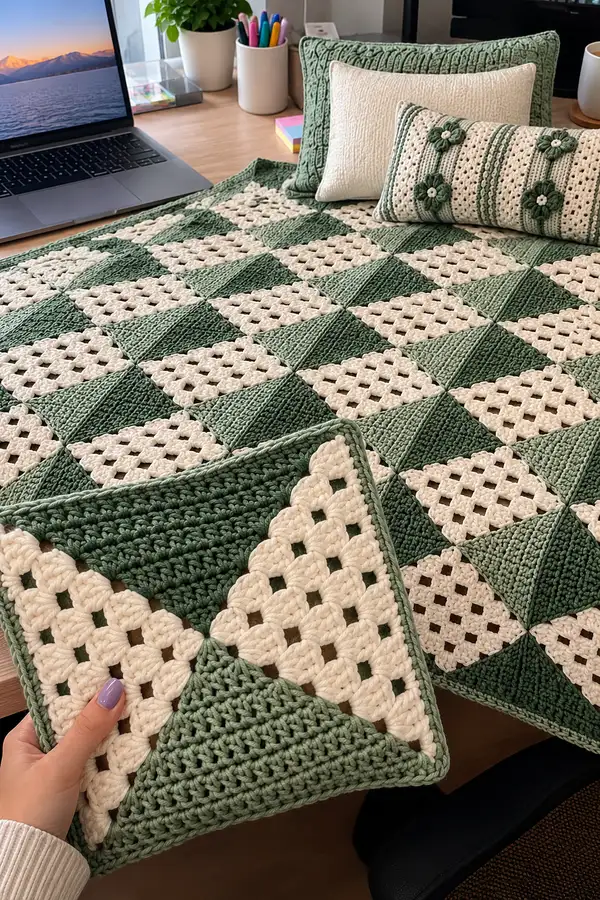
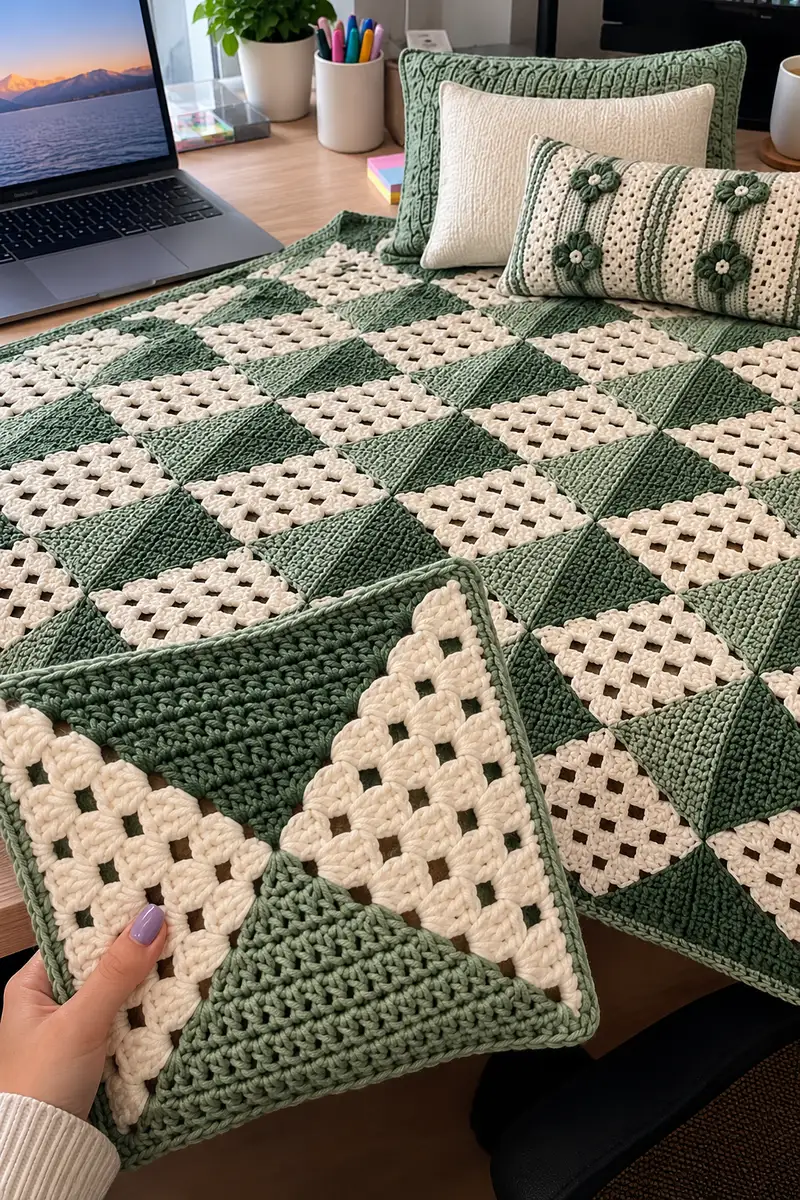
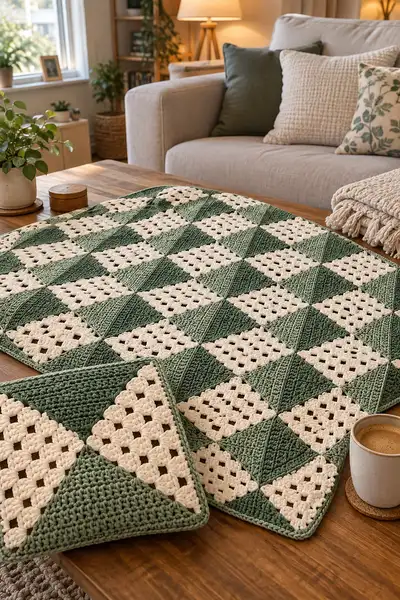
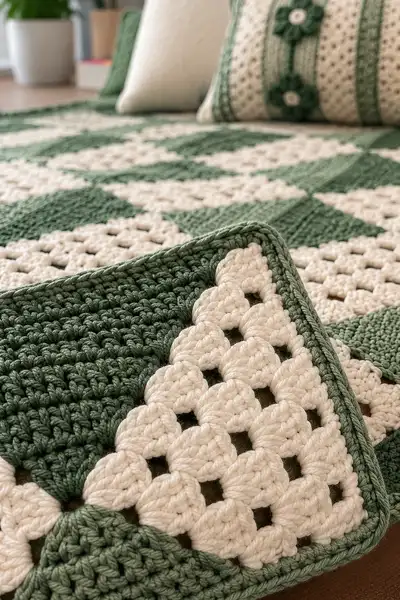
A modern, geometric bedspread made from alternating sage green and creamy white square motifs that form a striking diamond checkerboard. This pattern uses corner-to-corner (C2C) style granny clusters paired with solid triangular panels for a rich textured surface. Includes full instructions for making individual motifs, joining them, and a multi-round border to give a neat, finished edge.
Progress Tracker
0% Complete
— Notes & Gauge :
Info :
This pattern is written in US crochet terms. Gauge is measured as blocks for the C2C sections and rows for solid triangles. Using worsted weight (#4) yarn and a 5.0mm hook, one motif square (one green triangle + one cream triangle joined) measures approximately 6.75" to 7" across the finished square (measured flat). For the bedspread shown (approx. full/queen runner), lay out 9 squares x 11 squares for an overall size around 63" x 77". Adjust the number of squares for larger or smaller sizes.
Info :
Terminology: 'block' refers to one C2C block (a small square made of 3 dc cluster). In C2C, Row 1 = 1 block, Row 2 = 2 blocks, etc. When counting for matching size, count blocks along the longest diagonal of the triangle.
— Materials & Color Plan :
Info :
Color A (Cream) = granny C2C triangle; Color B (Sage Green) = solid C2C triangle or filled blocks. Optional Color C = second sage (deeper) used for alternating green squares. You will alternate squares so that each square is two triangular halves of different textures: one C2C granny triangle in Color A and one filled/solid C2C triangle in Color B (or Color C).
— Triangle Motif — Cream Granny C2C Triangle (Color A) :
Row 1 :
Make a slip knot. Ch 6, 3 dc in 4th ch from hook (counts as first block), turn to work into the chain. (1 block)
Row 2 :
Ch 6, turn, 3 dc into the turning ch-2 space of the previous block, ch 2, 3 dc into end turning ch-2 (2 blocks)
Row 3 :
Ch 6, turn, work 2 blocks across the row by placing (3 dc, ch2, 3 dc) into the end of previous cluster, then ch2 and 3 dc into the turning space; finish the row to have 3 blocks total (3 blocks)
Row 4 :
Repeat pattern, increasing by one block each row. Work into each turned block-end space: form a new block by (3 dc, ch2, 3 dc) into last block, then ch2 and 3 dc in next turning space, ending with the new block at the turning end. (4 blocks)
Row 5-12 :
Continue increasing 1 block each row until you reach 12 blocks on the final (outer) row. (Row N = N blocks; Row 12 = 12 blocks)
Info :
Make sure the outer edge of the triangle is straight by placing the final '3-dc cluster' in the outermost turning space. If your blocks flare out, work a tighter tension or use a slightly smaller hook for the C2C half.
Row 13 :
Fasten off leaving a long tail for joining (approx. 10-12" tail). Do not weave in yet; you will join this triangle to its partner triangle to make one square.
Info :
Total blocks along the final outer edge for this cream triangle should be 12 if you wish to match the solid triangle of 12 rows (adjust both halves accordingly for desired square size). Count the number of clusters on the longest edge and match the partner.
— Triangle Motif — Solid C2C Triangle (Dense/Green) (Color B) :
Row 1 :
Make a slip knot. Ch 6, work 3 dc in 4th ch from hook, ch 2, 3 dc in same turning ch-2 space to form the first full block if you want a slightly chunkier starting block, otherwise ch 6 and 3 dc as standard C2C (1 block)
Row 2 :
Ch 6, turn, 3 dc into turning ch-2, ch2, 3 dc into the outer turning ch-2 to form the second block across (2 blocks)
Row 3 :
Continue increasing one block per row as per C2C technique. For a dense solid appearance work each block as 3 dc (standard C2C block) and after completing the triangle you will work an additional finishing pass across the triangle in hdc to fill small holes.
Row 4-12 :
Work Rows until you have 12 blocks across the base (Row 12 = 12 blocks). This creates a triangle with the same dimensions as the Cream granny triangle but visually solid.
Info :
To achieve a completely filled surface without visible gaps between blocks, after Row 12 fasten off and rejoin Color B at the outer row. Work 1 round of hdc across the triangle: working along rows, place hdc evenly in the top loops of the clusters and down the slanted edge to smooth gaps. This will produce a denser surface more like the solid triangle seen in the photos.
Row 13 :
Rejoin Color B at the corner and work 1 round of hdc across the triangle rows (work 1 hdc in each block edge and 3 hdc into each horizontal block top), following the slanting rows until the triangle surface reads solid. Fasten off and leave a long tail for joining (approx. 10-12").
Info :
If using two green shades (sage + deeper sage), alternate which green is used for the filled triangle so your blanket shows subtle green variation as in the images.
— Making One Square (Join Two Triangles) :
Info :
Place the Cream Granny C2C triangle and the Solid C2C triangle right sides together so that the straight edges align to make a square. The joined seam will be the diagonal seam seen in photos. You will have two right-angled corners that meet to form one square block.
Step 1 :
Align triangles so that the long outer edges form the outer edges of the square and the two hypotenuse sides meet on the inside. Use pins to hold the two edges together, checking that block counts match along the seam (12 block-row counts must align).
Step 2 :
Sew the seam using a whip stitch or mattress stitch, working through the back loops of the last row of blocks for an invisible join. Use the long tail from one triangle for the seam and sew with tidy, evenly spaced stitches. Stop and adjust if the seam pulls or puckers.
Info :
When joining multiple seams later, bury the seam tail inside the square and leave the outer edge neat. If you prefer a visible seam, join with continuous single crochet along the seam from the right side, working into both triangle edges.
Step 3 :
Weave in the joining tail along the seam. Block the square lightly so that both halves sit flat; pin to a square blocking mat and steam or wet-block following yarn manufacturer instructions.
— Square Finishing Round (Make Outer Edge Clean) :
Round 1 :
With RS facing, join Color B at any outer corner. Ch1, work 1 sc evenly along the entire outer edges of the square (around all 4 sides) placing approx. one sc per block edge or top stitch (estimate 28-30 sc per side depending on exact block count). Work 1 sc in each sc along edges and 3 sc in each corner to maintain square shape. (Approx. 112-124 sc total depending on exact block counts)
Info :
Work tightly at corners (3 sc) to keep corners from curling. This round creates the uniform border that makes joining consistent later.
Round 2 :
1 sc in each st around. Slip stitch to join. Fasten off and weave ends. Your finished square should measure 6.75"-7" depending on blocking and tension.
Info :
Repeat the above to make the number of squares required: e.g., 9 wide x 11 long = 99 squares total. If you make 99 squares, you will have roughly 50 cream-granny + green-solid combinations; plan colors so that squares alternate to form the checkerboard diagonal design.
— Layout & Planning :
Info :
Lay out your squares on a large flat surface in a diagonal (on-point) configuration. The pattern in the photos alternates full cream-granny squares with full green-solid squares so diamonds of cream sit across the piece. Use pins to keep position before joining. For symmetry, place darker greens at intervals to echo the photo's two-tone green appearance.
— Joining Squares — Mattress Stitch Join (Invisible Join) :
Info :
Joining squares by mattress stitch on the WS keeps the RS uninterrupted. Use a length of matching yarn (Color B for green joins; Color A for cream-to-cream joins, or choose a neutral join color to match the photo where joins appear subtle in green).
Step 1 :
Start with two adjacent squares that form a seam. Place RS facing out and align edges. Thread yarn needle with 20-24" tail of worsted yarn. From the WS, insert needle under the edge loops of the first square (one side), then directly across into the matching loops of the second square. Pull gently but do not over-tighten; close seam until edges lie flat.
Step 2 :
Work a continuous mattress stitch along the seam. At the end of the seam, weave tail into the seam interior and trim. Join the next adjoining edge in the same manner. Join squares row-by-row or column-by-column until entire bedspread is assembled.
Info :
For a sturdier join, whipstitch the seam 2 or 3 times at the corners where stress is highest on the finished blanket. Alternatively, you may slip-stitch join from RS for a decorative ridge if you prefer visible seam lines.
— Alternate Join Method — Continuous Single Crochet Join (Decorative) :
Info :
If you want the small raised ridge between squares shown subtly in the photos, you can join rows of squares with continuous sc from RS. Join yarn at a corner, sc through both loops of each corresponding sc along the neighboring square edges.
Round 1 :
With RS facing, join yarn at a corner of the first square. Sc through both square edges across seam to join, place 2 sc in corners. Repeat joining for each seam across rows.
Info :
Continuous sc join will add slight height to seams and reads as a ribbed seam in the photo. Choose this method for a more visible grid; choose mattress stitch for a flatter look.
— After All Squares Are Joined — Flattening & Blocking :
Info :
After joining all squares, pin the whole bedspread to blocking mats and steam or wet-block to flatten and align squares and seams. This step ensures the diagonal pattern reads cleanly and encourages corners to sit properly for the border rounds.
— Border & Edging (Multi-Round) :
Round 1 :
With RS facing and Color B (sage), join at any corner and work 1 sc evenly around the entire outer edge of the assembled blanket. Work 3 sc in each corner. The purpose of this round is to create a uniform base for the subsequent decorative rounds. (Stitch counts will depend on the size of your assembled blanket; measure and place sc approx. 1 sc per 5 mm of edge.)
Info :
Keep stitches even and not too tight to avoid the border pulling the blanket edges in. If your joined blanket is very large, work with longer yarn tails or join a new ball at an edge to avoid changing tension mid-round.
Round 2 :
Ch2 (counts as hdc), hdc in same st, 1 hdc in each st around. At corners: 2 hdc, ch2, 2 hdc in corner st to keep border flat. Slip stitch to join. (This forms a cushioned but flat foundation row)
Round 3 :
Change to Color A (cream) for a small contrast ridge if you want the slightly two-toned frame seen in some photos. Ch1, sc in each st around, placing 3 sc in each corner. Sl st to join and fasten off Color A if used.
Info :
This small cream ridge is optional and adds a classic look similar to the photo where cream triangles repeat into the border. If you prefer an all-green border, skip this round.
Round 4 :
Rejoin Color B. Ch3 (counts as dc), *dc in next 3 sts, ch1, skip 1 st* repeat across edge to create a decorative textured band. At corners work (dc, ch1, dc) into corner sts. Sl st to join.
Info :
This band creates a series of shallow ridges echoing the diagonal rows of the blanket. Keep your stitch count even across each side so corner shaping is symmetrical.
Round 5 :
Ch2, hdc in each st around, working 3 hdc in corners to square the blanket. Sl st to join.
Round 6 :
For a neat rounded corner finish, work 1 sc in each st around in Color B, but at corners work (sc, ch2, sc) to give a gentle curve. Slip stitch to join and fasten off. Weave in ends.
Info :
You can add 1-2 more rounds of surface slip-stitch ridges or single crochet rounds to increase the border width to match the scale of your bed and personal taste. Many crocheters add up to 8 total edging rounds for a substantial framed look.
— Optional Corner & Pillow Treatments :
Info :
To recreate the matching pillow shown, make a rectangular panel 6 squares wide x 2 squares tall (or desired pillow size), join similarly, then add a sweet row of crocheted flowers sewn to the front. Flower pattern: with Color B, make ch4, join to form ring, (ch2, 3 dc) x 5 for petals, fasten off and sew to pillow front. Add a small cream button center.
Round 1 :
For the pillow back, make a second panel the same size; sew around three sides leaving the top open for a pillow insert or envelope closure.
Info :
Pillow edges can be edged with 2 rounds of hdc to match the blanket border for a cohesive look.
— Finishing & Care :
Info :
Weave in any remaining ends with a yarn needle. Snap a final steam block or gentle wet-block to even up edges and flatten seams. For washing, follow yarn manufacturer's care: generally gentle machine wash cold on delicate and dry flat, or hand wash and reshape while damp. Avoid high heat drying to prevent stretching.
Tip :
If your blanket has variations in square heights, add an extra sc round on the shorter sides to balance measurements before final blocking. Take your time—blocking and finishing transform the piece from handmade to professional.
Completing this Sage Green Geometric Bedspread is a deeply satisfying project—each joined square becomes part of a calm, botanical composition that livens any bed or sofa. The combination of classic granny texture with dense solid panels creates a beautiful tactile contrast, and the finished border ties everything together. 🧶 Take your time, enjoy the repetitive meditative rhythm of C2C blocks, and celebrate the finished piece—it's a cozy heirloom you'll love to display. 🌿✨