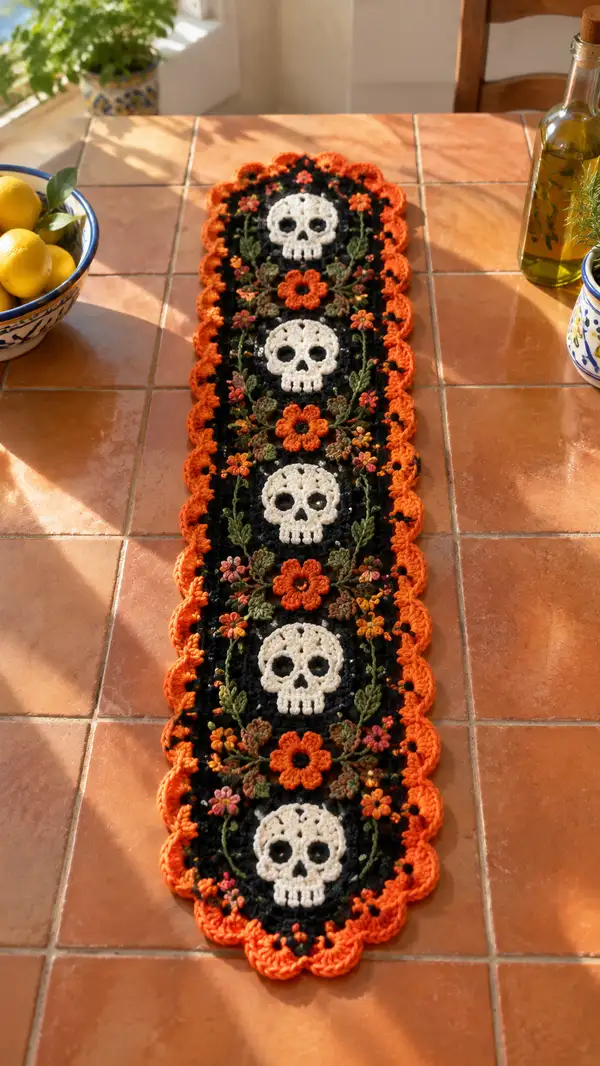
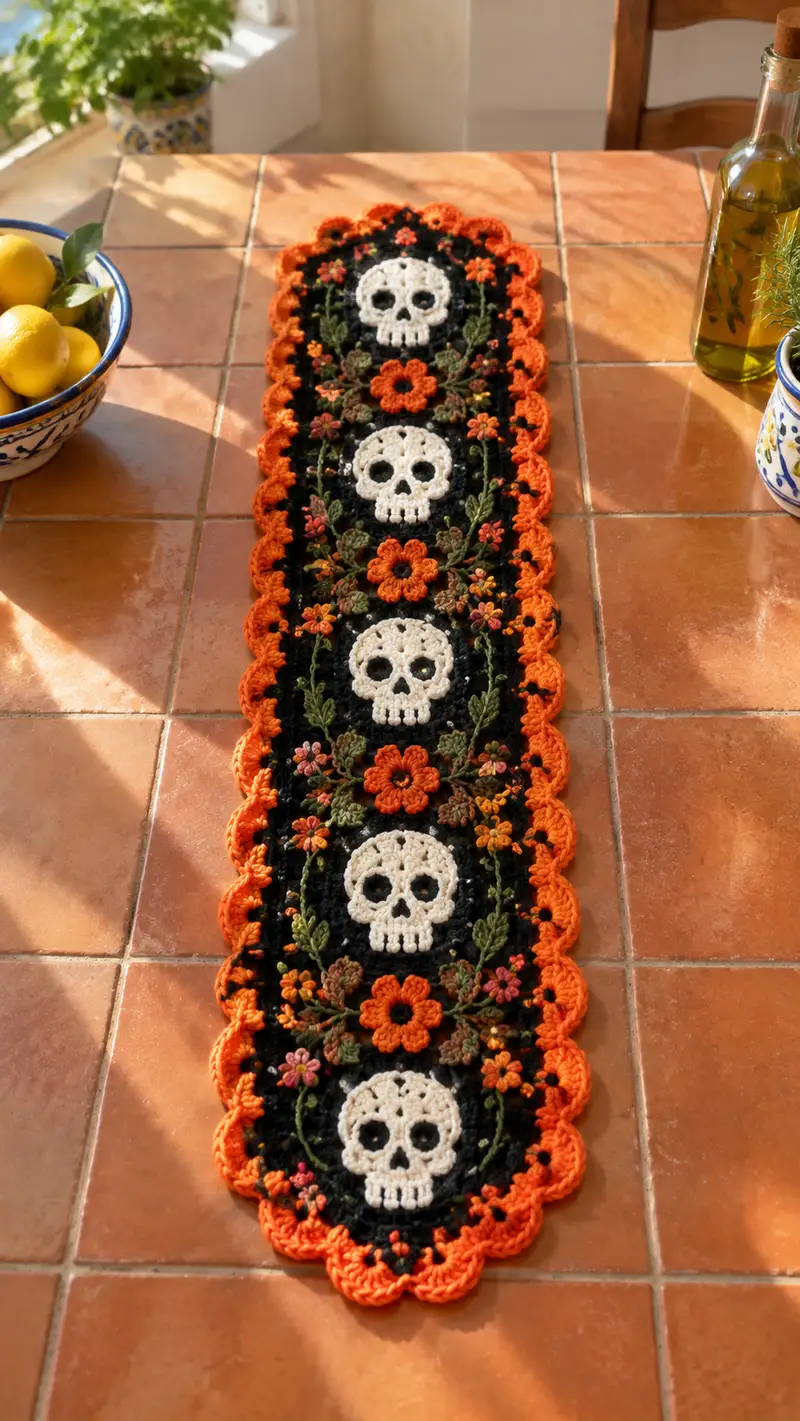
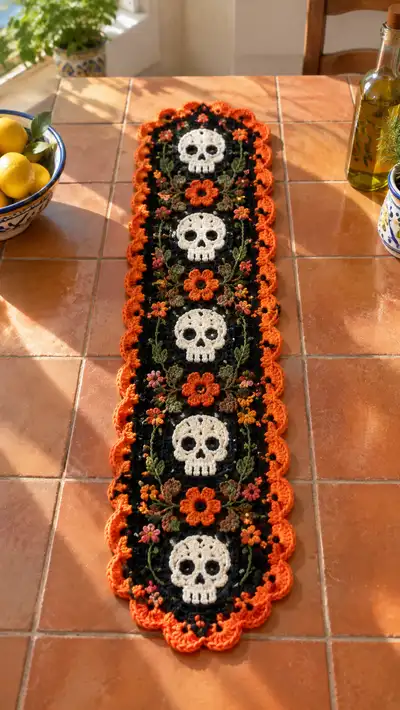
A striking Halloween-inspired table runner featuring repeated cream skull medallions framed on a deep black background, accented by warm orange scallops and embroidered green vines with tiny floral buds. This long, narrow runner is made from joined circular motifs and layered appliques for a richly textured, heirloom-style finish. Perfect as a festive farmhouse centerpiece or a year-round gothic accent, the pattern includes detailed motif construction, embroidery steps and a scalloped border.
Progress Tracker
0% Complete
— Skull Motif (make 4) :
Info :
Use cream/off-white yarn. The skull is worked in continuous rounds from a magic ring; do NOT join rounds unless noted. Place a stitch marker at the first stitch and move it each round. Tight tension gives dense fabric and well-defined eye cavities.
Round 1 :
6 sc in magic ring (6)
Round 3 :
(1 sc, inc) x 6 (18)
Round 4 :
(2 sc, inc) x 6 (24)
Round 5 :
(3 sc, inc) x 6 (30)
Round 6 :
(4 sc, inc) x 6 (36)
Round 7 :
(5 sc, inc) x 6 (42)
Round 8 :
(6 sc, inc) x 6 (48)
Info :
Rounds 1-8 form a circular disk base for the skull. From Round 9 we will begin flattening and shaping the top of skull and creating space for eye sockets. Keep a stitch marker to denote round start.
Round 9 :
1 sc in each st (48)
Round 10 :
1 sc in each st (48)
Round 11 :
(5 sc, dec) x 6 (42)
Info :
Begin eye placement: mark the positions for eye sockets on Round 12. Count roughly 10-12 sts across for each eye gap with a spaced center separation of 6-8 sts, depending on your gauge. The instructions below create circular negative space for eyes.
Round 12 :
Work as follows to create two eye sockets: *Sc in next 4 sts, ch 4, skip 4 sts,* rep across to form two ch-4 eyeholes; finish with sc in remaining sts to total (42). If your gauge creates a different count for holes, adjust ch-3 or ch-5 for desired hole size.
Round 13 :
Sc around the entire round working 4 sc into each ch-4 eyehole to create a reinforced eye ring, and sc in each other st (42 + 8 from holes = 50). (After this round you should have approximately 50 visible stitches including hole reinforcements.)
Info :
If you prefer inset black eye circles, work two small 6-sc black rounds separately and sew into the ch-4 holes later. Alternatively, embroider black centers after joining to background.
Round 14 :
(4 sc, dec) x 10 (40)
Round 15 :
1 sc in each st (40)
Round 16 :
(3 sc, dec) x 8 (32)
Round 17 :
(2 sc, dec) x 8 (24)
Info :
Rounds 16-17 shape the lower skull and begin the jaw area. From Round 18 we will build the chin and teeth; the front teeth are created with short post clusters for texture.
Round 18 :
(1 sc, dec) x 8 (16)
Round 19 :
1 sc in each st (16)
Round 20 :
Join to front center and work jaw row: ch1, sc in next 3 sts, work a small cluster row of 5 sc in the next 5 sts to simulate the top row of teeth, sc in next 3 sts, sc evenly around remaining sts (16)
Info :
To accentuate teeth, use a slightly tighter tension on the cluster row. If you want pronounced teeth, pull up post stitches (FPdc) behind the cluster row for depth.
Round 21 :
1 sc in each st (16)
Round 22 :
(1 sc, inc) x 8 (24)
Round 23 :
(2 sc, inc) x 8 (32)
Info :
Rounds 22-23 bring the skull back to a flatter disk so it sits well on the black medallion. Fasten off leaving a long tail for sewing. Weave a neat invisible join on the reverse later.
Round 24 :
Optional edging round: Join with sl st and work 1 sc in each st around working 2 sc in corner spaces where the skull will overlap medallion edge if necessary (32)
Info :
Make two small black insert rounds for eye centers if desired: Using black yarn, make mr, 6 sc (6); sl st to first and fasten off leaving tail to sew in. Sew black eye rounds into ch-4 holes from Round 12 and secure.
Info :
Optional: Add tiny nostril carving by embroidering two small vertical satin stitch dots between the eyes using brown or black yarn. This adds depth without bulk.
— Medallion Background (black) (make 4) :
Info :
These rounds create the black oval/round that frames each skull. Work in black yarn beginning from a magic ring, then join skull motif on top using slip stitch or whip stitch. Aim for a slightly raised background to cradle the skull.
Round 3 :
(1 sc, inc) x 6 (18)
Round 4 :
(2 sc, inc) x 6 (24)
Round 5 :
(3 sc, inc) x 6 (30)
Round 6 :
(4 sc, inc) x 6 (36)
Round 7 :
1 sc in each st (36)
Round 8 :
(5 sc, inc) x 6 (42)
Round 9 :
1 sc in each st (42)
Round 10 :
(6 sc, inc) x 6 (48)
Round 11-12 :
1 sc in each st (48)
Info :
Round 12 gives adequate surface for sewing the skull on. Position the skull in the center and baste with contrasting yarn to hold while you work the final rounds. Make sure skull sits centered front to back.
Round 13 :
1 sc around with a slight picot accent every 6 sts: *5 sc, picot (ch3, sl st to first ch),* rep (48)
Round 14 :
1 sc in each st (48)
Round 15 :
Change to olive green for leaf vine anchor row (Info below)
Info :
Before Round 15, attach olive/green for vine stems: we'll use surface slip stitch and short chains to create arches from medallion to medallion. Do not cut black yarn; carry it if you prefer or fasten off and later weave ends.
Round 16 :
Fasten off leaving long tail for joining to neighboring medallions (48)
— Large Flower Applique (orange) (make 4 between medallions) :
Info :
Large 6-petal flower sits centered between medallions. Work in orange. These are flat appliques sewn on later. Use a slightly larger hook for fluffier petals if preferred.
Round 1 :
mr, ch2 (counts as hdc), 10 hdc into ring, sl st to top of ch2 (11 hdc total including ch2) - fasten ring (11)
Round 2 :
*Ch3, sl st into next st* x 11 to create 11 loops around; join (11 loops)
Round 3 :
For each loop work petal: (2 dc, tr, 2 dc) into loop, sl st to next loop (6 petals formed if you group loops two at a time; adjust grouping for 6 even petals)
Round 4 :
Sc around petal bases to tidy, sl st and fasten off leaving tail for sewing
Info :
Block petals flat before sewing to make a neat arrangement. You can add a small brown or mustard center: mr, 6 sc, sl st, fasten off and sew to center.
— Small Flower Appliques & Buds (make many) :
Round 1 :
mr, 6 sc, sl st to first sc, fasten off leaving tail for sewing (6)
Round 2 :
Join contrasting color, ch3, and in each st around: (ch2, sl st) to create tiny petals; finish and fasten (6 tiny petals)
Info :
Make 8-12 small flowers per medallion cluster in mixed pink, rust and mustard. These are sewn in clusters around the large flower and skull to give a wildflower look.
— Leaves (crocheted appliques) (make 12-16 per medallion) :
Round 1 :
ch6; sc in 2nd ch from hook, hdc in next, dc in next 2, hdc in next; turn to work on other side of foundation ch: hdc, dc, dc, hdc, sc (total 9 sts) - fasten off leaving long tail to sew (leaf)
Info :
Work leaves in two shades of green for depth. Slightly block or steam-press flat. Sew leaves with tails and position to create mirrored vines between medallions.
— Embroidered Vines & Surface Stems :
Info :
Using olive yarn and a tapestry needle or small crochet hook, embroider vines connecting medallions. Use surface slip stitch, chain stitch and detached chain loops to create stems. Work vines before attaching delicate small flowers to ensure placement.
Step 1 :
From the lower edge of one medallion, insert yarn on the reverse and bring out at the location you want a stem root. Surface slip stitch along a gentle curve toward the adjacent medallion, creating a vine-length of approximately 20-28 sts depending on spacing.
Step 2 :
At points along the vine, attach small leaves by sewing leaf appliques with whip stitch through the vine and leaf tail. Add tiny bud French knots or small knotted picots in rust/pink for interest.
Info :
Vines should be symmetrical along the runner. Use pins to mark mirror points then embroider while the runner is flat to get uniformity.
— Joining Medallions into Runner Strip :
Info :
Layout medallions and large flowers on a flat surface. The pictured runner uses four skull medallions arranged end-to-end with large orange flower appliques between them and small flowers/leaves filling gaps. You will join medallions using slip stitch joins and ch-bridge stitches to form a sturdy but slightly lacy join allowing embroidery access.
Round 1 :
With black yarn working along one medallion edge, join to edge st and work *sc 3, ch5, skip 3 sts, sc 3* across to create evenly spaced bridge loops (approx 12 bridges per side depending on medallion size)
Round 2 :
Place next medallion adjacent and using the ch-5 loops, slip stitch through corresponding loops on both motifs to join: sl st in ch-5 loop of first medallion, sl st in ch-5 loop of second medallion; rep across. This creates an airy but secure connection.
Info :
If you prefer a fully solid join, use single crochet across both motifs without ch-bridges, working through corresponding stitches of both motifs (seam will be denser).
Round 3 :
After joining medallions into a strip, work a narrow connecting panel: with black yarn, sc evenly across the exposed join rows to tidy edges, finishing with a row of 1 sc in each st around the whole runner strip to prepare for border (width will remain approximately the medallion diameter).
— Border & Scallop (orange) :
Info :
The scalloped orange border defines the runner edges. Work with bright orange yarn; this border consists of a foundation round in black to unify edges and 3 subsequent orange rounds to create deep scallops. Make sure runner is blocked flat before starting border to avoid rippling.
Round 1 :
With black yarn, join at any edge st and work 1 sc in each st around the entire runner strip, placing 3 sc in each join corner or gap to maintain even count (approx total stitches will depend on length; work evenly). Fasten off black yarn.
Round 2 :
Join orange in back loop only (BLO) to create a defined ridge: 1 sc in each st BLO around (same st count as previous), join with sl st. This BLO round creates a ridge helping scallops sit neatly (same count)
Round 3 :
*Sc in next 2 sts, ch3, 5 dc in next st (scallop shell), ch3, sc in next 2 sts, sl st in next st* repeat around to form scallops. Count shells to ensure even spacing. If your stitch count doesn't yield whole shells, adjust by adding or subtracting small groups of sc before starting.
Round 4 :
Work a finishing round of scallop reinforcement: *In each 5-dc shell work (sl st, ch1, 3 dc) into center dc to create a raised cluster. Between shells, 1 sc in sc spaces to tidy.* Fasten off and weave in ends thoroughly on reverse.
Info :
Pin the runner to blocking board following scallop shapes, spray lightly with water and allow to dry thoroughly. This fixes scallops open and keeps runner flat.
— Final Embellishment & Tiny Details :
Step 1 :
Sew skull motifs to black medallions using whip stitch through the Round 24 tail and Round 12 of the black medallion. Use small stitches so seam is not visible from front.
Step 2 :
Sew large orange flowers centered between each pair of skull medallions. Reinforce with a few hidden stitches to prevent flop. Sew small flower clusters and leaves around each medallion using the layout in the photo as your guide.
Info :
For tiny buds and accent dots, use embroidery knots (French knots) in contrasting colors (rust, pink, mustard) along vine stems. Keep knots small; use two wraps for small buds and three for slightly larger buds.
Step 3 :
Weave in all ends on the reverse using a tapestry needle. Emphasize secure knots and bury tails into the reverse fabric so the front remains clean.
Info :
If you want more dimensional flowers, layer a small 6-sc center on top of the large petal flower and tack in place with a few stitches through the center only.
— Optional: Extend Length or Make Smaller Runner :
Info :
This pattern shows a runner with four skull medallions. To lengthen, make additional medallions and join with the same ch-bridge method. To shorten, make fewer medallions. Recalculate border stitches as needed to keep scallops even.
Finishing :
Block the entire runner by pinning scallops into shape; lightly steam or mist with water and let dry. Trim stray fibers and press if required with a cloth between iron and crocheted piece for a flat finish.
Info :
Label and store the runner flat or rolled to prevent scallop distortion. Avoid folding along scallop edges to maintain shape.
This skull & flowers table runner blends bold graphics with delicate floral detail to create a unique centerpiece you'll be proud to display. The modular design makes it easy to customize length or colorways, and the layered appliques give lively texture and charm. Every stitch adds personality — enjoy the creative process and the warm, handmade result! 🧶🎃