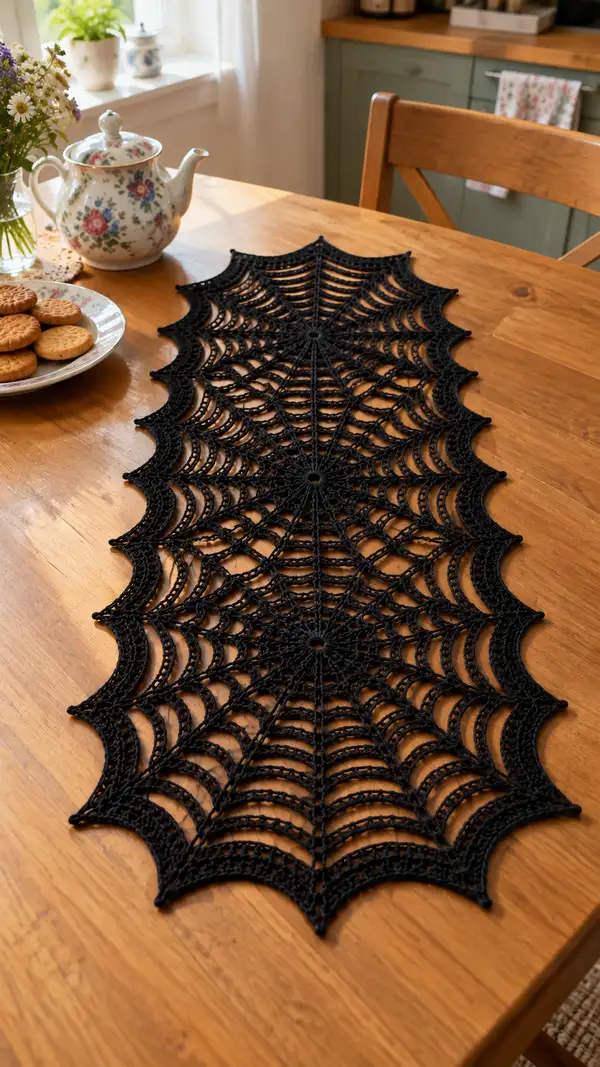
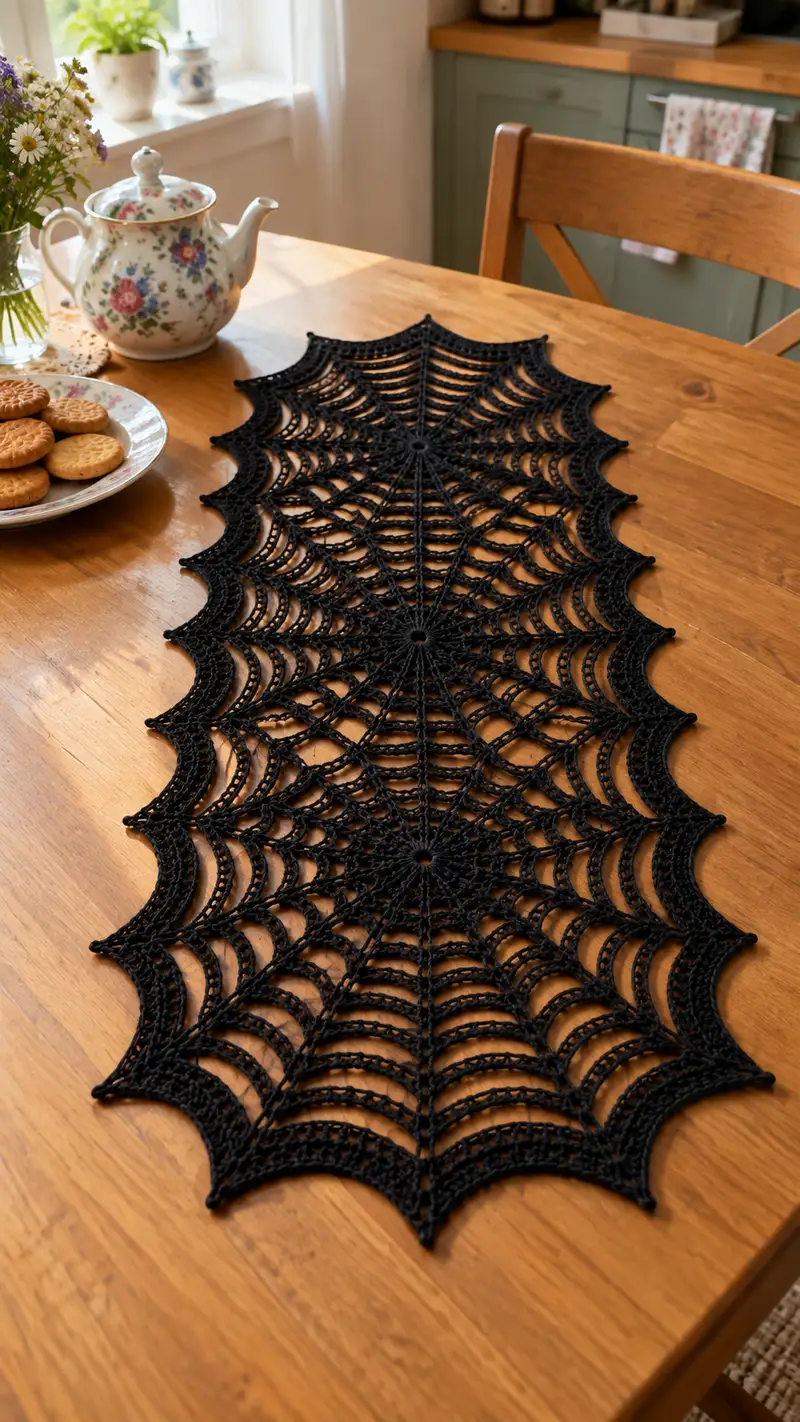
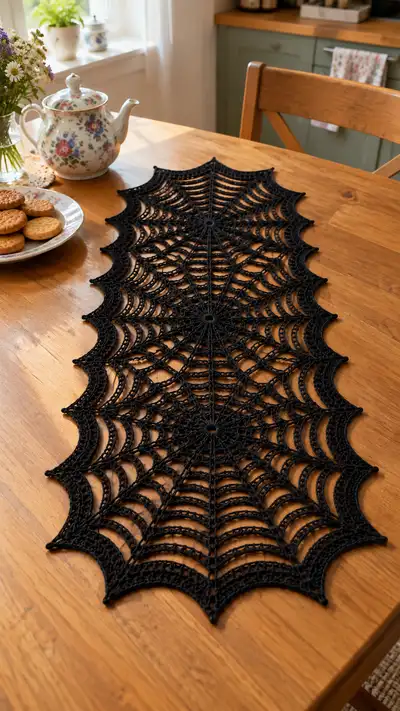
This elegant spiderweb table runner is a long, lacy centerpiece designed to bring moody, vintage charm to your table. Worked in deep black crochet thread, it features three connected circular web motifs with radiating spokes and scalloped edges. The openwork arches and picot points create a dramatic Halloween-ready runner or year-round gothic accent.
Progress Tracker
0% Complete
— Notes & Gauge :
Info :
This runner is built from three identical circular spiderweb motifs joined as you go. Work each motif separately or join on the final rounds. Gauge is not critical for lace; however a 1.75 mm hook with size 10 thread will produce a runner approximately 36-42 inches long when making three motifs joined as directed. Blocking will significantly increase final width and crispness. Each motif is constructed in 12 repeating segments (12 spokes) — keep this base in mind when counting repeats.
— Center Wheel (make 3 motifs) :
Round 1 :
Make a magic ring. Ch3 (counts as dc), work 11 dc into ring. Join with sl st to top of starting ch3. (12 dc)
Round 2 :
Ch1, sc in same st, *ch5, sk1 dc, sc in next dc; rep from * around to make 12 ch5 loops. Join with sl st to first sc. (12 sc and 12 ch5 loops)
Info :
Round 2 establishes 12 spokes by creating 12 chain loops. These loops are the anchor points for shells and spokes in later rounds—count them to ensure you have exactly 12.
Round 3 :
Sl st into first ch5 loop, ch3 (counts as dc), 7 dc in same ch5 loop, sl st to center of loop to form solid petal; *sl st into next ch5 loop, ch3, 7 dc in loop, sl st to center of that loop; rep from * around. (12 petals; each petal = 8 dc cluster)
Round 4 :
Ch1, sc into the top of the first petal (between petals), *ch7, sc between next two petals; rep from * around making 12 ch7 arches. Join with sl st to first sc. (12 ch7 arches)
Info :
These chain arches begin the openwork of the web. Keep chains even and relaxed, not pulled tight, to allow arches to curve gracefully when blocked.
Round 5 :
Sl st into first ch7 arch, ch3 (counts dc), 11 dc in same ch7 arch, sl st to opposite side of arch to anchor; *sl st into next ch7 arch, ch3, 11 dc in arch, sl st to opposite side; rep from * around. (12 shell clusters; each shell = 12 dc plus joining sl sts)
Round 6 :
Ch1, sc in top of first shell, *ch9, sc between next shells; rep from * around to make 12 ch9 arches. Join with sl st to first sc. (12 ch9 arches)
Info :
Rounds 4-6 set up a repeating growth pattern: solid petal, chain arch, shell, larger chain arch. This alternation creates the layered look of a spiderweb. Count arches and shells before moving on.
Round 7 :
Into each ch9 arch: (sl st, ch3, 15 dc, ch3, sl st) across the arch to form a deep fan. Sew or join at ends to the base so you have 12 large fans. (12 fans; each fan contains 15 dc)
Round 8 :
Ch1, sc into top of fan base, *ch11, sc between fans; rep from * around to make 12 ch11 arches. Join with sl st to first sc. (12 ch11 arches)
Info :
If you are joining motifs as-you-go, leave a long tail at the end of this round to join to the adjacent motif center later (instructions included in joining section). If working motifs separately, weave in ends later before blocking.
Round 9 :
Into each ch11 arch: join with sl st, ch3, 19 dc, ch3, sl st. Anchor each fan to its opposite side to create a pronounced layered petal. (12 fans; each fan contains 19 dc)
Round 10 :
Ch1, sc into top of each fan base, *ch13, sc between fan bases; rep from * around forming 12 ch13 arches. Join with sl st to first sc. (12 ch13 arches)
Info :
From this round onward you are shaping the inner web spokes: the tall arches will be connected in later rounds with chains that form the web 'rings'. Keep the twelve-segment repeat consistent.
Round 11 :
Sl st into first ch13 arch, ch3, 23 dc in arch, ch3, sl st; *rep into next ch13 arch; rep from * around. (12 fans; each fan 23 dc)
Round 12 :
Ch1, sc into top of first fan base, *ch3, sk next 11 dc of fan, sc into center of fan base (this creates small link chains over fans); rep around forming 12 link chains of ch3 between fan centers. Join with sl st. (12 ch3 link chains)
Info :
Round 12 simplifies the surface to create spaces between fan layers. These short ch3 bridges will anchor the inner web lines (spokes) later when you work long dc chains between motif centers.
— Radiating Spokes & Inner Web Rows :
Round 13 :
Working into each of the 12 link positions from Round 12: ch1, sc; *ch7, sc into next link; rep from * around to create 12 ch7 spokes anchored at inner fan bases. Join with sl st. (12 ch7 spokes)
Round 14 :
Sl st into first ch7, ch3, dc2tog over next 2 chs to establish a short raised line, then ch9 and sl st to the center top of the closest petal to begin the radial line; *rep this pattern into each ch7 to produce 12 raised staple spokes. Join with sl st.
Info :
The goal of rounds 13-16 is to create visible radial spokes that will later be linked across motifs. Work neat, even chains so the lines are consistent in tension and length.
Round 15 :
Ch1, sc around the top of each spoke start, *ch15, sc around next spoke top; rep from * around to create 12 ch15 loops that sit above the fans. Join with sl st. (12 ch15 loops)
Round 16 :
Into each ch15 loop: sl st, ch3, 7 dc, ch3, sl st; anchor to create small elevated arches that hint at web rings. (12 small arches; each 7 dc)
Info :
These small arches create the inner web rings and serve as an intermediary stage before the wide open arches of the outer web. Keep counts consistent: 12 repeats per round.
Round 17 :
Ch1, sc between each small arch, *ch19, sc between next arch; rep around to form 12 ch19 arches. Join with sl st. (12 ch19 arches)
Round 18 :
Sl st into ch19 arch, ch3, 11 dc, ch3, sl st into opposite side of arch; *rep around building 12 medium fans (11 dc each). Join.
Round 19 :
Ch1, sc in top of each medium fan base, *ch21, sc between fans; rep around creating larger ch21 arches. Join with sl st. (12 ch21 arches)
Info :
Rounds 17-19 set up the open web field—the ch19 and ch21 arches will be bridged in subsequent rounds with chains to form the 'web rings' that visually span the motif from center to outer edge.
Round 20 :
Into each ch21 arch: sl st, ch3, 15 dc, ch3, sl st. Anchor to create full fans that will visually form the inner ring. (12 fans; each fan 15 dc)
Round 21 :
Ch1, sc between fans, *ch23, sc between next fans; rep around to create 12 ch23 arches. Join. (12 ch23 arches)
Info :
At this stage the motif is growing outward quickly. Check that the twelve-segment repeat is still consistent—12 fans, 12 arches—and adjust if any mistakes occurred earlier.
Round 22 :
Sl st into first ch23 arch, ch3, 19 dc, ch3, sl st; *rep into each ch23 arch around to form 12 large fans (19 dc each). Join. (12 fans)
Round 23 :
Ch1, sc between fans, *ch25, sc between next fans; rep around forming 12 ch25 arches. Join with sl st. (12 ch25 arches)
Round 24 :
Into each ch25 arch: sl st, ch3, 23 dc, ch3, sl st. Anchor to create deep outer fans. (12 fans; each 23 dc)
Info :
Rounds 20-24 continue building the layered fans that create the web look. Keep tension even and count repeats frequently. If your fabric begins to ripple, you may need a slightly smaller hook for the next rounds to keep arches crisp.
— Inter-motif Connections (joining 3 motifs) :
Info :
You can choose to work each motif fully and then join them, or join on the outer rounds as you create the second and third motifs. The layout uses three motifs joined along two long sides by linking spoke tops and chain-arch centers. Instructions below assume you will join motifs on Round 30-36 of each motif to create a long runner: motif A (left), motif B (center), motif C (right).
Round 25 :
Ch1, sc around fan tops to stabilize; work 1 sc in each dc across the fan tops and in the sl st anchors from previous rounds ensuring the fan tops are reinforced. Join. (This is a stabilizing round; counts vary by fan size but maintain 12 repeat anchors)
Round 26 :
Ch1, *sc in next 5 sts, ch3, sc in next st; rep from * around. This creates small link points at regular intervals around the motif to accept joining stitches later. Join. (12 ch3 link points)
Info :
Leave long tails if you plan to sew motifs together instead of crocheting them joined—about 18-24 inches per joining site. When joining motifs by crocheting, you will insert sl sts through paired link points on adjacent motifs to create neat seams.
Round 27 :
Slip stitch around the outer fan rims to smooth any uneven edges, then fasten off leaving a long tail if you will join to the next motif. If working motifs separately, fasten off and weave in ends now. Repeat Rounds 1-27 for motifs B and C (or continue onto motif B and join on the spot following join method described next).
Join Method A (Crochet Join) :
When the second motif reaches Round 26 and you have matching ch3 link points aligned with motif A, place motifs wrong side to wrong side and join by sl st through link points across the seam: sl st in motif A link, then sl st in motif B link; rep across seam for each paired link point. Fasten off and weave in tail. Repeat to join motif C to motif B.
Join Method B (Sewing) :
Align motifs RS up, pin link points together, use tapestry needle and matching thread to sew a whip or mattress stitch through paired link points. Tie secure knot and weave ends. Both methods produce a flat, secure join when pins are used to hold alignment before final fastening.
Info :
When joining three motifs, ensure that the center motif (B) is anchored to motif A and motif C at identical positions so the runner lays flat. Pin a long seam across the length and compare both sides visually before final joining.
— Outer Web Rows (after joining motifs, rounds 28-90 across full runner) :
Info :
Once motifs are joined, the long runner needs additional rounds that span across the three centers to create continuous arches and elongated radial spokes. The following rounds operate on the full joined piece; counts are expressed per segment of 12 repeats across each motif and also across the whole runner when linking motifs.
Round 28 :
Attach yarn at any outer fan base. Ch1, sc in next st, *ch27, sk large fan, sc in next fan base to create 12 ch27 arches around the full runner edge of each motif; rep around each motif and across joined seams. Join. (12 ch27 arches per motif)
Round 29 :
Into each ch27 arch: sl st, ch3, 27 dc, ch3, sl st to opposite anchor point to create very deep fans. Work evenly around every motif and across joins so the fans butt neatly into each other along motif seams. (12 fans per motif; each fan 27 dc)
Info :
These very deep outer fans shape the long, elongated appearance of the runner. Check that fans along seams match gauge and shape of neighboring motif fans; if needed, reduce/increase dc in seam fans by 1-2 dc to match tension and prevent gaps.
Round 30 :
Ch1, sc around the back of each fan to reinforce base, *ch3, sc into base between big fans; rep around to create evenly spaced small ch3 connectors. Join. (12 connectors per motif)
Round 31 :
Working around the runner, *ch29, sc into base between fans; rep to create 12 long ch29 arches per motif that will produce the long arcs seen in the runner photograph. Join and fasten off; trim tail leaving long tail if you intend to stitch extra reinforcement later. (12 ch29 arches per motif)
Info :
Rounds 28-31 expand the motif outward and create the elongated ladder-like arcs visible in the runner. If you prefer a denser web, you may convert some of these arches into shorter ch lengths by subtracting 4 chains per arch and adding 1-2 dc more inside the arches to maintain width.
Round 32 :
Into each ch29 arch: sl st, ch3, 17 dc, ch3, sl st; *rep around across each motif and seam to form medium fans along the long arc. Join. (12 fans per motif; each 17 dc)
Round 33 :
Ch1, sc between fans, *ch11, sc between next fans; rep to create 12 ch11 link arches per motif. Join. (12 ch11)
Info :
These rounds create repeating layered rows of chain arches and fans that visually resemble the concentric rings of a spider web. The alternation of larger and smaller arches makes the openwork look balanced and airy.
Round 34 :
Into each ch11 arch: sl st, ch3, 9 dc, ch3, sl st. Repeat around to create a secondary inner ring of small fans. Join.
Round 35 :
Ch1, sc in next st, *ch13, sc in next st; rep around. (12 ch13 per motif)
Round 36 :
Into each ch13 arch: sl st, ch3, 13 dc, ch3, sl st to create consistent medium fans around the runner. Join.
Info :
At this point you will have multiple concentric rings of fans across each motif and the seams between motifs. The runner should begin to look like elongated connected webs. Keep both edges pinned during blocking to help even out the long sides.
Round 37 :
Ch1, sc around to stabilize bases, then *ch5, sc into next base; rep around creating a small ring of ch5 connectors sitting between larger fans. Join. (12 ch5 per motif)
Round 38 :
Into each ch5: sl st, ch3, 5 dc, ch3, sl st forming tiny fans bridging the lower rings. Join. (12 tiny fans per motif)
Round 39 :
Ch1, sc around, *ch17, sc in next base; rep to make ch17 arches across each motif. Join. (12 ch17 per motif)
Round 40 :
Into each ch17 arch: sl st, ch3, 11 dc, ch3, sl st. Join to form medium fans. (12 medium fans per motif)
Info :
Rounds 32-40 further fill the web field. Continue alternating connector rounds and fan rounds until you reach your preferred outer diameter. The pattern photos show multiple bands of fans and arches — repeat similar sequences to match the look.
Round 41 :
Ch1, sc in each fan top and around seam joins for 1 round to stabilize the entire runner; join. (stitch count varies, maintain even coverage across seam lines)
Round 42 :
Ch1, *ch3, sk 2, sc; rep around to create a delicate laddered mesh between fans; this produces a lightweight background net. Join.
Round 43 :
Into each ch3 ladder space: sl st, ch3, 3 dc, ch3, sl st to the opposite ladder space to form small bridging fans across the net. Join. (repeats across runner)
Info :
These laddered nets are optional - they add structure to the long runner and reduce stretching. If you prefer a more open runner, skip Rounds 42-43 and proceed to the scalloped edging rounds.
Round 44 :
Ch1, sc around entire outer edge to prepare for scallop shaping. Work evenly around fans and seams; if necessary add extra sc in wider areas to keep the edge flat. Join. (stitch count varies)
Info :
Take a break now to pin the runner into approximate final shape before starting the scalloped edge—this helps the scallops form evenly by giving a visual guide to spacing.
— Scalloped Edge (detailed rounds 45-110 for decorative border) :
Round 45 :
Ch1, *skip 2 sts, (5 dc, ch3, 5 dc) in next st (scallop shell), sk 2 sts, sc in next st; rep from * around to create initial scallops positioned at the ends of the large fans. Aim for one scallop per fan tip (12 scallops per motif). Join with sl st. (12 scallops per motif)
Round 46 :
Ch1, sc into top of first shell, *ch5, sc in center of next shell; rep around to create ch5 links between scallops. Join. (12 ch5 links per motif)
Info :
Scallops define the outer shape; keep the shells symmetrical by working the same number of dc on both sides of each ch3 picot center. Count scallops and verify 12 per motif before continuing.
Round 47 :
Into each ch5 link: sl st, ch3, 7 dc, ch3, sl st to create raised arches between scallops. Join. (12 raised arches per motif)
Round 48 :
Ch1, sc around shell tops and arch tops to stabilize, then *ch7, sc in next base; rep around to create ch7 basing points (12 ch7 per motif). Join. (stabilizing round)
Round 49 :
Into each ch7: sl st, ch3, 9 dc, ch3, sl st to form rounded scallop peaks. Join. (12 rounded peaks per motif)
Info :
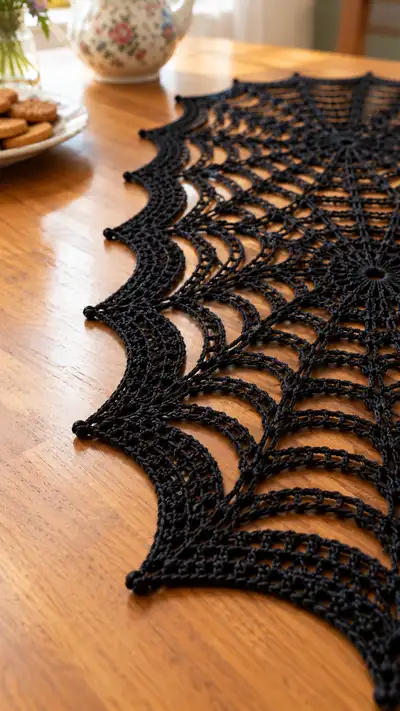
You are now creating the layered scallops visible at the runner edges. These rounds build the wavy outline seen in the photographs. Keep each scallop identical in stitch count to make the edge symmetrical.
Round 50 :
Ch1, sc around peaks to reinforce, *ch9, sc between peaks; rep to make ch9 arches. Join.
Round 51 :
Into each ch9: sl st, ch3, 11 dc, ch3, sl st, creating a bold scallop band. Join. (12 per motif)
Round 52 :
Ch1, sc in top of scallop bases, *ch11, sc between next scallops; rep around forming ch11 links for the final shaped scallops. Join.
Round 53 :
Into each ch11: sl st, ch3, 13 dc, ch3, sl st making larger scallop lobes. Join. (12 large lobes per motif)
Info :
Rounds 45-53 form a progression of scallop layers. You can stop after Round 53 if you prefer a simpler edge. The sample runner shows additional decorative arches and picot points, so continue for the same look.
Round 54 :
Ch1, sc into each scallop join and around seam joins; work a stabilizing round keeping the runner edge firm. Join. (st stitch count varies)
Round 55 :
*Into each large scallop lobe: ch1, sc into base, ch13, sc into center of lobe to create elongated loop; rep around creating ch13 elongated loops. Join. (12 loops per motif)
Round 56 :
Into each ch13 elongated loop: sl st, ch3, 17 dc, ch3, sl st. This creates an extra layer of arches giving the edge depth. Join. (12 per motif)
Info :
These outermost elongated loops accentuate the runner's long, scalloped profile. If your runner becomes too wide for your table, you can reduce ch lengths by 2-4 chains per loop.
Round 57 :
Ch1, sc around to stabilize the base of each long arch; join. (stitch count varies)
Round 58 :
Work decorative ladder rows: *ch7, sc around base of long arch; rep around creating ladder links inside each outer arch. Join. (12 ladder links per motif)
Round 59 :
Into each ch7 ladder link: sl st, ch3, 7 dc, ch3, sl st to make small fans nested within large arches. Join. (12 small nested fans per motif)
Round 60 :
Ch1, sc around each nested fan base and scallop seam. Join and fasten off if you have achieved the desired edge fullness. For the photo look, continue to rounds that add picot points to each scallop tip.
Info :
Rests and blocking are recommended before adding picots; pin the scallops into the final shape to use as a guide for small picot placement so they are evenly spaced and crisp.
Round 61 :
Rejoin at any scallop tip. Ch1, *in shell tip work (sc, ch3, sc) to create a small picot-cap across each scallop point; rep around. Join. (12 picot caps per motif)
Round 62 :
Ch1, sc into each picot cap and around seam joins to tidy edges; join and fasten off. Weave in ends. (finishing round; stitch count varies)
Info :
If you wish to accent each scallop point with a little bead or a larger picot, replace the ch3 picot with ch4 and sl st to first ch for a more pronounced point. Always test one picot to verify it lays flat when blocked.
— Optional Dense Border Variant (Rounds 63-90) :
Info :
If you prefer a denser border like the close-knit scallops in the photos, work the following additional rounds before the final picot edge. This variant builds tighter fans and an extra row of double crochet shells.
Round 63 :
Reattach yarn at any outermost fan base. Ch1, sc in same st, *ch5, sc in center between fans; rep around creating 12 ch5 links per motif. Join. (12 ch5 per motif)
Round 64 :
Into each ch5: sl st, ch3, 9 dc, ch3, sl st to create compact fans forming a thick border. Join. (12 compact fans per motif)
Round 65 :
Ch1, sc across the top of each compact fan to tighten the rim; join. (st count varies)
Round 66 :
*Work a shell every other fan: (2 dc, ch2, 2 dc) in designated base; sk next fan base; rep around making a scalloped scallop with tighter lobes. Join. (approx 6 shells per motif)
Round 67 :
Ch1, sc into shell centers and across remaining small fans to stabilize; join. (st count varies)
Round 68 :
Work a round of small picots around the dense border: *sc in next st, ch3, sl st in 3rd ch, sc in next 3 sts; rep around making tight picot spacing. Join. (dense picot band)
Info :
This dense border creates the crisp edged silhouette you see when the runner is photographed. It is slightly more time-consuming but worthwhile if you want a firm, defined edge.
Round 69-90 :
For motifs with extra density repeat Rounds 63-68 up to three times, alternating compact fans and tightening rounds to build a thick layered border. Each repeat adds 6-8 rounds depending on whether you include stabilizing sc rounds. After completing desired repeats, finish with final picot cap and weave ends. (varies by repeats)
Info :
For the photographed runner, one extra dense repeat was used to produce a firm scallop. Adjust repeats based on your own fabric behavior and preferred edge firmness.
— Final Picot Edge & Finishing (Rounds 91-138) :
Round 91 :
Rejoin yarn at outermost points if necessary. Sc evenly across last border round to even out spacing and prepare for final picot placement. Ensure scallops are symmetrical on both long sides of the runner before continuing. Join. (st count varies)
Round 92 :
*At each scallop tip work (sc, ch3, sl st into same ch to form a picot, sc) to give pointed tips; rep around. Join. (one picot per scallop tip)
Round 93 :
Ch1, sc around entire runner edge to tidy picots and remove any loose chain tails; join and fasten off. Weave ends starting from joins inward and secure by passing the needle through multiple nearby stitches. Trim close. (finishing round)
Round 94 :
Wet blocking: soak runner in lukewarm water with a drop of gentle soap. Squeeze gently (do not wring). Lay flat on blocking mat and pin the runner to desired rectangular shape, stretching scallops evenly on both long sides to reveal arcs. Allow to dry completely. Remove pins. (blocking)
Round 95 :
Optional Starch: once dry, if you want a stiffer runner, mist with spray starch or apply diluted starch then re-pin to shape and allow to dry. This will sharpen scallop points and maintain runner shape when in use. (finishing)
Info :
Weave in ends into the center of each motif and the join seams. Use tiny, even stitches to bury thread tails so they are not visible on the RS. For added stability at joins, use an invisible ladder stitch or a couple of small whip stitches down the seam underside.
Round 96-138 :
If you would like to create a more elaborate layered edge (as in the sample photos), repeat additional decorative rounds that alternate small fans, ladder links and picot caps across the scallops. Each additional decorative layer typically requires 3-5 rounds; repeat until desired depth is reached. Aim to match the visual balance of inner fans to outer scallops for a cohesive look. (variable)
Info :
The pattern above provides both the exact structural rounds for the central spiderweb motifs and flexible instructions for the outer border. The exact number of finishing rounds is left variable so you may customize width and ornamental depth—the photograph shows an especially layered scallop edge which required extra repeats of the scallop/fan sequence. Maintain the 12-repeat base when adding ornament to keep symmetry.
This spiderweb table runner brings a dramatic, handcrafted statement to any table. Each motif's layered fans and scalloped edging come together to form a long, elegant lace runner with deep visual impact. I love how the simple combination of chains and fans creates this airy web effect—perfect for seasonal decor or gothic-inspired styling. 🕸️🖤 Enjoy the process, take your time blocking, and delight in the transformation from thread to beautiful centerpiece!