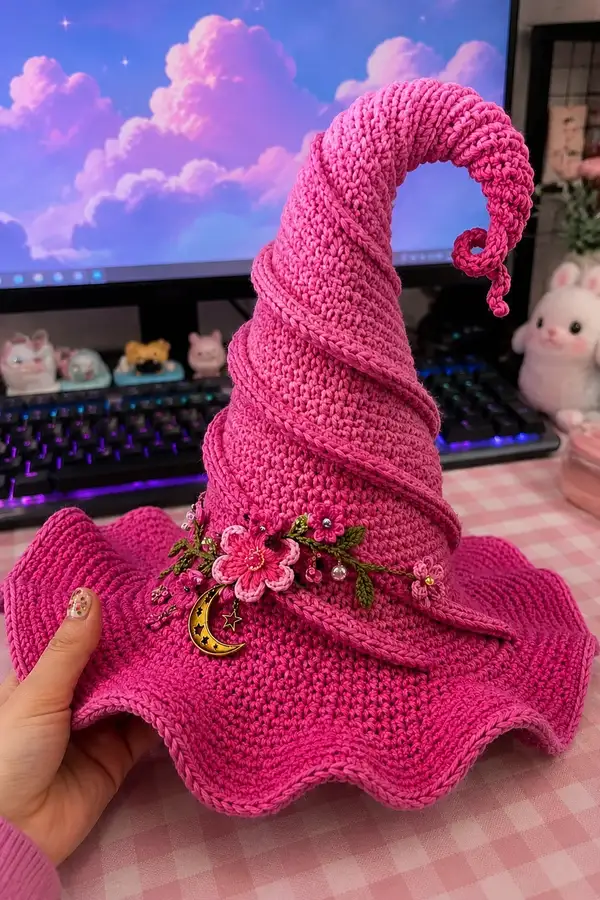
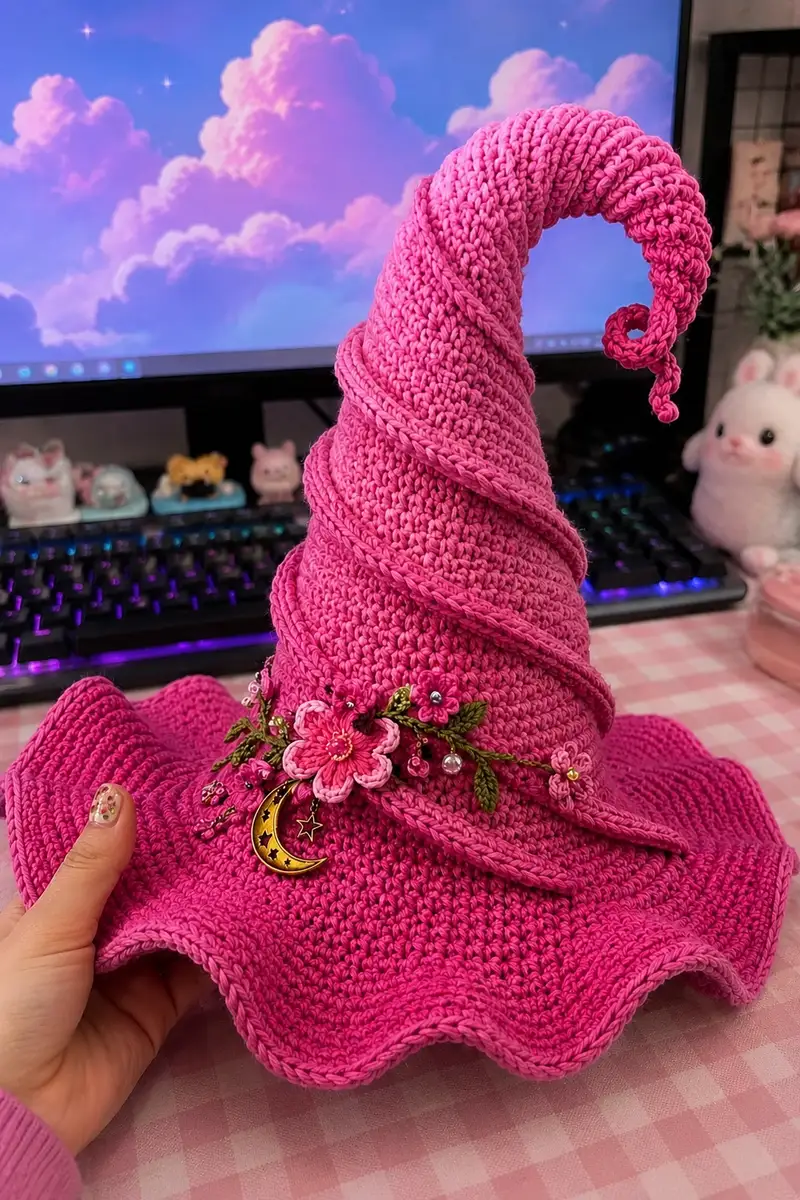
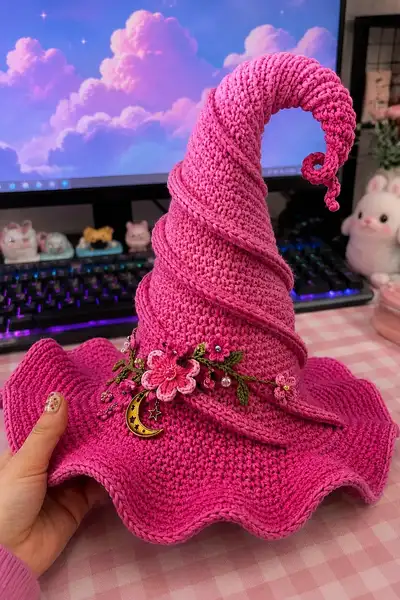
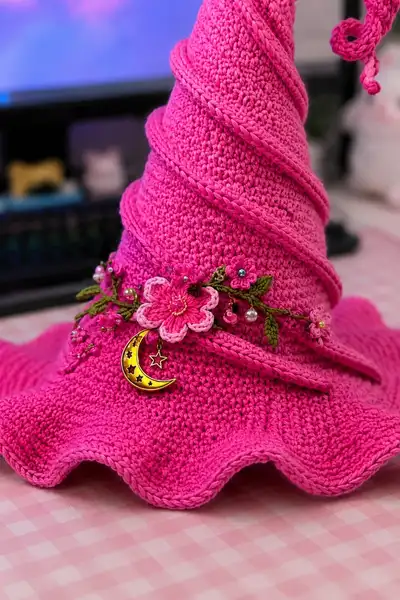
A whimsical, girly pink spiral witch hat with a dramatic wavy brim and a tall twisted spiral cone. Worked mostly in single crochet to create sturdy structure, the hat is trimmed with a braided spiral wrap and crochet floral garland with beads and a tiny moon charm. Perfect for costume accents, decor, or as a striking handmade gift.
Progress Tracker
0% Complete
— Crown / Head Opening :
Round 1 :
6 sc in magic ring (6)
Round 3 :
(1 sc, inc) x 6 (18)
Round 4 :
(2 sc, inc) x 6 (24)
Round 5 :
(3 sc, inc) x 6 (30)
Round 6 :
(4 sc, inc) x 6 (36)
Round 7 :
(5 sc, inc) x 6 (42)
Round 8 :
(6 sc, inc) x 6 (48)
Round 9 :
(7 sc, inc) x 6 (54)
Round 10 :
(8 sc, inc) x 6 (60)
Info :
These increases create the crown that will sit on the head. Try the crown on your head or measure circumference (aim for ~56-58cm / 22-23in finished). If you need a larger crown, add one extra increase round repeating (9 sc, inc) x 6 to reach 66 stitches; if smaller, omit last increase.
Round 11-18 :
1 sc in each st (60)
Info :
Work even in single crochet to build crown height. The crown height here is 8 rounds (11-18) which fits an average adult head; add or subtract rounds to adjust the fit. Keep stitches even and use a stitch marker on the first stitch of each round.
— Cone / Spiral Top :
Round 1 :
Join yarn at top of crown (pick up on last round). 1 sc in each st around (60)
Round 2-8 :
1 sc in each st (60)
Info :
Working evenly for several rounds lets the cone rise without narrowing too quickly. If you want a taller or shorter cone, adjust these even rounds now before the gradual decreases begin.
Round 9 :
(9 sc, dec) x 6 (54)
Round 10-15 :
1 sc in each st (54)
Info :
After the first decrease round the cone will begin to narrow. Work several rounds even to allow the cone to lengthen so the spiral has room to twist without kinking.
Round 16 :
(8 sc, dec) x 6 (48)
Round 17-22 :
1 sc in each st (48)
Round 23 :
(7 sc, dec) x 6 (42)
Round 24-29 :
1 sc in each st (42)
Info :
Check the cone for the curve: as you work even rounds the cone will rise. If you want a more pronounced spiral curve, begin to introduce a very slight offset by making one extra stitch at the start of one round every 6-8 rows, but keep track to maintain stitch counts.
Round 30 :
(6 sc, dec) x 6 (36)
Round 31-36 :
1 sc in each st (36)
Round 37 :
(5 sc, dec) x 6 (30)
Round 38-43 :
1 sc in each st (30)
Info :
At this stage the cone is narrowing significantly — if you intend to insert wire for a poseable tip, now is a good point to slide a length of floral wire or pipe cleaner down the center and secure it inside with a few stitches, ensuring the tip will hold shape. Leave a little wire extending to the very tip so you can shape the curl later.
Round 44 :
(4 sc, dec) x 6 (24)
Round 45-50 :
1 sc in each st (24)
Round 51 :
(3 sc, dec) x 6 (18)
Round 52-57 :
1 sc in each st (18)
Round 58 :
(2 sc, dec) x 6 (12)
Round 59-61 :
1 sc in each st (12)
Round 62 :
(1 sc, dec) x 6 (6)
Round 63 :
6 dec (0) — or close hole as directed below
Info :
Fasten off leaving a 20-30cm tail. If you inserted wire, bend wire end into a small loop and tuck into the top before closing. Use the tail to close the final 6 stitches by threading through remaining loops and pulling tight to close the tip. Weave tail into several rounds to secure.
Round 64 :
If you prefer a tiny curled tip rather than tightly closed, stop after Round 62 and shape the 6-stitch tip around the wire or stuffing to form a small spiral. Coil the tip clockwise to match the main spiral curve and secure with a few whip stitches.
— Spiral Wrap Cord (make 1 long cord) :
Info :
This cord creates the defined spiral ribbing wrapped around the cone. Make a long crocheted cord (i-cord or tubular single crochet) and wrap around the cone from lower cone toward tip. Use a contrasting slightly lighter or darker pink for subtle depth.
Cord Round 1 :
Ch 120 (or length needed to wrap cone snugly from base to tip; measure against cone as you go)
Cord Round 2 :
Starting in 2nd ch from hook: 1 sc in each ch across (119)
Cord Round 3-6 :
1 sc in each st, fasten off leaving long tail for sewing
Info :
For a more tubular cord: make a foundation chain of 40-80 and work over it in rounds to form a tube: join to work in continuous rounds in BLO for a braided look. The example above is a flat cord; you can fold and sew the cord into a raised helix when wrapping.
Optional Cord Variation :
Create a 3-strand braid from three cords of ch 60 each, braid and sew ends closed for a chunky spiral.
— Brim (worked from crown base outward) :
Info :
Join yarn at the last round of crown where the crown meets base. The brim is worked in rounds increasing to form a wide ruffle with a wavy scalloped edge. Keep stitch counts exact each round per instruction.
Round 1 :
From base, 1 sc in each st around (60). Place marker at first st.
Round 2 :
1 sc in each st (60)
Round 3 :
(4 sc, inc) x 12 (72)
Round 4 :
1 sc in each st (72)
Round 5 :
(5 sc, inc) x 12 (84)
Round 6 :
1 sc in each st (84)
Info :
These increase rounds flare the brim outwards. If your brim begins to ripple too much too quickly, omit an increase repeat or work one fewer increase round for a subtler curve. If you want a more dramatic ruffle add an extra increase round (6 sc, inc) x 12.
Round 7 :
(6 sc, inc) x 12 (96)
Round 8 :
1 sc in each st (96)
Round 9 :
(7 sc, inc) x 12 (108)
Round 10 :
1 sc in each st (108)
Info :
At around 108 stitches the brim will be wide. Try the hat on or measure brim diameter. For a large dramatic brim, continue increases another round; for smaller brim stop after Round 9 or 10 and begin scalloped edge.
Round 11 (scallop begin) :
(1 sc, skip 1, 5 dc in next st, skip 1, 1 sc) x 27 (108 scallops)
Round 12 :
In each dc group: sl st in top of group, ch 1, 1 sc into adjacent base to neaten edge. Work around and fasten off. (Approx 108)
Info :
This scalloped edge creates a wavy rim. Adjust the number of double crochets in the shell to increase the wave depth. Blocking lightly with steam or pinning into shape can set the waves more permanently.
— Floral Garland & Leaves (make multiple small motifs) :
Small Flower (Make 3) Round 1 :
6 sc in magic ring (6)
Round 3 :
(1 sc, inc) x 6 (18)
Round 4 :
Change to lighter pink if desired. *Ch 2, 3 dc in next st, ch 2, sl st in next st* repeat around to form petals: (6 petals)
Round 5 :
Working behind petals: 1 sc in each back loop around base to finish (18)
Info :
Embroider a small center using gold thread or tiny French knots with embroidery floss and sew a tiny bead for sparkle. Make 1 large flower and 2-3 small flowers for the garland.
Small Leaf (Make 6-8) Round 1 :
Ch 8, starting in 2nd ch from hook: 1 sc, hdc, 3 dc, hdc, 1 sc across; sl st to base, fasten off (7 sts leaf) make leaves in green.
Info :
Sew leaves and flowers onto a thin crocheted chain or embroidery thread to create a garland. Add tiny seed beads and pearl beads on short lengths of thread and secure between flowers for dangling sparkles.
— Small Accent Berry Clusters & Bead Drops :
Berry Cluster (Make 4) :
Ch 4, join to ring with sl st to make short loop. In loop: 6 sc, fasten off leaving long tail for sewing. Sew clusters in groups of 2-3 between leaves for a natural look.
Bead Drop (Make 4) :
Thread a bead onto a short length of thread or fine yarn, knot beneath bead, anchor to base of flower with a couple of stitches leaving bead to dangle. Reinforce with glue if desired.
Info :
Be careful to secure beads tightly if hat may be handled roughly. Use small jewel pins or sew beads with a doubled thread for strength.
— Moon Charm Attachment :
Info :
Sew a small jump ring or attach a sewn loop of thread to the base of the garland. Clip the moon charm onto this loop so it dangles at the front-left of the hat as shown. For a removable charm, use a tiny lobster clasp sewn into the loop.
— Finishing Ridges (Optional raised spiral) :
Round 1 :
Option A: Using the long cord made earlier, wrap cord around cone from base upward in a spiral and stitch it down every 4-6 wraps so it sits as a raised ridge.
Round 2 :
Option B: Work a raised ridge directly on cone by sl st in each stitch on alternate rounds to create a twisted rib. Example: sl st in BLO in a spiral from base to tip, fastening off when you reach tip.
Info :
Wrapping the cord slightly offset each revolution gives the whimsical coiled appearance. Secure both ends invisibly by sewing them into the cone interior.
— Edge Neatening and Optional Surface Texture :
Round 1 :
With contrast light pink, work 1 round of sc in BLO around brim edge to define the scallop (use 3.0mm hook for tighter finish)
Round 2 :
1 sc in each st, sl st to join and fasten off. Weave ends in.
Info :
Surface slip stitches or shallow spirals add a hand-stitched look. Try 1 round of sl st in same color for tone-on-tone refinement.
— Optional Reinforcement for Brim Stability :
Info :
If you want a stiff brim, slip a thin plastic canvas disk cut to brim diameter between rounds while the brim is still open (before final scallop), or use a fabric stiffener spray after finishing. For a flexible but shaped brim, block and pin while damp and allow to dry.
— Assembly & Decoration Placement Notes :
Info :
Before attaching garland, pin cord spiral into position and pin flowers and leaves where you like them. The sample hat has the garland placed around lower cone just above brim and slightly off-center to the front-left. The moon charm hangs from the central large flower.
Info :
Sew the cord spiral in place first, then attach garland and beads. Use small whip stitches to secure each motif. Reinforce bead stitches with a second pass for durability.
— Troubleshooting and Adjustments :
Info :
If the spiral refuses to sit correctly, slightly loosen tension on cord wraps or reposition stitches. You can also add a few tiny hidden tacks (stitches) through cord into cone to hold shape without being visible on the outside.
Info :
If brim ripples excessively, block and press to flatten slightly, or add a second round of sc in BLO with a smaller hook to pull edge inwards slightly.
— Final Touches :
Info :
Weave in all loose ends into the interior of the hat. If you used wire, be sure any sharp ends are safely tucked into the final seam and covered with yarn. Lightly steam-block the hat into final shape, pinning the brim and spiral until cool and dry.
Info :
Add a small label or ribbon inside the crown if giving as a gift. Store flat or on a wig head to preserve shape.
This whimsical spiral witch hat brings together structure and sweetness — a magical project that shows beautifully the moment you finish the garland and charm. Each wrap and blossom is a small victory of handmade charm. I hope this pattern sparks your creativity and becomes a showpiece in your collection. Happy stitching and enjoy making a bit of pink magic! 🌙🌸