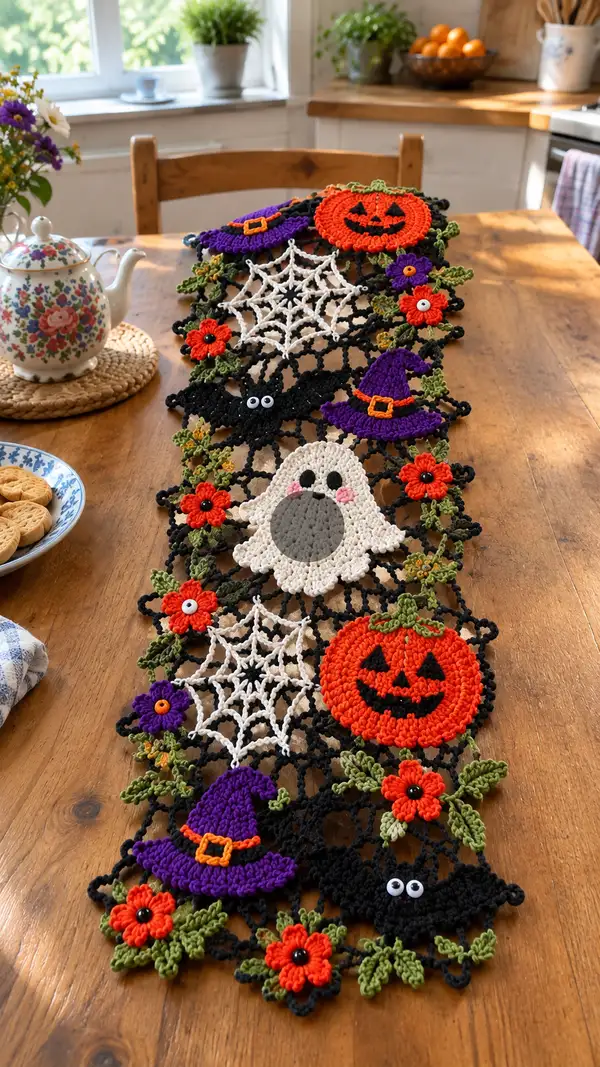
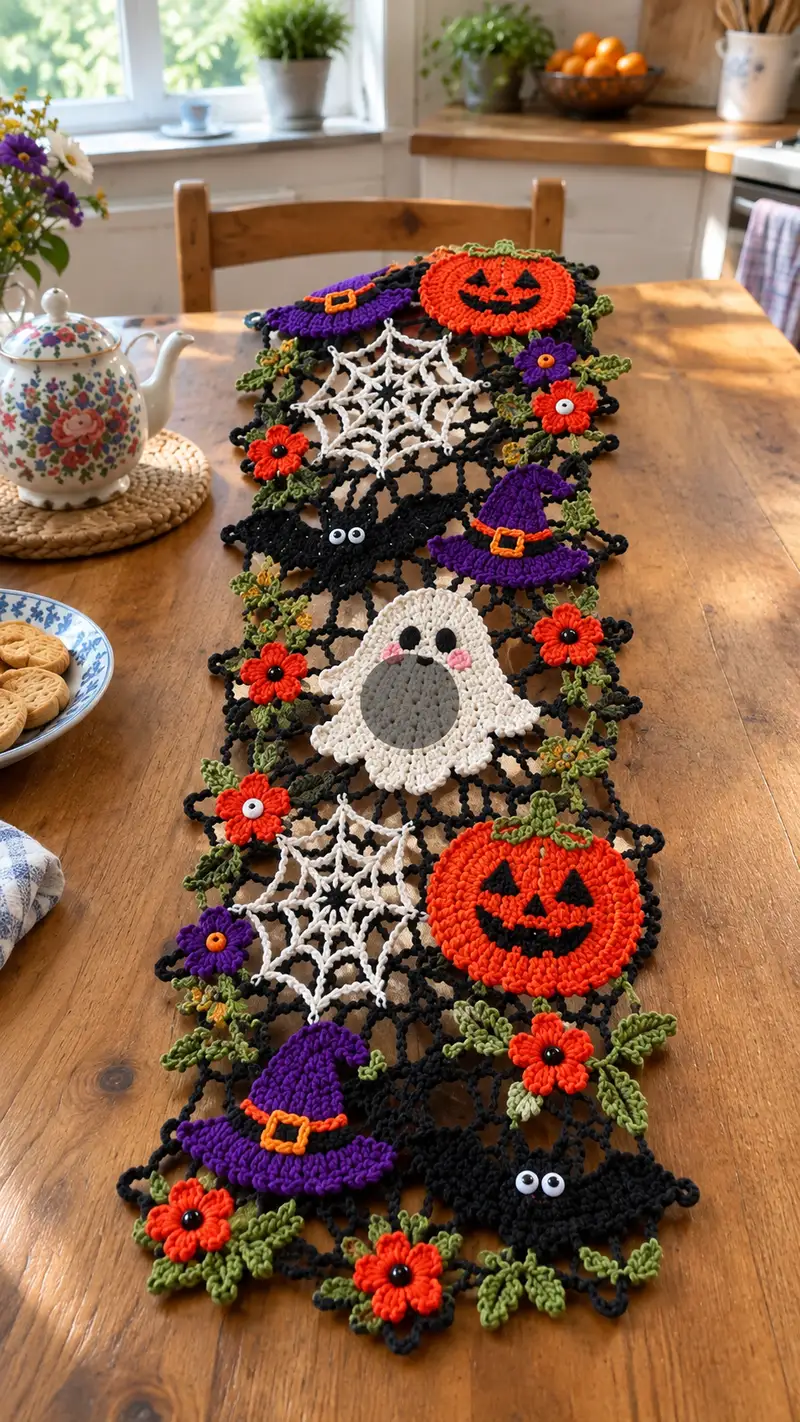
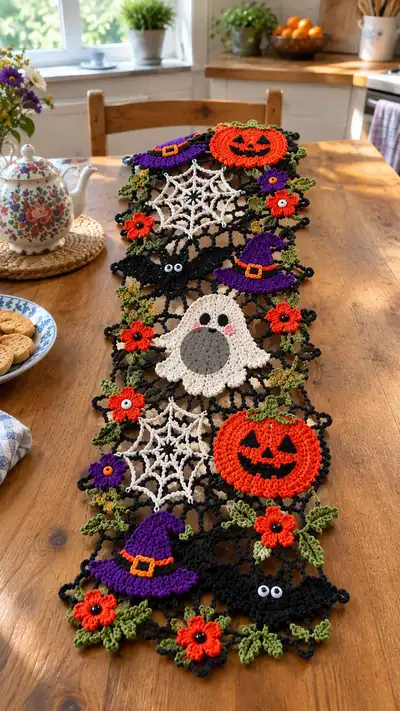
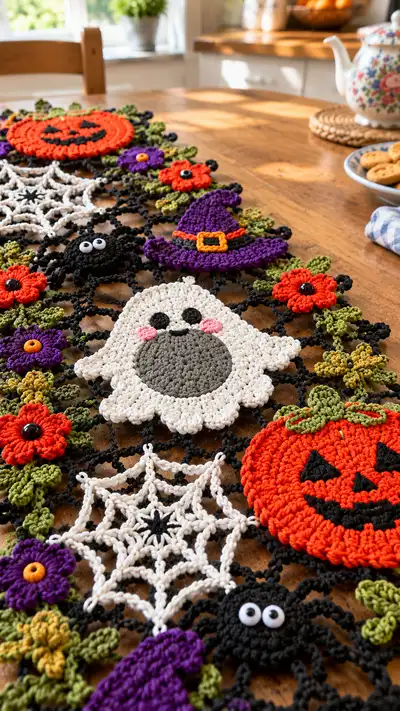
A charming spooky-themed crochet table runner featuring jack-o-lanterns, a friendly ghost, purple witch hats, black spiders, delicate spiderwebs and bright orange flowers linked by a lacy black mesh. This vibrant runner uses contrasting cotton yarns for crisp motifs and a sturdy mesh background that lays flat on a table. Perfect for adding handmade Halloween charm to your dining room or mantle.
Progress Tracker
0% Complete
— Notes & Gauge :
Info :
This table runner is constructed from individual motifs joined to a crocheted black mesh. Work motifs flat and block them before joining to ensure a clean, even runner. Gauge is flexible for this decorative piece; with DK cotton and 3.5mm hook, a 10cm/4" swatch of sc rounds in the motif center should equal approximately 14-16 sts x 8-10 rows. Adjust hook size if needed.
Info :
Throughout the pattern rounds counts are given in parentheses. Work tightly enough that stuffing is not visible (for small stuffed parts like spider eye backs) but keep motifs flat. Use a smaller hook (3.0mm) for tiny pieces to keep edges crisp.
— Pumpkin Motif (Make 2) :
Round 1 :
6 sc in magic ring (6)
Round 3 :
(1 sc, inc) x 6 (18)
Round 4 :
(2 sc, inc) x 6 (24)
Round 5 :
(3 sc, inc) x 6 (30)
Info :
Change to pumpkin orange yarn now if you began with a contrasting working tail. Carry yarn neatly behind if you prefer not to fasten off between motifs.
Round 6 :
(4 sc, inc) x 6 (36)
Round 7 :
(5 sc, inc) x 6 (42)
Round 8 :
1 sc in each st (42)
Round 9 :
1 sc in each st (42)
Info :
Create slight ridges to suggest pumpkin segments. Join a slip stitch into a strategic stitch and work a raised seam: sc in FLO across next round to create a ridge; repeat for 6 segment lines spaced evenly (see assembly info for placement).
Round 10 :
1 sc in each st BLO (42)
Round 11 :
(6 sc, dec) x 6 (36)
Round 12 :
(5 sc, dec) x 6 (30)
Info :
Work a decorative outer rim using picots if you want a more scalloped edge: ch3, sl st in 3rd ch for every 6th stitch on the last round. Otherwise continue with a clean edge.
Round 13 :
(4 sc, dec) x 6 (24)
Round 14 :
(3 sc, dec) x 6 (18)
Round 15 :
Fasten off orange leaving long tail for sewing (18). Embroider triangular eyes and mouth with black yarn: place eye triangles symmetrically, each triangle approx 6 sts apart centered near round 6. Use tight satin stitches to fill face shapes.
Round 16 :
Stem: With green, ch 6, sc into 2nd ch from hook across (5), sl st to base at top center of pumpkin. Fasten off and weave in ends.
Info :
For a puffier pumpkin, work two rounds of dc in the center and then flatten slightly before finishing the rim. Ensure face embroidery is secure and backstitch ends are woven into the wrong side.
— Ghost Motif (Make 1) :
Round 1 :
6 sc in magic ring using cream yarn (6)
Round 3 :
(1 sc, inc) x 6 (18)
Round 4 :
(2 sc, inc) x 6 (24)
Round 5 :
(3 sc, inc) x 6 (30)
Info :
Shift to a slight oval shape by inserting 2 extra sts on the widest side: in the next round add an extra (inc) at two adjacent increase points to bias the circle into an oval body.
Round 6 :
(4 sc, inc) x 6 (36)
Round 7 :
1 sc in each st (36)
Round 8 :
1 sc in each st (36)
Round 9 :
Body shaping: (3 sc, dec) x 6 (30)
Info :
Switch to heather gray for tummy insert. The tummy is worked as a separate small circle that will be sewn on flat to the ghost centre. Make a 14-stitch circle as below and sew on after blocking.
Tummy Round 1 :
6 sc in magic ring (6)
Tummy Round 2 :
6 inc (12)
Tummy Round 3 :
(1 sc, inc) x 6 (18)
Tummy Round 4 :
(2 sc, inc) x 6 (24) - Fasten off and weave tail for sewing (24)
Round 10 :
(2 sc, dec) x 6 (24)
Round 11 :
(1 sc, dec) x 6 (18)
Info :
Ghost scalloped hem: Round 12 will create the ruffled edge. Use *ch3, skip 1 st, sl st in next st* around or work (sc, picot, sc) in each alternate stitch to form soft waves.
Round 12 :
*sc in next st, ch3, sl st in 3rd ch from hook (picot) , skip next st* rep around to form scallops (18 scallops). Fasten off leaving long tail for sewing. Block flat and sew gray tummy to center with whipstitch.
Info :
Embroider eyes and mouth using small black circles or use safety eyes when pinning, then cover the back with a felt circle to secure. Add two small pink cheeks by working tiny 6-8 st circles in light pink and sewing them in place on either side of mouth.
— Witch Hat Motif (Make 3) :
Round 1 :
6 sc in magic ring (6) with purple yarn
Round 3 :
(1 sc, inc) x 6 (18)
Round 4 :
(2 sc, inc) x 6 (24)
Info :
At this point we will create the brim as a separate flatter circle later. These rounds form the cone of the hat; work an extra set of increases to build a taller cone before shaping the brim.
Round 5 :
(3 sc, inc) x 6 (30)
Round 6 :
1 sc in each st (30)
Round 7 :
1 sc in each st (30)
Round 8 :
Bend shaping: *sc in next 5 sts, dec* x 5 then sc in remaining 5 sts (25) - this creates a tapered top for the hat
Round 9 :
1 sc in each st (25)
Round 10 :
Fasten off purple leaving tail for sewing. Brim: With purple, ch 36, join with sl st to form ring, ch1, sc in each ch around (36). Round 2: (2 sc, inc) x 12 (48). Round 3: 1 sc in each st (48). Round 4: BLO 1 sc in each st (48) to create a slightly raised brim edge. Fasten off and sew cone to center of brim from wrong side, tucking extra cone rounds into the brim opening.
Round 11 :
Belt: With orange, ch 24, sl st to join, work 1 round sc around to form a thin belt (24). Attach belt around hat where brim meets cone. With yellow or orange, work a belt buckle: ch6, sl st back and sew a small rectangle (6 x 2 sc) in place and outline with contrasting yarn. Fasten off and tidy ends.
Info :
Make three hats in identical or slightly varied sizes for visual interest. Block each hat flat so brims sit neatly when joining to mesh.
— Spider Motif (Make 2) :
Round 1 :
6 sc in magic ring using black yarn (6)
Round 3 :
(1 sc, inc) x 6 (18)
Round 4 :
1 sc in each st (18)
Info :
Spider body is a flat disc. You will attach 8 legs made of chains and slip stitches; make legs before attaching eyes. For googly eyes, secure with glue or sew small white beads on top of black discs.
Round 5 :
Make legs: *Ch 12, sl st back along chain to create thick leg, sl st into next body stitch* repeat x8 evenly spaced; fasten off and weave ends (18 body stitches remain)
Round 6 :
Attach eyes: Sew two small white bead eyes onto top of the disc with small black bead pupils or use safety eyes. Secure very firmly with thread and glue if using beads.
Info :
If you want slightly raised spiders, work one more round of hdc around body in FLO then fasten off to produce a domed effect before adding legs.
— Spiderweb Motif (Make 2) :
Round 1 :
Using black for small center, ch6 and join with sl st to form ring, ch3 (counts as first dc), work 11 dc into ring; join (12)
Round 2 :
Change to white yarn. *Ch7, sl st into next dc* repeat around to form 12 spokes; finish with sl st to base of first spoke (12 spokes)
Round 3 :
Work round of connecting arcs: in each ch7 loop work (sl st, ch3, 3 dc, ch3, sl st) to form rounded band. This becomes first visible ring. Fasten off white and change to black for next round if you want alternating color
Info :
Spiderwebs are worked in open-lace style. For a more delicate web, use ch6 spokes and 2 dc clusters on rings. Be sure the web diameter approximately equals the pumpkin diameter so the layout looks balanced.
Round 4 :
Add outer ring: With white, ch5 into each space between spokes and sl st to create a scalloped ring around the web. Fasten off and block flat with pins in circular shape to keep spokes taut.
— Flower Motifs (Make 10 small flowers total; 6 orange, 4 purple) :
Round 1 :
6 sc in magic ring with orange or purple yarn (6)
Round 3 :
Petals: *ch3, 3 dc, ch3, sl st in next st* repeat around to create 6 petals; fasten off leaving tail to sew bead center (12)
Info :
Sew a small black bead or button to the center of each flower for a polished look. Space flowers along the mesh borders and between motifs to echo the pictured layout.
— Leaf Motifs (Make 24 small leaves) :
Round 1 :
Ch6, sc in 2nd ch from hook, hdc in next, dc in next 2, tr in last ch, then work back down the other side: dc, dc, hdc, sc; sl st to base (creates one leaf) - fasten off (approx 10 sts)
Info :
Work leaves in varied shades of green. For more texture, work BLO on the return side to make a ribbed mid-vein. Make pairs of leaves clustered around each flower and motif as seen in the photo.
— Black Decorative Mesh & Joining Chain (Make panels to connect motifs) :
Info :
The mesh is worked in long open motifs formed of chained loops joined by small clusters. You will create multiple rectangular mesh panels that mirror the width of the runner and join motifs along their perimeter using slip stitches and small picot loops.
Round 1 :
With black yarn, ch 120 (or length matching desired runner width), join with sl st to first ch to form long loop, ch1
Round 2 :
*ch8, sl st in next ch of foundation chain, ch8, sl st in next ch* rep across entire loop to create evenly spaced open loops (approx 15 loops across width depending on chain foundation)
Round 3 :
Join loops into a honeycomb: In each ch8 loop work (sc, ch5, sc) connecting to the previous loop with a sl st to form a lattice. At the ends turn and repeat to create a second narrow mesh strip using sl st to attach to foundation to stabilize.
Round 4 :
Continue building mesh lengthwise by repeating Round 3: work rows of (sc, ch5, sc) in each loop, joining at intersections with sl st into the sc from the previous row. Repeat until mesh length equals desired runner spacing (approx 14-18 rows depending on motif arrangement).
Info :
Include a picot or small loop (ch3, sl st) every 4th mesh intersection where motifs will be sewn. These small loops act as tidy anchors for sewing and mimic the decorative black scalloped joins seen in the photo.
Round 5 :
Edge finish: Work a round of sc around the outside perimeter of mesh panels to give a neat border. Optional: work 1 round of (sc, ch3, sc) at corners to soften edge and create loops for motif attachment. Fasten off and block flat.
— Assembly & Joining Motifs to Mesh :
Info :
Blocking and layout: Block all motifs flat. Lay the mesh strips out on a blocking board matched to the runner length. Arrange motifs roughly as in the reference photo: alternating pumpkins and spiderwebs down the center with ghost centrally placed; witches hats and spiders inset along the mesh columns with flowers and leaves forming a leafy border.
Round 1 :
Pin each motif to the mesh using tapestry pins aligning motif edges to picot loops and mesh intersections. Start by pinning the central motifs (pumpkin, web, ghost) into the central column of loops and work outward.
Round 2 :
Sew motifs by whipstitching through motif edge stitches and into the underlying picot loops on the mesh. Use matching yarn colors for tidy joins. For the pumpkin and ghost, sew all around the motif; for lighter motifs like the web, sew only at 6-8 anchor points to keep the airy look.
Info :
When attaching 3D features (hat cones, pumpkin stems, bead centers), secure with extra backstitching and a tiny dab of fabric glue if needed. Weave all ends to the wrong side and trim close.
Round 3 :
Finish border: After motifs are attached, add leaf clusters and small flowers to the edges of the mesh by sewing pairs of leaves and flower centers into gaps, tucking ends under mesh stitches for a neat finish. Work symmetrical placement down each side for balanced look.
Round 4 :
Edge scallop: To emulate the photo's scalloped edges, work a round of *sc in mesh st, ch3, sl st in next mesh intersection* around the entire runner border, creating decorative little loops. Fasten off and weave in all ends.
Info :
Gently steam-block the assembled runner flat and allow to dry fully on the blocking board with each motif pinned in place to preserve shape and evenness. This final block will help motifs and mesh relax into a single, cohesive piece.
— Finishing Touches & Embellishments :
Round 1 :
Sew on spare bead eyes or small safety eyes to spiders. If using glued googly eyes, attach a small felt circle behind to secure them and stitch through felt into the spider body in 2-3 passes to ensure durability.
Round 2 :
Stitch tiny embroidered details: add a few French knots to pumpkin stems for texture, and a small embroidered smile detail on ghost if desired with black yarn. Add satin-stitch leaves along veins for extra depth.
Info :
Trim any loose fuzz from cotton yarn ends and do a light hand-press with a damp cloth if needed to neaten. Avoid excessive heat on cotton and any glued components.
— Alternate Layout & Size Notes :
Info :
To change runner length, add or subtract mesh rows between motif rows. To widen or narrow the runner, adjust the mesh foundation chain and re-space loops. This modular construction allows endless customization.
Info :
If you prefer a placemat version, choose fewer central motifs and create a single tile of mesh with one pumpkin, one web and surrounding flowers. Scale down by using sport or dk yarn and a 3.0mm hook for smaller motifs.
This Halloween table runner makes a wonderful festive centerpiece — playful, colorful and handmade with care. Each motif adds personality and is so satisfying to stitch and arrange. Add it to your seasonal table to delight guests and family 🎃🧶. Enjoy the process and share your finished runner with friends — it looks gorgeous in any autumnal setting!