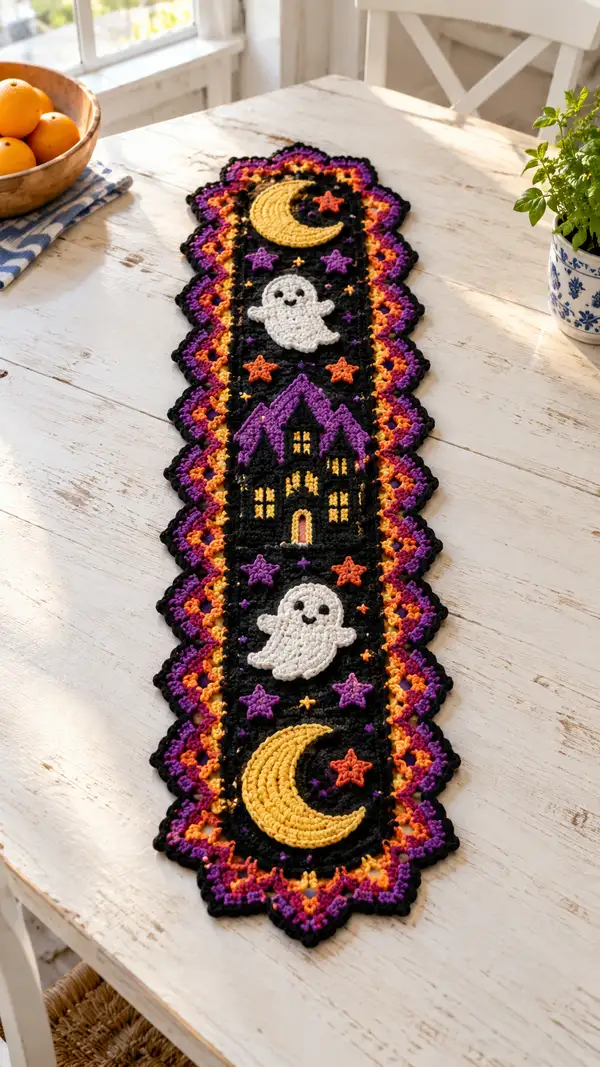
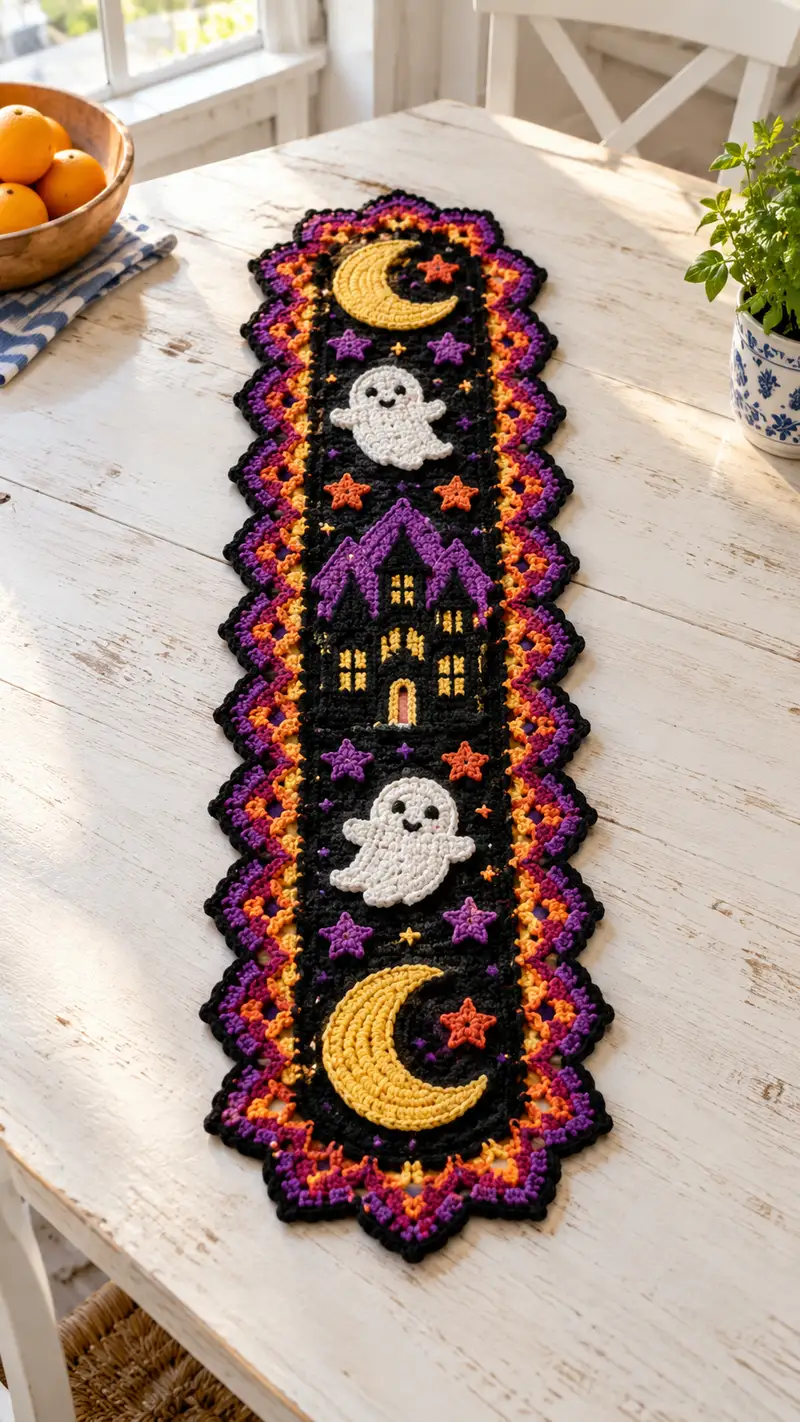
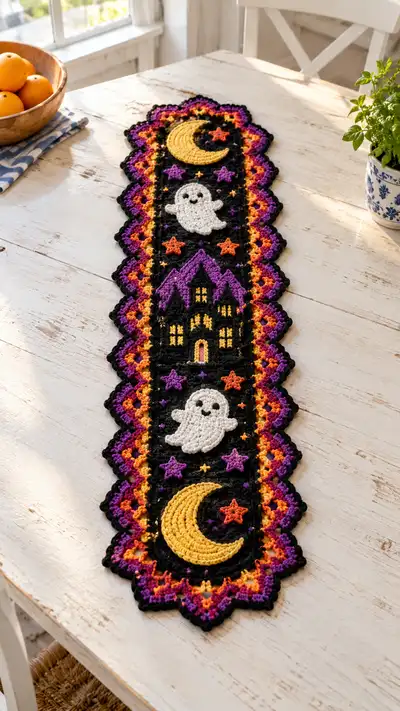
A long, festive Halloween table runner worked in bright purple, pumpkin orange, mustard yellow and deep black with white ghost appliques. Features whimsical crescent moons, smiling ghosts, a haunted house and scattered stars framed by a scalloped multi-color border. Ideal as a centerpiece for seasonal decor or a Halloween party table.
Progress Tracker
0% Complete
— Runner Central Panels (Make 5 panels arranged lengthwise) :
Notes :
Each central panel is a 20-round square motif that will be joined end-to-end to form the runner base. Panels are worked in round and use color changes to create a subtle inner frame. Final assembled base will be approximately 10 cm wide by combined length of panels; adjust hook or stitch number for exact table length.
Panel Round 1 :
With black, 6 sc in magic ring (6)
Panel Round 2 :
6 inc (12)
Panel Round 3 :
(1 sc, 1 inc) x 6 (18)
Panel Round 4 :
(2 sc, 1 inc) x 6 (24)
Panel Round 5 :
(3 sc, 1 inc) x 6 (30)
Panel Round 6 :
1 sc in each st (30)
Info :
For even panels keep tension consistent. These early rounds build the flat circular square center; do not stuff. Place a stitch marker at the start of each round.
Panel Round 7 :
Change to purple. Work 1 sc in each st BLO for a defined ridge (30)
Panel Round 8 :
Change to black. 1 sc in each st (30)
Panel Round 9 :
(3 sc, inc) x 6 (36)
Panel Round 10 :
1 sc in each st (36)
Panel Round 11 :
(4 sc, inc) x 6 (42)
Panel Round 12 :
1 sc in each st (42)
Panel Round 13 :
Change to orange. 1 sc in each st BLO (42)
Panel Round 14 :
Change to black. 1 sc in each st (42)
Panel Round 15 :
(5 sc, inc) x 6 (48)
Panel Round 16 :
1 sc in each st (48)
Panel Round 17 :
(6 sc, inc) x 6 (54)
Info :
These larger rounds prepare the panel for square shaping. Block lightly if needed to keep panels flat before joining. Make 5 panels total for the shown runner length.
Panel Round 18 :
1 sc in each st (54)
Panel Round 19 :
Change to purple. 1 sc in each st BLO (54)
Panel Round 20 :
Change to black. 1 sc in each st (54). Fasten off leaving long tail for joining
Info :
Repeat to make five identical panels. Join panels end-to-end using mattress stitch or slip stitch join along straight edges so that join seam is flat on RS. When joining, align color ridges so purple/orange decorative inner frame repeats along the runner length.
— Moon Applique (Make 2 identical crescents) :
Notes :
Each crescent is worked in rounds and shaped by increasing on one side and decreasing on the other to create a crescent curve. Work flat and avoid stuffing. Use mustard yellow yarn.
Moon Round 1 :
With mustard, ch 6, join to form a loop, ch 1 (counts as turning chain), 6 sc into loop (6)
Moon Round 2 :
Inc in each st around (12)
Moon Round 3 :
(1 sc, inc) x 6 (18)
Moon Round 4 :
(2 sc, inc) x 6 (24)
Moon Round 5 :
1 sc in each st (24)
Moon Round 6 :
(3 sc, inc) x 6 (30)
Info :
Now begin shaping the crescent by omitting increases on one side; you will work semi-circular increases on the outer edge and regular rows on the inner edge to bias the piece.
Moon Round 7 :
Work 15 sc along stitches 1-15, then dec once, then 13 sc (29)
Moon Round 8 :
Work 14 sc, dec, 13 sc (28)
Moon Round 9 :
Work 13 sc, dec, 13 sc (27)
Moon Round 10 :
Work 12 sc, dec, 13 sc (26)
Moon Round 11 :
Work 11 sc, dec, 13 sc (25)
Moon Round 12 :
Work 10 sc, dec, 13 sc (24). Fasten off leaving long tail to sew to panel
Info :
Block flat to accentuate crescent curve. Sew moons onto first and last panel centered lengthwise and offset to the upper half of each panel so moons face inward toward runner center as in photo.
— Ghost Applique (Make 2 identical ghosts) :
Notes :
Ghosts are small raised appliques worked flat in white with simple scalloped bottom edges created by shell stitches. Embroider eyes and mouth with black yarn or use tiny safety eyes if preferred for decorative runner (not for toys).
Ghost Round 1 :
With white, 6 sc in magic ring (6)
Ghost Round 2 :
6 inc (12)
Ghost Round 3 :
(1 sc, inc) x 6 (18)
Ghost Round 4 :
(2 sc, inc) x 6 (24)
Ghost Round 5 :
1 sc in each st (24)
Ghost Round 6 :
(3 sc, inc) x 6 (30)
Info :
Round 6 gives the ghost a rounded head. Next rounds will shape the sides and create the scalloped bottom using shell stitches across the bottom arc of the applique.
Ghost Round 7 :
Work 10 sc, ch2, sk next 2 sts, (5 dc in next st, sk next 2 sts) repeat shell along bottom span across 6 shells total, 10 sc across remaining head stitches (30)
Ghost Round 8 :
1 sc in each st and in each dc of shells (30)
Ghost Round 9 :
(4 sc, dec) x 5, 10 sc (25)
Ghost Round 10 :
(3 sc, dec) x 5, 5 sc (20)
Ghost Round 11 :
(2 sc, dec) x 5, 5 sc (15)
Ghost Round 12 :
(1 sc, dec) x 5, 5 sc (10)
Ghost Round 13 :
Fasten off leaving long tail for sewing. Embroider or stitch eyes (2 small X stitches about 6 stitches apart) and a small smile with black yarn
Info :
Ghosts are worked flat and are slightly domed from rounds. Place ghosts between moon and house panels on the assembled base. Sew closely around edges so they sit flush with the base.
— Haunted House Applique :
Notes :
House comprised of two appliques worked together: main house block in black and roof in purple. Windows and door are worked as surface crochet or separate tiny appliques sewn on.
House Base Round 1 :
With black, 8 sc in magic ring (8)
House Base Round 2 :
8 inc (16)
House Base Round 3 :
(1 sc, inc) x 8 (24)
House Base Round 4 :
(2 sc, inc) x 8 (32)
House Base Round 5 :
1 sc in each st (32)
House Base Round 6 :
(3 sc, inc) x 8 (40)
Info :
Now shape house rectangle by working even rounds on two opposing sides and adding small increases on roof edge to broaden the top for roof attachment.
House Base Round 7 :
Work 10 sc, ch2, sk2, 10 sc, ch2, sk2 across to create slight flat top edges (40)
House Base Round 8 :
1 sc in each st (40)
House Base Round 9 :
(4 sc, inc) x 8 (48)
House Base Round 10 :
1 sc in each st (48)
House Roof Round 1 :
With purple, ch 10, join to work along top edge of house: dc in each ch across to form a pointed roof triangle base (10)
House Roof Round 2 :
Turn and dc2tog across to taper roof (5)
House Roof Round 3 :
Join sides and work 1 sc around roof base to attach, then sc evenly across top edge of house to secure roof (48)
House Details Round 1 :
With mustard, work 2x2 small window squares: ch4, join, (dc, dc, dc) in loop, fasten off. Make 3 windows and a door (door: ch6, dc across, leave long tail)
Info :
Sew windows and door onto house base using tapestry needle and secure with small whip stitches. For glow effect, embroider tiny crosses or plus signs in mustard in window centers.
House Finish :
Fasten off and leave long tail for sewing. Position house centrally on third panel (middle of runner). Ensure roof peaks are aligned toward the runner centreline for symmetrical appearance.
— Star Appliques (Make 12 small stars) :
Notes :
Small five-pointed stars crocheted in pumpkin orange and purple. These are tiny 4-5 round motifs stitched flat and scattered around main appliques.
Star Round 1 :
With orange or purple, ch 6, sl st to join forming a ring, ch2 (counts as first dc), (dc, ch2, sl st) five times into ring to create five points, fasten off (5 small points)
Star Round 2 :
Alternatively: ch4, (sl st in 2nd ch from hook, hdc in next, sc in next) repeat for each point to make slightly fuller stars. Fasten off leaving long tail for sewing
Info :
Make at least 12 stars in a mix of orange and purple to scatter across runner between motifs. Sew flat with small stitches or glue if desired for a very firm hold.
— Small Accent Crosses (10 tiny decorative points) :
Accent Round 1 :
With mustard, ch3, sl st back into base to form tiny cross center; or embroider small X with yarn needle across black background where photo shows little golden stars
Info :
Use these tiny crosses as filler between larger appliques to give the runner a star-filled sky. They are purely surface decoration and should be sewn with short secure stitches.
— Joining Appliques to Panels :
Info :
Lay out the five joined panels flat. Arrange appliques in sequence from one end: crescent moon, ghost, haunted house, ghost, crescent moon. Leave even space between panels. Use pins to hold in place, then sew with a matching yarn tail using close whip stitches. Sew all around each applique so the edge lays flat.
Info :
When positioning: moons should sit centered across the width with tips pointing inward toward runner centre. Ghosts should be centered and slightly raised from the panel centerline. House should sit centrally in panel three with roof peak aligned with runner long axis.
— Decorative Surface Stitching :
Surface Round 1 :
With black on purple roof and white on black background, use surface slip stitch to outline moons and ghosts for definition. Work slip stitches close together following the applique edge.
Info :
Surface slip stitch also defines the house roof lines and each window. For little glowing window crosses, use two short embroidered stitches crossing in the centre.
— Scalloped Border Assembly :
Border Info :
The scalloped border is worked round the entire runner after joining panels and appliques. It consists of alternating color rounds creating the photographed layered scallop with purple, orange and black layers. Work border from RS, pick up stitches evenly along straight edges and around shaped ends.
Border Round 1 :
With black, join at one long edge seam, ch1, work 1 sc evenly along the edge across the seam, working 1 sc in each stitch around the runner edge including curved ends and along the short sides until you return to start. Fasten off (stitch count will be roughly equal to perimeter; aim for even spacing)
Border Round 2 :
Change to purple. Join in any sc, ch3 (counts as dc), *skip 1 sc, (5 dc) in next sc (shell), skip 1 sc, dc in next sc* rep around to form shell scallops. Adjust shell spacing so shells align with panel seams and appliques. Join with sl st to top of starting ch3
Info :
You should have consistent shells around the long edges; if you see gaps, adjust shell placement by moving a shell one stitch left or right to align with underlying pattern features.
Border Round 3 :
Change to orange. Work 1 sc in each dc and sc around, then in each shell work (ch2, 3 dc in shell center, ch2) to create a smaller raised shell in front of the purple shell. This creates the two-tone scallop edge effect
Border Round 4 :
Change to purple. Work a single round of sc in each st to tidy the edge and prepare for final black picot edge (sc count will remain consistent with previous round)
Border Round 5 :
Change to black. Work *(sc, ch3, sl st into top of shell apex) repeat across to create small picoted edging; adjust to create crisp scallops. Fasten off and weave in ends
Info :
For the scalloped end caps (rounded ends where moons sit), create a small semicircular cluster of shells: work 5 shells spaced closely across the end, then continue along the long side. This gives the printed scalloped shape on each end of the runner.
— Finishing and Blocking :
Finish Round 1 :
Weave in all ends through the wrong side with tapestry needle, trimming close to braid. Use blocking pins to gently shape runner flat on blocking mat and spray lightly with water. Allow to dry fully.
Info :
Blocking evens stitches and makes scallops and appliques lay flat. Pin the scallops to a uniform radius for a polished appearance. Steam-blocking can also be used carefully with a pressing cloth.
— Detailed Stitching Counts & Adjustment Guidance :
Info :
The stitch counts listed within appliques are calculated for typical worsted yarn with 3.5mm hook. If your gauge differs, measure central panel width and add or remove rounds to keep motif sizing proportional. When increasing panels to fit larger tables, add pairs of panels for every 10-12 cm length increase.
Info :
If you prefer a denser runner, use 3.25mm hook throughout; for a looser drape use 4.0mm and expect larger finished dimensions. Keep color changes tidy by carrying yarn inside small areas or using the invisible join technique to reduce tails.
This Spooky Halloween Table Runner brings seasonal personality to any table with playful moons, ghosts and a haunted house! Each applique and careful border combine to form an heirloom-quality decor piece. The layered colors and scalloped edge make it feel both whimsical and elegant. 🧶🎃 Add a tealight runner beneath for cozy party ambiance. Happy stitching and enjoy creating your spooky centerpiece! 👻