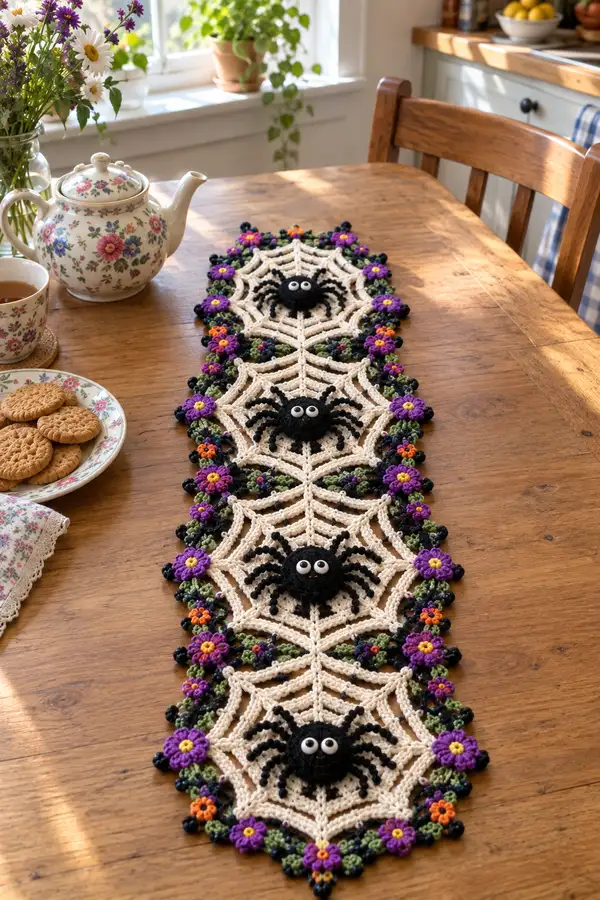
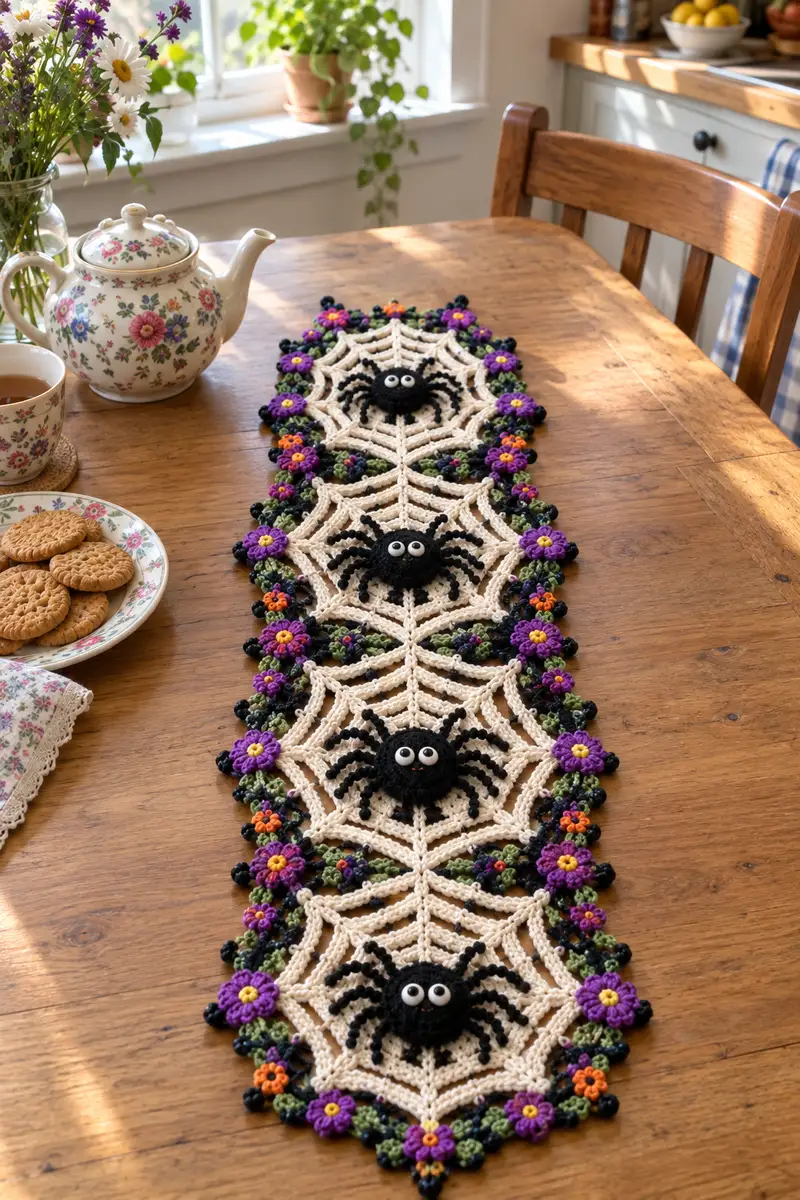
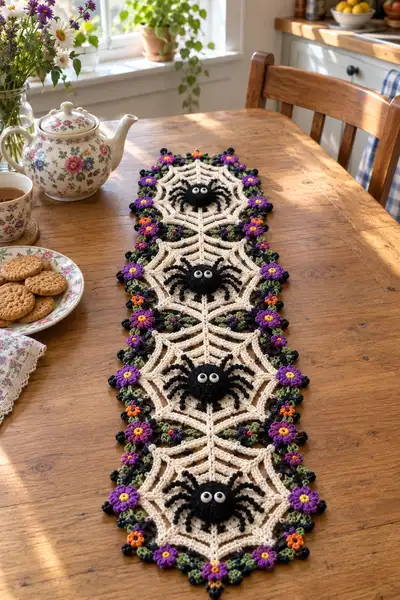
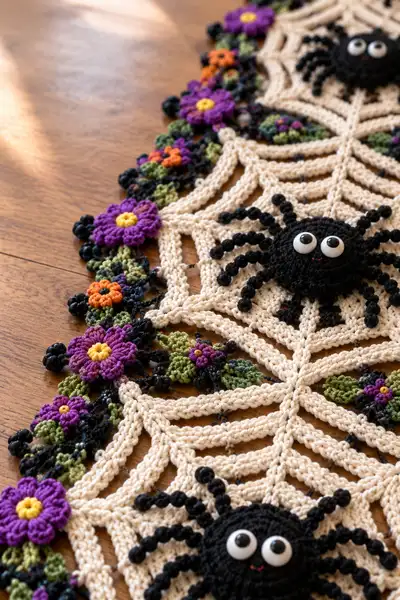
A charming Halloween table runner featuring three connected spiderweb motifs, playful black spiders with googly eyes, and a floral vine border in purple, orange and green accents. The runner is worked motif-by-motif and joined as you go for a lightly textured, lace-like finish. This pattern includes step-by-step instructions for webs, spiders, legs, flowers, leaves and the decorative edging so you can recreate the whole runner at home.
Progress Tracker
0% Complete
— Notes :
Info :
This runner is built from repeated web motifs joined along a central column and finished with a floral cluster border. Work motifs flat. For uniformity, block each completed web motif before final joining. Use stitch marker at the beginning of each round. When the pattern says 'make X', work that many separate motifs/parts and assemble as described.
Info :
Abbreviations used: mr, ch, sc, hdc, dc, tr, sl st, inc, dec, picot, bp (bobble). All rounds are worked in continuous rounds unless noted as joined rounds. When working with black yarn for spiders, consider switching to a 3.0mm hook for a tighter fabric if you prefer less visible stitches.
— Spider Center (make 3) :
Round 3 :
(1 sc, 1 inc) x 6 (18)
Round 4 :
(2 sc, 1 inc) x 6 (24)
Round 5 :
(3 sc, 1 inc) x 6 (30)
Info :
If you want a slightly raised spider body, use a small amount of fiberfill now and again after rounds 6-8. Spider centers are intended to be nearly flat; stuffing should be light and even.
Round 6 :
1 sc in each st (30)
Round 7 :
1 sc in each st BLO (30)
Round 8 :
(4 sc, 1 inc) x 5, 5 sc (35)
Round 9 :
(5 sc, 1 inc) x 5, 6 sc (41)
Info :
These slight increases give the spider body a rounded-scalloped profile which helps the legs sit neatly around the perimeter. If you prefer a flatter body, stop at round 6 and fasten off.
Round 10 :
1 sc in each st (41)
Round 11 :
(5 sc, 1 dec) x 6, 5 sc (35)
Round 12 :
(4 sc, 1 dec) x 5, 5 sc (30)
Round 13 :
1 sc in each st (30)
Info :
Fasten off leaving a 40cm/16in tail for sewing. Weave tail through final round and pull closed slightly if needed. Attach safety eyes at the end of Round 6 to sit near the center — place them approximately 4-6 sts apart depending on desired expression. For glued or embroidered eyes, place and secure after sewing to the web.
— Spider Legs (make 24 legs; 8 legs per spider) :
Info :
Each spider has eight legs. Work legs in black. Legs are crocheted as short twisted chains with bobble accents; they are made flat and then sewn to the perimeter of the spider center. Work 8 legs for each spider and attach evenly around the final round of the spider center.
Round 1 :
Ch 14, starting in 2nd ch from hook: sc, hdc in next, dc in next 2, tr in next 2, dc in next, hdc in next, sc in next (this creates a tapered length) (12 sts worked into chain)
Round 2 :
Turn, working into back loops of chain foundation only: sl st in first 3, (bp in next: [yo, insert hook, pull up loop] x3 then pull through and close to make a small bobble), sl st in next 2, bp, sl st rest to end. (This adds two small bobbles along the leg)
Info :
Bobble (bp) instruction: yarn over, insert in indicated st, pull up loop; repeat 3 times (5 loops on hook), yarn over and pull through all loops, ch1 to close bobble. Keep tension consistent for round bobbles. If you prefer simple legs, you can replace bobbles with picots (ch3, sl st in 3rd ch).
Round 3 :
Fold leg slightly and join ends with sl st to create a curve (no stitch count change)
Info :
Make 8 legs per spider. Space legs evenly and sew through the underside of the spider center so the seam is hidden. For a sturdier attachment, pass the yarn needle through the spider center twice per leg and knot on the underside.
— Web Motif (make 3) :
Info :
The web motif is worked from the center out in rounds and uses chain loops to form spokes and arches to imitate web threads. Work motifs in cream/ivory. Each web is hexagonal (6 spokes) to match the decorative runner layout.
Round 1 :
Ch 6, sl st to form ring (or mr alternative), ch 1, 12 sc into ring, join with sl st to first sc (12)
Round 2 :
Ch 6 (counts as first spoke chain), *sl st into next sc, ch 6; rep from * around to make 6 chain spokes; join with sl st into base of first ch-6 (6 loops)
Info :
Counting chain spokes carefully is important. You should have six even loops forming spokes. These loops will be used to build the arches that create the web pattern.
Round 3 :
Working into each ch-6 loop: *(sc, ch3, 3 dc, ch3, sc) in loop; sl st into next base st between loops; rep from * around (6 decorative arches)
Round 4 :
In each arch from previous round make: *(sl st at base, ch7, sl st at center of arch) to form bridging loops across spokes; rep around (6 larger loops)
Info :
These bridging loops create the layered web effect. Maintain even loop tension to keep a flat motif. If any loop pulls tight, block the motif while damp to even out the tension.
Round 5 :
Working along each bridging loop: *[sc, picot, dc, picot, sc] into the chain space, sl st to next base; rep around (6 sets; count is based on spaces, not standard sc count)
Round 6 :
Ch 1, *sc into next 5 sts and into top of each arch, then in the center of each spoke [ch3, sl st] to create a small picot-spoke; rep around producing a scalloped outline
Round 7 :
1 sc in each sc around forming a tidy round (approx 48 sc depending on how you executed arches) (48)
Info :
If your stitch count differs slightly due to differing chain tensions, aim to maintain the same number of arches and loops per spoke so motifs join neatly later. Block each motif flat, pinning the spokes evenly to a hexagonal shape.
Round 8 :
To define outer web ribs: *(ch3, sl st into next arc top) around each arch repeat to create 6 outer ribs; join with sl st to first st (6 ribs)
Round 9 :
Work one round of sc evenly around outer edging catching the back of the rib loops so the motif edge is firm (approx 60 sc) (60)
Round 10 :
1 sc in each st BLO around to give a defined ridge for joining later (60)
Info :
Leave a long tail (~40cm/16in) at the end of the final round for position sewing if you prefer to do a whipstitch join rather than join-as-you-go. I recommend join-as-you-go for a seamless runner.
— Central Spine Join (connecting webs) :
Info :
Webs are connected along a central column formed by chaining and sewing at the spoke tips so that three web hexagons are aligned. We will perform a join-as-you-go from the second web onward. Work joining after completing Round 9 of each web motif while motif is still on your hook.
Round 1 (join step on second web) :
Position second web next to first with spokes aligned. When you reach the spoke that joins to the first web, sl st into the corresponding outer rib of the first web, ch3 to continue, then continue around the second web repeating this join at each of the three contact spokes (no global stitch count change)
Info :
Repeat for the third web — join the third to the second in the same manner. Take care to pin motifs together so the chain joins sit neatly and the motifs are aligned straight along the runner center.
— Floral Cluster (flowers and berries; make enough to trim both sides) :
Info :
Border is formed from small 6-petal flowers (purple), tiny 5-petal accent flowers (orange), little leaf clusters and small bobble berries (black). Make the number of flowers required to run the length of both sides of the runner; roughly 6 large flowers and 8-12 small accents per side depending on spacing (estimate: make 24 large purple flowers, 36 small orange flowers, 60 leaf clusters and 40-50 berries). You can reduce or increase to suit your layout.
Large Flower - Round 1 :
mr, ch1, 8 sc in mr; join with sl st (8)
Round 2 :
*(ch3, 3 dc, ch3), sl st into next sc to form a petal; rep from * around to form 8 petals. Join (8 petals)
Round 3 :
In front of petals, with contrasting yellow, make center: attach yarn to center, ch2, work 6 hdc into center and sl st, fasten off. Weave end to back and secure (6 center)
Info :
Use a smaller hook (3.0mm) for flowers if you want them tighter. Press flat lightly when blocking to keep petals from curling. Sew flowers into place along the outer edges of the web motif following the photos for placement — typically at arc junctions and outer seam points.
Small Flower - Round 1 :
mr, ch1, 6 sc in mr, join (6)
Round 2 :
*(ch3, 3 dc, ch3), sl st into next sc; rep around to make 6 petals; join and fasten off (6 petals)
Leaf Cluster - Round 1 :
With green, ch6, sc in 2nd ch from hook, hdc in next, dc in next 2, tr in last ch (leaf shape). Turn and sl st back down the opposite side to base for a little symmetrical leaf, fasten off. Make clusters of 2-3 leaves and sew them between flowers.
Berry/Bobble :
With black, in chosen spot sc2tog three times into same base st to produce a small bobble cluster or make a small 6-sc ball using mr - 6 sc in mr, pull tight, fasten leaving a tail for sewing. Sew berries into clusters near flowers as in photo.
Info :
Arrange flowers and leaves loosely before sewing to decide your spacing. Pin in place, then stitch through the back loops of the web motif outer round and around the flower base so each flower and leaf cluster is securely anchored and the runner lays flat.
— Decorative Edge & Final Joining :
Round 1 :
With cream edge color, sc evenly around entire assembled runner outer edge catching backs of flower/leaf stitch bases where possible to unify edge (approx 200-260 sc depending on spacing) (count will vary)
Round 2 :
*(ch3, picot, sl st into next st) to create a scallop effect along the entire outer edge; rep around. When you reach a flower, work 3 picots to emphasize placement. Join with sl st.
Info :
This scalloped edging softens the runner silhouette and ties together the web spokes with the floral border. Block the finished runner flat with pins and steam lightly or damp-block to set shape. Weave in all ends securely on the underside.
— Alternate Spider Body Option (raised, amigurumi-style) :
Round 3 :
(1 sc, 1 inc) x 6 (18)
Round 4 :
(2 sc, 1 inc) x 6 (24)
Info :
For a more three-dimensional spider that sits above the web, use this option and stuff lightly. Continue increasing to round 6 then work even for 3-4 rounds before decreasing. Stuff firmly but not overfull so the spider sits comfortably on the web surface.
Round 5 :
1 sc in each st (24)
Round 6 :
(3 sc, 1 inc) x 6 (30)
Round 7-11 :
1 sc in each st (30)
Round 12 :
(3 sc, 1 dec) x 6 (24)
Round 13 :
(2 sc, 1 dec) x 6 (18)
Round 14 :
(1 sc, 1 dec) x 6 (12)
Info :
Fasten off leaving a long tail for sewing. Stuff before final decreases and close the opening with a yarn needle. Sew this body to the center of the web, then attach the eyes and legs as described earlier.
— Assembly & Placement Info :
Info :
Lay all three web motifs in a straight row with edges almost touching. The center of each web should line up along a single central axis so spiders appear centered in each web. Pin in place and perform join-as-you-go or whip stitch along the inner ribs to create a stable runner. Follow the floral placement in the photos: alternate large purple flowers and small orange accents with leaf clusters in between to create a lively border.
Info :
Attach spiders after webs are joined and blocked. For each spider, position the spider center over the central portion of the web and baste it in place. Arrange 8 legs around the perimeter evenly—use previous round counts to determine equal spacing (e.g., every 3-4 outer edge stitches depending on web size). Sew legs through the web and spider center for secure attachment.
Info :
Check that the runner sits flat when sewn. If any motif puckers, unpick the join locally and re-pin to correct the angle. For extra stability on a frequently-used table, lightly apply fabric glue under the underside joins or add a non-slip pad beneath the runner.
— Finishing Touches :
Info :
Trim and weave all ends into the underside of the runner. If using safety eyes, glue from underside additionally for extra security. Steam-block gently if desired to open the lace; avoid melting any plastic eyes. Optionally add tiny embroidered mouths or cheek blushing for character using small amounts of embroidery floss or fabric paint sparingly.
Info :
Care: Hand wash cool and lay flat to dry; avoid machine washing or tumble drying to preserve shape and glued elements. Spot clean as needed for small marks.
This spider web table runner transforms your table with a playful mix of spooky and sweet details. Each carefully crocheted web, spider and floral cluster comes together for a charming seasonal centrepiece you can proudly display. The join-as-you-go construction makes assembly straightforward while allowing creative placement of flowers and berries. 🕷️🌸 Enjoy the process and delight in the tiny details — this runner will be a conversation starter at every gathering. Happy crocheting! 🎃