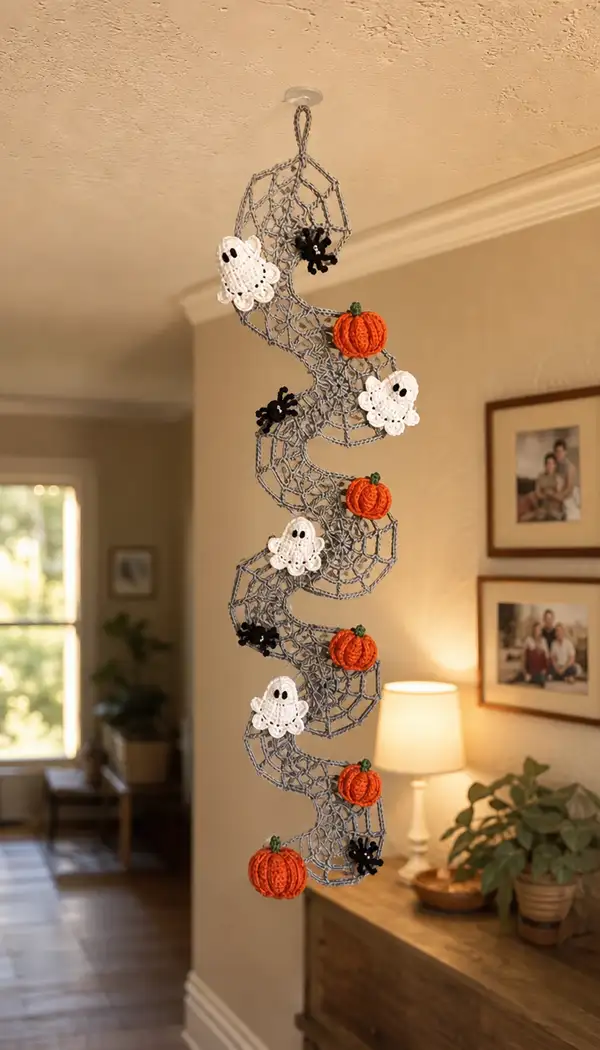
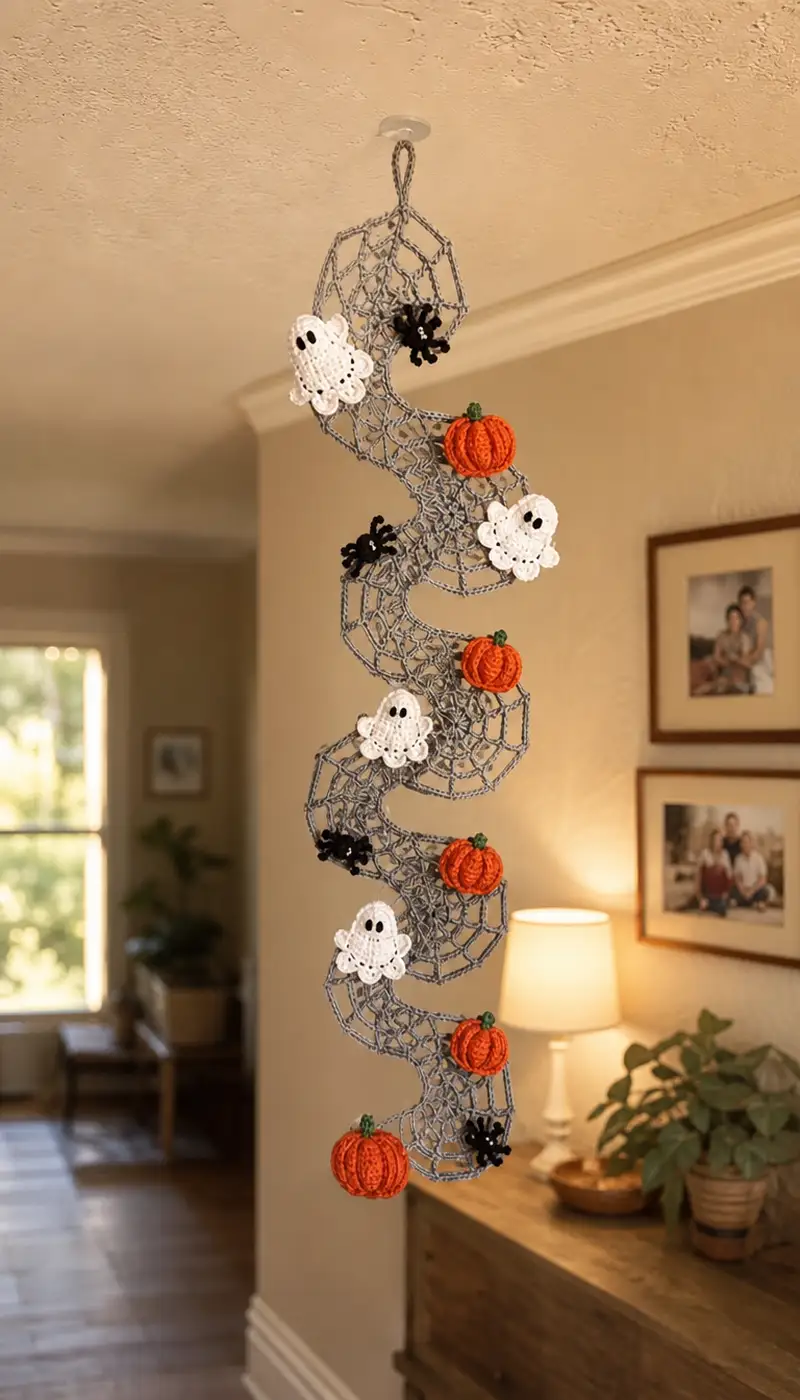
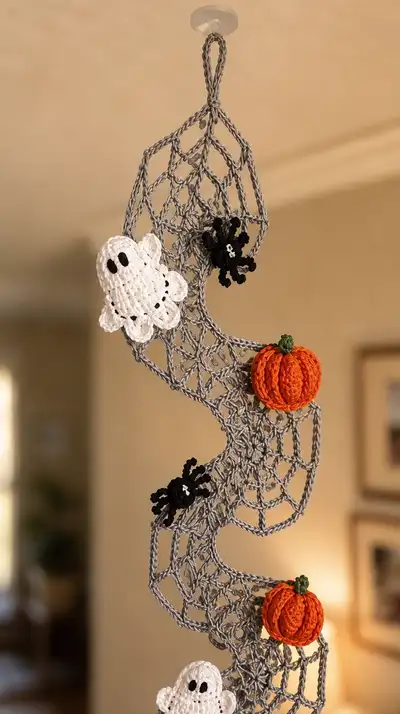
Create a whimsical hanging spiral garland decorated with tiny ghosts, ribbed pumpkins, and playful spiders. This project features an openwork grey spiderweb spiral, five scalloped white ghosts, five textured orange pumpkins with green stems, and small black spiders — all crocheted and sewn onto a graceful S-shaped garland. The finished piece hangs as a spooky seasonal accent and makes a charming, handmade Halloween decoration.
Progress Tracker
0% Complete
— Overview & Construction Notes :
Info :
This project is constructed from separate motifs sewn onto a sinuous chain of joined spiderweb motifs forming a vertical S-shaped spiral. Make the spiral as a series of web octagons joined and curved as you go with slip-stitch join points to create the S-shape. Sew pumpkins, ghosts, and spiders to the web after blocking and light starching if desired. Use yarn appropriate to your tension to maintain structure: cotton or cotton blend is recommended for crisp openwork.
Info :
Tension note: For amigurumi-style pumpkins and ghosts, work tightly so stuffing does not show. For the open spiderweb spiral, keep tension looser for lacy effect but avoid extremely loose chains that will droop. Use a slightly smaller hook for stuffed motifs than for the web if you want tighter fabric.
— Spiral Spiderweb (Make 7 web segments, join to form spiral) :
Round 1 :
Begin with light grey yarn. Make a magic ring. ch2 (counts as first dc throughout this motif), 11 dc in ring, pull ring closed (12 dc)
Round 2 :
Ch3 (counts as dc), dc in same st, ch2, *2 dc in next st, ch2; rep from * around, join with sl st to top of ch3 (12 groups, 12 ch-2 loops)
Round 3 :
Sl st into first ch-2 sp, ch3, (2 dc, ch2, 3 dc) in same ch-2 sp (corner shell), *sk next dc group, sl st into next ch-2 sp, (3 dc, ch2, 3 dc) in ch-2 sp; rep from * around, join with sl st to top of ch3 (12 corner shells)
Info :
These first three rounds form a small octagonal web hub. Keep your ch-2 corners roomy — they will be used to create openwork web lines in following rounds. Place a marker at the start of Round 3 to maintain orientation for joining to next segments.
Round 4 :
Sl st into center of a corner shell, ch4 (counts as tr), tr, ch3, *sk to next corner shell, sl st into center of shell, ch4, tr, ch3; rep around ending with sl st to top of first ch4 (12 web points)
Round 5 :
Sl st into ch3 sp, ch5 (counts as dtr), dtr in same ch3 sp, ch3, *sl st into center of next shell, ch5, 2 dtr in same sp, ch3; rep around, join with sl st to first ch5 (12 long spokes)
Info :
Work Round 4-5 loosely to create a lacy web. These long chains/spokes will later be connected with chain arches to form webbing. If you prefer a tighter look, use one hook size smaller for the web segments.
Round 6 :
Sl st to nearest chain between dtrs, *ch6, sl st into center of next corner shell to anchor, ch6, sl st into next chain between dtrs; rep around to create chain arches between spokes. Join with sl st. This creates a loosely connected net around the octagon.
Round 7 :
Work a decorative border: sl st in each anchoring sl st and chain top, *ch3, sl st into ch6 arch at center point to make a scallop; rep around until you return to start, join with sl st
Info :
Each web segment measures approximately 4.5-6 inches across depending on yarn/hook. Block each web flat and stretch slightly to emphasize shape before joining. Make 7 identical web segments to form a long spiral. To make the web curved into an S shape, vary join points and angle segments slightly when attaching together as you go.
Web Join Technique — Round 8 :
When your first web is finished (Rounds 1-7), begin the second web. Join round 1 of the second web by placing it adjacent to the first and slip-stitching through a chain space on web 1 at desired join point. For a gentle S curve, attach web 2 offset by 3-4 stitches relative to web 1, joining 3-4 sl sts along the adjoining edge. Continue making web 3 through web 7, joining each to the previous with 3-6 slip stitches staggered along one edge to create a flowing curve. Fasten off and weave ends. (No stitch count — join points vary to shape curve)
Info :
Tip: To make a sinuous S-shape, alternate joining the next web segment slightly left then slightly right of center relative to the previous segment. Pin the seven segments on a blocking board or on a flat surface to check the overall spiral shape before permanently sewing.
Edge Trim Round 9 :
With the grey yarn and 3.5mm hook, work a firm border around the entire assembled spiral: join yarn, ch1, sc evenly around all outer edges (approx. 6-8 sc per web edge depending on size). At corners or points where web edges are joined, work 3 sc to maintain smooth curvature. Join and fasten off. (Stitch count varies with join layout)
Info :
Create a hanging loop at the topmost point now by chaining 30-40, fold to form a loop and sl st to base, then reinforce with extra sc around the base of the loop. This gives a neat hanging point for a suction cup or hook.
— Ghost Motifs (Make 5) :
Round 1 :
With white yarn and 3.0mm hook: mr, 6 sc in ring (6)
Round 3 :
(1 sc, inc) x 6 (18)
Round 4 :
(2 sc, inc) x 6 (24)
Info :
These rounds form a small rounded head. Place safety eyes between rounds 4 and 6 roughly 4-6 stitches apart depending on expression; alternatively embroider eyes later with black yarn. If using safety eyes, insert and secure before stuffing.
Round 5 :
1 sc in each st (24)
Round 6 :
1 sc in each st (24)
Round 7 :
(3 sc, inc) x 6 (30)
Round 8 :
1 sc in each st (30)
Info :
Begin stuffing lightly at the end of Round 8: use small amounts of fiberfill and add until head holds gentle shape but still squishy. Stuff more firmly at the top for a rounded head, less at the bottom to allow scalloped skirt to sit flat against the web.
Round 9 :
(4 sc, inc) x 6 (36)
Round 10 :
1 sc in each st (36)
Round 11 :
1 sc in each st (36)
Round 12 :
(4 sc, dec) x 6 (30)
Round 13 :
(3 sc, dec) x 6 (24)
Info :
At rounds 12-13 shape the base of the head slightly so the ghost will sit naturally on the web. Continue stuffing gradually as you decrease so the interior remains smooth.
Round 14 :
(2 sc, dec) x 6 (18)
Round 15 :
(1 sc, dec) x 6 (12)
Info :
Fasten off leaving a long tail for sewing. Finish stuffing through the opening and use a yarn needle to close the small opening with an invisible stitch. Tuck tail inside and weave in securely.
Scalloped Skirt — Round 17 :
Rejoin white yarn to any lower round stitch along the bottom edge of head where you want the scallop to begin. *Ch3, sl st into next st to create a small scallop; rep around the entire lower edge. Aim for 8 evenly spaced scallops. Fasten off and weave in ends.
Round 18 :
Optional: For a fuller scalloped skirt, in each ch3 sp work (sc, hdc, sc) to create petite petals; 8 petals total. Fasten off.
Info :
Embroider eyes with small black yarn: make two short satin-stitched ovals about 4-6 stitches apart, or attach 6-8mm safety eyes between Rounds 4-6 before stuffing. Add a small row of black running stitch as mouth or dimples if desired.
— Pumpkin Motifs (Make 5 small ribbed pumpkins) :
Round 1 :
With orange yarn and 3.0mm hook: mr, 6 sc in ring (6)
Round 3 :
(1 sc, inc) x 6 (18)
Round 4 :
(2 sc, inc) x 6 (24)
Info :
These rounds shape the pumpkin base. To create prominent ribs later, use either front loop ribbing or surface slip stitch ribs worked after stuffing. Here we create the pumpkin round base; ribs are formed by working back loop hdc rounds or by working vertical chains around the body.
Round 5 :
1 sc in each st (24)
Round 6 :
1 sc in each st (24)
Round 7 :
(3 sc, dec) x 6 (18)
Info :
Begin stuffing the pumpkin firmly through the opening using small amounts, focusing near the base and center so the pumpkin sits plump. Keep stuffing firm but do not overfill — we'll cinch a running thread to create ribbing and shape.
Round 8 :
(2 sc, dec) x 6 (12)
Round 9 :
1 sc in each st (12)
Round 10 :
Fasten off leaving long tail. Thread tail through remaining 12 stitches and pull tight to close top. Knot and weave tail through center to secure. This forms a small closed pumpkin sphere. (12 -> gather closed)
Ribbing Detail — Round 11 :
To make distinct ribs, take a long length of yarn and stitch from bottom to top across the outside: fold pumpkin so the seam line is hidden, then with yarn threaded onto a blunt needle, stitch a line from bottom center over the top to bottom center again, repeat 8 times spaced evenly around to create eight ribs. Pull each line snug but not so tight as to distort stuffing. Secure ends inside with knots and weave in.
Round 12 :
Optional crochet ribs: With orange yarn and 2.75mm hook, work surface slip stitches or BLO hdc vertical ridges: working from bottom to top in each rib section, insert hook under a few pulled loops and work hdc or sl st to form a raised ridge. Repeat for all ribs to emphasize texture.
Stem — Round 13 :
With green yarn, ch6, join to form small ring, 6 sc in ring (6). Work 3 rounds of 6 sc (6 each round). Fasten off leaving long tail; sew to top center of pumpkin. Add a small leaf by ch4, sl st back into base and fasten off. Weave in ends.
Info :
Make five pumpkins and vary the amount of stuffing slightly to produce pumpkins that look hand-made. Concordant ribbing and green stems give realistic miniature pumpkins. Place pumpkins alternating on the left and right side of the spiral for a balanced look.
— Little Spiders (Make 6 small spiders) :
Body Round 1 :
With black yarn and 2.75-3.0mm hook: mr, 6 sc in ring (6)
Round 3 :
1 sc in each st (12)
Info :
Slightly stuff the spider body through the opening; do not overstuff. Leave long tail for sewing. Tiny spiders look best with compact bodies about 1 inch across. You can use a 2.75mm hook for a tighter stitch for small spiders.
Legs Round 4 :
Attach black yarn at one side of body, *ch6, sl st back into body at adjacent stitch to form a curved leg; rep to make 3 legs on this side. Repeat on opposite side to make 6 legs total. For curly legs, ch6 then (sc, hdc, sc) in each chain to curl; or use a short piece of floral wire covered with yarn for poseable legs. Fasten off and weave ends.
Round 5 :
Optional: Add two tiny white stitched dots for eyes with white yarn and a small black stitch in center with black thread, or stitch a small white stitch on top of the body. Fasten off.
Info :
Make 6 spiders. For joints and belly texture, work one round of surface slip stitches around body to add a glossy highlight if desired. Place spiders in small web cups then fasten to the spiral as accents.
— Assembly Prep & Placement :
Info :
Before sewing motifs to the spiral, block both the web spiral and motifs lightly with a damp cloth and allow to dry for crisp edges. Plan placement: in the pictured example the spiral holds five pumpkins spaced roughly evenly down the length, five ghosts alternating side to side, and six spiders tucked into web pockets. Use pins to place pieces then step back to view balance before sewing.
Info :
Thread a yarn needle with matching yarn for invisible stitches: use white for ghosts, orange for pumpkins, black for spiders. Sew each motif to the web by stitching through the web border and through the back/top stitches of the motif. Reinforce with multiple passes for pumpkins which are heavier.
— Detailed Round-by-Round Stitching Summary (Full breakdown across motifs) :
Spiral Segment Rounds 1-7 :
Follow earlier web instructions for each web segment: R1 12 dc, R2 12 groups with ch2, R3 12 corner shells, R4 tr spokes, R5 dtr spokes, R6 chain arches, R7 decorative scallops. Repeat identical R1-R7 for all 7 segments and join each subsequent segment to the previous along 3-6 slip-stitch joins to create S-curve.
Info :
When joining segments, stagger joins about one-third down the side for an alternating S; alternate left and right offsets. This stagger creates a serpentine flow instead of a straight column.
Ghosts Detailed Rounds 1-18 (each ghost) :
R1 mr 6 sc (6), R2 6 inc (12), R3 (1 sc, inc) x6 (18), R4 (2 sc, inc) x6 (24), R5 1 sc each (24), R6 1 sc each (24), R7 (3 sc, inc)x6 (30), R8 1 sc each (30), R9 (4 sc, inc)x6 (36), R10 1 sc each (36), R11 1 sc each (36), R12 (4 sc, dec)x6 (30), R13 (3 sc, dec)x6 (24), R14 (2 sc, dec)x6 (18), R15 (1 sc, dec)x6 (12), R16 6 dec (6) - close, R17 join for scallops with ch3 sl st repeats, R18 optional petal details.
Info :
These 18 rounds give each ghost a cute rounded head and a scalloped, lacy skirt. If you want a flatter ghost, invoke fewer increase rounds and make the skirt smaller. Embroider eyes after placement if you prefer positional flexibility.
Pumpkins Detailed Rounds 1-13 (each pumpkin) :
R1 mr 6 sc (6), R2 6 inc (12), R3 (1 sc, inc)x6 (18), R4 (2 sc, inc)x6 (24), R5 1 sc each (24), R6 1 sc each (24), R7 (3 sc, dec)x6 (18), R8 (2 sc, dec)x6 (12), R9 1 sc each (12), R10 gather and close using long tail, R11 create 8 ribs by stitching from bottom to top evenly around, R12 optional BLO hdc ribs, R13 stem: make small 6-stem tube (6 sc rounds x3) then sew to top.
Info :
Rib count: aim for 8 ribs on each pumpkin to echo classic pumpkin sections. You can do 6 or 10 ribs for variety but keep even spacing. When sewing ribs pull gently to create deep grooves; if you over-tighten you will flatten the pumpkin.
Spiders Detailed Rounds 1-5 (each spider) :
R1 mr 6 sc (6), R2 6 inc (12), R3 1 sc across (12), R4 attach legs: ch6 sl st back for each leg (3 legs each side), R5 optional eyes and surface slip stitch highlight. Fasten off and leave tail for sewing.
Info :
For curly legs: after ch6 sl st twice in each chain to curl, or use a short pipe cleaner covered with yarn inserted through the body before final stitching for fully poseable legs. Tuck wire ends safely into the body so no sharp ends remain.
Additional Decorative Options — Bats, Leaves, Extra Motifs :
Optional: add small green leaves near pumpkin stems with ch4 leaf pattern or tiny black bat silhouettes worked in black yarn with tiny wings. Use same attachment technique as other motifs.
Info :
Make extras and swap motif arrangement to create a unique garland — you can reduce the number of pumpkins and increase ghosts for a spookier look or add colorful beads into the web for sparkle.
— Final Finishing Touches :
Info :
Once all motifs are sewn to the spiral and ends woven in, lightly mist the entire garland with water and pin into shape on a towel to dry (blocking). If you want a crisp look, use a light spray starch and allow to dry. Attach the hanging loop to a suction cup or ceiling hook. For extra security on heavier pumpkins, sew through both pumpkin base and web border with multiple passes of yarn.
Info :
Inspect all seams and reinforce any motif that feels loose. Trim any long tails flush to the fabric. If you added safety eyes to any motif, double-check their backs, and secure with craft glue for extra permanence if this piece will be displayed where it may be handled frequently.
This spiral spiderweb garland brings playful Halloween charm to any room with its lacy web and joyful trio of pumpkins, ghosts, and spiders. Each section is handcrafted with care and becomes a small scene of its own as you assemble the motifs onto the spiral. Enjoy the meditative work of crocheting the openwork web and the satisfying shaping of tiny pumpkins and scalloped ghosts. Hang it in a doorway or window for a whimsical seasonal accent that guests will adore. 🎃🕸️