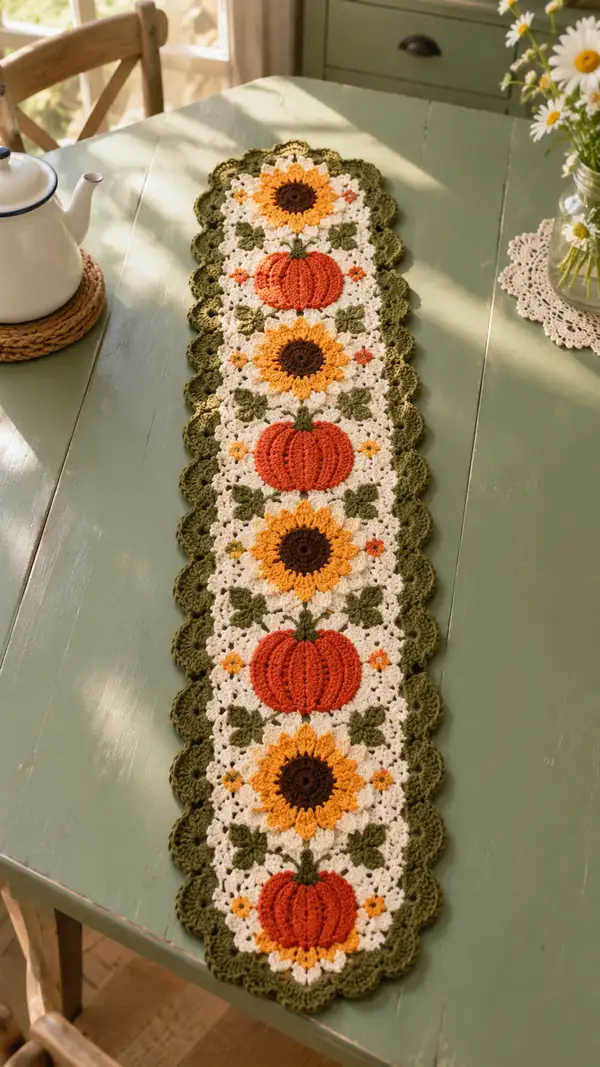
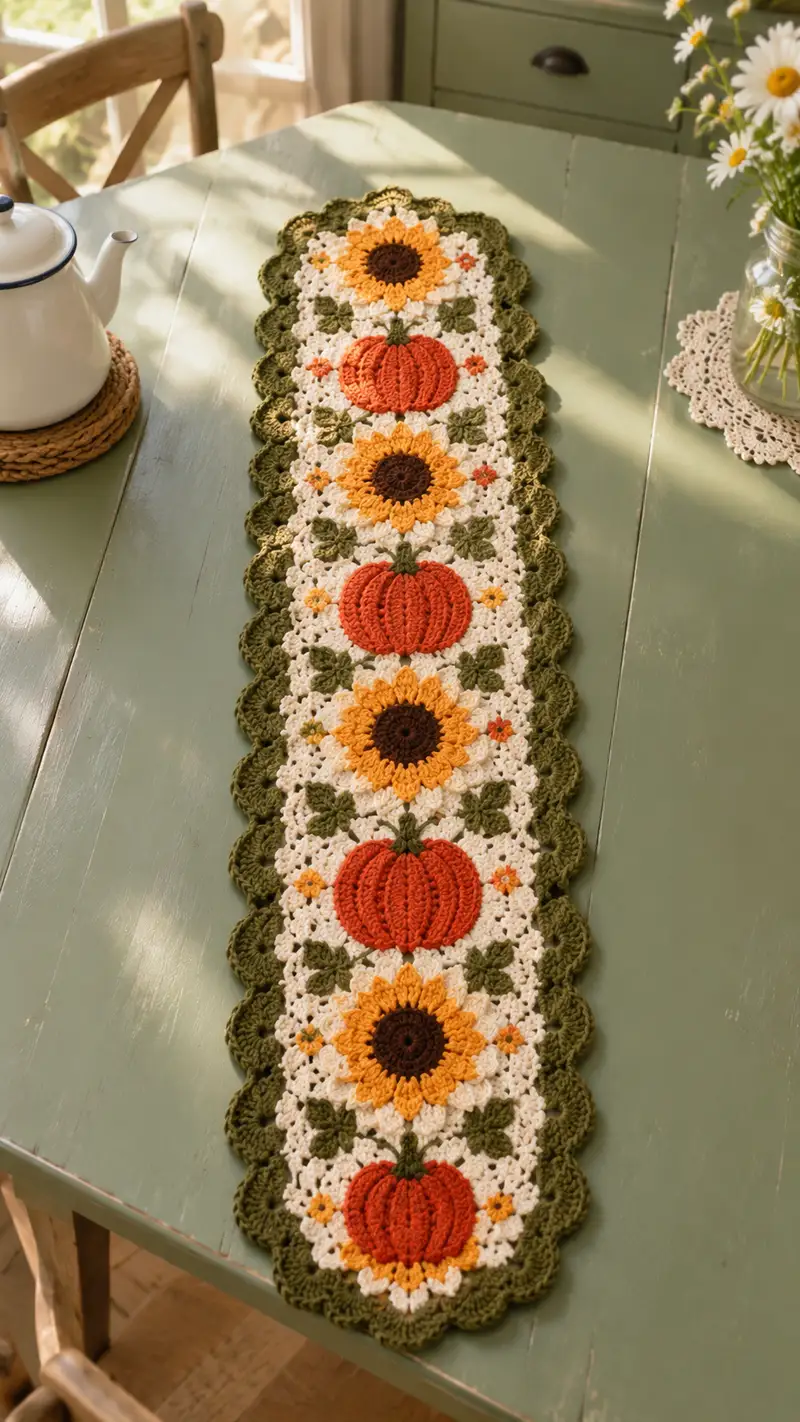
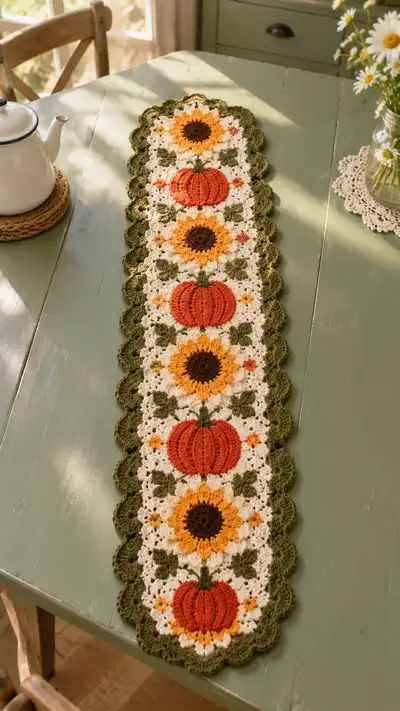
A warm, autumn-inspired table runner featuring alternating sunflower and pumpkin motifs set on a soft cream lattice with leafy accents and a scalloped olive border. The textured pumpkins use raised puff-style ribs and the sunflowers have layered petals and a deep brown center. This runner is worked motif-by-motif and joined to create a long, narrow centerpiece that looks beautiful on dining and console tables. Ideal for seasonal decor and thoughtful handmade gifts.
Progress Tracker
0% Complete
— Pattern Notes & Gauge :
Info :
Gauge is not critical for table runner use, but for consistent motif size aim for motifs about 8-9 cm (3.25-3.5 in) across each square before blocking when using worsted weight yarn and a 3.5mm hook. Work tightly enough so textured stitches (puffs, post stitches) hold shape. Block motifs gently to flatten and square them before joining.
Info :
This runner is made of repeating square motifs: Sunflower Square (35 rounds), Pumpkin Square (35 rounds), Leaf Cluster (12 rounds) and Small Accent Flower (8 rounds). The sequence is Sunflower - Pumpkin - Sunflower - Pumpkin - Sunflower - Pumpkin for a long runner. Join motifs with a join-as-you-go slip stitch or whip stitch as you prefer, then add scalloped olive border over the joined panel.
— Sunflower Square (Make 3) :
Round 1 :
6 sc in magic ring (6)
Round 3 :
(1 sc, 1 inc) x 6 (18)
Round 4 :
(2 sc, 1 inc) x 6 (24)
Round 5 :
(3 sc, 1 inc) x 6 (30)
Round 6 :
(4 sc, 1 inc) x 6 (36)
Round 7 :
(5 sc, 1 inc) x 6 (42)
Round 8 :
(6 sc, 1 inc) x 6 (48)
Info :
These rounds build a deep brown disc for the sunflower center. Keep tension even and place a stitch marker at the first stitch of each round to help counting. If you prefer a slightly larger center, add one more increase round (7 sc, inc) x 6 to reach 54.
Round 9 :
1 sc in each st (48)
Round 10 :
1 sc in each st (48)
Info :
Change to golden yellow for sunflower petals in the next round. Fasten off brown and join yellow with a standing sc or sl st into any stitch.
Round 11 :
Change to golden yellow. *Ch2, skip 1, (3 dc, ch2, 3 dc) in next st (creates a tall petal shell), ch2, skip 1, sc in next 3 sts* repeat across to create 8 petal zones; adjust slightly so you end with sc in last 3 sts and join with sl st (48 base points used)
Round 12 :
1 sc in each st and in each shell space around to tidy edges (48)
Round 13 :
*In space of each petal shell: (sc, hdc, 5 dc, hdc, sc) worked across the shell area working several stitches into the same base loop to form raised petals; work sc in base sc stitches between shells* (48)
Info :
Round 13 forms the layered petal height. Work petals evenly and do not add increases so square proportions stay predictable. If your petal clusters extend beyond the target width, use BLO in the following rounds to compress the fabric slightly.
Round 14 :
1 sc in each st (48)
Round 15 :
Change to cream. *Ch3, skip next 2 sts, sc in next st, ch2* repeat to create a lattice foundation turning the round into a square-approach (work into every 6th stitch space to later form corner groups) (48)
Round 16 :
Change to cream. Work 1 sc in each st and into chain spaces, placing (sc, ch2, sc) at four points spaced evenly to form four corner spaces — these will guide the square shaping (48)
Round 17 :
1 sc around in cream; at each corner space work (sc, ch3, sc) to start square geometry (48)
Info :
At this stage you will transform the circular motif into a nearly square motif by spacing four corners evenly. Use blocking pins to nudge the work into a square if necessary before continuing.
Round 18 :
1 sc in each st (48)
Round 19 :
(3 sc, 1 inc) x 12 (60)
Round 20 :
1 sc in each st (60)
Round 21 :
(4 sc, 1 inc) x 12 (72)
Round 22 :
1 sc in each st (72)
Info :
These increases add a stabilizing square frame around the sunflower so motifs will match the pumpkin squares. Keep the corners defined by working extra chains in the corner spaces when needed.
Round 23 :
Work in cream: *sc in next 7 sts, (sc, ch2, sc) in corner space* repeat 4 times (72)
Round 24 :
1 sc in each st (72)
Round 25 :
Change to olive. Work one round of green leaf connectors: *ch3, skip 2, sc in next 2, ch2* around to create leaf anchor points (72)
Round 26 :
Change to cream. 1 sc in each st (72)
Round 27 :
Work decorative small leaf clusters in olive into anchor points: *into ch3 space: (sc, hdc, 3 dc, hdc, sc)* across anchor points; sc across remaining sts (72)
Round 28 :
1 sc in each st (72)
Round 29 :
Change to cream. *sc in next 10 sts, (sc, ch3, sc) in corner* repeat (72)
Round 30 :
1 sc in each st (72)
Round 31 :
Change to olive. Work small picot-style flower accent corners: *in the side centers, (ch3, sl st into base, sc) to anchor tiny flowers* then sc around (72)
Round 32 :
1 sc in each st (72)
Round 33 :
Work a tidy finishing round in cream: 1 sc in each st, sl st to join; fasten off and weave ends (72)
Round 34 :
Block square gently to 9 cm/3.5 inches if necessary and ensure the petals radiate evenly
Round 35 :
Info : Set aside completed sunflower square. Repeat to make 3 sunflower squares in total
— Pumpkin Square (Make 3) :
Round 1 :
6 sc in magic ring (6)
Round 3 :
(1 sc, 1 inc) x 6 (18)
Round 4 :
(2 sc, 1 inc) x 6 (24)
Round 5 :
(3 sc, 1 inc) x 6 (30)
Round 6 :
(4 sc, 1 inc) x 6 (36)
Round 7 :
(5 sc, 1 inc) x 6 (42)
Round 8 :
(6 sc, 1 inc) x 6 (48)
Info :
These rounds make the small central disc that will become the pumpkin body. We're going to build vertical ribs using front post stitches and puff stitches to give the pumpkin its sculpted shape.
Round 9 :
1 sc around in pumpkin orange (48)
Round 10 :
Change to pumpkin orange. Work a round of evenly spaced post ribs: *fpdc around next st, skip next st* across to create raised pillars (48 posts made into 24 base groups)
Round 11 :
1 sc around in orange, working behind the posts to stabilize (48)
Round 12 :
Work puff ribs: *into designated post stitch: (yarn over, insert hook into post, pull up loop) repeat 4 times in same post, yarn over and pull through all loops, ch1 to close puff; sl st into next base stitch* repeat to make 8 well-spaced puff ribs across the disc (48 base positions used)
Info :
Puff ribs create the pumpkin 'segments'. Keep each puff roughly the same size and close with a short ch to keep it defined. If you want deeper ribs, use 5 yarn-over pulls per puff instead of 4.
Round 13 :
1 sc around (48)
Round 14 :
Change to cream and begin squaring rounds: *sc in next 5 sts, (sc, ch2, sc) in corner space* repeat to form corners (48)
Round 15 :
1 sc in each st (48)
Round 16 :
(3 sc, 1 inc) x 12 (60)
Round 17 :
1 sc in each st (60)
Round 18 :
(4 sc, 1 inc) x 12 (72)
Round 19 :
1 sc in each st (72)
Info :
At this point the orange pumpkin is anchored within a square cream field similar to the sunflower motif. The puff ribs should be visible through the cream background but remain part of the orange section.
Round 20 :
Change to olive. Work small stem base at top center area: work sc across until top center, then into 3 center stitches work (sc, hdc, sc) in olive to form a short stem nub; continue sc around (72)
Round 21 :
Change to cream. 1 sc in each st (72)
Round 22 :
Change to olive. Work leaf anchors: *ch3, skip 2, sc in next 2* around to mark leaf positions near pumpkin corners (72)
Round 23 :
Change to cream. 1 sc in each st and into chain spaces (72)
Round 24 :
Work olive leaf clusters into anchor points: *(sc, hdc, 3 dc, hdc, sc) in each ch3 space* sc across remaining sts (72)
Round 25 :
1 sc in each st (72)
Round 26 :
Change to cream. *sc in next 10 sts, (sc, ch3, sc) in corner* repeat (72)
Round 27 :
1 sc in each st (72)
Round 28 :
Change to olive. Small accent rounds: add two tiny mustard/orange picot flowers by working (ch3, sl st into base) placed symmetrically at sides then sc around (72)
Round 29 :
1 sc in each st (72)
Round 30 :
Finishing round in cream: 1 sc in each st; sl st to join and fasten off (72)
Round 31 :
Block pumpkin square to 9 cm/3.5 in and ensure puff ribs remain defined
Round 32 :
Info : Repeat to make 3 pumpkin squares
Round 33 :
Optional: If you desire deeper ribs, into the puff center run an embroidery stitch with matching orange yarn to deepen segment separation
Round 34 :
Info : Keep these three pumpkin squares set aside for joining
Round 35 :
Check that stem positions align with runner layout before joining; adjust placement by shifting where you placed the stem earlier if needed
— Leaf Cluster Square (Make 6) :
Round 1 :
6 sc in magic ring (6)
Round 3 :
1 sc around (12)
Round 4 :
Change to olive. *Ch3, sl st into next st, sc in next 2* repeat to create small leaf anchors across (12)
Round 5 :
Work splitted leaves: *into ch3: (sc, hdc, 3 dc, hdc, sc)* across each anchor; sc across remaining sts (12)
Round 6 :
1 sc around (12)
Round 7 :
Change to cream. *sc in next 2, ch2* repeat building a small square foundation (12)
Round 8 :
1 sc in each st and into chain spaces, place (sc, ch2, sc) at 4 corners to square (12)
Round 9 :
(sc in next st, inc) x 6 (18)
Round 10 :
1 sc in each st (18)
Round 11 :
Work tiny mustard accent flowers into two side spaces: *ch3, sl st into base, sc in next st* then sc around (18)
Round 12 :
Finish round in cream 1 sc in each st and fasten off (18)
— Tiny Accent Flower Motif (Make 6) :
Round 1 :
6 sc in magic ring (6)
Round 2 :
Change to mustard. *ch2, (3 dc) in next st, ch2, sl st* around to make 6 tiny petal clusters; fasten off (6 petal clusters)
Round 3 :
Info : These tiny flowers are worked flat and attached later into open cream spaces between larger motifs
Round 4 :
Weave ends and press flat with light steam; make 6 in total
Round 5 :
Optional: Add a tiny brown French knot or embroidered dot at flower center
Round 6 :
Info : Set these tiny flowers aside for joining and accent placement
— Joining Motifs Into Runner Panel :
Info :
Layout sequence along the long axis: (Sunflower Square) - (Pumpkin Square) - (Sunflower Square) - (Pumpkin Square) - (Sunflower Square) - (Pumpkin Square). There are six large squares total. Between each large square add a leaf cluster square at the four side intersections (one on each long side between adjacent large squares) to create the decorative leaf grid; add tiny accent flower motifs into the small cream diamond spaces as desired.
Round 1 :
Pick a central sunflower square as the starting piece. With right sides facing, join pumpkin square to its right using join-as-you-go slip stitch: hold squares together, working through corresponding rounds, sl st through next 72 sts aligning edges until the entire seam is joined. Use cream yarn for an invisible join.
Round 2 :
Repeat joining process for remaining squares to complete a linear panel of six squares. When joining, aim to match corner (sc,ch3,sc) corner spaces so the border scallop will align later.
Info :
If you prefer a more visible seam, use whip stitch with matching cream yarn. For a join-as-you-go approach add the adjacent motif on its final round by crocheting into the adjacent motif's edge stitches instead of making separate seams.
Round 3 :
After joining large squares along the length, position leaf clusters into the short side gaps between adjacent squares: match 4 leaf cluster squares along each side seam and join similarly with sl st (use olive for an invisible tie) so that each large square is flanked by leaf clusters left and right.
Round 4 :
Attach tiny accent flowers into diamond openings: use tapestry needle and small whip-stitch through the motif center and knot securely on reverse side; hide thread ends through seams (6 tiny flowers total)
Round 5 :
Info : Block the entire joined panel on a long foam board. Use measuring tape to ensure straight edges and consistent width (aim ~8.5-9 inches across including scallop placement). Blocking helps the scallop border lay neatly later.
Round 6 :
Inspect seams and weave any loose ends into nearest stitches on reverse. Trim tails close to surface after weaving several inches to secure.
Round 7 :
Optional reinforcement: use a thin line of fabric glue on seam intersections on reverse (not visible on front) and press to secure for heavy-use surfaces
Round 8 :
Info : Once joined and blocked, measure the long panel length; with six large squares expect roughly 36-40 inches (92-102 cm) long and 8-9 inches (20-23 cm) wide depending on exact gauge and blocking. Adjust by adding small spacer rows if you want a longer runner.
Round 9 :
For a neater border anchoring, work an even round of sc all around the joined panel in olive to create a base for scallops: work 1 sc in each st and (sc, ch3, sc) into each external corner to keep corners shaped (approx 420-480 sc depending on seam technique)
Round 10 :
Info : Fasten off and weave in ends before beginning the scalloped finishing border to keep the edge tidy
— Scalloped Olive Border (Approx 30 Rounds of Detail Work, Final Border Rounds Shown) :
Round 1 :
With olive yarn join at center short edge with a standing sc. Work 1 sc evenly around the entire outer edge working into external scs and into the chains at corners (no increases—keep stitch count even). Count total sts around and note the number (we will use this to space scallops).
Round 2 :
1 sc in each st around (maintain same count)
Round 3 :
Info : Determine scallop spacing. For example, if there are 240 sts around, make 40 scallops => 6 sts per scallop. Adjust counts so scallops sit evenly. Use a removable marker at the start of the long edge center to ensure symmetry.
Round 4 :
For each scallop: *skip next 2 sts, (5 dc) in next st, skip next 2 sts, sl st into next st* repeat across, adjusting to keep 40 scallops (this is a decorative preliminary row where dc shells are anchored)
Round 5 :
1 sc in each st around to tidy and anchor scallop shells
Info :
These rounds form the base for the deep scallops. If your counted space is different, divide total edge stitches by desired scallops to get spacing. Adjust the skip and shell widths to make the scallops sit flat.
Round 6 :
Work shell detail: *into each shell base: (sl st, sc, ch2, (7 dc in same space), ch2, sc)* sl st between shells for spacing; repeat across long and short edges
Round 7 :
1 sc in each st around to tidy (count should equal previous sc round count)
Round 8 :
Optional depth: Work a second scallop row on top of previous by working *sl st into center dc of each 7-dc shell, ch1, (5 dc in same space), sl st into opposite side* this gives a layered scallop (no change to base count)
Round 9 :
1 sc in each st around to secure layered scallops
Round 10 :
Info : Add final picot-like finishing to scallop tip by working *into center dc of each large scallop: (sc, ch3, sl st into top)* then sc across between scallops for tidy edge
Round 11 :
Neatening round: 1 sc in each st around; fasten off and weave ends; steam-block scallop edge lightly to shape
Round 12 :
Info : If you want a double-toned scallop, work the first scallop row in a darker olive and the top-layer scallop in a lighter olive for contrast
Round 13 :
Optional edging embroidery: use a contrasting olive to add small French knots at scallop bases for an extra vintage accent
Round 14 :
Info : Final pressing: lay runner flat and pin scallops into final shape; use steam (no direct iron contact) to set scallops. Let dry fully before removing pins.
Round 15 :
Finishing: Weave all ends to the wrong side and trim. Inspect both sides for loose threads and secure as needed.
— Final Finishing Touches :
Info :
Stitch tiny mustard/orange flowers into cream diamond spaces between major motifs where desired for extra visual interest; place them symmetrically to balance the runner. Secure all motifs by weaving ends into seams and trimming. Give the entire runner a final blocking to ensure the scallop border lays flat and the motifs align end-to-end.
Info :
Optional: Add a thin fabric backing with matching cloth and slip-stitch or sew to the reverse for an extra protective layer for high-use tables. Use a slip-proof liner underneath when placing on polished surfaces to avoid sliding.
Info :
Care instructions: Hand wash gently in cool water, reshape while damp, and lay flat to dry. Avoid tumble drying to maintain scallop shape and texture.
This sunflower-and-pumpkin table runner brings cozy autumn charm to any table with its textured pumpkins, layered sunflowers, and leafy scalloped border. Each motif is a little treasure — when assembled, they make a warm, heirloom-quality centerpiece you'll be proud to display. Enjoy the satisfying rhythm of making each flower and pumpkin, then watch them come together across the runner. 🧶🍂 Celebrate the season with this handmade accent and share it as a thoughtful seasonal gift!