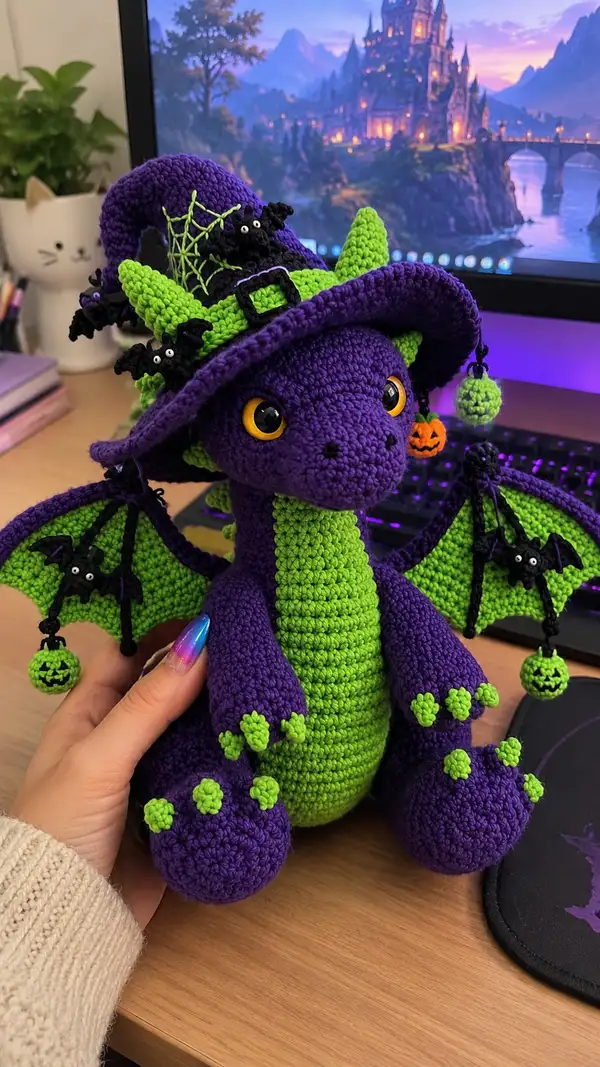
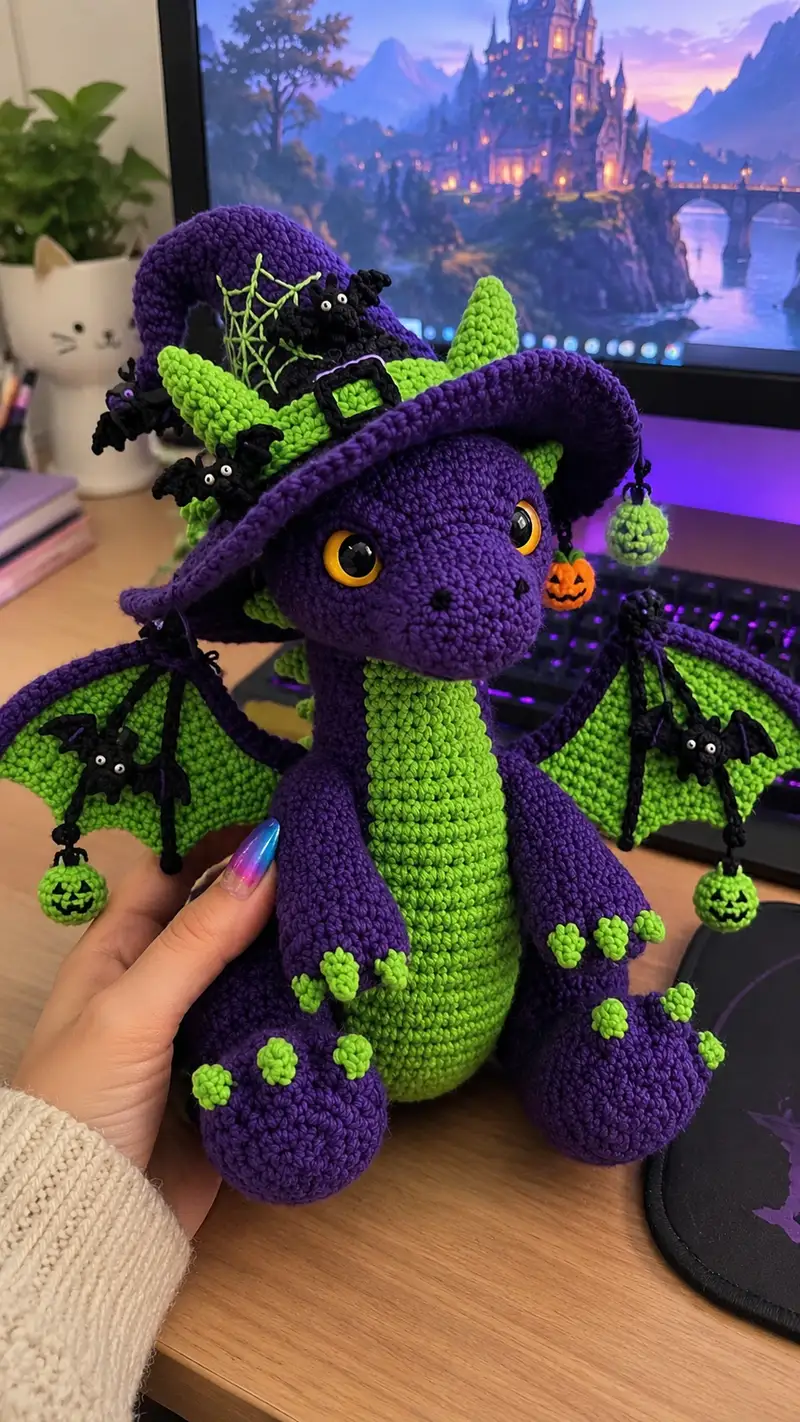
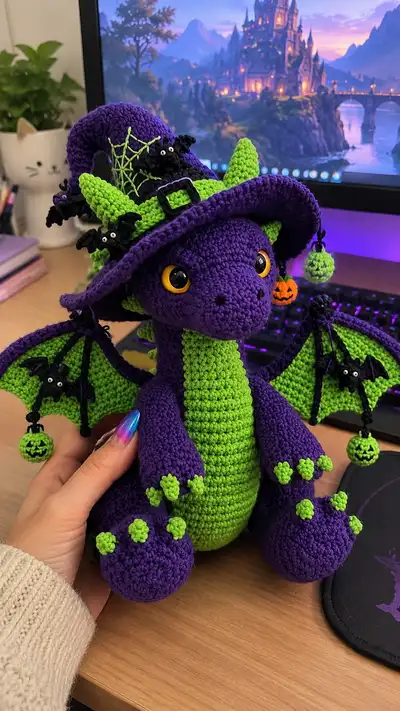
Create a whimsical Halloween Witch Dragon amigurumi with bold purple and neon green contrast, a floppy witch hat decorated with tiny bats and a spiderweb, expressive yellow safety eyes, and dangling pumpkin charms. This detailed pattern breaks each part into clear round-by-round instructions with tips on stuffing, assembly, and personalization. Perfect for festive decor or a playful collectible — follow the step-by-step rounds to bring this charming dragon to life.
Progress Tracker
0% Complete
— Head :
Round 1 :
6 sc in magic ring (6)
Round 3 :
(1 sc, inc) x 6 (18)
Round 4 :
(2 sc, inc) x 6 (24)
Round 5 :
(3 sc, inc) x 6 (30)
Round 6 :
(4 sc, inc) x 6 (36)
Round 7 :
(5 sc, inc) x 6 (42)
Round 8 :
(6 sc, inc) x 6 (48)
Round 9 :
1 sc in each st (48)
Round 10 :
1 sc in each st (48)
Info :
Place stitch marker at the beginning of each round; after Round 10, mark the center front for eye alignment. Check placement by holding safety eyes to head: eyes will sit between Rounds 12 and 14
Round 11 :
(6 sc, inc) x 6 (54)
Round 12 :
1 sc in each st (54)
Round 13 :
1 sc in each st (54)
Info :
Insert 12mm safety eyes between Rounds 13-14, spacing 8-10 sts apart depending on desired expression; use a marker to note the two eye stitches
Round 14 :
1 sc in each st (54)
Round 15 :
(7 sc, inc) x 6 (60)
Round 16 :
1 sc in each st (60)
Round 17 :
1 sc in each st (60)
Info :
Embroider tiny nostrils: mark two adjacent stitches 6-8 stitches below the eye line. Use black yarn and small stitches to create nostril dots after head is mostly formed
Round 18 :
(8 sc, inc) x 6 (66)
Round 19 :
1 sc in each st (66)
Round 20 :
1 sc in each st (66)
Info :
Begin shaping the muzzle: we'll work decreases after Round 22. Prepare stuffing: start adding a little fiberfill now so the face keeps shape while you continue rounds
Round 21 :
(8 sc, dec) x 6 (60)
Round 22 :
(7 sc, dec) x 6 (54)
Round 23 :
1 sc in each st (54)
Round 24 :
(6 sc, dec) x 6 (48)
Info :
Stuff head firmly but not overstuffed — aim for firm cheeks and a slightly softer crown. Continue stuffing evenly as you go, filling in small gaps with fiberfill tucked in with a blunt needle
Round 25 :
(5 sc, dec) x 6 (42)
Round 26 :
(4 sc, dec) x 6 (36)
Round 27 :
(3 sc, dec) x 6 (30)
Round 28 :
(2 sc, dec) x 6 (24)
Round 29 :
(1 sc, dec) x 6 (18)
Info :
If adding a neck opening to sew into the body, stop decreases at Round 30 to leave a slightly open neck tube. Otherwise complete the head with Round 31 and leave a long tail for sewing
Round 31 :
Fasten off leaving a long tail for sewing. Weave tail through live stitches and pull closed if you are closing the head. Finish stuffing firmly before final closure (6)
— Neck Tube (if attaching separately):
Round 1 :
6 sc in magic ring (6)
Round 3-8 :
1 sc in each st (12)
Info :
Make neck tube length 6-10 rounds depending on desired neck height; stuff lightly and leave opening for sewing to body
— Body :
Round 1 :
6 sc in magic ring (6)
Round 3 :
(1 sc, inc) x 6 (18)
Round 4 :
(2 sc, inc) x 6 (24)
Round 5 :
(3 sc, inc) x 6 (30)
Round 6 :
(4 sc, inc) x 6 (36)
Round 7-10 :
1 sc in each st (36)
Info :
If using a separate belly panel (neon green), change color now. Carry purple inside or fasten off and join green at next round
Round 11 :
Change to neon green now for belly panel: 1 sc in each st (36)
Round 12 :
1 sc in each st (36)
Round 13 :
(5 sc, inc) x 6 (42)
Round 14 :
1 sc in each st (42)
Round 15 :
(6 sc, inc) x 6 (48)
Info :
Begin stuffing the body moderately from the bottom up. Keep body firm but slightly softer than head to allow a nice seated position
Round 16 :
1 sc in each st (48)
Round 17 :
1 sc in each st (48)
Round 18 :
(6 sc, dec) x 6 (42)
Round 19 :
(5 sc, dec) x 6 (36)
Info :
For a smooth belly seam, work belly panel in FLO or BLO for 1 round to create a ridge where you will later attach feet and front legs
Round 20 :
1 sc in each st (36)
Round 21 :
(4 sc, dec) x 6 (30)
Round 22 :
(3 sc, dec) x 6 (24)
Round 23 :
(2 sc, dec) x 6 (18)
Info :
Stop decreasing when you have an opening large enough to insert the neck tube snugly. If attaching head directly, align neck opening to head and sew securely
Round 24 :
(1 sc, dec) x 6 (12)
Round 26 :
Fasten off leaving long tail for sewing. Finish stuffing through the neck opening until body has desired fullness (6)
— Belly Panel (Worked separately if preferred) :
Round 1 :
6 sc in magic ring (6)
Round 3 :
(1 sc, inc) x 6 (18)
Round 4 :
(2 sc, inc) x 6 (24)
Round 5-12 :
1 sc in each st (24)
Info :
Sew belly panel to front of body aligning widest section of belly with Rounds 11-18 of the body; use invisible ladder stitch for a neat seam
— Arms (Make 2) :
Round 1 :
6 sc in magic ring (6)
Round 3 :
(1 sc, inc) x 6 (18)
Round 4 :
1 sc in each st (18)
Info :
Create small paw nub at Round 1-3 to form the rounded hand area. Stuff the paw area firmly before working up wrist rounds
Round 5 :
(3 sc, inc) x 4 + 2 sc (22) - this rounds math adjusts to keep slightly oval shape
Round 6-8 :
1 sc in each st (22)
Round 9 :
(4 sc, dec) x 4 + 2 sc (18)
Round 10-14 :
1 sc in each st (18)
Info :
Work 3 tiny green claws onto the end of each arm: using neon green, make 3 small bobbles (see Claws section) and sew them evenly across the front edge of the paw
Round 15 :
(2 sc, dec) x 4 + 2 sc (14)
Round 16 :
1 sc in each st (14)
Round 17 :
(1 sc, dec) x 4 + 2 sc (10)
Round 18 :
1 sc in each st (10)
Info :
Stuff hands firmly and arms lightly. Leave long tail for sewing and position arms at body Rounds 18-22 for natural resting placement
— Legs (Make 2) :
Round 1 :
8 sc in magic ring (8)
Round 3 :
(1 sc, inc) x 8 (24)
Round 4 :
(2 sc, inc) x 8 (32)
Round 5 :
(3 sc, inc) x 8 (40)
Round 6-8 :
1 sc in each st (40)
Info :
Shape a rounded foot; flatten and work increases evenly to maintain a smooth curve. Add extra stuffing in the foot for a stable seated base
Round 9 :
(4 sc, dec) x 8 (32)
Round 10 :
1 sc in each st (32)
Round 11 :
(3 sc, dec) x 8 (24)
Round 12 :
1 sc in each st (24)
Round 13 :
(2 sc, dec) x 6 (18)
Round 14 :
1 sc in each st (18)
Info :
Sew three small neon green claws across the top of each foot (see Claws); position claws evenly across the toe area before final sewing
Round 15 :
(1 sc, dec) x 6 (12)
Round 16 :
1 sc in each st (12)
Round 18 :
Fasten off leaving long tail for sewing. Stuff legs firmly; sew legs to bottom of body aligning to body Rounds 1-6 for good balance
Round 19 :
Optional extra shaping rounds if you want larger thighs: join yarn and 1 sc in each st (6) for up to 4 rounds then fasten off
— Claws (Make 12 small claws total) :
Round 1 :
4 sc in magic ring (4)
Round 3 :
1 sc in each st (8)
Round 4 :
Join to make a bobble: (sc dec) x 4 to make a teardrop shape (4)
Info :
Fasten off leaving long tail. Do not stuff claws; use tail to sew them projecting from paws and toes. Arrange claws in clusters of three for each hand/foot
— Tail :
Round 1 :
6 sc in magic ring (6)
Round 3 :
(1 sc, inc) x 6 (18)
Round 4-8 :
1 sc in each st (18)
Round 9 :
(2 sc, dec) x 6 (12)
Round 10-15 :
1 sc in each st (12)
Round 16 :
(1 sc, dec) x 4 + 4 sc (8)
Round 17 :
1 sc in each st (8)
Round 19 :
Fasten off leaving long tail for sewing. Lightly stuff tail and optionally insert floral wire for poseability. Sew to back center of body at approx. body Round 10
— Spikes / Horns (Make 6-8 small spikes) :
Round 1 :
6 sc in magic ring (6)
Round 2 :
(1 sc, inc) x 3 (9)
Round 3 :
1 sc in each st (9)
Round 4 :
(1 sc, dec) x 3 (6)
Round 5 :
Fasten off leaving tail. Sew spikes along neck and head ridge and along tail top; space evenly. For larger horns, work rounds up to 6-8 to increase height
— Wings (Make 2 whole wings: membrane + piping + frame) :
Inner Membrane - Round 1 :
Ch 26, sc in 2nd ch from hook and across (25)
Inner Membrane - Round 2 :
Ch 1, turn, 1 sc in each st (25)
Inner Membrane - Round 3 :
Ch 1, 1 sc in first 3 sts, inc in next st; repeat across to make scallops, end 1 sc (30)
Inner Membrane - Round 4 :
1 sc in each st (30)
Info :
Work the inner membrane in neon green. Keep tension tight to create a flat membrane; the outer frame will provide curve
Inner Membrane - Round 5 :
(4 sc, inc) x 5 + 5 sc (35)
Inner Membrane - Round 6 :
1 sc in each st (35)
Inner Membrane - Round 7 :
(5 sc, inc) x 5 + 5 sc (40)
Inner Membrane - Round 8 :
1 sc in each st (40)
Outer Frame - Round 1 :
Join purple around membrane edge, sc evenly around, working 2 sc in corners to keep shape (approx. 44)
Outer Frame - Round 2-5 :
1 sc in each st (44)
Outer Frame - Info :
Work 1-2 rounds in BLO for a defined ridge that becomes the wing edge. Add a final single round in contrasting color to create a pipe effect
Wing Piping - Round :
Join black and sc around the outermost edge in BLO to create a raised piping (44)
Wing Struts :
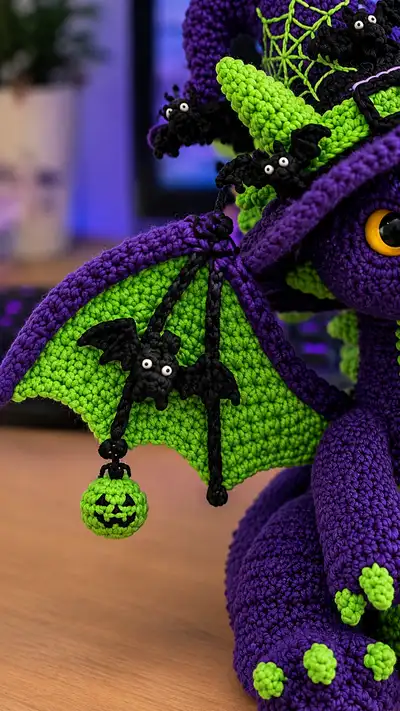
Create three short black cords by ch 20 and slip stitch into a cord (make 6). Attach cords from wing tip to top near body to simulate struts and tie small bat charms to the cords
Info :
Sew wings to body at approximate body Rounds 10-14, aligning inner membrane with the side seams. Reinforce by sewing through outer frame and body for stability
— Hat (Witch hat with decorations) :
Hat Crown - Round 1 :
6 sc in magic ring (6) - purple
Round 3 :
(1 sc, inc) x 6 (18)
Round 4 :
(2 sc, inc) x 6 (24)
Round 5 :
(3 sc, inc) x 6 (30)
Round 6 :
(4 sc, inc) x 6 (36)
Round 7-10 :
1 sc in each st (36)
Info :
Create a slightly droopy tall crown by working more even rounds and then increasing asymmetrically to create a curve; we will shape the drop after Round 15
Round 11 :
(5 sc, inc) x 6 (42)
Round 12-14 :
1 sc in each st (42)
Round 15 :
BLO around (42) to add a firm ridge where the crown meets the brim
Hat Brim - Round 1 :
Join yarn to brim edge and sc evenly for one round (approx. 48)
Hat Brim - Round 2 :
(6 sc, inc) x 6 + 12 sc (54)
Hat Brim - Round 3 :
1 sc in each st (54)
Hat Brim - Round 4 :
(7 sc, inc) x 6 + remainder to keep flat (60)
Hat Shaping :
Work 1-3 more even rounds (60) then fold and stitch brim edge in a few places to achieve desired floppy look
Info :
Decorations: create small neon green hat band (ch length to fit around crown), a black buckle (small rectangle using black), and embroider a spiderweb in neon green on the crown using simple surface embroidery
Hat Drop :
To create a droopy end, pick up stitches along back of hat crown and dec slightly every 4-6 stitches while working 8-12 rounds to create taper; stuff lightly if you want a stuffed droop
Info :
Sew hat to head resting slightly back from forehead; pin first to check angle. Attach small bats and pumpkins to hat rim using short black cords
— Mini Bat (Make 6-8) :
Bat Body - Round 1 :
6 sc in magic ring (6) black
Round 3 :
1 sc in each st (12)
Bat Wings - Round 1 :
Ch 6, sc in 2nd ch and across to form small scalloped wing; make two wings and sew to sides of body
Bat Finish :
Sew tiny white dots for eyes or use micro beads. Fasten off leaving tails to stitch the bat onto wings or hat. Add a few chain cords if you wish to dangle small pumpkins
Info :
Use 2.5mm hook for tiny bats to keep them tight; add a curl of extra stitches on the body for a cute wavy look
— Mini Pumpkin Charm (Make 2-4) :
Round 1 :
6 sc in magic ring (6) neon green or orange depending on desired look (2)
Round 3 :
(1 sc, inc) x 6 (18)
Round 4 :
1 sc in each st (18)
Round 5 :
(1 sc, dec) x 6 (12)
Info :
Before fully closing, stuff lightly and use black yarn to embroider a jack-o-lantern face: small backstitches for eyes and jagged mouth; leave a tail to create a short cord to attach to wing or hat
— Decorative Web Embroidery :
Step 1 :
With neon green yarn and yarn needle, bring yarn out on crown and stitch straight lines radiating from a center point to create spiderweb spokes
Step 2 :
Connect spokes with curved chain-like stitches working outward to form concentric arcs; secure ends and weave in tails
Info :
Practice web on scrap before stitching on hat; keep stitches even and slightly taut so web sits flat against crown
— Assembly Instructions :
Info :
Attach head to body by inserting the neck portion into the body opening. Pin in place first, then sew securely using whip stitch all around, ensuring even attachment
Info :
Position arms on sides of body at rounds 18-22 for natural look. Sew through both arm and body using ladder stitch for invisible seam
Info :
Attach legs to bottom of body at rounds 1-6, spacing them evenly. Sew securely, adding extra stitches for stability if character will be posed
Info :
Sew spikes to back of head and down the tail centerline spaced evenly; use a sharp tapestry needle and stitch multiple times for secure hold
Info :
Sew wings to body at approximate body rounds 10-14. Reinforce by attaching through the wing frame into the body with hidden stitches
Info :
Attach hat to head with a few secure stitches through the inner crown; add extra stitches behind ears to anchor the hat so it doesn't flop forward
Info :
Sew mini bats and pumpkins to hat rim and wing cords. Use short chain cords (ch20) to dangle charms. Knot and weave ends securely inside hat or wing seams
Info :
Weave in all yarn tails and hide them in body. Trim excess yarn and inspect seams for gaps. Optionally glue safety eyes washer with a tiny dab of fabric glue for extra security
This adorable Witch Dragon combines classic amigurumi shaping with whimsical Halloween details—floppy hat, dangling pumpkins, and tiny bats. Each step brings you closer to a festive handmade friend you'll be proud to display or gift. I hope you enjoy the meditative rhythm of stitching and the thrill of seeing all the little details come together. Share your finished dragon and celebrate every stitch! 🧶🎃