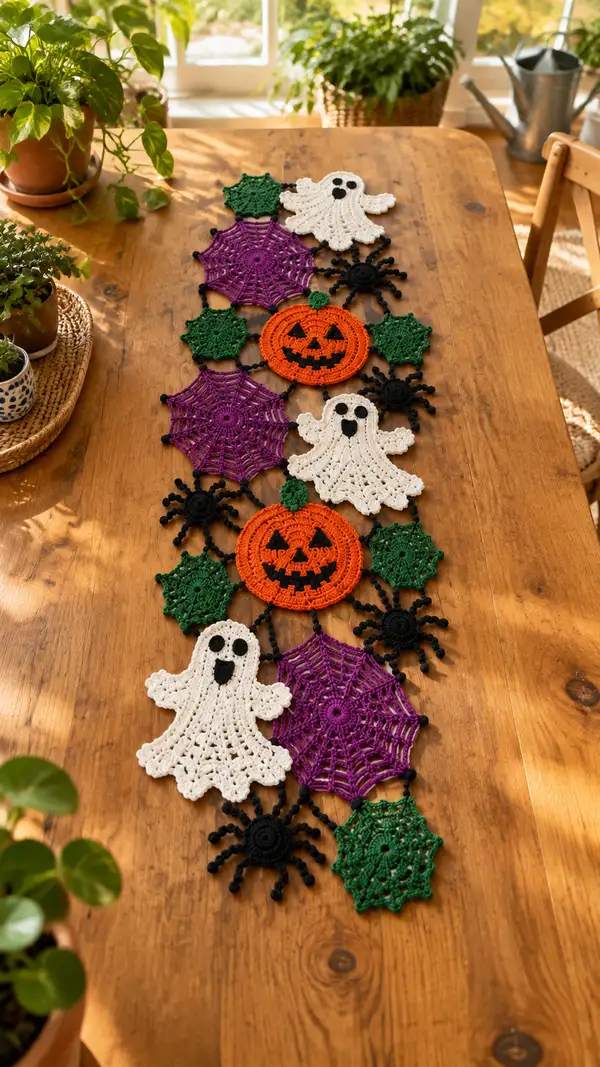
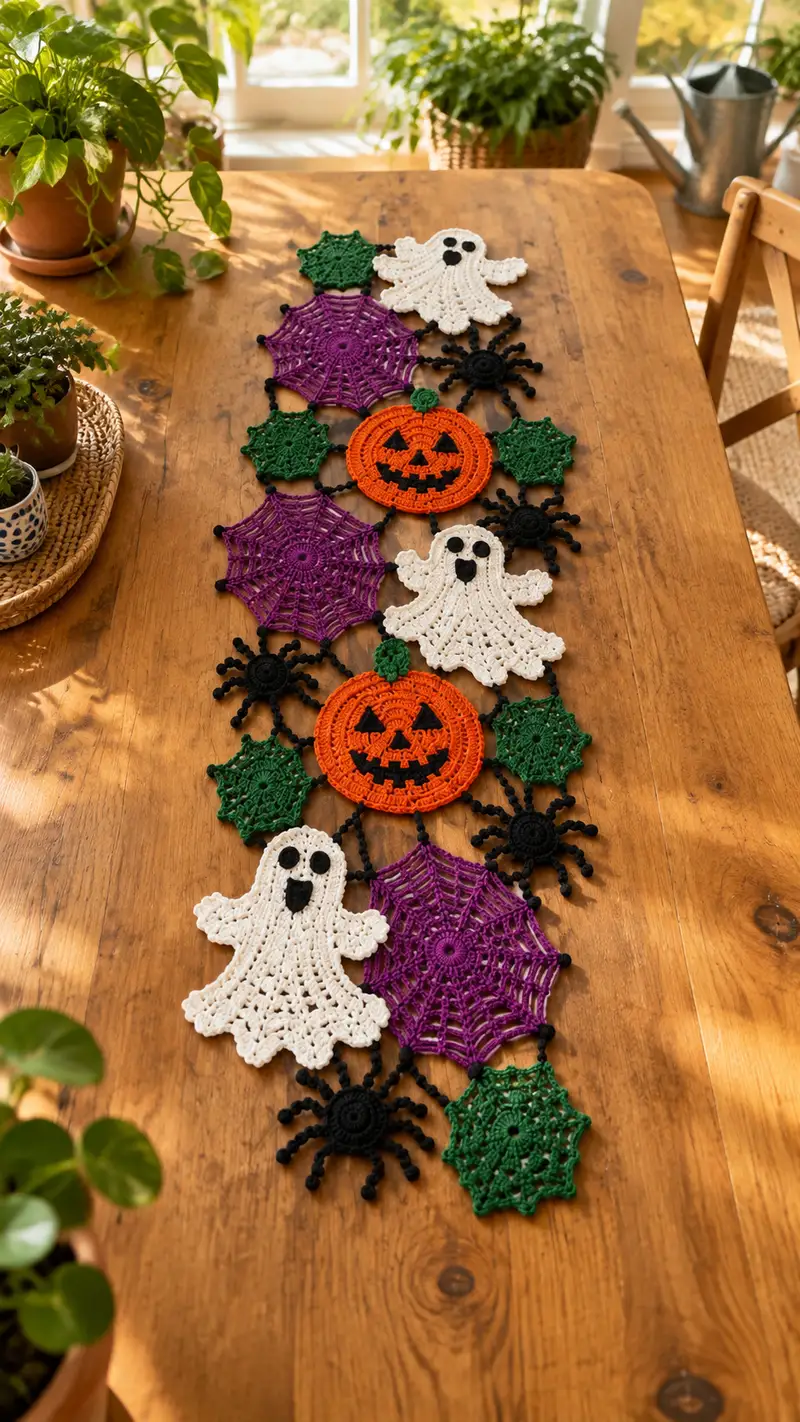
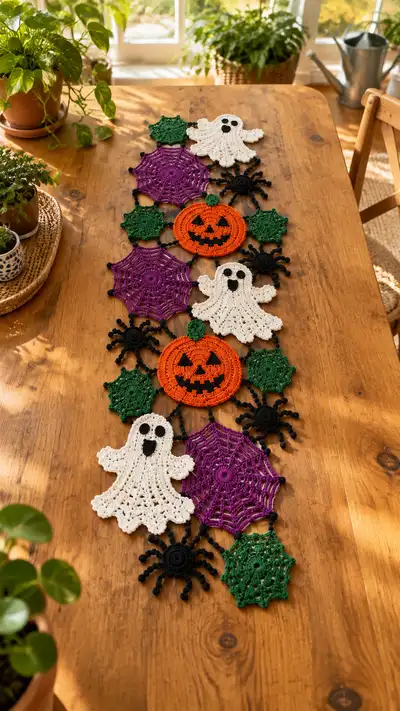
Create a striking Halloween table runner made from individual crocheted motifs joined into a long, whimsical centerpiece. Motifs include lacy purple spiderwebs, smiling orange jack-o-lanterns, fluttering white ghosts, little green star/leaf medallions and bold black spiders, all joined with decorative black connectors. The finished runner is flat, decorative, and perfect for tabletops, dressers, or as a festive mantle accent. Detailed stitch-by-stitch instructions, joining notes, and finishing tips make this a fun project for makers who love seasonal decor.
Progress Tracker
0% Complete
— Materials & Gauge :
Info :
Gauge is not critical for a decorative runner but consistent tension will ensure motifs match and join neatly. With worsted weight and 3.5mm hook, a 10cm (4in) circle made with the pumpkin rounds below should measure approximately 10cm. Adjust hook size to match your preferred fabric density. Block motifs before joining for best results.
— General Notes :
Info :
Work motifs flat in continuous rounds or joined rounds as specified. Use a stitch marker to mark the first stitch of every round unless indicated otherwise. The pattern uses decorative bobbles and picots; practice these techniques on a scrap swatch before starting motifs. All motifs are made individually and then joined with short black chains and small bobbles or sl st connections. For clarity I list rounds in full and include Info sections regularly to explain techniques, placement and finishing.
— Ghost Motif (Make 3) :
Info :
Make three identical ghost motifs in white. Work from the top (head) down to the scalloped skirt. The ghost is approximately 12-14cm tall when blocked. Use 3.5mm hook and worsted yarn. This pattern uses alternating rounds of dc and shell scallops to create the flowing hem.
Round 3 :
(1 sc, inc) x 6 (18)
Round 4 :
(2 sc, inc) x 6 (24)
Round 5 :
(3 sc, inc) x 6 (30)
Info :
These increases create a slightly rounded head. Keep stitches loose enough to create a soft curve but firm enough that the ghost lays flat when blocked later.
Round 6 :
1 sc in each st around (30)
Round 7 :
1 sc in each st around (30)
Round 8 :
1 sc in each st around (30)
Info :
Place safety eyes or mark eye placement between rounds 6 and 8. For a small ghost use 8mm felt or embroidered eyes approximately 6-8 sts apart. I recommend embroidering eyes with black yarn to keep the motif flat.
Round 9 :
(4 sc, inc) x 6 (36)
Round 10 :
1 sc in each st around (36)
Round 11 :
1 sc in each st around (36)
Round 12 :
(3 sc, inc) x 9 (45)
Info :
At the end of round 12 you have created the ghost shoulders. The next rounds start the arm/wing shaping and flowing body. If you prefer a narrower ghost, omit round 12 and continue even rounds from 36 sts.
Round 13 :
*ch1, sk1, sc in next 2 sts, ch2, sc in next st (creates small arm indent)* rep across gently to create two slight scalloped arm openings; end rep to close (45)
Round 14 :
1 sc in each st and ch sp around, working 2 sc in chain-2 spaces to fill (45)
Round 15 :
(4 sc, inc) x 9 (54)
Info :
Begin forming the skirt: alternating rows of dc shells and sc to create the ruffle. Ensure counts remain multiples where shells fit. The shells used will be (sc, 3 dc, sc) worked into a designated stitch or space; they add flare to the hem.
Round 16 :
*sc in next 2 sts, (sc, 3 dc, sc) in next st* rep around (54)
Round 17 :
1 sc in each st around, working 2 sc in center dc of each shell to stabilize (54)
Round 18 :
*sc in next 3 sts, (sc, 3 dc, sc) in next st* rep around (54)
Info :
To accent the flowing hem, work a round of picots or small bobbles on every third shell. The picot version gives a delicate lace edge; the bobble gives a playful, puffy finish. I demonstrate both techniques below.
Round 19 :
1 sc in each st around (54)
Round 20 :
*(sc, picot) in the shell center, sc in next 3 sts* rep around (54)
Round 21 :
1 sc in each st around (54)
Round 22 :
*sc in next 4 sts, (sc, 3 dc, sc) in next st* rep around (54)
Round 23 :
1 sc in each st around (54)
Round 24 :
*sc in next 5 sts, (sc, 3 dc, sc) in next st* rep around (54)
Info :
Finish the hem with a scallop round that creates the trailing edges. The hem is what gives the ghost its flowing motion, so allow the shells to splay and block well. If you want a more ragged edge, use a picot in every shell point.
Round 25 :
*(sc, 5 dc, sc) in next st, sk 2 sts, sc in next st* rep around to create larger scallops (54)
Round 26 :
1 sc in each st around (54)
Round 27 :
Fasten off, leaving a long tail for sewing/joining. Weave ends, block the ghost flat, shaping scallops with pins to emphasize points.
Info :
Embroider eyes and mouth with black yarn after blocking. Use small satin-stitch circles for eyes and a small teardrop mouth. Sew securely through the fabric and weave in ends on the back. If you prefer felt, cut small circles and glue/sew them in place before final blocking.
— Pumpkin Motif (Make 2) :
Info :
The pumpkin is a circular medallion with an outer textured ridge to suggest pumpkin ribs, plus a small green stem. Work the face pieces in black and sew them on after blocking, or crochet the face as appliques for a raised look. The finished pumpkin diameter is approx 10-12cm.
Round 3 :
(1 sc, inc) x 6 (18)
Round 4 :
(2 sc, inc) x 6 (24)
Round 5 :
(3 sc, inc) x 6 (30)
Round 6 :
(4 sc, inc) x 6 (36)
Info :
Rounds 1-6 form a flat central disc. To achieve a slightly domed pumpkin body, work a round of half-double crochets that are elevated by front post double crochets (FPdc) to create subtle ribs. These ribs will later be defined by working around posts.
Round 7 :
1 hdc in each st around (36)
Round 8 :
*fpdc around next st, 1 sc in next st* rep around (36)
Round 9 :
1 sc in each st around (36)
Round 10 :
(5 sc, inc) x 6 (42)
Info :
Work an outer ridge by alternating clusters that create vertical ribs. The pumpkin has 8 subtle ribs; to achieve this divide the round into 8 equal sections when working post stitches. The math below uses 8 ribs for symmetry.
Round 11 :
*dc cluster (dc3tog made over 3 sts) to begin rib, ch2, sk 2 sts, sc in next 3 sts* rep around aligning clusters to create 8 ribs (42)
Round 12 :
1 sc in each st and ch sp around (42)
Round 13 :
(6 sc, inc) x 6 (48)
Round 14 :
1 sc in each st around (48)
Round 15 :
Work 1 round of BLO (1 sc in each st BLO) to create a slight ridge for face placement (48)
Info :
After round 15, mark the pumpkin center and plan face placement. Either crochet triangular eyes and mouth in black as appliques (small triangles and rectangles) or embroider the features using black yarn. Crocheted appliques provide a raised, crisp edge and are recommended for a visible, graphic jack-o'-lantern.
Round 16 :
Fasten off orange and change to black for face appliques (see Info). Alternatively continue in orange and sew black appliques later (48)
Info :
To make small triangular eyes quickly: make 2 small triangles as follows: ch4, sc in 2nd ch from hook, hdc in next, dc in last; sl st to close and weave in ends. For the mouth, crochet a small rectangle and notch out teeth with small sl st cuts or whipstitch teeth with orange to create a smile.
Round 17 :
Attach green yarn at a top stitch and ch1, 6 sc in mr for stem (6) - fasten off leaving tail to sew. Flatten slightly and place at center top of pumpkin to sew down.
Round 18 :
Optional: create extra depth by sewing a few running stitches from top to bottom of pumpkin to gather slightly, adjusting spacing to suggest ribs. Thread orange yarn onto needle and sew around the disc crossing at 8 evenly spaced points then gently pull to define ribs, knot and hide tail (48)
Info :
Block the pumpkin flat; embroider or sew facial pieces on after blocking. If you prefer an inset face, place appliques and then work a round of sc around the face edge in black for a neat inlaid look.
— Spiderweb Motif (Make 3, Purple) :
Info :
Large lacy spiderwebs are worked as radial rounds with chain arches and treble loops to suggest webbing. Each web measures about 12-13cm across. Add small black bobbles at the outer points for a decorative connector identical to the photo.
Round 1 :
ch3 (counts as first dc), 11 dc in mr, sl st to top of ch3 to close (12)
Round 2 :
*ch5, sl st into next st* rep 12 times to create 12 chain loops around center (12 loops)
Round 3 :
sl st into first ch5 loop, ch3 (counts as dc), work 8 dc into same loop, sl st into next loop; rep around (12 sets of 9 dc clusters)
Round 4 :
*ch6, sl st into the center of the next dc cluster (between clusters)* rep around creating 12 long arches (12 arches)
Round 5 :
Working into each ch6 arch: sc, 3 dc, sc, sl st into next cluster space to anchor (12 big shells)
Info :
These shell clusters make the web look like spokes. Keep tension even and don't pull chains too tight or the web will pucker. Blocking is essential to give open web shape and flat edges.
Round 6 :
*ch4, sl st into each shell center to create inner radial threads across the shell* rep 12 times (12 radial chain spines)
Round 7 :
Work 1 sc around each outer dc of shells to neat the edge (approx 72 sc total depending on counts)
Round 8 :
*picot on every third sc around edge: sc in next 2 sts, picot (ch3, sl st into top of last sc)* rep around to make delicate points (approx 24 picots)
Round 9 :
Fasten off leaving long tail for joining. Add a small black bobble at each point by chaining 6, sl st into the same point to form a small loop and work a 5-stitch bobble into that loop with black yarn, finish off (12 bobbles)
Info :
For tidy bobbles use the black yarn and work a small 5-dc bobble: (yo, insert, yo, pull through) five times in same loop, draw yarn through all loops and secure. These black connector bobbles will be used later as joining nodes between motifs.
— Small Green Medallion (Make 6) :
Info :
Small six- or eight-point medallions act like little leaves or stars between larger shapes. Work 6 or 8 depending on layout. These are quick to make and are primarily decorative connectors.
Round 3 :
(1 sc, inc) x 6 (18)
Round 4 :
*ch4, sl st into every second st to create points* rep around to make 6 arches (18)
Round 5 :
Into each ch4 arch: sc, picot, sc to make defined points; sl st to base and repeat around (18)
Round 6 :
1 sc in each st around, fasten off leaving tail for joining
Info :
Block flat and starch slightly if you want the small medallions to be crisp. These little pieces visually tie the runner together and can be swapped for leaves or black star motifs if desired.
— Spider Motif (Make 4) :
Info :
Small black spiders are made with a central round body and eight legs formed from chains with bobble ends. Legs are attached by surface slip stitching through the body to keep spider profile low.
Round 3 :
1 sc in each st around (12)
Round 4 :
Fasten off leaving long tail. Using tail, embroider 8 evenly spaced attachment points around the body circumference where legs will attach. Legs are made separately as chains then sewn or slip-stitched into the body.
Round 5 :
Make a leg: join black yarn at a marked point, ch8, (make a small bobble into the last chain: bobble of 4 dc) sl st back into body point to anchor. Repeat for all 8 legs around the body.
Info :
For symmetry, divide the 12-stitch body into eight leg positions by spacing: attach a leg every 1-2 sts. Slight variation creates a more natural look but aim for balance. Keep leg chains taut but not tight so legs curve gracefully when the spider is laid flat.
Round 6 :
After attaching legs, weave in ends and gently block legs into a natural curve with small pins. Optionally stiffen leg tips with a tiny dab of fabric glue if you want them to hold shape.
— Joining & Decorative Connector Chains :
Info :
Lay out motifs in your preferred order on a blocking board or flat table. Traditional layout from the photo: purple web, small green medallion, orange pumpkin, black spider, white ghost, repeating in an alternating vertical column. Place motifs roughly 1-2cm apart and use black yarn chains with small bobbles to connect them. Plan the connections to avoid twisting motifs and to keep runner flat.
Round 1 :
With black yarn and 3.25mm hook, join at the bobble point of a purple web, ch6, sl st into a corresponding point on adjacent small green medallion; repeat short chain-bobble connectors between all adjacent motifs following layout. Each connector: *ch6, bobble (5-dc bobble), sl st into target motif*.
Round 2 :
For T-junctions and three-way joins (where three motifs meet), create a small circular node of 6 sc in mr worked in black, fasten off leaving tail and use tail to sew the node into place connecting three motifs securely.
Info :
Use pins to hold connectors in place while attaching. Make connectors slightly loose so motifs aren't drawn in; you want a little movement so runner drapes naturally. Avoid over-tightening chains which will warp motif edges.
Round 3 :
Reinforce connections by slip stitching through both motif edges across the connector if extra strength is required: sl st through motif A, ch2, sl st through motif B, ch2, sl st back into motif A at next anchor point; repeat as needed.
Round 4 :
Where a spider overlaps a web or sits adjacent to a pumpkin, sew the spider body onto the motif using the long tail left when fastening off, making several passes for a secure join. Hide tails under the spider body and weave securely.
Info :
Keep the runner flat as you join: check from the top frequently and adjust connector chain lengths to prevent tidal or twisted edges. If a motif pulls, undo the connector and re-pin with a slightly longer chain or an extra bobble node.
— Edging & Finishing Rounds :
Round 1 :
Once all motifs are connected and the runner shape is confirmed, work a minimal edging around outer exposed motif edges with single crochet in black to add cohesion: attach black yarn at an outermost motif point, 1 sc in each outermost st around that motif, sl st to next outer motif and continue around entire outer perimeter. Do not build a full continuous round across inner connectors — keep edging only on exposed outer edges.
Round 2 :
Where the outer edge has a scallop, accent with picots every 3-4 sts: *sc in next 2 sts, ch3, sl st into top of last sc* to create tiny decorative points that echo the ghost hems and webs.
Info :
Weave in all ends on the back side of the runner and clip close. Use a few securing stitches in the join nodes to prevent the runner from coming apart during light use. For a stiffer runner, lightly spray-block with diluted fabric starch and dry flat with pins in place.
Round 3 :
Optional: add a backing of lightweight felt strips to protect table surfaces and add slight stiffness. Cut strips to follow runner shape and tack with a few hand stitches at junction points to keep the felt in place.
Info :
Final blocking step: pin runner flat, stretching gently to even spacing. Allow to fully dry overnight. This ensures motifs keep shape and connectors remain taut. After drying, remove pins and check all joins once more for any loose stitches to secure.
— Alternative Sizes & Adjustments :
Info :
To make a shorter runner, make fewer motif repeats and adjust connector lengths. For a wider runner, make two parallel columns and join across with bridging chains or medallions. Swap colors freely: try white/pale gray ghosts for a softer look, or swap purple for black for a more gothic palette.
Final Notes :
All motif stitch counts are provided to keep rounds mathematically consistent. If you diverge (e.g., you add larger shells or alternate stitch counts), re-check increases to ensure shells align at the end of rounds for even shaping. Enjoy the process and block carefully — blocking makes the largest difference for a flat, professional-looking runner.
This Spooky Halloween Table Runner Pattern lets you create a playful, handmade centerpiece packed with personality. Each crocheted motif brings a little scene — smiling pumpkins, fluttering ghosts, creepy spiders and lacy webs — together into one long, festive runner. The modular design means you can extend, shorten, or recolor the runner to match your holiday style. 🧶🎃 Add a personal touch and celebrate the season with handmade delight. Happy crocheting and enjoy displaying your creation! ✨