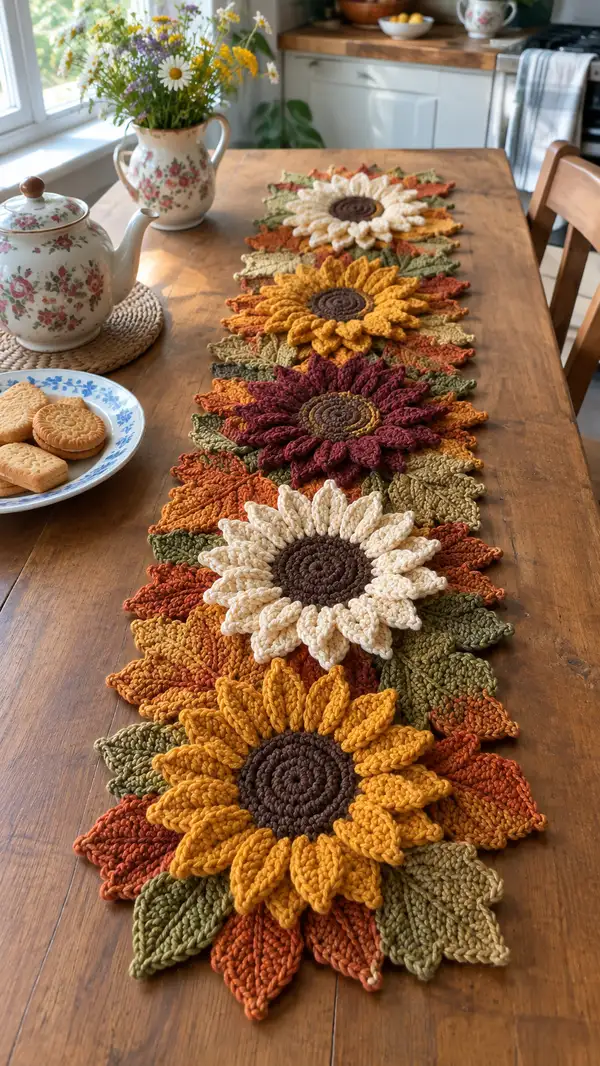
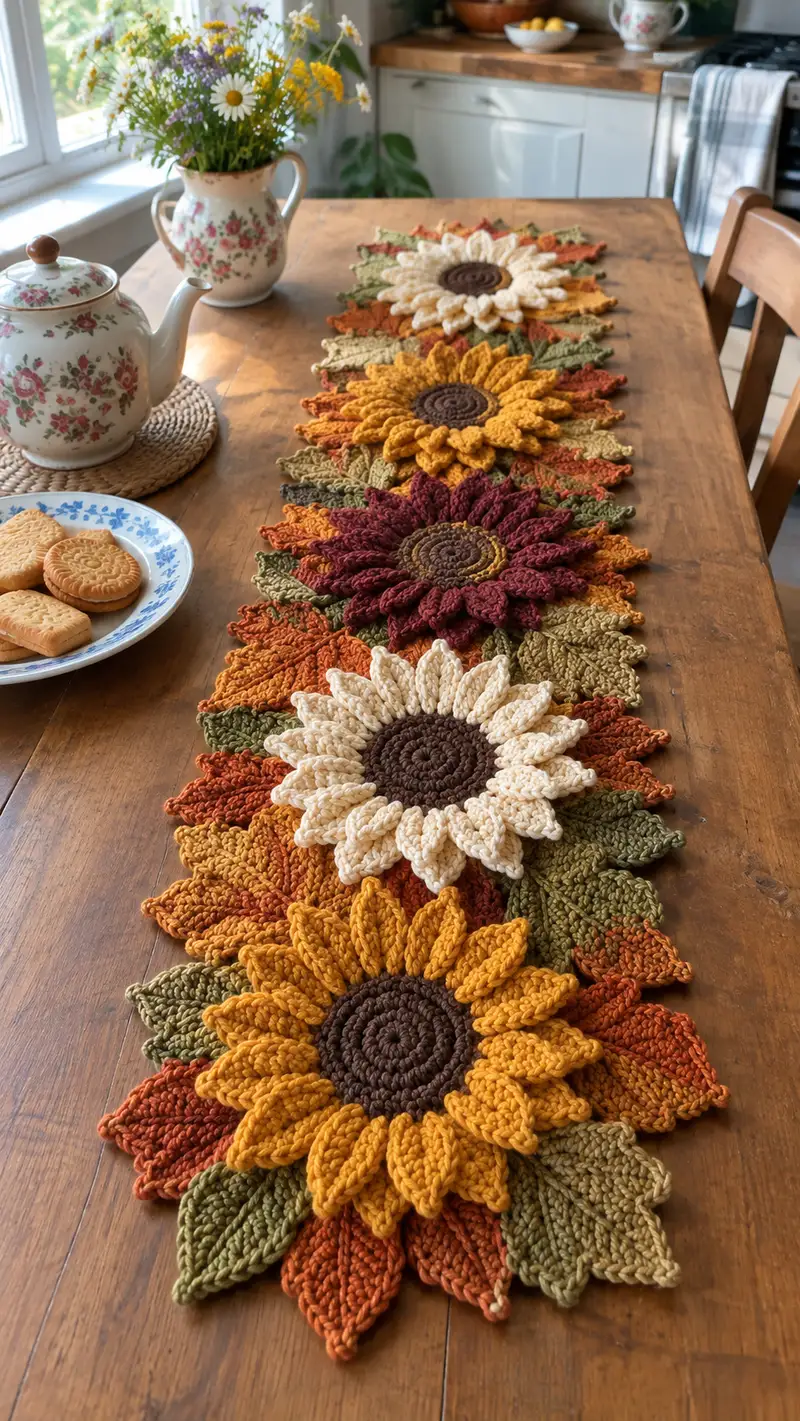
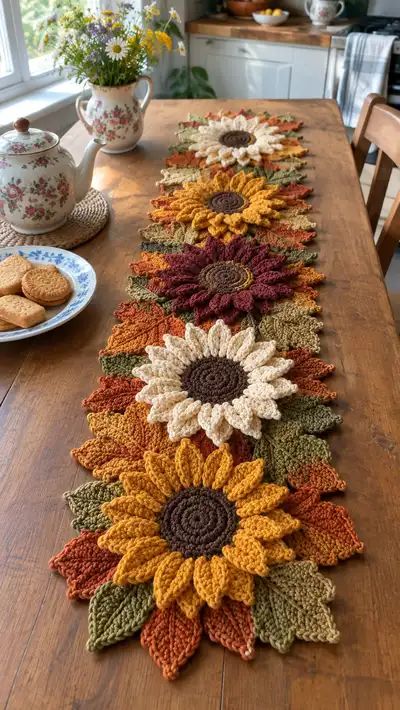
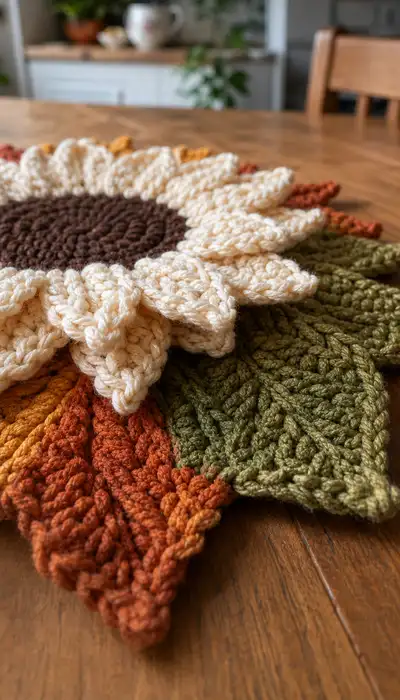
Create a warm, textured table runner inspired by sunflowers and autumn leaves. This pattern builds layered sunflower motifs with raised petals, a coiled center, and leafy background motifs that join into a long runner. Colors visible include deep mustard, cream, burgundy, rust, olive and chocolate brown, giving a cozy fall palette. The design uses textured stitches (post stitches, puff clusters) to create three-dimensional petals and sculpted leaves for a stunning centerpiece.
Progress Tracker
0% Complete
— Overview :
Info :
This pattern is modular: each sunflower motif is made of three main components — the Center Disk, the Petal Assembly (two layered petal rounds), and the Leaf Background Unit. Motifs are joined as you go using slip-stitch or whip-stitch joins. The instructions below break each component into rounds with clear stitch counts. Keep your stitch marker in the first stitch of each round and recount at the end of each round to maintain accuracy.
— Center Disk (Make one per flower) :
Round 1 :
Make a mr, 6 sc in ring (6)
Round 3 :
(1 sc, inc) x 6 (18)
Round 4 :
(2 sc, inc) x 6 (24)
Round 5 :
(3 sc, inc) x 6 (30)
Round 6 :
(4 sc, inc) x 6 (36)
Round 7 :
(5 sc, inc) x 6 (42)
Round 8 :
(6 sc, inc) x 6 (48)
Info :
Change to chocolate brown or chosen center color at the end of Round 6 if starting color differs. Work tightly on the center so the disk is firm and sits slightly raised. Use smaller hook (3.5mm) for a denser center if you prefer.
Round 9 :
1 sc in each st (48)
Round 10 :
1 sc in each st (48)
Info :
These even rounds create a flat, coiled look for the sunflower center. If you want a more spiral look, work Round 10 in sl sts to the back loop to tighten slightly.
Round 11 :
1 sc in next 2 sts, spike sl st into center of previous round (to create a subtle coil), repeat around (48)
Round 12 :
1 sc in each st (48)
Round 13 :
1 sc in each st (48)
Info :
Fasten off leaving a 20-25cm tail for sewing if your petal base will be joined by whipstitch. Weave end to back for a clean finish if not joining immediately.
— Petal Base Round (sc ring for petal attachment) :
Round 1 :
Join flower center to working color for petals in any stitch. ch1, *sc in next 2 sts, ch2, skip 2 sts to create spacing* around to create 16 ch2 spaces for petals; adjust spacing to total 16-18 petals depending on desired fullness (suggest 16) (48)
Info :
Mark the first sc after a ch2 space as 'petal marker' if you prefer exact placement. Counting the center stitches will give you an even distribution for petal anchors; set marker at each ch2 space for easy petal placement.
— Petal Layer A (Front Layer - Raised Petals) :
Round 1 :
Attach petal color at first ch2 space: (in ch2 space) ch3 (counts as first tr), 3 tr clustered into same ch2 space (yo, insert, pull up loop x3 finishing as cluster), ch1, sl st into next ch2 space to anchor petal base — repeat for each ch2 space to form 16 tr-cluster petals. Finish with sl st to base. (16 petals)
Round 2 :
Turn petals outward by working from the back: *At petal base, work (fpdc, dc, tr, dc, fpdc) across petal body working into the front loops of the cluster and into the base ch to create a raised petal with a ribbed look* Repeat around (16 petal shells)
Round 3 :
Work 1 sc between petals into base round for spacing (16) then sl st to join. This locks petal base and creates small gaps for layered petals.
Info :
Work these stitches loosely enough to shape petals but tight enough so they stay upright. Use your fingers to curve each petal while stitch sets. If petals are floppy, add an additional fpdc at the base next to each petal to stiffen.
Round 4 :
Edge each petal with rev sc (crab stitch) along outer edge for a clean, raised rim: work from back to front around each petal's outermost stitches. Sl st to join. (No change in count)
— Petal Layer B (Back Layer - Secondary Petals under Front Layer) :
Info :
Petal Layer B is made next and sits under Layer A; it uses a slightly different stitch sequence to create depth. Use same or contrasting color. Position these petals offset between Layer A petals for rich fullness.
Round 1 :
Working into same ch2 spaces but staggered between Layer A anchors, attach yarn in ch2 space located between two Layer A petals: ch2, (hdc, dc, hdc) into space, sl st to next ch2 space (16 petal bases)
Round 2 :
For each small petal: *(ch2, 5 dc in same space, ch2), sl st into top of neighboring sc to anchor* repeat around to form 16 broader base petals. Sl st and fasten off leaving tail for sewing under Layer A.
Info :
When layering, pin Layer B petals down and position Layer A over them before sewing. This helps you achieve the offset petal look shown in the photo where some petals peek from beneath.
— Petal Sculpting Rounds (Detailing for both layers) :
Round 1 :
With main petal color, join at petal tip and work 1 sc around outer curve of each Layer A petal to define edge (16 sc)
Round 2 :
Working from tip back to base on each petal: fpdc around the edge stitch row to create a ribbed vein down the middle of the petal. Sl st between petals to move. (16 ribs)
Info :
If you want a puffier petal, replace fpdc ribs with 3-row puff stitch: (yo, insert, pull up loop) x 3, yo and draw through all loops, ch1 to close puff. Repeat along the petal center for a very plump look.
— Leaf Background Unit (Make multiple; each motif uses 8 background leaves) :
Round 1 :
Make a mr, ch1, 6 sc in ring, sl st to first sc (6)
Round 3 :
(1 sc, inc) x 6 (18)
Round 4 :
Change to leaf color (olive). ch1, 1 sc in next 18 sts (18)
Info :
This small disc is the anchor for each leaf; extra rounds create a flat base. Leaves are worked outwards in rows rather than concentric rounds to shape a very natural elongated leaf.
Round 5 :
Work into each sc: *ch4, turn and in chain space work (sc, hdc, dc, hdc, sc) to form a long leaf lobe, then join with sl st to next sc on base* repeat 8 times to create 8 long leaves around disk. Fasten off slightly leaving tails to sew into main motif.
Info :
Each leaf is worked as a small flap attached to the central base. Work deliberately and keep edges tidy; blocking will help even the shape later.
Leaf Shaping Round 6 :
With leaf attached: (work along leaf body from tip to base) ch1, starting at leaf tip, 1 sc in tip, inc (2 sc) next, hdc in next 2 sts, dc in center 3 sts, hdc next 2 sts, dec (sc2tog) towards base, sl st to join. Fasten off. Repeat for each leaf (8 leaves per disk)
Info :
Alternate leaf colors (rust, olive, light tan) for the layered foliage effect seen. Use three distinct shades and alternate in sets of two or three around the motif for visual interest.
— Leaf Texturing (Veins and Raised Ridges) :
Round 1 :
With contrasting thin yarn, work a row of sl sts up the center of each leaf to create a vein. Insert needle at leaf tip and sl st along centerline to base; fasten off. (No stitch count change)
Round 2 :
With same leaf color, work 1 fpdc at intervals along leaf edge to create ribbed texture. Place three fpdc evenly spaced on each side of the central vein for a natural ridge look.
Info :
Use a smaller hook for the fpdc veins to get a crisp ridge. Press lightly when blocking to set the vein shape.
— Join Motif Edging (Round to prepare for joining multiple motifs) :
Round 1 :
With a neutral mid-tone yarn, join at any outermost sc between two leaves. ch1, sc evenly around outermost edge of motif into outer loops of petal edges and leaf edges; aim for a multiple of 4 around (approx 96 sc depending on petal count)
Round 2 :
1 sc in each st (same count). If adjacent motifs will be joined, work sl st joins at predetermined points around this round where motifs will meet.
Info :
Plan joins: motifs in the pictured runner are arranged tip-to-tip with leaves interlocking. Mark three to four join points along each motif where leaves touch neighboring motif leaves so you'll know where to connect later.
— Decorative Raised Stitch Round (Optional Texture) :
Round 1 :
With main flower color, work a round of alternating fpdc and bpdc around petal bases to create a braided ridge where petals meet the center. *fpdc around post of st, bpdc around post of next st* repeat around. (Count should equal base sc count, usually 48)
Info :
This detail mimics the sculpted ridges at the base of the petals in the photo and adds a handcrafted look. It also helps hide joins between center and petals.
— Assembly and Joining Rows (How to join motifs into runner) :
Info :
Decide motif layout before joining: the pictured runner uses 5 sunflower motifs in a straight line with their leaves overlapping to create an organic continuous runner. You'll join motifs by slip-stitching or whip-stitching leaf-to-leaf at three points per joining seam (left leaf, center leaf overlap, right leaf).
Round 1 :
Place two motifs right sides together where their leaves overlap. Using a matching yarn tail, whip-stitch through outermost edge round (the Join Motif Edging round) along three evenly spaced points and tie off. Ensure petals stay on top and leaves form the underside seam. Repeat for all adjacent motifs.
Round 2 :
After sewing all motifs, work a finishing round: join neutral yarn and sc around entire outside of runner to create unified border. Use 2 sc in outermost tip points (where leaf tips protrude) and 1 sc elsewhere; the border evens out the edge and stabilizes joins. Fasten off and weave ends. (No global stitch count)
Info :
If you prefer a flexible join, use sl st joins into matching stitches instead of sewing. For a flatter join, overlap leaves only slightly and then sc around both layers together to anchor.
— Finishing Details and Blocking :
Info :
Lightly block motifs by pinning them flat on a blocking board and misting lightly with water (or use steam from an iron kept 2-3cm away). Allow to dry fully. Blocking evens petals and leaf shapes and helps motifs lay flat on the table. Trim and weave in all ends using a tapestry needle; secure any loose petal tips with a few invisible stitches if needed.
Info :
For extra stability on tabletops, you can back each motif with a thin felt circle glued or sewn into place; this also protects surfaces and gives the runner a bit more weight.
— Alternate Single Placemat Version (If you prefer one motif) :
Info :
To make an individual placemat instead of a runner, make one full sunflower motif and add a wide border of 6 sc rounds until you reach desired diameter (use 1.5-2cm extra border made with 3-4 rounds of sc). Block and finish as above.
Info :
Scale the placemat by using thicker yarn and a larger hook (e.g., bulky yarn and 6.0mm hook) or make it smaller with sport weight and a 3.0mm hook. Adjust round counts to maintain shape.
— Notes on Stitch Choices and Tension :
Info :
Use consistent tension throughout. Petal stitches require slightly looser tension than center rounds to allow petals to flare. Post stitches (fpdc, bpdc) are used to sculpt and should be worked carefully into posts of previous rounds. If you're unfamiliar with post stitches or puff clusters, practice on a small swatch before working on motif components.
Info :
Always count stitches at the end of each round and place a marker in the first stitch. Many of the shaping instructions rely on accurate stitch counts to align petal anchors and leaves correctly for joining.
This sunflower table runner pattern brings the warmth of late-summer blooms to your table with sculpted petals and layered foliage. Each motif is a satisfying mix of simple rounds and textured stitches that create beautiful three-dimensional flowers. The modular design makes it easy to craft a single placemat or an entire runner — and the rich fall palette adds cozy charm to any meal. 🌻🧶 Enjoy the slow, meditative stitching, and be proud of the handcrafted centerpiece you'll display for seasons to come!