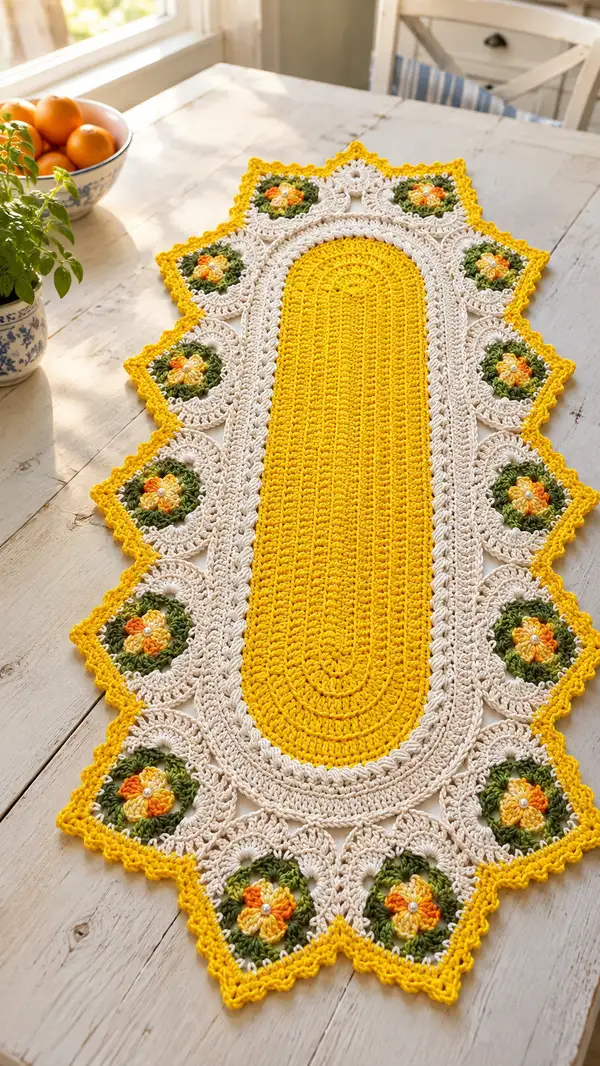
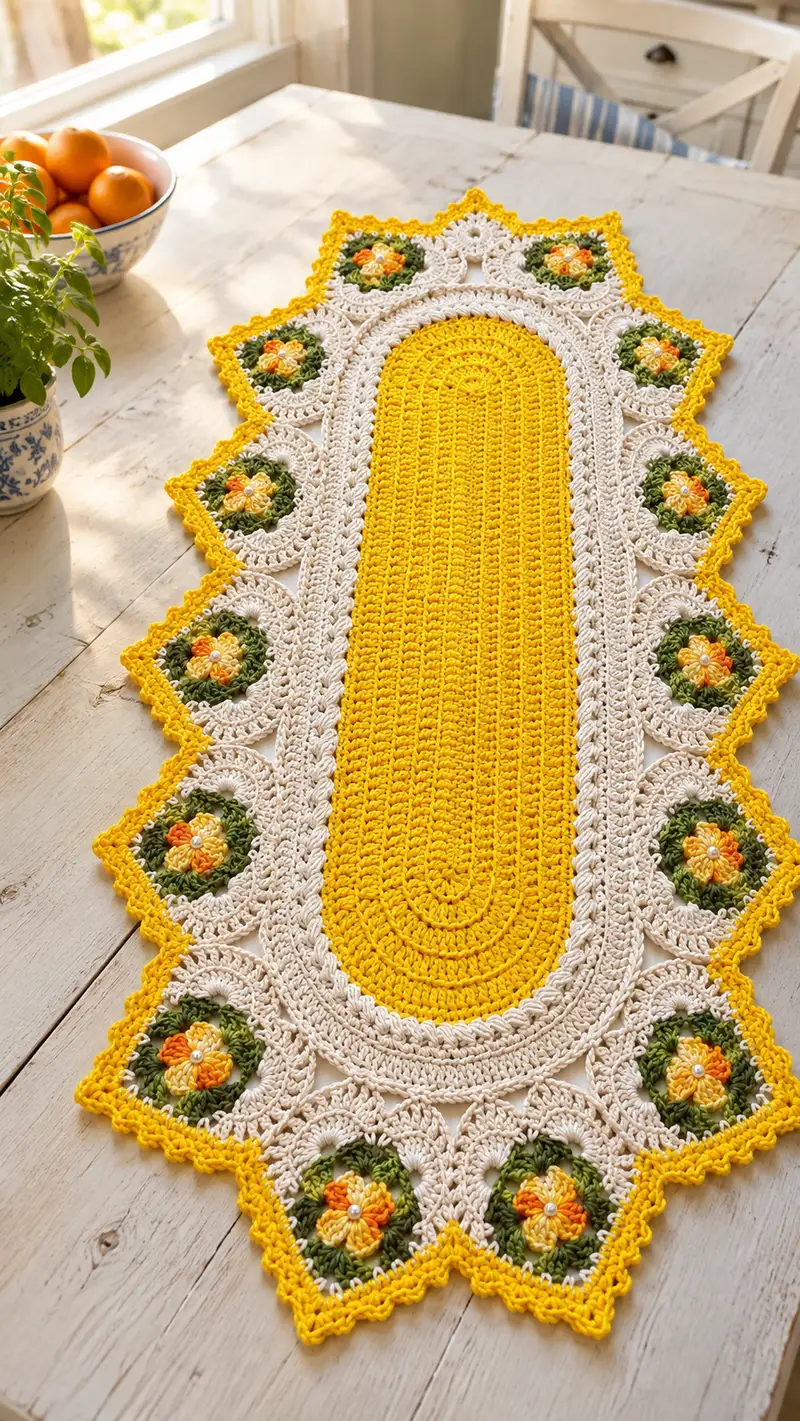
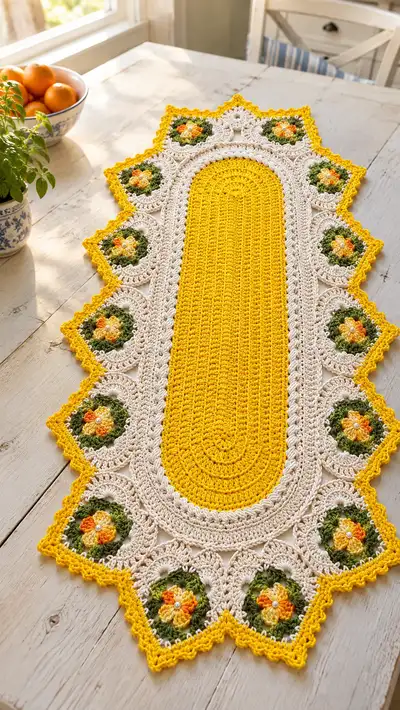
Bright, hand-crocheted table runner with a sunny yellow oval center, cream lace frame, and charming green-yellow floral medallions along the edges. This elegant runner adds farmhouse warmth and a pop of color to any tabletop. Detailed stitchwork, scalloped borders, and pearl-centered flowers give a polished, vintage-inspired finish. Perfect for spring or summer decor and makes a wonderful handmade gift.
Progress Tracker
0% Complete
— Materials & Gauge :
Info :
Gauge is approximate: for 10cm x 10cm square, 16 sc x 20 rows in worsted weight using 3.5mm. Adjust hook if needed to ensure firm fabric without visible stuffing (not applicable here) and to match pictured density.
— Center Oval Panel (worked in bright yellow) :
Round 1 :
6 sc in magic ring (6)
Round 3 :
(1 sc, 1 inc) x 6 (18)
Round 4 :
(2 sc, 1 inc) x 6 (24)
Round 5 :
(3 sc, 1 inc) x 6 (30)
Round 6 :
(4 sc, 1 inc) x 6 (36)
Round 7 :
(5 sc, 1 inc) x 6 (42)
Round 8 :
(6 sc, 1 inc) x 6 (48)
Round 9 :
(7 sc, 1 inc) x 6 (54)
Round 10 :
(8 sc, 1 inc) x 6 (60)
Info :
At round 10 we have established the width of the runner center: 60 stitches around. Check your tension — this circumference determines final width. If you prefer narrower, substitute a smaller hook or reduce increase rounds by one.
Round 11-18 :
1 sc in each st (60)
Info :
Work even rounds to build the central oval length. Because this project is an elongated oval, the long middle rows create length; counting rows here will determine runner length. For a runner similar to the photo, work these even rounds until you reach desired length — in our pattern we continue to round 48 to match the proportions shown.
Round 19-28 :
1 sc in each st (60)
Info :
To keep the oval edge smooth when working tall stitches later, maintain tidy stitch tension. Use a stitch marker to mark the first stitch of each round to avoid accidental increases or decreases.
Round 29 :
Chain 2 (counts as first hdc), hdc in same st, hdc in each st around (60) — join with sl st to top of ch2
Round 30 :
Ch2, hdc in each st around (60)
Info :
Working two rounds of hdc gives a subtle raised texture in the center that visually matches the photo. If you prefer all sc, substitute sc for hdc — just maintain the same stitch counts.
Round 31-40 :
Ch2, hdc in each st around (60)
Info :
The center of the runner in the photo has visible rib lines. To create rows of ribs, on rounds 35 and 37 switch to 1 row of dc in each st worked in BLO to create subtle ridges. Example: Round 35: ch3, dc in each st BLO (60).
Round 41 :
Switch to sc: ch1, sc in each st (60)
Round 42 :
1 sc in each st (60)
Info :
We now prepare to create the decorative cream frame. Fasten off yellow leaving a 30-40cm tail for joining later to the cream frame or simply break and weave in after assembling.
— Floral Motif (make 12 total: 6 per side) :
Info :
Each floral medallion is worked in rounds using green outer rounds, petals in yellow and orange, and a small pearl sewn into the center. Work one motif fully then make 12 identical motifs. Block each motif flat before joining.
Round 1 :
mr, ch1, 6 sc in mr (6)
Round 2 :
2 sc in each st around (12)
Round 3 :
(1 sc, 1 inc) x 6 (18)
Round 4 :
Change to green yarn. (2 sc, 1 inc) x 6 (24)
Round 5 :
1 sc in each st (24)
Info :
Round 5 creates the green background round for the petals. Adjust tension so the round lays flat — if it cups, use a slightly larger hook for this round and then return to normal hook.
Round 6 :
Change to light yellow. Ch2 (counts as first hdc), (hdc, ch1, hdc) in same st, *skip 2 sts, (hdc, ch1, hdc) in next st; rep from * around to make 6 petal bases (12 hdc + ch spaces total) — sl st to join (24)
Round 7 :
Working in petals: Into each ch-1 space: ch1, (sc, hdc, 3 dc, hdc, sc) — fasten off light yellow after each petal round if changing to orange for accents
Round 8 :
Change to orange for accent: In the central two dc of each petal work 2 dc cluster: sl st to center dc of petal, yarn over, pull up a loop, (yarn over pull through two) twice to form a cluster, sl st to secure — this creates a small raised accent in each petal. (6 clusters)
Info :
These flower rounds are decorative and you can vary colors. The pattern pictured has alternating tones of yellow and orange for a natural sunflower look. After petals are complete, place a small pearl bead in the center and sew securely with matching cotton thread.
Round 9 :
Change to green: ch1, work 2 sc in each st around to form a neat circular border around the petals (48)
Round 10 :
(3 sc, 1 inc) x 12 (60)
Round 11 :
1 sc in each st (60)
Round 12 :
Switch to cream yarn: (FLO) ch3, *skip 4 sts, (5 dc in next st), skip 4 sts, sl st into next st; rep from * around to create petals framing the motif — adjust spacing so total rounds remain even and motif stays circular
Info :
Final cream round prepares motifs to be inset into the lace arches. Block motifs flat so the cream outer round lays flat and has a clean shape for joining.
— Cream Frame & Arches (worked around center and motifs) :
Info :
The frame is worked around the yellow center in cream yarn. This frame creates oval arches that hold motifs at even intervals. You will work a sequence of rounds that build up arches and connection points for the motifs. Pin the central oval flat before beginning.
Round 1 :
Join cream to any stitch on the top edge of the yellow oval: ch3 (counts as dc), dc in each st around until you reach the other end; at the ends (short edges) work (dc, ch2, dc) into the end stitches to create a smooth curve — total sts will approximately be 60 dc + 4 for end chains (adjust to keep the same number of anchor points) (approx 64)
Round 2 :
Ch1, sc in each dc around including around end chains and spaces to even out (approx 64)
Info :
Round counts will vary slightly depending on tension and hook differences; be consistent and aim for a firm, even frame that lies flat against the center. Use blocks to shape the arch curvature before working the next rows.
Round 3 :
Ch4 (counts as tr), *skip 2 sts, 5 dc shell in next st, skip 2 sts, ch2, sl st in center of next shell to begin arch across to the other side; rep across along side rows to create 6 arches on each side (work shells so you have 6 shallow arches per side) (approx 64 shells/arches)
Round 4 :
Ch1, sc in each st and ch space around to tidy shells and arches; when encountering ch2 spaces at arch tops, work (sc, ch3, sc) to define a loop that will accept the motif edge later
Info :
Placement of arch tops is crucial — count stitches and mark the centers of each arch with stitch markers. The photo shows 6 arches per long side, each hosting a round motif. Make sure arch spacing is even by dividing the side count into 6 equal sections.
Round 5 :
Work 1 sc in each st across the top and sides, in arch loop spaces work 7 sc evenly to form a firm cup for motif insertion (approx 64)
Round 6 :
Ch3, dc in each st around; in the center of each arch (the ch3 loop), work 3 dc, ch2, 3 dc to increase the arch rim (approx 64)
Info :
At this stage your frame will have well-defined arches with a small cup to house each circular motif. Place each blocked motif onto its arch to check fit; there should be a small gap around the motif for a decorative joining round in cream.
Round 7 :
With cream, work 1 sc evenly around the entire frame and arch rims, placing a slightly tighter pull in arch cups to secure shape (approx 64)
Round 8 :
Change to an open lace: *ch3, sk 1 st, sc in next st; rep from * around to create eyelet row (approx 64)
Round 9 :
Ch1, sc in each st around to stabilize the eyelets (approx 64)
Info :
Now you're ready to join motifs to the frame. Decide whether to sew them into the cups or to join as-you-go. The instructions below describe sewing for secure placement and even finish.
— Joining Motifs to Frame :
Info :
Arrange motifs along both sides of the cream frame so that one motif sits inside each arch. Use pins to secure placement: motifs should be centered in the arch cup and have an even border of cream showing.
Round 1 :
Position first motif inside arch. Using cream yarn and a yarn needle, whip stitch through outer cream round of motif and the sc rim of the arch, using small stitches every 2-3 sts for a neat invisible seam. Repeat for all motifs on one side then the other.
Round 2 :
After all motifs are sewn in, work a slip-stitch round in cream around the junction: join yarn at the base of any motif, sl st around the interface catching the last round of motif and the arch rim to lock seams in place (approx 64 sl sts)
Info :
Press lightly with steam or gently block again after motifs are attached to set stitches. If any motif puckers, remove a few joining stitches and re-stitch with wider spacing to eliminate tension.
— Decorative Lace Rounds (cream) :
Round 1 :
Ch3, dc in each st around (work into motif joins, frame edges and between arches) (approx 88)
Round 2 :
Ch1, sc in each st around (88)
Round 3 :
Switch to shell pattern: *skip 3 sts, (5 dc in next st), sk 3 sts, sc in next st; rep from * around (11 shells)
Info :
This shell round builds up the decorative scalloped foundation which will be echoed by the bright yellow outer edge. Ensure shells along long sides line up with arches so peaks point outward where the final scallops will sit.
Round 4 :
Ch1, sc in each st and through each shell apex; in shell centers work (sc, ch3, sc) to create small looped spaces for the final picot edging (approx 88)
Round 5 :
1 sc in each st (88)
Info :
The runner in the photo uses a tightly worked cream lace so that the yellow scallop sits crisply. If your shell density looks too open, add an extra sc between shells to tighten the fabric by 8-12 stitches across.
— Outer Yellow Scalloped Edge :
Round 1 :
Join yellow at any shell apex: ch3, dc in same st, *skip 2 sts, (5 dc in next st), skip 2 sts, dc in next st; rep from * around to form big scallops following shell placement—apex count should match shells (approx 44 scallops)
Round 2 :
Ch1, sc across and into scallop bumps: in each 5-dc scallop work (sc, ch3, sc) across scallop to define a small picot loop (approx 44 loops)
Round 3 :
For each picot loop work: (sc, picot, sc) where picot = ch3, sl st into first ch — this adds the delicate pointed detail seen in the photo. Fasten off and weave ends.
Info :
Edge picots are optional - if you prefer a plainer edge, simply work 2 sc in each scallop peak instead. Blocking will emphasize scallops and make the yellow rim pop against the cream lace.
— Final Finishing Rounds & Details :
Round 1 :
Inspect entire runner and add a final tidy round of sc in either cream or yellow where seams appear uneven. Typically this will be one round around seams only (approx 30-50 sts touched)
Round 2 :
Sew pearl beads into center of each floral motif using a small hand-sewing needle and thread; secure thread through several times and knot tightly on the back side; secure with a drop of fabric glue if desired (12-14 beads)
Info :
Give the entire runner a light steam block to set the scallops and arches. Pin scallops to hold shape until dry. Trim all ends closely and weave tails into the backs of cream rounds to hide them.
Round 3 :
Optional: add a final lace overlay row worked in cream using (ch5, sl st into next apex) to add subtle loops along the scallop edge. This is decorative only and not required.
Info :
Care instructions: Hand wash or gentle machine wash in cold water on delicate cycle; reshape while damp and dry flat to preserve blocking and shape.
Finishing this Sunny Floral Table Runner is such a joy — each scallop, arch, and pearl adds personality and charm. The combination of bright yellow and soft cream creates a fresh, welcoming centerpiece for any table. It’s a satisfying mix of structured rows and lacy edges that make for beautiful handmade decor. 🧶🌼 Happy stitching, and enjoy the sunshine you bring to your home with this runner! ☀️