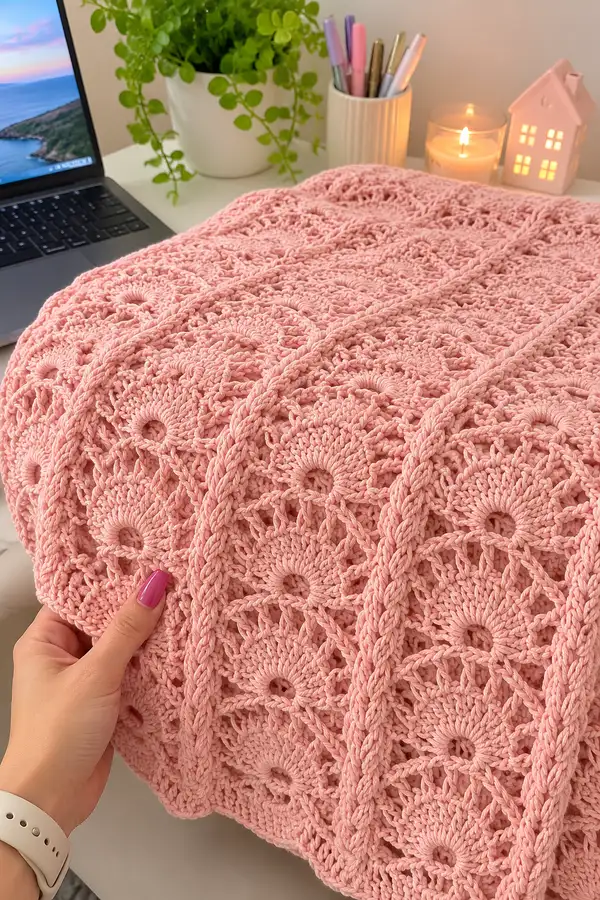
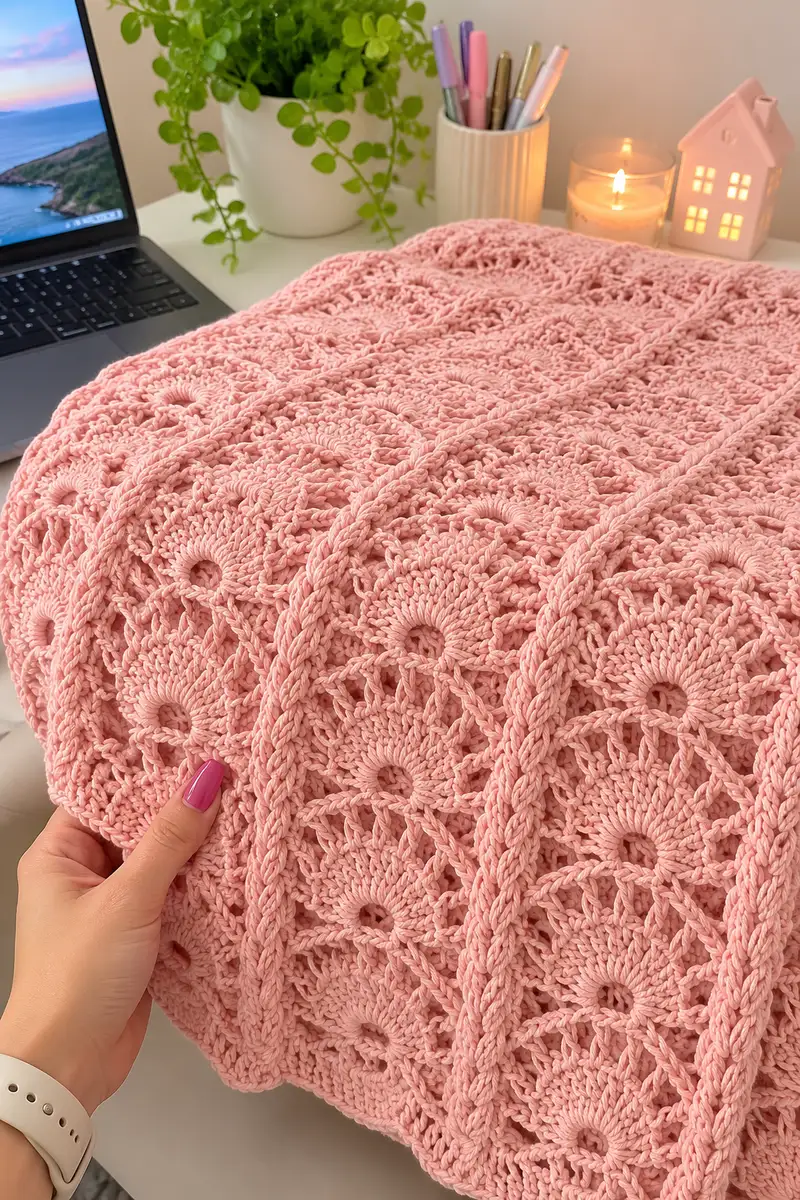
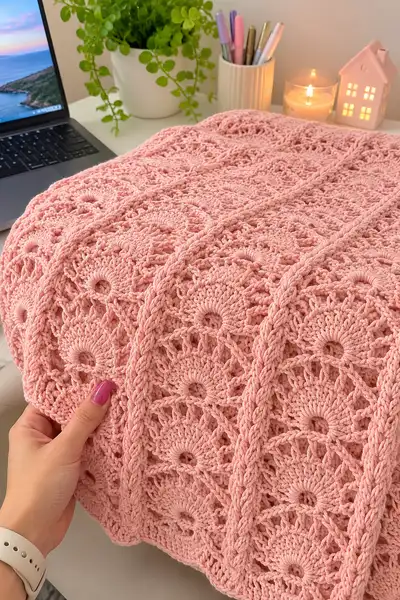
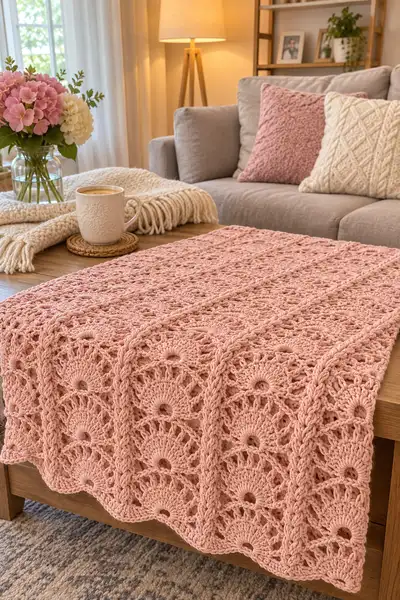
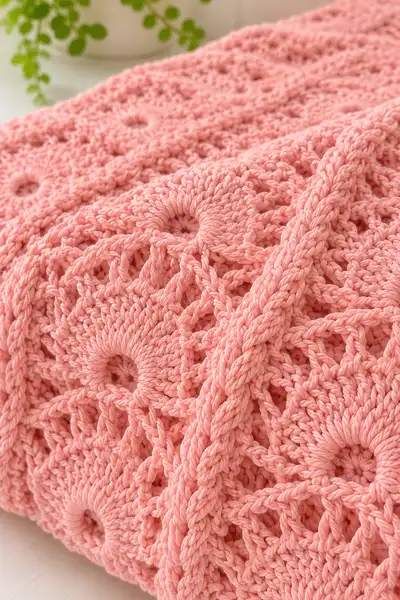
A romantic, artisan-style bedspread worked in a soft blush pink bulky cotton yarn. This design combines lacy circular floral motifs with raised braided joining strips to create a light, textured coverlet perfect for layering. The airy openwork with defined braids gives this bedspread a polished, handmade look that drapes beautifully over a bed or sofa.
Progress Tracker
0% Complete
— Gauge & Notes :
Info :
Gauge is not crucial because this pattern is modular and sized by motif count. With bulky #5 cotton yarn and a 6.5mm hook a single finished round floral motif (after blocking) should measure approximately 6.5" to 7" across. Always make a test motif and block it before committing to final motif counts to match the layout and desired finished size.
Info :
Working in continuous rounds is optional. For neat joins and consistent motif orientation, I recommend working motifs in joined rounds, fastening off, then blocking before assembly. Use stitch markers at the start of each round to track round counts.
— Primary Floral Motif (Make as many as needed) :
Round 1 :
Make a magic ring. Ch 3 (counts as dc), work 11 dc into the ring. Join with sl st to top of ch3. (12 dc)
Round 2 :
Ch 3 (counts as dc), 1 dc in same st, (2 dc in next st) x 11. Join with sl st to top of ch3. (24 dc)
Round 3 :
Ch 1, sc in same st, *ch 3, skip next dc, sc in next dc* around to create 12 ch3 spaces. Join with sl st to first sc. (12 sc, 12 ch-sp)
Round 4 :
Into each ch3 space: (ch 2, 7 dc, ch 2, sl st in same ch3 space). This forms 12 tall petals. Join with sl st to base of first petal. (12 petals)
Info :
Each petal is a deep fan to create the sunburst look. Keep tension consistent so fans sit evenly. On bulky cotton, do not over-tighten the magic ring; pull it closed to a small hole but allow the center to breathe for blocking.
Round 5 :
Ch 1, sc in same st, *ch 3, 2 sc around the center of next petal (insert between the 4th and 5th dc of the fan), ch 3, sc in base between petals* repeat around. Join with sl st. (24 sc approx, 24 ch-sp)
Round 6 :
Ch 4 (counts as tr), tr in next 3 sts, ch 3, sl st to top of adjacent petal center to create linking arches; continue around creating 24 short arches. Join with sl st to top ch4. (24 arches)
Round 7 :
Ch 3, 2 dc in same arch, (3 dc in next arch) x 23, join with sl st to top ch3. (72 dc)
Info :
This round increases density and forms a circular band that will be squared later. Keep track of the stitch counts; after Round 7 you should have 72 dc in large motifs worked with bulky yarn. If your count differs, recount fans and arches first before adjusting.
Round 8 :
Ch 1, sc in same st, *ch 5, skip 2 dc, sc in next dc* around to create open lacy points. You will have 24 ch5 spaces. Join with sl st. (72 sc positions, 24 ch5)
Round 9 :
Into each ch5 space work: (sc, hdc, 5 dc, hdc, sc) to form shell petals. Join with sl st. (24 shells, increases to approximately 200 sts across motif)
Info :
At bulky gauge the number of total stitches may vary; the important structural elements are the 24 shells placed evenly. If a shell feels tight, pull loops gently to relax; blocking will open shells evenly.
Round 10 :
Ch 3, dc in next 2 sts, *(ch 2, skip next 6 sts, dc in next 3 sts)* repeat around aligning dc groups to define corners for later squaring. Join with sl st. (approx 72 dc and 24 ch2)
Round 11 :
Ch 1, sc in same st, *work 3 sc evenly across next 3 dc, 7 ch loop (ch 7) in each ch2 space from previous round, sc in next dc group* repeat around. Join with sl st. (24 ch7 loops)
Round 12 :
Into each ch7 loop: (sc, hdc, 9 dc, hdc, sc) forming larger scallop petals around each lacy gap. Join with sl st. (24 large scallops)
Info :
These large scallops are the motif's outer petals; they will be joined to neighboring motifs and braided strips. Keep tails long when fastening off to help weaving or joining if you prefer whipstitch joins.
Round 13 :
Ch 2, hdc evenly across scallop tops (approximately 9-11 hdc across each scallop) creating a band that begins to square the round into a blockable shape. Join with sl st. (approx 264 hdc depending on your stitch counts)
Round 14 :
Ch 1, sc in same st, *ch 3, sc in the center of next scallop* around to create 24 ch3 spaces spaced between scallop centers. Join with sl st. (24 ch3)
Round 15 :
Into each ch3 space: (sc, 5 dc, sc). This forms connecting petals which will align when motifs are joined. Join and fasten off leaving a 10-12" tail for joining. (24 petal connectors)
Info :
Fasten off and weave in ends partially; leave 10-12" tails for joining. Block the motif flat—stretch gently until centered and pin to measured dimensions. Blocking will open the lace and ensure consistent motif size for assembly.
— Motif Variation / Square Finishing (Optional for tighter corners) :
Round 16 :
Re-join yarn at an outer scallop center. Ch 1, sc around outer edge working (2 sc, ch 1) across each scallop arc to make slight picot edging. Work evenly to create 96 sc total around depending on your motif size. Join with sl st. (approx 96 sc)
Round 17 :
Ch 3, dc in next 3 sts, *(ch 2, skip 1 sc, dc in next 4 sts)* repeat around to square corners into slight straight edges where motifs will align. Join with sl st. (approx 120 dc & ch2s)
Round 18 :
Ch 1, sc in same st, *sc across 4 dc, ch 2, sc across next group* repeat around to create a stable edge for joining strips. Join and fasten off. (approx 120 sc)
Info :
If you prefer a softer motif edge, omit Rounds 16-18 and leave the scalloped edge from Round 15—joining will still work but the finished bedspread will be more lacy and less grid-like.
— Braided Joining Strip (Make as many vertical/horizontal strips as required) :
Round 1 :
Ch 60 (or a multiple to match motif spacing) leaving a long tail for sewing. Join with sl st to form a ring if making a continuous braid strip or work back-and-forth foundation for a flat braided column. For a flat column, do not join—turn to work in rows.
Round 2 :
If ring: ch 1, work 1 sc in each ch around to create a tidy base (60 sc). If working rows: sc in 2nd ch from hook and across (59 sc). Fasten off and turn to braid technique.
Round 3 :
Re-join yarn to any stitch and work 3 rows of sc to create a base plate (60 sc). Then work 18 successive chains of 6 ch each across the top of the base to create vertical loops which will be used to create the rope/braid effect later. Fasten off leaving a long tail.
Info :
The braided joining strip is created by crocheting a flat base and then working a set of long chain loops across its length, then twisting/working them with slip stitches to create a rope-braid texture. Alternatively, you may crochet three long cords and braid them physically, then sew them over the base strip.
Round 4 :
For the rope braid: make 3 long I-cords or crochet cords each the same length as the base (approximately 3 times motif height). Attach cords along the base and braid them tightly across the length, sewing at intervals to secure. For an all-crochet braid, insert hook into base stitches and pull loops through the chain loops then sl st across to compress into a twisted rope look. Finish by sewing both ends under motif edges. (No numerical stitch count required; length varies)
Info :
Many crocheters find making three simple crochet cords (chain + sl st back) and braiding them by hand yields a sturdier, cleaner braided column that matches the photos. Use the same bulky yarn held single for the cord so the braid dimension matches the motif scale.
— Joining Two Motifs (Join-As-You-Go OR Sew-Assembled) :
Round 1 :
Join-As-You-Go method: With motif A facing and motif B laid right-side down, rejoin yarn in motif A at a connector scallop space that aligns with motif B, ch 1, sc through motif A scallop and sc through corresponding stitch on motif B, repeat across connector points to join securely. Work 12-24 joining points depending on motif edges. Fasten off with long tail to weave and secure. (Number of joins equals number of connector scallops aligned—24 typical)
Round 2 :
When adding a braided column between motifs, position the braid on the right-side of a completed motif, then join the next motif to the braid and the previous motif simultaneously using sl st or sc across aligned loops. This creates a seam where the braid sits raised between motif panels.
Info :
Pin motifs and braid strips with safety pins or T-pins before sewing to ensure perfectly straight columns. Joining as you go is faster and neater for lace motifs; sewing after blocking lets you adjust tension and alignment more precisely.
— Full Layout & Repeat Plan :
Info :
Decide your layout first. For a lapghan (approx 36" x 48") use 5 motifs across by 7 motifs down (35 motifs). For a twin or small bedspread increase motif count accordingly—e.g., 10 x 12 for a larger spread. Remember to account for joining columns between motifs: a 5-across layout will require 4 braided vertical columns and optionally 6 horizontal rows of braid if you wish to add grid columns horizontally too.
Info :
Calculate yarn by making a small swatch of 4 motifs and their joining braids; measure total grams used and multiply by number of motif groups needed for your chosen size to estimate total yarn required more accurately.
— Reinforced Inner Border & Edge Stabilizing Rows :
Round 1 :
Once the motifs are all joined into the desired layout, work a single round of sc evenly around the entire outside edge to stabilize raw edges: attach yarn at any corner, ch 1, sc evenly approximately 1 sc for every 6-8 outer stitches, working 3 sc in each corner chain space to turn. Join and fasten off. (st count varies by layout)
Round 2 :
Rejoin yarn and work one round of hdc in each sc around for a neat, slightly raised band. This creates a base to attach the scalloped outer border and keeps the motifs from stretching. Join with sl st and fasten off. (st count varies)
Info :
Do not pull this band tightly; keep a comfortable tension so the finished border lays flat when blocked. If your motifs are slightly different in size, this band helps equalize the perimeter circumference for a smooth final border.
— Scalloped Decorative Border (Work around whole blanket) :
Round 1 :
Attach yarn to any outer edge. Ch 3, dc in same st, *skip 2 sc, (5 dc, ch 2, 5 dc) in next sc (shell), skip 2 sc, dc in next sc* repeat around to form scallop shells along the edge. Work 3 dc in corner spaces to keep edge square. Join with sl st. (number of shells depends on blanket perimeter)
Round 2 :
Ch 1, sc in same st, *ch 4, sc in shell center next* around to add small openwork arches between scallops. Join and fasten off. (approx number of ch4 loops = number of shells)
Round 3 :
Re-attach yarn and in each shell work: (sc, hdc, 7 dc, hdc, sc) to deepen scallop and echo motif petals. Work 3 sc in corner stitches to prevent curling. Join with sl st and fasten off. (scallop count = number of shells)
Info :
Work this border loosely on bulky yarn; heavy tension will curl scallops inward. After completing the border, block the whole blanket again to set the scallops and align braid columns; pin scallops evenly to keep the border consistent and even.
— Final Finishing Rows & Trim :
Round 1 :
For a finished cord edge, attach yarn and work 2 rounds of sc around the entire blanket edge. In the second round, work in BLO to create a subtle ridge. Join and fasten off securely with a long tail to weave in. (st count varies)
Round 2 :
Weave in all tails with yarn needle, tucking ends under braid columns and inner bands so finishing is invisible. Trim excess yarn ends close to the fabric after weaving. Add a light steam-block if needed to set texture—do not over-steam on cotton rope yarn if manufacturer advises against it.
Info :
Take photos of your finished layout before weaving in ends in case you need to undo any joins. A neat finish means paying attention to tail placement and securing braid ends well at motif intersections.
— Optional Heavy-Duty Braid Reinforcement (for bedspread use) :
Round 1 :
If this blanket will be used on a bed and handled frequently, reinforce braid joins by stitching a narrow strip of matching fabric behind the braid columns before sewing braid to motifs. This prevents sagging and reduces strain on joins.
Round 2 :
Sew the braid onto the blanket with a yarn needle using the long tails left from motif rounds, taking small, even stitches through the motif edge and braid underside every 3-4 cm. Tie off and weave ends into the braid interior to hide knots.
Info :
Reinforcement is optional but recommended for a larger bedspread or heavy-use item. It adds durability while keeping the braid visually raised and tidy.
— Sizing Guide & Motif Count Examples :
Info :
Sample motif counts by finished blocked motif measurement (~7"):
Info :
- Lapghan (approx 36" x 48"): 5 motifs across x 7 motifs down = 35 motifs, plus 4 vertical braids across width and 6 horizontal braids across length if desired.
Info :
- Throw (approx 50" x 60"): 7 x 8 = 56 motifs. Add 6 vertical braids and 7 horizontal braid rows to match grid.
Info :
- Twin-size bed (approx 66" x 90"): 10 x 13 = 130 motifs; plan for 9 vertical braid strips and 12 horizontal, or reduce horizontal braids and place only vertical columns for a more textile feel.
Info :
Remember to account for the width of braided columns when calculating final width—each braid may add 1.25" to 1.5" depending on braid thickness.
— Care & Maintenance :
Info :
Hand wash or machine wash gentle cycle in cold water with mild detergent. Re-shape and lay flat to dry to retain lace shape and braid integrity. Do not tumble dry at high heat; air-dry flat to maintain the bulky cotton yarn structure.
Info :
Store folded in a cool, dry place away from direct sunlight to prevent color fading. For long-term storage, place acid-free tissue between folds to prevent creasing in heavy braids.
This Sweet Blush Pink Bedspread brings soft, romantic texture to any room with its lacy floral motifs and raised braided columns. Each motif is a little meditative joy to crochet, and joining them into the final spread is deeply satisfying. The bulky cotton yarn creates a cozy, polished finish you will be proud to display. Enjoy the tactile pleasure of each stitch—this blanket will add warmth and charm to your home! 🧶💕