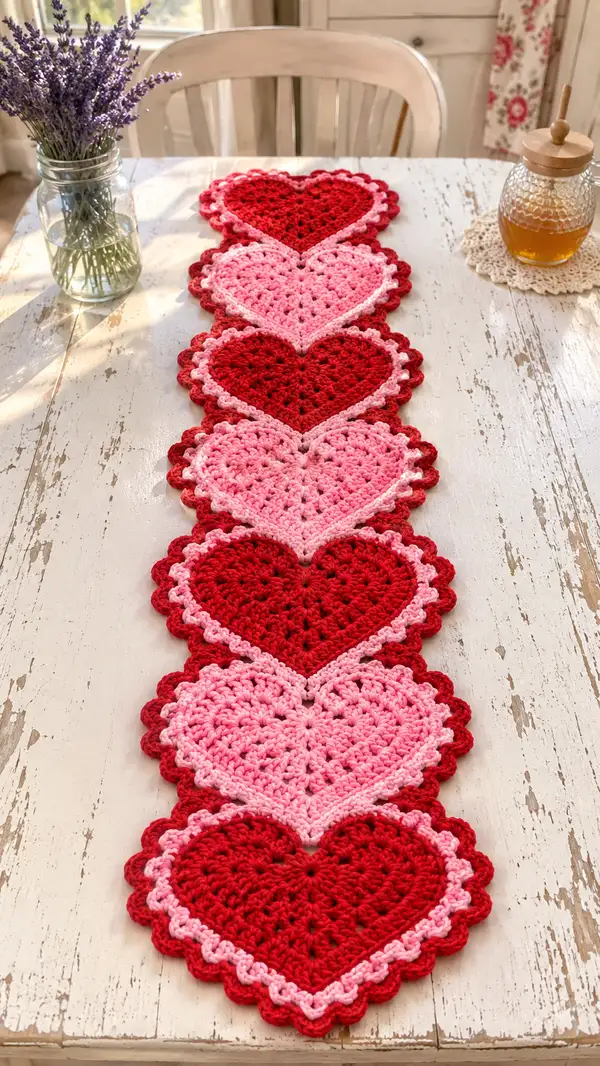
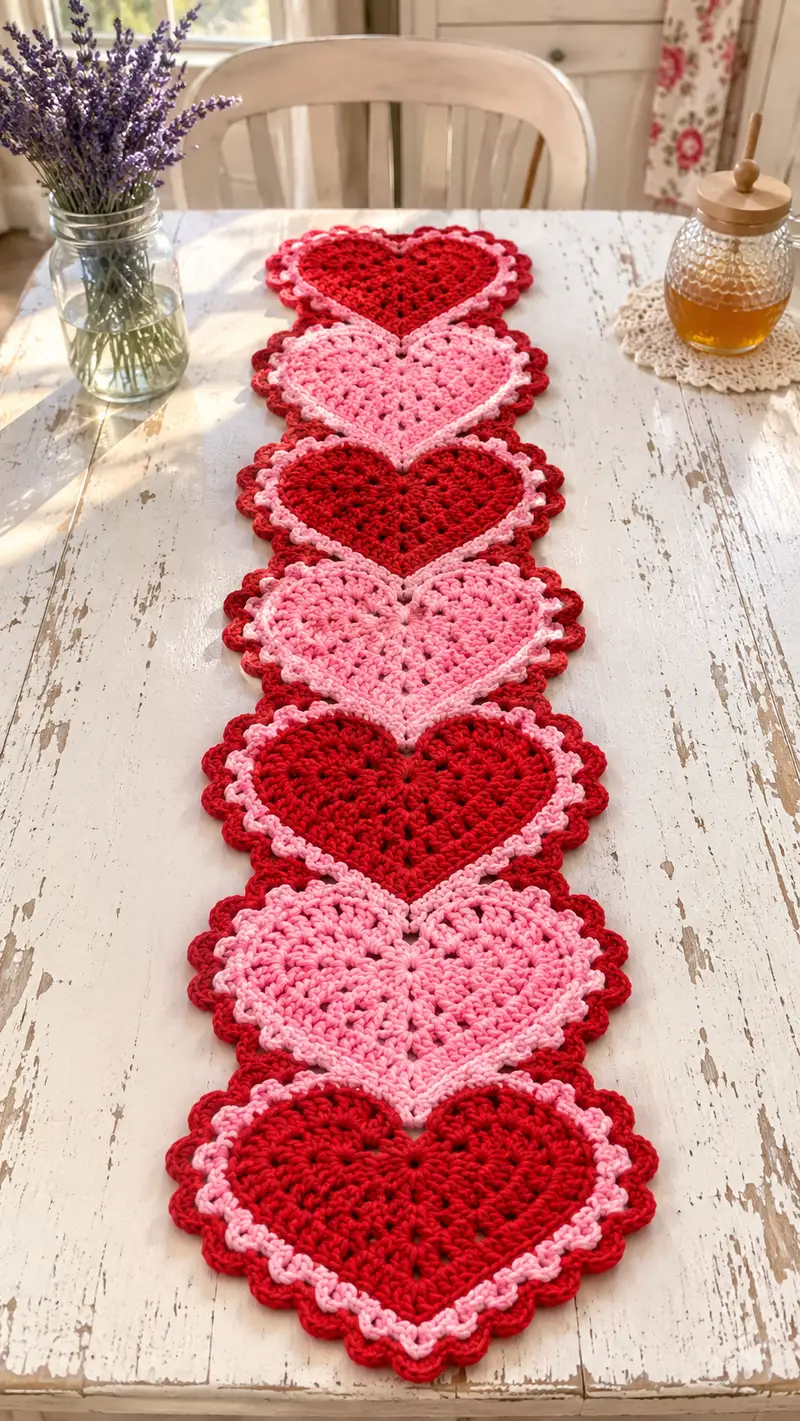
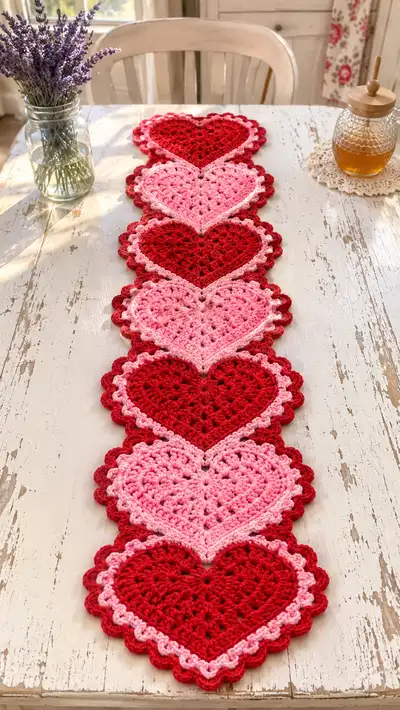
Create a charming Valentine heart chain table runner made from linked heart motifs in alternating red and pink. This pattern uses simple rounds, shell edging and a delicate contrast picot row to produce the scalloped hearts in the photo. The runner is made from repeating heart motifs joined edge-to-edge and trimmed with a pretty scalloped border — perfect for holiday tables, romantic breakfasts, or daily cottage-style decor.
Progress Tracker
0% Complete
— Heart Motif (Make 6 or as many as you need) :
Notes :
Each heart is worked flat in rounds. The rounds below create a slightly domed flat heart that is finished with two scallop rounds. Follow the stitch counts exactly to ensure hearts match. For the runner shown, make 6 hearts alternating colors (Red, Pink, Red, Pink, Red, Pink). Use a contrast color for the thin scallop line between hearts if desired.
Round 1 :
Make a magic ring, ch3 (counts as dc), 2 dc in ring, ch2, 3 dc in ring, ch2, 3 dc in ring, ch2, 3 dc in ring, ch2, 3 dc in ring, sl st to top of ch3 to join. (15 dc, 5 ch2 spaces)
Info :
This ring creates 5 small 3-dc groups that will become the two lobes and the upper shaping areas of the heart. Do not pull the ring fully closed yet — you will flatten it as you work the next round.
Round 2 :
Ch1, sc in first dc and in each dc across until you reach the first ch2 space, in each ch2 work (3 dc, ch2, 3 dc) to build a lobe; continue sc in each dc across to the next ch2 and repeat in each ch2 space. Sl st to first sc to join. (45 total stitches counted as 15 sc + 30 dc placed in ch2 zones = 45)
Info :
After Round 2 the motif is expanding into a flat, slightly triangular shape. Keep work flat on your lap and gently press the two adjacent three-dc clusters down to help the lobes form naturally.
Round 3 :
Ch3 (counts as dc). Work 1 dc in each of the 45 sts around. Sl st to top of ch3. (45)
Round 4 :
Ch3, *1 dc in next 6 sts, 1 inc (2 dc in next st); rep from * around. Sl st to join. (45 + 6 inc = 51)
Info :
Round 4 increases are placed evenly across the row to gently widen the motif while keeping the two lobes defined. Place stitch marker at the beginning of the round to track round starts.
Round 5 :
Ch3, *1 dc in next 7 sts, inc; rep from * around. Sl st to join. (51 + 6 inc = 57)
Round 6 :
Ch3, 1 dc in each st around. Sl st to join. (57)
Info :
At this stage the motif is roughly circular. We will begin heart shaping by working decreases along the lower center area while keeping increases at the top to form lobes. Flatten motif on table to visualize where the heart point will be.
Round 7 :
Ch1, sc in next 8 sts, dec, sc in next 7 sts, dec, sc in next 8 sts, dec, sc in next 7 sts, dec, sc in remaining sts to end. Sl st to join. (57 - 4 dec = 53)
Round 8 :
Ch3, *dc in next 6 sts, dec over next 2 sts; rep from * around until end (repeat 8 times evenly spaced). Sl st to join. (53 - 8 dec = 45)
Info :
Rounds 7-8 compress the bottom center of the circle to shape the point of the heart. Check that the motif resembles a heart with two rounded lobes at the top and a central pointed bottom before continuing.
Round 9 :
Ch1, sc in each st around. Sl st to join. (45)
Round 10 :
Ch2 (counts as hdc), *hdc in next 4 sts, 3 hdc in next st (this creates a small increase for shaping), hdc in next 4 sts; rep from * entire round. Sl st to join. (Pattern yields 45 + 6 increases = 51)
Info :
The 3-hdc clusters are placed at the top lobe edges to make the lobes fuller. Keep tension even so the lobes puff slightly outward to read as round tops when blocked.
Round 11 :
Ch3, dc in each st around. Sl st to join. (51)
Round 12 :
Ch1, sc in next 7 sts, dec, sc in next 6 sts, dec, sc in next 7 sts, dec, sc in next 6 sts, dec, sc to end. Sl st to join. (51 - 4 dec = 47)
Info :
Round 12 pulls in the bottom slightly to exaggerate the point and define the lobes. If your heart looks too flat, work this round with slightly tighter tension.
Round 13 :
Ch2, hdc in each st around. Sl st to join. (47)
Round 14 :
Ch1, sc in first st, *skip next st, (5 dc shell) in next st, skip next st, sc in next st; rep from * around to create scallop sections along the outer edge. Adjust last shell placement so shells fall evenly. Sl st to join. (Shells count as 5 dc each plus sc anchors; total stitches will equal previous round count but read as shell groups)
Info :
This is the beginning of the scalloped edging that creates the pretty rounded scallops seen in the photo. The skip+shell+skip pattern forms individual rounded scallops that look like petals around the heart edge.
Round 15 :
Change to contrast color (if desired) before starting this round. Ch1, sc in each sc around, and in each 5-dc shell work (sl st, sc) across the top of the shell to flatten slightly and create the thin contrast ridge. Sl st to join. (47)
Info :
Use the thin contrast color to create the light outline seen around each heart in the photo. Carry the contrast yarn up along the inside edge so only a thin line appears between hearts when joined.
Round 16 :
With main motif color again, ch1, *sc in next sc, 7 dc shell in top of next shell (work shell into the center of the previous shell), sc in next sc; rep from * around to create a fuller scallop. Sl st to join. (Shells are counted visually; total stitch count remains the same as previous joining points)
Info :
Round 16 builds up the scallop to create the pronounced scalloped edge seen around the hearts. Use consistent tension in shells so scallops are even in size.
Round 17 :
Ch1, sc in each st around, placing 1 sc in the center top of each 7-dc shell to anchor shells plus 1 sc between shells. Sl st to join. (approximate stitch count 47)
Round 18 :
Optional picot round: change to contrast or blush color. Ch1, *sc in next 2 sts, ch3, sl st into first chain of ch3 to form picot, sc in next 3 sts; rep from * around to add a tiny picot accent between scallops. Sl st to join. Fasten off leaving long tail for joining. (47)
Info :
If you prefer the runner in the photo, add a subtle thin contrast row (Round 15) between the main shell rounds which visually separates hearts when they are joined. Fasten off leaving a 18-24" tail to help with assembly if you will whip-stitch or sew joins.
Heart Assembly - Heart 1 (Bottom-most Heart in Runner shown) :
Make heart motif following Rounds 1-18 in Color A (Red). Fasten off with long tail for joining. Block flat before joining.
Heart 1 Rounds Recap :
Rounds 1-18 as above (work all rounds exactly). Ensure Round 15 contrast ridge worked in blush if you want the thin light line seen in the photo.
Info :
After completing Heart 1, block it flat using pins and a low-steam iron or steam blocking. Blocking flattens scallops so joins lay perfectly flat later.
Heart Assembly - Heart 2 :
Make heart motif following Rounds 1-18 in Color B (Light Pink). On Round 15 use the same blush contrast as Heart 1 for continuity. Fasten off leaving long tail for joining. Block flat.
Info :
Alternate colors for each subsequent heart (Heart 3 = Red, Heart 4 = Pink, etc.) to match the photo. You can also substitute any color combination you like for seasonal decor.
Repeat Hearts 3-6 :
Make Hearts 3, 4, 5 and 6 following the same 18-round motif instructions, alternating colors so you have a total of 6 hearts. Each heart is identical in stitch count but color placement alternates. Block all hearts before joining.
Info :
Blocking all motifs before joining improves alignment and makes sewing easier. Use pins to line up scallops and align the thin contrast ridge so it looks like a continuous line down the runner.
— Joining Hearts :
Info :
Hearts are joined side-to-side along their scalloped edges so the contrast ridge between motifs aligns centrally. There are two methods: whip-stitch join through outermost scallop anchors for a flat seam, or crochet join using slip stitches and single crochets. Both are described below.
Method A - Whip-stitch Join (Recommended for neat flat seam) :
Pin Heart 2 to Heart 1 with right sides up and scallop peaks matched. Using the long tail from Heart 2 and yarn needle, whip-stitch through the innermost loop of each scallop (through both hearts' last round foundation stitches) drawing the hearts snug but not scrunched. Make 2-3 passes across each scallop to secure. Work from center out to top and then center out to bottom so the seam lies flat. Weave in ends after sewing.
Method B - Crochet Join :
With right sides together, join with sl st into outermost st of heart 1, ch1, *insert hook through corresponding st on heart 2 and heart 1, sc both together (sc2tog through both pieces); rep across the edge joining each scallop anchor. When you reach the top large scallops, work (sc, ch1, sc) to give a slight gap for natural flex. Fasten off and weave ends. This method shows a decorative ridge on the runner side.
Joining Round Count Guidance :
There are approximately 16-20 scallop anchor points along each side depending on your tension and how you spaced shells. Sew or crochet through each matching anchor so the two motifs are tightly joined along the side without overlapping shells.
Info :
Pin each pair carefully, then tack with small safety pins before sewing. If you want a continuous contrast line between hearts (like the photo), align the thin contrast round so it meets at the center seam and sew through that row to hide the seam.
— Runner Assembly (Order & Alignment) :
Step 1 :
Layout hearts in order on a flat surface: Alternate Red and Pink starting at one end. Ensure the little V points are aligned so the central seam runs through the contrast ridge if used.
Step 2 :
Pin Heart 2 to Heart 1 with scallop peaks lined and join using your chosen method. Continue joining Hearts 2-3, 3-4, etc. until you have a length matching the photo or the desired runner length. The sample photo shows six hearts joined edge to edge without additional spacing.
Step 3 :
After all hearts are joined, press the assembled runner lightly with steam or block again flat to ensure joins relax and scallops sit evenly. Trim and weave in all working tails securely on the underside.
Info :
If you're making a longer runner, join additional hearts in the same manner. For a centerpiece size, use 3 hearts. For a table runner that covers a dining table, repeat hearts until desired length is reached.
— Optional Reinforcement Rounds (Edge Stability) :
Reinforce Round 1 :
With main color, join yarn anywhere along the long runner edge and ch1, sc evenly through the outer loops of each scallop along the long edges (not the seam edge). This creates a neat edge and strengthens the runner. Work 1 sc in each anchor point around the long edges. Sl st to join.
Reinforce Round 2 :
Ch2, hdc in each sc around to slightly bulk the edge and create a finished look. Sl st to join and fasten off. Weave ends. (This adds 2 small rounds of reinforcement to both long sides of the runner.)
Info :
These reinforcement rounds ensure the runner hangs flat and the scallops don't flip up. Use the same color as the outer scallops for an integrated finish, or contrast for a framed-out look.
— Final Border (Picot & Finishing Touches) :
Final Round 1 :
Change to blush or thin contrast color for final accenting. Along the entire runner edge (both long sides and the two short ends), sc evenly, placing 1 sc in each top-of-shell and 2 sc at seam intersections. Sl st to join at the end of the row. (Keep counts even for a balanced look.)
Final Round 2 :
Ch1, *sc in next 2 sts, ch3, sl st into first chain of ch3 to make picot, sc in next 3 sts; rep from * around runner perimeter focusing on long sides and gently forming picots at each scallop. Fasten off and weave ends. Block gently after finishing.
Info :
The final picot round is optional but gives the delicate dotted edge seen in the photo. Keep picots small and even to prevent bulk in the runner seam areas.
— Tips, Gauge & Sizing :
Gauge :
Heart motif approx 6.25 - 6.75 inches wide after blocking depending on yarn and tension. Using worsted weight yarn and a 5.0mm hook produces the size pictured. If your hearts are too small, go up one hook size; if too large or too holey, go down one size.
Finishing :
Weave in all ends on the underside and press lightly. For a permanently flat runner, mist with a light spray of fabric stiffener if desired (test on a scrap first).
Care :
Hand wash cold, reshape and lay flat to dry. Avoid high heat as some yarns can shift or spot-fade under direct sun.
Final Measurements :
Sample runner with 6 hearts measures approx 33-36" long and 6-7" wide depending on blocking. Add or subtract hearts to adjust final length.
Assembly Instructions
- Attach hearts in pairs by aligning scallop anchors and pinning; whip-stitch through the last round anchor stitches to create a flat seam, sewing from the center outward to avoid puckering.
- Match the thin contrast ridge (if used) between hearts so the seam is hidden inside that row; sew through that row for a clean continuous line.
- If crocheting a join, place right sides together and work sc through corresponding stitches of both hearts (sc2tog) along the entire join edge so the seam is integrated into the edge.
- After joining each heart, block the paired section flat to make the next join easier and to keep scallops even across joins.
- Once all hearts are joined, work the reinforcement rounds along the long edges and then the picot final round around the entire perimeter, working carefully around seam intersections.
- Weave all tails into the underside of the runner, trim close, and tuck ends into a neighboring row for discreet finishing. If necessary, use a small dab of fabric glue at hidden ends for extra security.
Important Notes
- 💡Use stitch markers at the beginning of each round to avoid counting errors and keep scallops symmetrical
- 💡Block every heart before joining — blocking evens shells and ensures flat joins
- 💡Stuffing is not used in this flat runner; keep joins flat and sew only through the edge rows to avoid bulky seams
- 💡Maintain even tension across all hearts so that shells and scallops align when pinned together
- 💡Carry contrast yarn inside the work when possible to minimize ends; otherwise leave long tails and weave them into the underside
- 💡Pin pieces carefully and check alignment visually before sewing to avoid offset scallops
- 💡If substituting yarn weight, adjust hook size to maintain a tight but not stiff fabric
- 💡For family use or items for children, avoid small embellishments and secure all ends well; consider embroidered accents over buttons
This Valentine Heart Chain runner is a delightful mix of simple stitches and charming details that transform an everyday table into something special. Each heart is a little handiwork of love, linked together to create a long, romantic accent for breakfasts and gatherings. The scalloped edges and soft contrast line give a vintage-cottage vibe that looks wonderful in red and pink. Enjoy the meditative rhythm of making hearts and the joy of seeing them join into a beautiful runner. 🧶💗
What is the finished size of this runner?
Using worsted weight yarn and a 5.0mm hook, a runner of six hearts measures approximately 33-36 inches long and 6-7 inches wide after blocking. Exact size varies with tension and blocking.
Can I use different yarn weights for this pattern?
Yes — you can use other weights but adjust hook size accordingly (usually 1-2 sizes smaller than the yarn label for a tighter fabric). Changing yarn weight will change the finished heart size and runner length.
Do I need to block the hearts before joining?
Blocking is strongly recommended. It flattens scallops, evens the shape of each heart and makes the joins lay flat and neat.
How do I make the runner longer or shorter?
Add or remove heart motifs. The pattern is modular — each additional heart adds approximately the width of one motif (6-7 inches depending on gauge).
Can I machine wash this runner?
Hand wash cold and lay flat to dry for best results. Machine washing may distort scallops and seams depending on yarn fiber. Check the yarn label for care.
What joining method do you recommend?
Whip-stitching through the scallop anchor points is the neatest and flattest. Crochet joins are decorative but add slight bulk. Choose based on preferred finish.
How much yarn will I need?
Approximately 180-220g of main red, 120-140g of light pink and small amounts (20-30g) of blush/contrast are a good starting point for a six-heart runner, but this depends on your tension and hook choice.
Can the hearts be made larger or smaller?
Yes — adjust hook size or yarn weight. For a larger statement piece use bulky yarn and a larger hook, and for a delicate runner use DK or sport weight and an appropriately smaller hook.
Stay in the Loop!
Get notified when we release new free crochet patterns and join our crafting community!