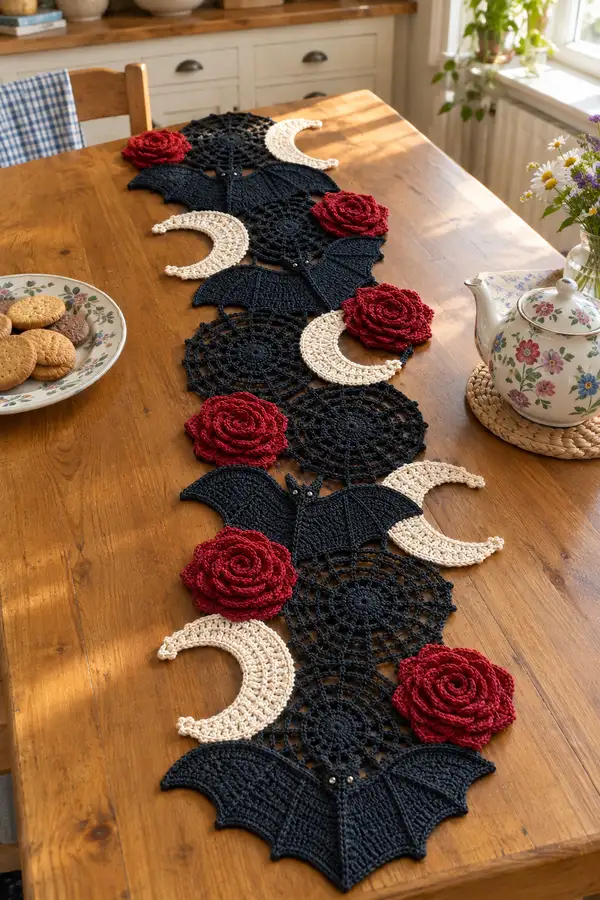
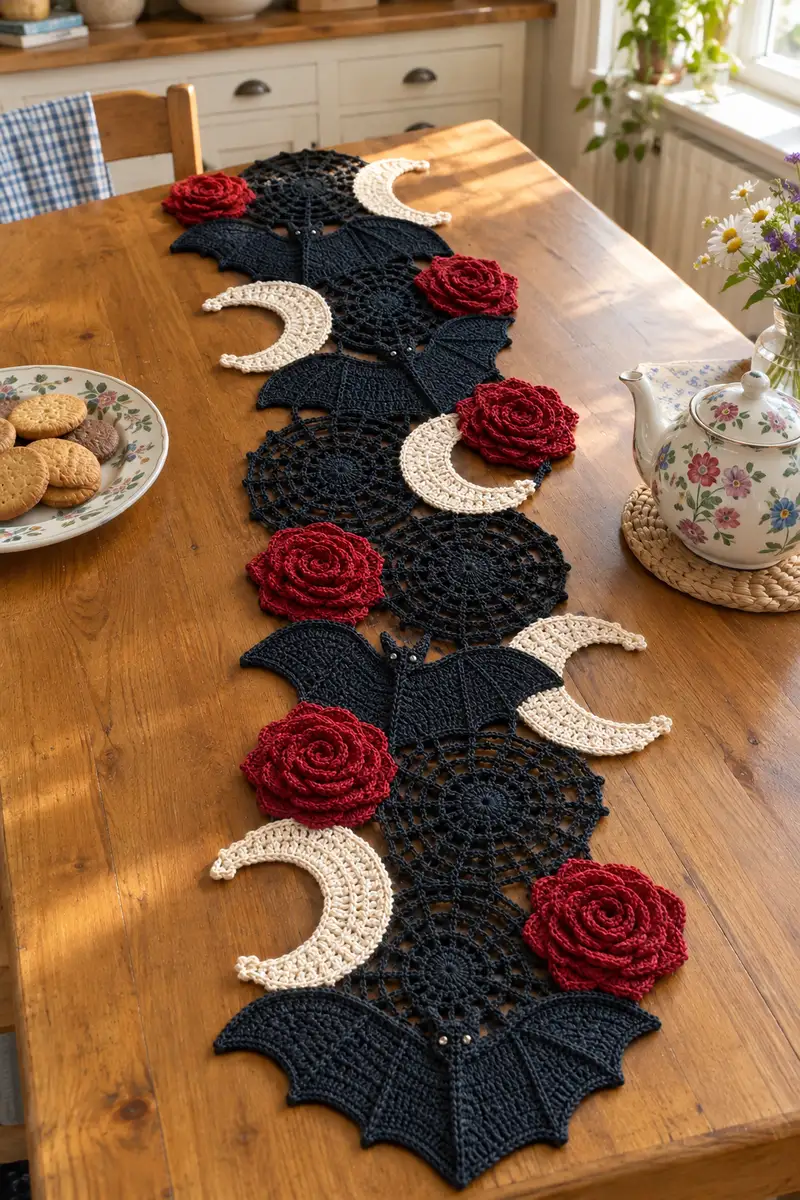
Create a dramatic gothic table runner featuring lacy spiderweb doilies, sculpted black bats, creamy crescent moons and dimensional deep-red roses. This pattern combines crochet lace, motif joining and textured 3D roses for a striking centerpiece. The runner is modular — make as many repeats as you like — and the detailed instructions guide you through each motif, edge and assembly step.
Progress Tracker
0% Complete
— Spiderweb Doily (make 4–6 depending on runner length) :
Round 1 :
6 sc in magic ring (6)
Round 3 :
(1 sc, 1 inc) x 6 (18)
Round 4 :
(2 sc, 1 inc) x 6 (24)
Round 5 :
(3 sc, 1 inc) x 6 (30)
Round 6 :
(4 sc, 1 inc) x 6 (36)
Round 7 :
(5 sc, 1 inc) x 6 (42)
Round 8 :
(6 sc, 1 inc) x 6 (48)
Round 9-11 :
1 sc in each st (48) — work tightly to keep center flat and avoid cup-shape
Info :
Place a stitch marker at the start of each round. Keep tension consistent — do not pull too tight on sl sts in the center
Round 12 :
*ch 6, skip 3 sc, sl st in next sc* around, ending with sl st to join (8 chain loops, 48 base points)
Round 13 :
Into each ch-6 loop: (sc, hdc, 4 dc, hdc, sc), sl st to join. This creates the first ring of petals (8 petal clusters; 48 total base joins)
Round 14 :
ch 4, *sl st in top of next petal cluster, ch 4* around, join (8 chain arches)
Round 15 :
Into each ch-4 arch: (sc, ch 3, 2 tr, ch 3, sc) — this opens the web. Maintain 8 arches
Info :
Blocking now will help the arches open and make them uniform. Wet-block each doily flat on a foam mat and pin into a circular shape before proceeding
Round 16 :
Working between arches: ch 7, sl st into next arch gap; repeat for 8 spokes (8 ch-7 spokes)
Round 17 :
Join spokes by working into ch-7 loops: *sc, ch 5, sc* around each spoke loop to form small connecting rings. Join with sl st (8 small rings)
Round 18 :
Round of decorative picots: in each small ring work (sc, ch 3, sl st) to produce spider-lace texture; finish with sl st to join. Keep count aligned to 8 rings
Round 19 :
Edge: *(sc, ch 2, sc) in each gap created by previous round; move to next small ring* around. This creates a neat scalloped edge for joining later
Round 20 :
Optional decorative final round — add tiny picots every other scallop: (sc, ch 3, sl st) to create subtle texture. Fasten off and weave ends
Info :
Make as many doilies as you need to form the runner spacing. For the pictured runner we used 4 full spiderweb doilies spaced alternately with bats and moons
— Crescent Moon Motif (make 3–4) :
Round 1 :
ch 4, join to form ring, 8 sc into ring (8)
Round 2 :
2 sc in each st around (16)
Round 3 :
(1 sc, inc) x 8 (24)
Round 4 :
(2 sc, inc) x 8 (32)
Info :
We are building a slightly flattened disc that will be shaped into a crescent by working only on one side for the next few rounds
Round 5 :
1 sc in each st (32)
Round 6 :
Fold disc to create a crescent curve. Working in BLO on half the disc only: 1 sc in next 16 sts (16)
Round 7 :
(1 sc, 1 inc) x 8 along BLO section to bulk the inner crescent ridge (24 on the folded section)
Round 8 :
Turn this folded section into a curved shell by making 2 rows of (sc in each st) along the folded edge to thicken it and give it stability (24 then 24)
Info :
When shaping the crescent, gently pull the outer edge so the crescent opens slightly. Use blocking pins to hold curve as you finish
Round 9 :
Work around the outer edge: *sc, ch 2* across outer circumference to create a decorative border. Maintain overall balance across both sides
Round 10 :
Final tidy round: sc in each st and add small picot (sc, ch 3, sl st) every 6 stitches to create a lacy crescent outline. Fasten off leaving tail for joining (count depends on final edge)
Info :
Use cream/ivory yarn for the moons. Block with a slight curve; if you prefer a firmer crescent insert a thin crochet blocking wire along the inner edge before final round
— Bat Motif (make 4) :
Round 1 :
6 sc in magic ring for central head/body (6)
Round 3 :
(1 sc, inc) x 6 (18)
Round 4 :
(2 sc, inc) x 6 (24)
Info :
We are forming a short central tube that will become the bat's body ridge and neck area — mark the last stitch of this round as R4 end
Round 5 :
1 sc in each st (24) — work evenly to create a short tube 3–4 rounds tall; this is the body center
Round 6 :
Fold tube flat and join to create a small ridge: sc through both layers around to compress into a narrow body (24)
Round 7 :
Fasten off center yarn; attach new yarn at leftmost edge to begin left wing. Ch 1, turn and work in rows across wing shape (this section will be worked back-and-forth but labeled as rounds below)
Round 8 :
Working across 24 stitches: Row A: sc in first 6 sts, hdc in next 6 sts, dc in next 6 sts, 3 dc in last 6 sts (creates flared tip). Keep count 24
Round 9 :
Row B (return): sc in first 24 sts (24) — keep edges neat
Round 10 :
Row C: Shape scallops along wing tip by making: *sc2tog at stitch 3–4 from tip, 2 sc across, (sc, ch1, sc) in next three repeats to create scallop points across last 12 stitches* — overall maintain 24 foundation points
Info :
Work wings slightly stretched flat. Use a stitch marker at the outermost wing tip to ensure symmetry when you move to the right wing
Round 11 :
Repeat Row B across to lock scallops (24)
Round 12 :
Decrease gently toward the body: sc across first 10 sts, 2 sc together for seam toward body, sc across remaining 12 to keep curve (23)
Round 13 :
Finish outer edge with (sc, ch 2, sc) along scallop edges, working 6 scallop picots; end and fasten. This completes left wing
Round 14 :
Reattach yarn at right edge of body and repeat wing rows 8–13 mirrored to form right wing; maintaining same counts and scallop placement (mirrored 24 foundation stitches)
Round 15 :
Rejoin at body center and work one round of sc around the entire body-wing joint to neaten seam (approx. 60 sc around depending on seam joins)
Round 16 :
Work raised ribbing lines on wings: Using FLO, work 3 rows of 1 sc in each st FLO to create subtle ribbing across each wing panel; counts remain consistent with wing foundation
Round 17 :
Optional: Embellish wing center ribs by working surface slip stitches from body center toward tips in parallel lines (3 ribs each wing)
Info :
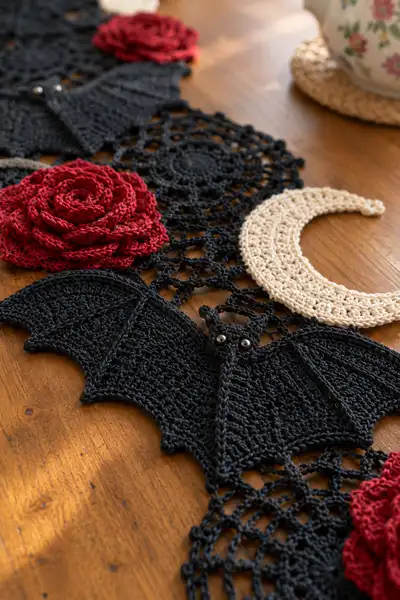
For a firm wing that lays flat, block each bat pinned to shape. Attach two small beads for eyes by sewing through the body center just above the join; secure with doubled thread and knot behind
Round 18 :
Fasten off and weave ends. Make 4 bats for the runner, blocking each to the same size so spacing remains consistent
— Layered Rose (make 4–5) :
Round 1 :
ch 40, join with sl st to form ring (or ch 32–50 depending on desired rose diameter)
Round 2 :
ch 3 (counts as dc), *dc, ch 1* across ring; join with sl st to create foundation loops (approx. 40 dc)
Round 3 :
Work first petal row: *in next ch-1 space: (sc, hdc, 3 dc, hdc, sc), sl st to next space* — repeat around. This creates a tight petal ring
Round 4 :
Chain 3, then work a second petal row behind existing petals: join yarn beneath first petal ring and in each gap work (sc, 2 hdc, 4 dc, 2 hdc, sc) to form larger petals that overlap (this adds volume)
Info :
Use a hook one size smaller for roses if you want the petals firm and compact. Work petals with consistent tension so they curl naturally
Round 5 :
Third petal row: attach yarn behind second row and work (sc, 3 hdc, 5 dc, 3 hdc, sc) into each gap to form full outer petals; leave longer tail for sewing
Round 6 :
Form spiral: starting at center, roll the foundation strip of petals into a spiral; use the tail and whip stitch through the back edge to secure each coil. Stitch through each petal base at least twice to hold shape
Round 7 :
Final shaping: Tug each petal slightly outward and tack in place where necessary to create a natural-looking rose bud. Fasten off and weave ends into the back
Info :
Make roses a little larger or smaller by altering the starting chain length. For the pictured runner we used ch 40 base and three petal rows to create deep blossoms approximately 10–11 cm across
— Mesh Connector & Runner Body (make long mesh strip to join motifs) :
Round 1 :
Using black yarn reattach and ch 80 (this forms the main mesh scaffold between motifs). Turn and sc in 2nd ch from hook and across (79 sc)
Round 2 :
ch 6 (counts as tr and ch-3), *skip 3, sc in next, ch 6* across. End with sc in last st; join with sl st to create repeated ch-6 arches. Aim for 10 arches per 80-ch scaffold
Round 3 :
Into each ch-6 arch: (sc, ch 4, sc) to create an open diamond; this produces an airy mesh for motif joining
Round 4 :
Work a second mesh row offset by half an arch: *ch 3, sl st into center of next diamond, ch 3* across and sl st to join. This produces a stable lattice that will hold motifs
Info :
Make the mesh length to suit your table — the runner pictured alternates 4 doilies and 4 bats/moons in a long connected spine. Make multiple strips and sew motifs on later
Round 5 :
Reinforce edges: sc around entire mesh strip (work into ch spaces and sc stitches) to create a tidy border. Keep count consistent — check stitches each side for symmetry
Round 6 :
Optional decorative fringe: along long edges make little picot loops by *sc, ch 5, sl st back into same st* every 6 sts for subtle edging detail. Fasten off and weave ends
Info :
If your table runner will be used often, consider making two mesh strips and joining them with flat slip-stitch seams for extra durability
— Bat Wing Detail & Ribbing (additional shaping rounds) :
Round 1 :
Attach yarn at wing center; work surface slip stitch ribs: sl st along center toward tip, skipping 2 sts between rows to form raised veins. Repeat 3 times on each wing
Round 2 :
Using contrasting FLO technique: 1 sc in each st BLO across wing panels to create textured ribs and shadowing; maintain counts to match wing foundation
Info :
Surface slip stitches look best done with the motif blocked flat and working from body center outward. Keep lines straight by following the wing's natural fan lines
— Finishing Edging for Runner (final rounds) :
Round 1 :
With black yarn, join at one end and sc around entire combined runner (through mesh and motif edges) — keep stitches even and count as you go
Round 2 :
Decorative scallop edge: *(ch 3, skip 2, sc)* around. This gives a subtle finishing touch while keeping flatness
Info :
Block the entire runner gently after assembly. Use steam or wet-block to flatten motifs and set joins. Pin roses carefully so petals keep 3D shape while dry
Round 3 :
Final tidy round: sc into each scallop and add finishing picots on corners if desired: (sc, ch 3, sl st) for an elegant look. Fasten off and weave all tails behind motifs
Info :
Weave ends through the back of mesh and motifs for a clean front appearance. Test lay your runner on the table and add a few hidden whip-stitches beneath roses or bats to secure movement if it will be frequently moved
— Assembly & Joining Notes :
Round 1 :
Lay out all motifs on flat surface in desired order (sample runner order: doily, bat, doily, moon, doily, bat, doily). Pin motifs in place on mesh to confirm placement before sewing
Info :
Sew motifs to mesh using matching yarn and a yarn needle. Use tidy whip stitch or mattress stitch around joining chaplets so edges meet without puckering. Join at the predefined small rings or arch points on the doily to the mesh diamonds for secure anchoring
Round 2 :
Attach roses: sew through the back spiraled foundation to the top of doilies or mesh, spacing them so they appear to sit over the doily edge and fill gaps between bats and moons. Use long tail to secure each rose with multiple passes
Round 3 :
Sew bats and moons into place: align bat body center with doily join points so wings span two adjacent doilies for natural connection. The crescent moons tuck into doily edges and are secured with small invisible stitches along the inner curve
Info :
When sewing beads for bat eyes, place a small knot at the back and reinforce with glue if the runner will be handled often. Alternatively embroider small eye details for a child-safe runner
Round 4 :
Trim and weave in all yarn tails; double-check joins and add extra stitches at tension points so the runner is secure and flat. Re-block if edges pull after sewing
Info :
For a longer runner repeat the motif order sequence and join additional mesh strips. Keep symmetry so patterns mirror along center axis for a professional look
This gothic table runner brings elegance and drama to any table with spiderweb lace, sculpted bats, creamy moons and rich red roses. The modular motifs let you customize length and repeat pattern for a runner that suits your space. Pin and block each motif, then assemble with care — the result is a show-stopping centerpiece perfect for seasonal styling or everyday gothic charm. 🖤🌹✨