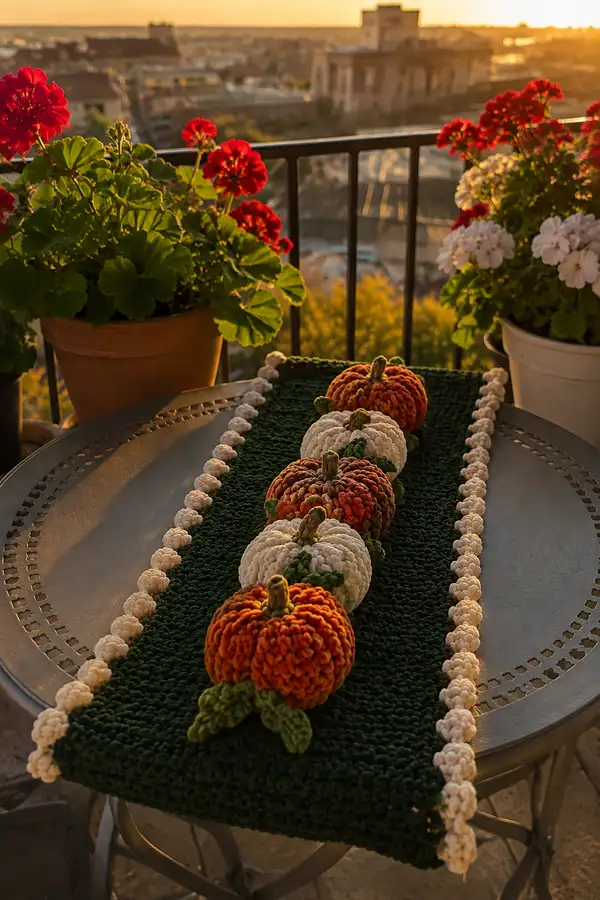
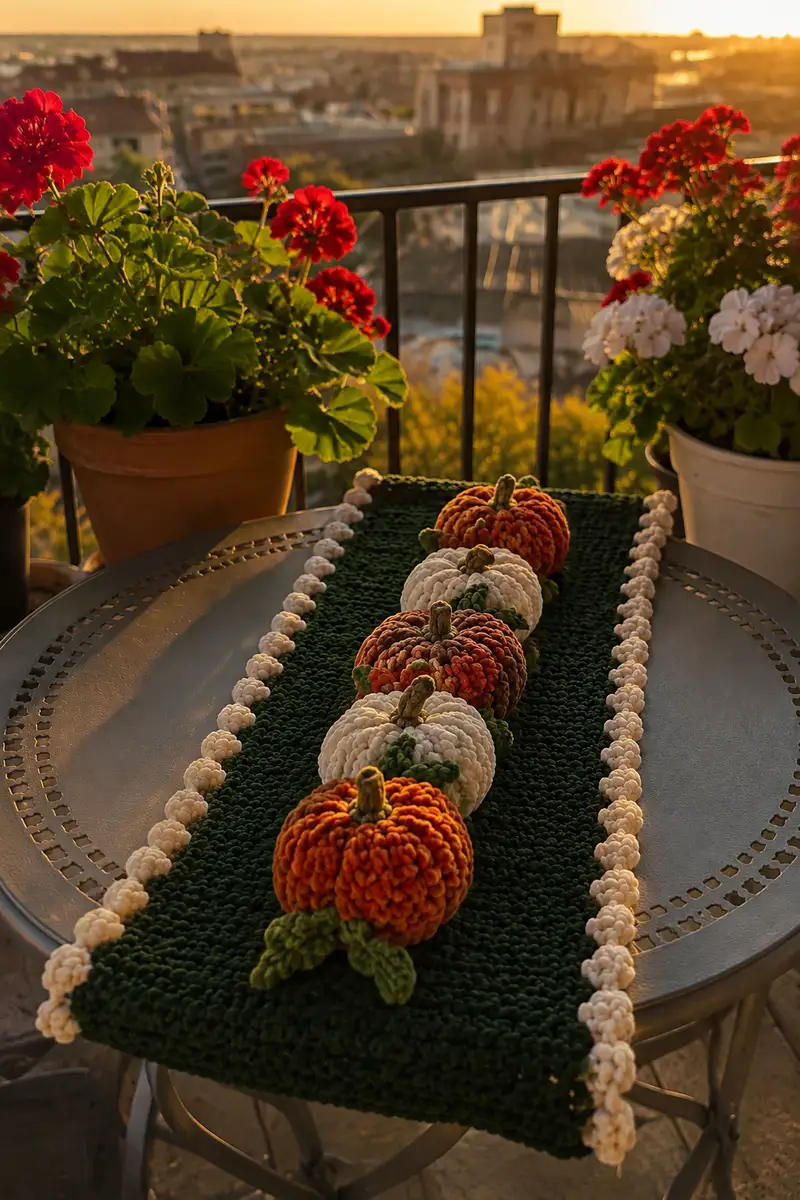
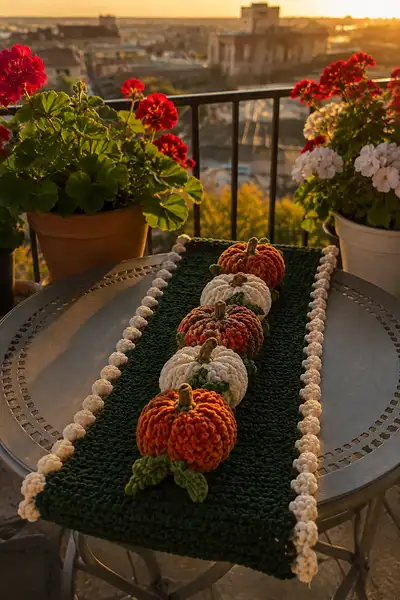
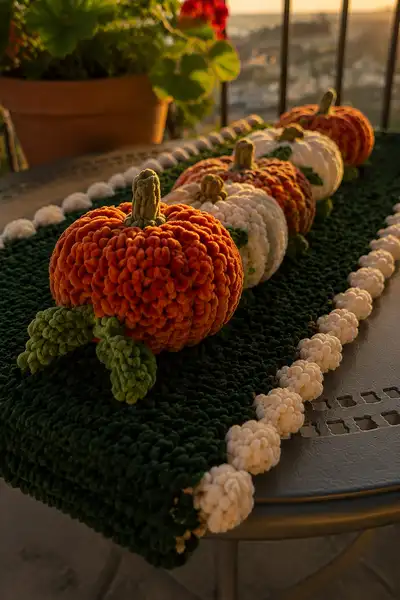
A cozy, autumn table runner featuring a row of plush velvet pumpkins set on a deep green velvet ground with a playful cream bobble trim. The design uses soft velvet yarn for the pumpkins and runner, and chenille-style stitches to create plush texture and pronounced pumpkin ribs. Includes full instructions for pumpkins, stems, leaves, runner body, and cream bobble border.
Progress Tracker
0% Complete
— Materials & Gauge :
Info :
Gauge is flexible because this is a decorative runner made with bulky velvet yarn. Approx gauge for runner: 10 sc x 10 rows = 4 inches using 5.5mm hook in bulky velvet yarn. Pumpkin diameter (finished) approx 3.5-4 inches. Adjust hook or yarn to change scale. Work tightly to avoid visible stuffing for pumpkins.
— Pumpkin (Make 5 total - instructions repeated for each pumpkin) :
Round 1 :
6 sc in magic ring (6)
Round 3 :
(1 sc, 1 inc) x 6 (18)
Round 4 :
(2 sc, 1 inc) x 6 (24)
Round 5 :
(3 sc, 1 inc) x 6 (30)
Round 6 :
(4 sc, 1 inc) x 6 (36)
Round 7 :
(5 sc, 1 inc) x 6 (42)
Round 8 :
(6 sc, 1 inc) x 6 (48)
Info :
At the end of Round 8 you have established the widest point of the pumpkin. You can vary final size by stopping increases earlier for smaller pumpkins (for instance stop at 42 sts instead of 48 for a slightly smaller pumpkin). Keep rounds joined invisibly, working in continuous spiral for smoother texture.
Round 9-16 :
1 sc in each st (48) - work 8 rounds even to build the mid-section of the pumpkin (48)
Info :
Begin stuffing between rounds 12-13. Use small amounts of polyester fiberfill and push into the curves so the ribs will form nicely. Stuff moderately firm but not rock-hard — velvet compresses so aim for slightly softer stuffing than you would use in non-velvet amigurumi.
Round 17 :
(6 sc, 1 dec) x 6 (42)
Round 18 :
(5 sc, 1 dec) x 6 (36)
Round 19 :
(4 sc, 1 dec) x 6 (30)
Info :
Continue stuffing as you decrease. Work patiently and shape the pumpkin gently with your fingers to maintain a smooth round profile. If you prefer stronger ribs, slight overstuffing in the midsection helps accentuate the valley lines when you later pull the ribs tight.
Round 20 :
(3 sc, 1 dec) x 6 (24)
Round 21 :
(2 sc, 1 dec) x 6 (18)
Round 22 :
(1 sc, 1 dec) x 6 (12)
Info :
Fasten off leaving a long tail (approx 12-18 inches) for the ribbing and final closing. Before you fully close, ensure the pumpkin is stuffed to your liking. The long tail will be used to create the vertical ribs and to attach the stem and leaf later.
Round 24 :
Use long tail, draw through remaining 6 stitches, pull tight and weave through the inside to close hole securely. Knot inside and hide tail by weaving back through the center of the pumpkin. Leave a working length of yarn for ribbing (approximately 24-30 inches) or attach a new length of the same yarn if you prefer separate ribbing yarn.
Info :
Ribbing technique: We will create vertical ribs by stitching from bottom center to top center multiple times, cinching to form segmented grooves. Plan on 8 ribs for a classic pumpkin look; you can make 6 or 10 depending on desired look. Mark 8 evenly spaced anchor stitches around the widest point with pins or removable markers to guide the ridge placement.
Round 25 :
Attach tapestry needle to long tail. Starting inside the bottom center, bring the needle out at one anchored point at the base, then guide it to the top center (through the hole you closed) and out. Pull yarn through leaving a small loop at top for final tying; repeat for each of the 8 anchor points until you have stitched from bottom to top through all anchor points making 8 straight lines. Pull each line with even tension to create indents between ribs. Tie the yarn securely at top center and weave the tail inside pumpkin. (0 - this is shaping step, no stitch count change)
Info :
After ribbing, always adjust stuffing if some ribs feel flat; carefully open a small area if needed to add fiberfill and re-sew closure. This ribbing approach gives a natural vertical segment look typical of pumpkins without complicated special stitches.
Round 26 :
Optional surface texture: If you'd like additional texture, work a round of slip stitches spaced across the pumpkin's surface by moving the tapestry needle with leftover same-color yarn and weaving a few passing stitches to create tiny surface loops. This is optional and purely decorative.
Info :
Make 5 pumpkins total. You can make varied sizes by stopping increases at Round 7 (42 sts) for a small pumpkin, or by adding one more increase round to reach 54 sts for a larger pumpkin. The pattern above produces a mid-sized plush pumpkin apx 3.5-4 inches diameter when using bulky velvet yarn and 5.5mm hook.
— Stem (Make 5) :
Round 1 :
With moss/olive yarn, ch 6, join to work in continuous round (work as small tube) - sc in 2nd ch from hook and across (5)
Round 2 :
1 sc in each st around (5)
Round 3 :
1 sc in each st (5)
Round 4 :
(1 sc, inc) x 2, 1 sc (7)
Info :
Work tube height to approx 1 - 1.25 inches by repeating rounds of sc for 5-7 rounds depending on desired stem height. Keep tube slightly narrow so it seats well into the top of the pumpkin. Work tightly so stuffing won't escape through stem.
Round 5 :
Work 3 rounds 1 sc in each st (7)
Round 6 :
(1 sc, dec) x 2, 1 sc (5)
Round 7 :
1 sc in each st (5)
Info :
Stuff the stem lightly with fiberfill. Fasten off leaving approx 6-8 inches tail for sewing into pumpkin top. Insert base of stem into top center hole and sew around base with long tail using whip stitch to create a secure seam. Hide ends inside the pumpkin.
— Leaf (Make at least 6 leaves - 1-2 per pumpkin as desired) :
Round 1 :
With olive/leaf green yarn ch 6
Round 2 :
1 sc in 2nd ch from hook, 1 hdc, 1 dc, 1 hdc, 1 sc (5) - turn to work on opposite side of foundation chain
Round 3 :
1 sc, 1 hdc, 1 dc, 1 hdc, 1 sc (5) - slip stitch to base and fasten off, leaving 6-8 inch tail for sewing
Info :
For a more textured leaf, work in FLO the first hdc round or use a small surface slip stitch vein down the center. Shape leaf with your fingers and slightly block with steam if needed. Sew leaves in pairs beside stems or tuck beneath pumpkins for a natural cluster look.
— Runner Body (Base) :
Round 1 :
Using deep forest green bulky velvet yarn and 5.5mm hook: ch 44 (this is your runner width, adjust chain in multiples of 1 to make it wider or narrower). Turn; foundation count = 44 chains.
Round 2 :
1 sc in 2nd ch from hook and across to last ch, 2 sc in last ch; rotate to work along opposite side of foundation chain and sc back along chain base to join - this works a 'continuous round' rectangle base with 44 sts per row equivalent (44)
Round 3-6 :
1 sc in each st around (44) - work 4 rounds to create a firm foundation edge for the runner (44)
Info :
From Round 3 onward, work in continuous rounds/spiral for a seamless edge, or place a stitch marker if you prefer to work joined rows. The runner in the photo is long and narrow; I recommend 80-96 rounds for a 36-40 inch long runner depending on tension. Work even to establish a dense, flat fabric.
Round 7-96 :
1 sc in each st around (44) - repeat until runner reaches desired length. For a standard table runner approx 36-40 inches long, work 80-96 rounds depending on your gauge. (44)
Info :
Ensure your runner stays flat. If it curls, add an extra row of sc in BLO along the long edges every 12-16 rounds to create a subtle ridge that helps keep the fabric flat. The runner in the image is thick and plush—if you want less bulk use hdc or switch to a slightly smaller hook.
Round 97 :
Work 4 rounds 1 sc in each st to create a firm border (44)
Info :
Fasten off and weave ends. Blocking bulky velvet is not necessary; gently shape with hands. The runner should measure roughly 10-12 inches wide (depending on your stitch gauge) by your chosen length. This pattern assumes 44 stitches width for proportion with pumpkins shown.
— Cream Bobble Trim (Make 88 bobbles for two long sides; adjust count based on runner length) :
Round 1 :
Make a bobble motif: Using cream bulky yarn, mr, ch 1, 6 sc in mr, pull tight, join with sl st (6)
Round 2 :
Ch 1, 2 sc in each st around (12) - optional for larger bobble; otherwise leave as 6 for a compact bobble (12 or 6)
Round 3 :
Fasten off leaving long tail for sewing. Make as many bobbles as needed to space along each long edge. For 44 stitch width and 88 rounds length, plan approx 44 bobbles per side if you place one bobble per row; adjust spacing to taste.
Info :
To attach bobbles evenly: mark two parallel lines of attachment points along the runner edges every 0.75-1.0 inches. Use a stitch marker or washable pencil. Sew bobbles through the base using long tails and secure with several passes so they do not come loose in use or washing.
Round 4 :
Alternative bobble (popcorn): Ch 1, (dc 5 in same st, drop loop, insert hook in next st, pull through loop and sl st to secure). Fasten off leaving tail for sewing. This variation yields a pronounced rounded bobble typical of the photo.
Info :
Work bobbles separately and sew them onto runner's edges for neat attachment. If you prefer working trim as you go, you can join bobbles by crocheting them into the runner edge while working Round 97: (sc 2, make bobble in next st, sc 2) etc., but separate construction gives you better control for even spacing and removal if washing is necessary.
— Attachment & Finishing Details for Pumpkins on Runner :
Info :
Plan pumpkin spacing: In the photographed layout there are 5 pumpkins centered in a straight line down the runner with equal spacing. Measure your runner length and divide into 6 equal spaces to locate 5 center points for pumpkins (leave equal margins at ends). Mark with pins or removable markers.
Step :
Place each stuffed pumpkin on the runner at marked locations and check the visual balance. Ideally pumpkins are approx 2.5 - 3.5 inches apart depending on pumpkin width. Pin pumpkins in place through their base into the runner fabric using common sewing pins (avoid sharp pins that might show through). If you want removable pumpkins, sew small snap fasteners or hook-and-loop tape to base and runner instead of fully sewing through the fabric.
Info :
Sew pumpkins to runner: Using long tail from final closure (or a new length of matching yarn), sew through the pumpkin base into the runner at several points in a spiral pattern to secure them. Weave the tail through runner fabric and tie off on underside; weave ends to hide them. Sew leaves and stems in place next to each pumpkin for a natural cluster look. Reinforce seams with 6-8 stitches around base for stability.
Step :
If adding magnets for removability, sew a small disk magnet inside the bottom of the pumpkin (wrap in scrap fabric or multiple layers of yarn to fully conceal and prevent contact with metal surfaces) and fasten matching magnets under the runner fabric in the corresponding positions. Test magnet strength to ensure pumpkins stay in place but can be removed for washing.
Info :
Weave all tails thoroughly and trim close. Use a tapestry needle to hide yarn ends deep within the runner or inside the pumpkins. For a polished look, rotate pumpkins so stems point alternately or all face the same direction — both styles are attractive.
— Alternative Decorative Variations :
Info :
Color variations: Make 2-3 pumpkins in orange, 2 in cream, and 1 in variegated rust to mirror the photographed arrangement. You can also make a trio or a single large pumpkin cluster for tabletop centerpieces. For a more rustic look, use wool-like yarn instead of velvet.
Info :
Leaf and vine accents: Crochet long chain vines with spaced slip stitches and tuck them between pumpkins. Make tiny seed pods or acorns by working small rounds and sewing them in clusters if you prefer more elaborate natural styling.
Info :
Care instructions: Velvet yarns can be delicate. If you plan to launder the runner, make pumpkins removable or hand wash the runner on a gentle cycle in a laundry bag and lay flat to dry. Avoid high heat or tumbling which can crush the velvet texture.
— Final Quality Checks :
Info :
Check all attachments: tug lightly on each pumpkin, sewn leaf and bobble to ensure secure stitching. Inspect runner edges for loose loops; weave back and secure any tail. Trim loose fibers to create a neat, finished look. Arrange pumpkins and leaves, photograph your finished runner, and enjoy your seasonal decoration.
This velvet pumpkin table runner is a joy to finish — plush textures, warm autumn colors, and playful cream bobbles combine for an elegant seasonal centerpiece. Each carefully sewn pumpkin and leaf brings depth and charm to your table, and the modular design makes care and storage easy. Share it as a handmade gift or keep it for yourself to enjoy cozy fall evenings. 🧶🍁