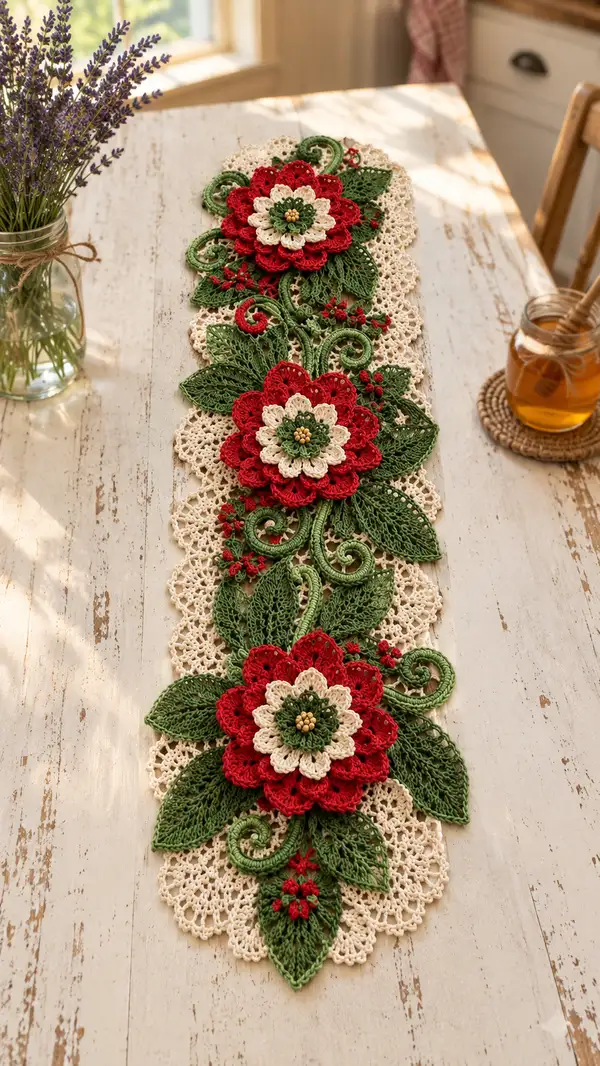
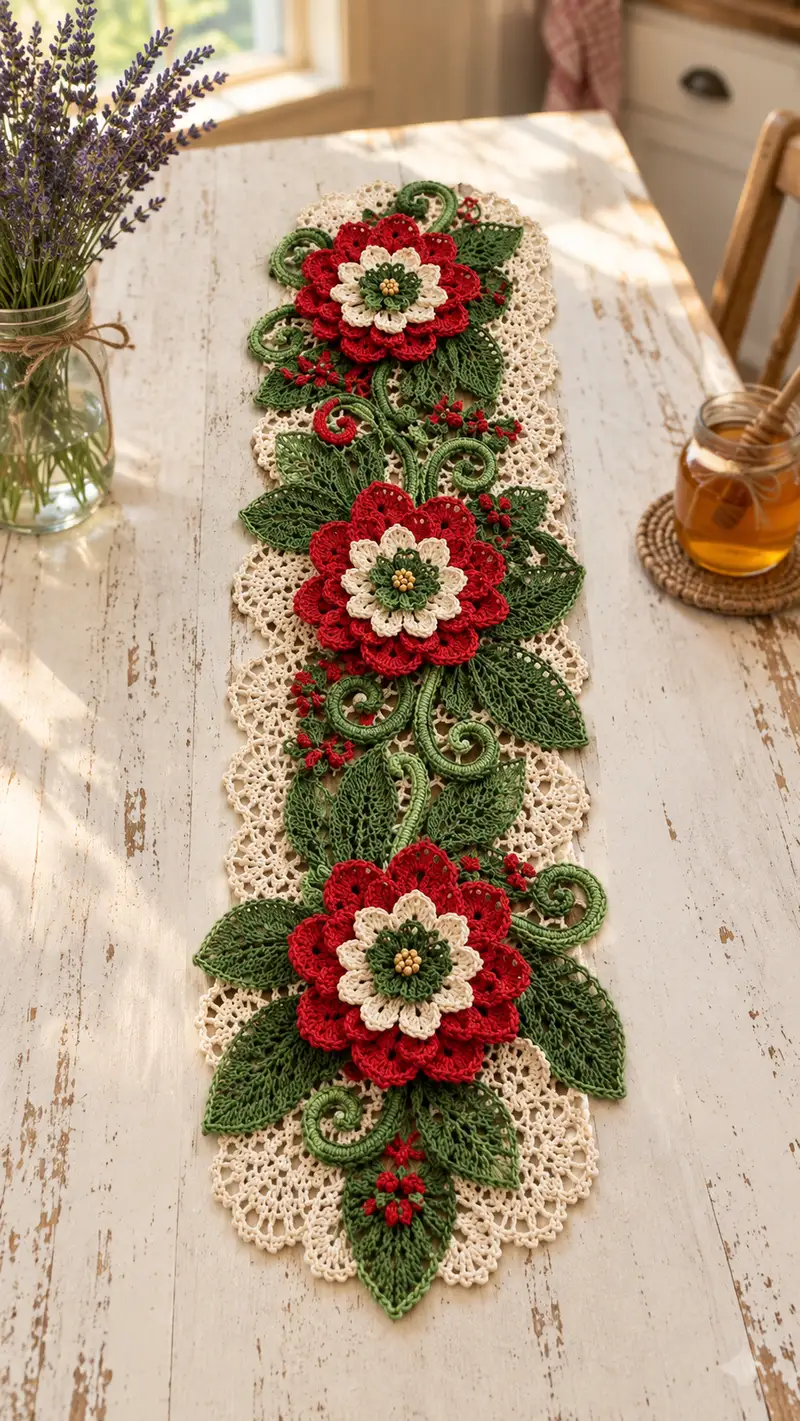
A romantic vintage-style table runner featuring layered poinsettia flowers, lacy cream doily background and elegant green leaves and scrolls. The runner shows three large floral medallions set on a delicate openwork base with embroidered berry clusters and bead centers. Worked in fine cotton thread for a crisp, heirloom finish—perfect for holiday tables, gift giving, or seasonal decor.
Progress Tracker
0% Complete
— Lace Base (Make 1 full runner base) :
Round 1 :
With cream thread, make 8 ch, join with sl st to form ring or work mr with 8 sc if preferred (8)
Round 2 :
Ch3 (counts as tr), 1 tr in same st, ch2, (2 tr in next st, ch2) x3, join with sl st to top of ch3 (8 tr groups, 8 ch-2 sps)
Round 3 :
Sl st into first ch-2 sp, ch4 (counts as tr+ch1), (tr, ch1, tr) in each ch-2 sp around, join (8 clusters, 16 tr, 8 ch-1 sps)
Round 4 :
Sl st to next ch-1 sp, ch2 (counts as hdc), 3 hdc in same sp, *ch2, 4 hdc in next ch-1 sp; rep from * around, join (8 blocks of 4 hdc separated by ch2)
Round 5 :
Working into ch2 sps: sl st into ch2, ch5 (counts as tr+ch2), (tr, ch2, tr) in same ch2 sp, *skip next block, (tr, ch2, tr) in next ch2 sp; rep from * around, join (8 large lacy arches)
Info :
This initial circular base forms a repeated motif that will be joined in rows to make the long runner. Work tightly and maintain even tension for a crisp lace ground. Place a stitch marker at the start of each round to keep track.
Round 6 :
Ch1, sc into top of joining stitch, ch3, (sc into space between tr groups, ch3) around to create picot-like connecting arches; join (8 sc and ch3 loops)
Round 7 :
In each ch3 loop: sl st, ch7, (dc, tr, dc) into center of each previous large arch; rep around, join (8 shell arches)
Round 8 :
Ch1, sc in each dc across shell, create 5 sc picot edge: (sc, ch3, sc) at peaks of shell to accent scallop; rep around, join
Round 9 :
Work 2 rounds even in sc around to stabilize: ch1, 1 sc in each st (count depends on previous round but maintain symmetry)
Info :
Block this circular motif flat before joining to others. Make a total of 6 of these base circles—you will join them in a line to make the runner foundation. For the runner in the photo three full circle motifs are joined with half-circles between them; this pattern will show how to join them in rows and add scalloped border rounds.
Round 10 :
Join motifs in a row: place motifs right sides together, sc through both outer shell peaks to tack them together every other shell peak to create a continuous strip. Join with sl st and fasten off. Repeat until you have a strip length matching three motifs plus two connecting half motifs (approximately 34-38 inches long depending on blocking).
Round 11 :
With cream, pick up edge and work a round of sc around whole strip, placing (2 sc, ch2, 2 sc) in outermost shell peaks to form scallops and working evenly along sides with 1 sc per stitch. Join and fasten off.
Info :
The base lace must be fully blocked and dry before applique. Blocking opens the lacy stitches and stabilizes geometry for precise placement of floral motifs. Pin scallops evenly and allow to dry.
Round 12 :
Edge decoration: rejoin cream at scallop peaks, ch5, picot (sc at 3rd ch from hook), sl st into peak, *ch5 picot, sl st into next peak; rep across all scallops for a delicate picot edging. Fasten off and weave in ends.
Info :
Set base aside after blocking. You will work flower motifs, leaves and vines separately and then pin/applique to the base. Blocking each motif after completion helps match curvature and scale.
— Flower Center (Make 3 centers) :
Round 1 :
With dark green, mr, ch1, 6 sc in mr (6)
Round 3 :
(1 sc, inc) x6 (18)
Round 4 :
(2 sc, inc) x6 (24)
Round 5 :
Ch1, 1 sc in each st BLO around to create a slight cup effect (24)
Info :
Sew 6 gold seed beads into the center at this stage using a beading needle and thread: pass needle through center to add beads and knot securely on the back. This gives the raised golden button look seen in the photo.
Round 6 :
Ch1, sc in each st around (24). Fasten off leaving long tail for sewing to inner petal layer. Press lightly to maintain cup shape.
Info :
Create three identical centers. Use a small dab of clear fabric glue behind each bead knot for extra security if the runner will be handled frequently.
— Inner Petal Layer (Cream) (Make 3, one for each flower) :
Round 1 :
With cream, mr, ch1, 6 sc in mr (6)
Round 3 :
(1 sc, inc) x6 (18)
Round 4 :
(2 sc, inc) x6 (24)
Round 5 :
Ch2, *in next st work (dc, tr, dc), ch2; rep around to form tall petal arches; join with sl st (8 tall petal arches) (24 base sts)
Round 6 :
Into each petal arch: sl st, ch1, (sc, hdc, 3 dc, hdc, sc) in arch, sl st to next arch base to secure petals (Each petal uses 7 stitches worked into arch)
Round 7 :
Ch1, 1 sc in each st around the petal bases to tidy edge; work 2 sc in tip of each petal for a slightly frilled rim (Total sts vary but maintain symmetry across 8 petals)
Info :
Press petals lightly or steam-block to hold shape. Leave long tail to sew center into place and to attach outer petal layer later. Ensure petals are evenly spaced—count stitches between petals if needed.
— Middle Petal Layer (Small Green Ring) (Make 3) :
Round 1 :
With medium green, join to back of cream inner petal layer at base between petals, ch1, sc evenly around base to form a narrow ring (24)
Round 2 :
(1 sc, inc) x8 (32)
Round 3 :
Ch2, *dc in next 3 sts, ch1; rep around, join (creates small ridged scallops for next layer to sit on)
Info :
This small green ring functions as a spacer and decorative ridge between the cream inner petals and the large red outer petals. Secure with a few whip stitches so it does not shift when layered.
— Outer Petal Layer (Red) (Make 3 large petals layers) :
Round 1 :
With red, mr, ch1, 8 sc in mr (8)
Round 3 :
(1 sc, inc) x8 (24)
Round 4 :
(2 sc, inc) x8 (32)
Round 5 :
Ch2, *in next st work (dc, tr, dtr, tr, dc), ch2; rep around creating 8 large petal arches (32 base sts)
Round 6 :
Into each arch: sl st, ch1, (sc, hdc, 5 dc, hdc, sc), sl st to next arch base — this creates plush rounded petals with height (work same for all 8 petals)
Round 7 :
Ch1, 1 sc evenly around petal bases to tidy edge; work (2 sc, ch3, 2 sc) into tips of each petal to create petite scallopped edging (maintain symmetry)
Round 8 :
Fasten off leaving long tail for sewing. Layer the red outer petals under the cream inner petals and over the green spacer ring; baste with long sewing stitches every petal to hold in place.
Info :
The outer red petals are designed to be the largest layer. Adjust the dtr or tr counts to scale petals to taste—more dtr yields taller petals. Keep petals consistent by counting base stitches per arch when working flower layers.
— Flower Finishing (Assemble 3 full flowers) :
Round 1 :
Place center on cream inner petal layer and whip stitch center into place, using long tail from center. Ensure beads remain centered and secure.
Round 2 :
Using green spacer ring tail, mattress stitch spacer ring to inner petal base so it nests neatly between cream and red layers. Tack at 8 equidistant points.
Round 3 :
Using red layer tail, sew outer petals to inner assembly by stitching through petal bases and spacer ring—use invisible slip-stitch style mattress stitches to hide thread. Fasten off and weave ends into back of petals.
Info :
Make three identical floral medallions. Block each flower gently to flatten and set petals; pin petals into pleasing positions so they slightly overlap forming a layered poinsettia look as in photo.
— Leaves (Make 9 large leaves + 6 medium leaves + 6 small leaves) :
Large Leaf Round 1 :
With medium green, ch12, sc in 2nd ch from hook and across to last ch, 3 sc in last ch, rotate and sc along opposite side of chain back toward starting point to form leaf outline (approx 22 sc)
Large Leaf Round 2 :
Ch1, sc around whole leaf, working 3 sc in each tip to round edges smoothly; join and sl st to first sc (approx 26)
Large Leaf Round 3 :
Ch2, *dc in next 3 sts, ch1; rep across leaf to create central openwork panel. This creates lacy texture seen in the photo. Join and fasten off.
Info :
To create the visible veins, work a second pass with darker green in FLO: rejoin at base and work 1 sc in each st FLO for 2 rounds, then with a tapestry needle embroider surface veins (single strand) with running stitch using darker green thread. This gives the raised vein look.
Medium Leaf Round 1 :
Ch10, sc across, 3 sc in tip, sc back (approx 18 sts), round 2 sc around and ch2 dc accents to create lace veins; fasten off.
Small Leaf Round 1 :
Ch8, sc across, 3 sc in tip, sc back (approx 14 sts), sl st join. Add 1 round of picot trims if desired.
Large Leaf Round 4 :
Rejoin medium green and work (1 sc, BLO) x around to produce a slightly cupped edge which lifts the leaf from the background—this creates the sculpted effect in photo (maintain stitch count approx 26)
Info :
Lightly steam-block leaves over a curved surface (rolled towel) to shape cup. Pin edges slightly upward while drying to match the dimensional look. Make 9 large leaves, 6 medium and 6 small for full coverage between three flower medallions.
— Curled Vines / Scrolls (Make multiple scrolls) :
Round 1 :
With medium green, ch40 (or desired length for vine), sc in 2nd ch from hook and across to end to create a tube-like cord; fasten off (approx 39 sc)
Round 2 :
Rejoin at one end and work through both loops BLO, 1 sc in each st to create a thicker, rope-like vine. Stuff lightly with fiberfill as you go for sculptural body if vine is too flat.
Round 3 :
Edge vine with chain surface: using tapestry needle and same green thread, couch around vine in spiral to create a corded wrap for a neat finish on visible edges.
Info :
To form curls, wind vine around a dowel or pencil while damp and allow to dry; alternatively, use a small amount of craft starch to set curl. Make at least 6 scrolls of varying lengths for the runner layout shown.
— Tiny Berry Clusters (Make 12 clusters) :
Round 1 :
With red thread, mr, ch1, 6 sc in mr, pull tight (6) — form a tiny puff cluster
Round 2 :
Sl st into each st around to tidy and fasten off, leaving tail to sew onto leaves between veins as tiny berries. Alternatively work 3 sc and 1 sl st to form a compact 3-bead style cluster.
Info :
Sew clusters in groups of 3-5 near leaf bases and vine intersections to echo the photograph. Vary cluster placement for natural feel.
— Additional Decorative Stitches and Raised Veins :
Round 1 :
Using darker green, embroider raised center vein on each leaf: bring needle from back to front at leaf base, run single strand along center, anchor at tip and backstitch on either side to create twin vein effect.
Round 2 :
Where you want ribbing on petals, rejoin yarn at base of a petal and work 1 sc in FLO across petal to create subtle ridges that catch light. Repeat for each petal where desired.
Info :
These embroidery steps make the leaves and petals read like the photo—from a distance they look sculpted and dimensional. Use small, consistent stitches and match thread color closely to keep details subtle.
— Assembly & Applique (Pinning and Sewing) :
Round 1 :
Position: Place the three large flower medallions on the blocked lace base evenly spaced along the runner (approximately 11-12 inches between centers for a 36" runner). Pin each flower center first to align orientation.
Round 2 :
Leaves: Arrange 3-4 large leaves around each flower, with medium and small leaves filling gaps. Curl some leaves over the edge of the lace to mimic the layered look. Pin securely with rust-proof pins to avoid shifting.
Round 3 :
Vines: Place curled vines so they weave between flowers and leave edges. Use fine whip stitches to anchor vine ends and midpoints to the lace base—do not stitch through a visible scallop peak or you'll warp the base. Use discrete stitches through the base mesh.
Round 4 :
Small berries: Sew berry clusters into leaf groupings using the tail left from cluster making. Secure each with 2-3 stitches and knot on the back; hide tails into the base using tapestry needle.
Round 5 :
Final securement: Once everything is positioned and loosely tacked, go back with short, even stitches across the base of petals and leaf undersides to fully secure all pieces. Add beads if any are missing and glue lightly behind bead knots for security.
Info :
Pin everything first and step back to check symmetry. The runner in the photo uses mirrored arrangements around the center medallion, so try to reflect the top and bottom sections for a balanced view from either end of the table.
— Border and Final Touches :
Round 1 :
After appliqué, crochet a final edge round in cream to unify the piece: join thread at any scallop, ch1, sc around entire runner, working 3 sc in outermost shell tips and 1 sc between. This ties the appliques and base together.
Round 2 :
Ch3, *sl st into next sc, ch3; rep to create small looped trim along inside edge of scallops. Fasten off and weave ends securely to the back of the runner.
Round 3 :
Final blocking: Lightly steam block entire runner assembled, pinning petals and leaves slightly lifted to hold their 3D shape. Allow to cool and dry thoroughly before use.
Info :
Take care with steam and beads—do not over-wet. If you added starch or craft glue to set curls, allow those areas to dry completely before removing pins.
— Alternative Size and Scaling Notes :
Round 1 :
To scale the runner longer or shorter, add or remove base lace circular motifs before joining. Each base motif adds roughly 11-13 inches in length when blocked and joined as in pattern.
Round 2 :
To make larger flowers, increase outer petal foundation rounds by adding 1-2 more rounds of increases before forming arches (for example, add a (3 sc, inc) round before arching).
Info :
When scaling, maintain proportion by increasing leaf counts and vine lengths correspondingly. Always test one motif at new size and block to verify visual balance before committing to entire runner modification.
Completing this vintage-inspired poinsettia runner is immensely satisfying—layered petals, sculpted leaves and tiny bead centers come together to create a show-stopping holiday centerpiece. The delicate lace base gives the whole piece an heirloom finish, perfect for gifting or seasonal decorating. Pin, sew and block with care, and you'll have a runner that delights for years. 🧶🌿✨