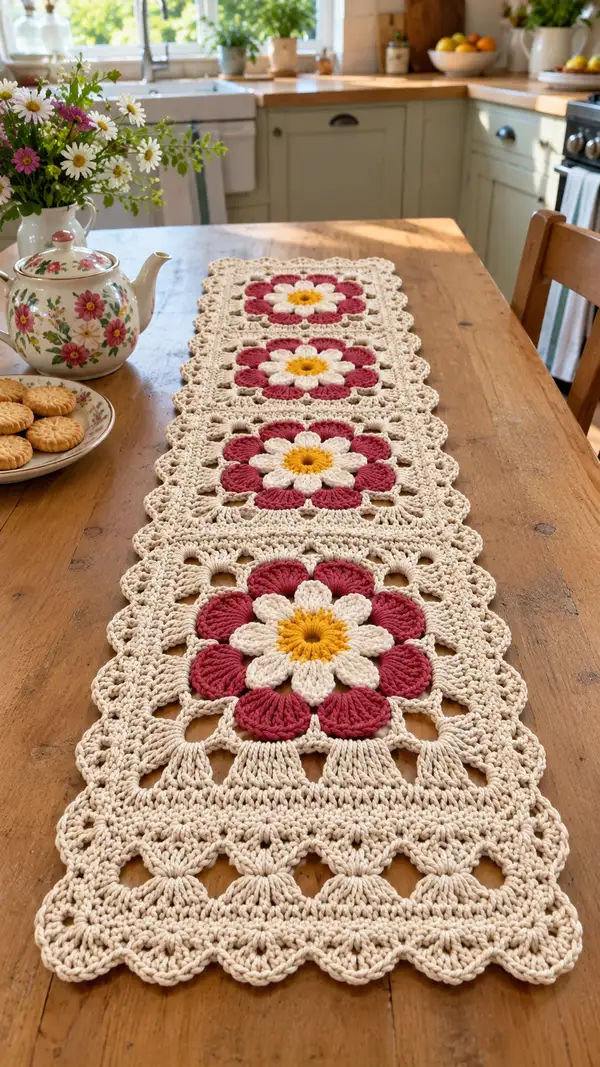
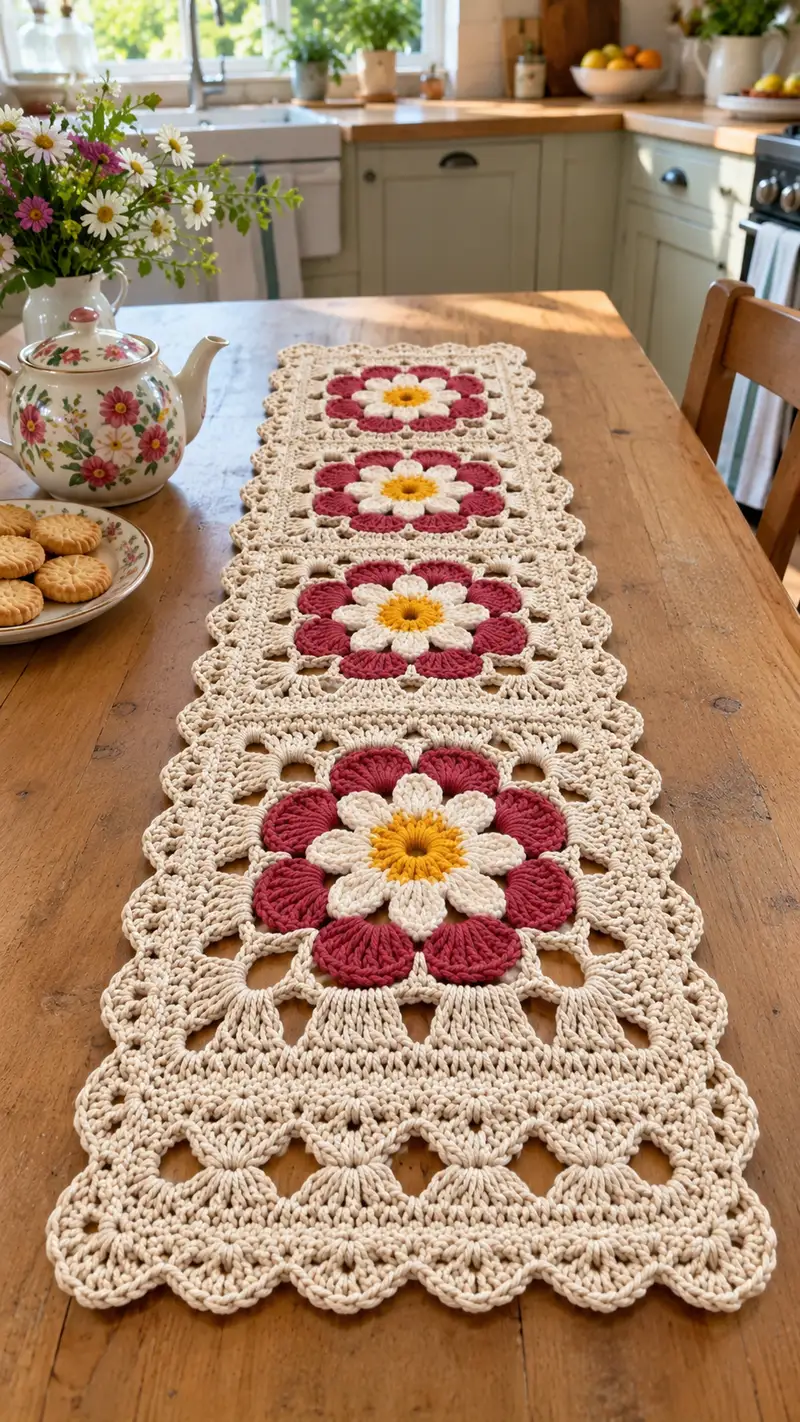
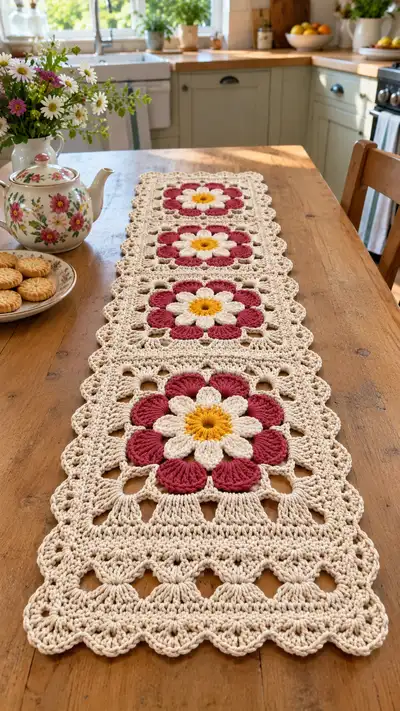
This charming table runner features linked daisy medallion squares in creamy natural cotton with warm pink petals and a sunny yellow center. The textured puff petals and open lacy border give it a vintage-inspired, handmade look. Perfect for a farmhouse table or breakfast nook, the runner combines solid surface crochet with airy granny-style lace for an elegant finish. Detailed step-by-step instructions guide you through motifs, joining, and a scalloped finishing border.
Progress Tracker
0% Complete
— Notes & Techniques :
Info :
Skill notes: This pattern uses basic clusters/puff stitches, shells, chains for openwork, and granny-style square building. We work most rounds in continuous rounds or joined rounds — I'll specify which. Work in US terms. Keep a stitch marker at the first stitch of each round. Maintain even tension for consistent motif size. Block each motif before joining to even edges.
Info :
Puff stitch (instructions): Yarn over, insert hook, pull up loop, yarn over, insert hook, pull up loop (3 times total depending on puff height), yarn over and pull through all loops on hook, ch1 to close puff. We use 5-loop puffs for large outer petals and 3-loop puffs for smaller inner petals. Keep tension looser than normal to allow finishing through all loops.
Info :
Cluster stitch (if used): work [yo, insert, pull through] repeated per cluster count, finish by yarning over and pulling through all loops, ch1 to secure. Counts listed in the rounds refer to produced base stitches or shell counts at the end of a round.
— Daisy Motif (make 4) :
Round 1 :
With golden yellow, make a magic ring. Ch2 (counts as first hdc), 11 hdc into ring, pull ring closed and join with sl st to top of ch2 (12)
Round 2 :
Ch2 (counts as hdc), 1 hdc in same st, (1 hdc, inc) x5 around — meaning (1 hdc in next st, 2 hdc in following st) repeated to create 24 hdc. Join with sl st to top of ch2 (24)
Info :
Place a stitch marker in the top of the ch2 to mark round start. Keep your hdc tension relaxed — these are the base that will form the inner petal anchors.
Round 3 :
Change to soft cream for inner petals with an invisible join into any stitch. Ch1, *sc in next st, ch3, sc in next st* repeat around so you have 8 ch3 loops (24 stitches remain along base, placement: each petal uses 3 base stitches or one ch3 loop anchor per petal). Join with sl st to first sc (24 base points for anchors)
Round 4 :
Into each ch3 loop: join cream yarn into loop, ch1, [3-loop puff made into loop] ch1, sl st into same loop to finish petal. Repeat for all 8 inner petals (no change to base stitch count). Join with sl st to beginning of first petal anchor (24)
Info :
Inner 3-loop puff: yarn over, insert, pull up loop, yarn over, insert, pull up loop, yarn over, pull through all loops, ch1. Keep puffs even in height and not overly tight. These small petals sit closer to the center.
Round 5 :
Working behind inner petals, rotate work so the back of petals faces you. With soft cream, ch2, hdc evenly across the base round working 1 hdc in each base stitch between petal anchors (24). Join with sl st (24)
Round 6 :
Switch to main cream if inner petals were lighter (optional). Ch1, *sc in next st, ch4, sk next 2 sts* repeat around placing ch4 loops between clusters of base stitches — this creates the foundation for the larger outer petal placement. Aim to create 8 ch4 loops (24)
Info :
Change to berry/rose for outer petals. Carry unused yarn along the back or fasten off short tails and join anew at first ch4 loop for neater color changes.
Round 7 :
Into each ch4 loop: join berry yarn, ch1, make a large 5-loop puff into the loop (yarn over, insert pull up loop five times to create five loops, yoh and pull through all loops), ch1, sl st to same loop to secure. Repeat for all 8 outer petals. End with sl st to first puff (24)
Round 8 :
With berry, rotate and working behind petals: ch2, 1 hdc in each base stitch across the round (24). This creates an even ring behind the petals. Join with sl st (24)
Round 9 :
Change to cream for square buildup. Ch3 (counts as dc), 2 dc in same st, *ch1, sk next puff base stitch, (3 dc in next 3 sts) forming a shell across* repeat evenly around to form 8 wide shell sections with ch1 spaces between shells — finish round by joining top of ch3 (calculated stitch-rich shell work, overall shell groups: 8)
Info :
This round forms a round of bold shells directly adjacent to the petals — you will have eight shell groups corresponding to petal positions. Count shells rather than single sts to keep track: 8 shells spaced evenly.
Round 10 :
Ch3, dc in each dc of previous shells, working 3 dc in each shell peak, and 1 dc in each ch1 space to even out the round. Join (this is a 'smoothing' round that evens stitch counts). Approximate stitch count end of round: 96
Info :
From here we will turn the circular motif into a square by building corners. Maintain an approximate total of 96 dc-equivalent stitches across the round — we use shell groups and chains to create corners in following rounds.
Round 11 :
Switch to main cream. Ch3, dc in next 7 stitches, (3 dc, ch3, 3 dc) into the next ch1 space to create a corner, dc in next 14 stitches, (3 dc, ch3, 3 dc) in next corner chain, dc in next 14 sts, corner again (3 dc, ch3, 3 dc), dc next 14, corner (3 dc, ch3, 3 dc), dc remaining sts to join. End round will still be worked as a joined round — count shell-group centering yields an even square shape (approx 120 dc-equivalents including corner chains)
Info :
Create four corners spaced evenly. If your stitch counts differ slightly, adjust the dc count per side to keep corners aligned; the goal is four equal sides with corner ch3 spaces.
Round 12 :
Ch1, sc in each dc across, at corner ch3 space work (sc, ch3, sc) into corner to maintain square, continue sc evenly across next side. This rounds off and tightens the square edge. Stitch count will equal the number of dc peaks + corner stitches — expect ~120 sc equivalent.
Round 13 :
Ch3 (counts as dc), *skip next sc, 7 dc fan into the following sc to create a lacy fan, skip next sc, dc in next 3 sts* repeat around for a decorative openwork row that creates chain-eyelets on each side. Join. Approx stitch equivalent: 96 fans/peaks across whole square.
Info :
Adjust fan spacing so there are the same number of fan motifs on each side (this keeps the square balanced). Use stitch markers to mark the middle stitch of each side if helpful.
Round 14 :
Ch2, hdc in each stitch and into top of each fan to create a solid band around the square — this evens the motif and prepares for next lacy row. Join. Approximate total 96 hdc.
Round 15 :
Ch1, sc in each st across for a tidy band; at each corner ch1 make (sc, ch3, sc) to keep the corner airy and maintain square corners. Join. (96 sc)
Info :
If you prefer a slightly larger square, add an extra round of dc or hdc now before continuing to the openwork border rounds. For the pictured runner, the square size matches four across a long runner length.
Round 16 :
Ch3, dc in next 2 sts, ch3, sk 2, dc3 in next 3 sts, *ch2, sk 3, dc3 in next 3 sts* repeat around to form a row of tall clusters separated by chain arches. Join. Approx clusters per side: 6 (total cluster groups 24)
Round 17 :
Switch to working popcorn-like clusters: Ch1, sc across each dc and chain to stabilize, at each chain arch (ch3 or ch2 space) work (ch3, 5-dc puff cluster, ch3) anchored in the space to create tall textured picot-like arches. Join. Base stitch count ~120 equivalents.
Info :
These tall arches create the 'open' spaces visible between petal clusters in the photo. Keep tension consistent; puff sizes should be even to make a uniform edge for the next square rounds.
Round 18 :
Ch2, 1 hdc in each st across, in each tall arch space work (3 hdc) to create a stable band. Join (approx 120 hdc)
Round 19 :
Ch1, sc in each st, and in each tall arch space work (sc, ch3, sc) to preserve the 3-chain holes for later joining. Join (approx 120 sc)
Round 20 :
Ch3, *dc in next 5 sts, 3 dc in corner ch3 space, dc next 5 sts, (ch2, skip 2) across side to create airy block spaces* repeat around. This forms the final squared motif ready for blocking and joining. Join. Approx total 132 dc-equivalents.
Info :
Fasten off leaving 8-12cm tail for joining if you plan to whip-stitch motifs together. Make 4 identical motifs following R1-R20. Block each motif carefully to square out edges before joining.
— Joining Motifs & Center Runner Construction :
Info :
We will join 4 motifs in a straight line using join-as-you-go (JAYG) or slip-stitch join after blocking. The photos show four motifs linked with additional filler rows between them to create a continuous runner. Decide whether to JAYG (recommended) for seamless look or join with slipstitch and a final border.
Round 21 :
If using JAYG: On the final round of motif 2, align motif 1 and motif 2 right sides together. Work the final ch3 corner and when at the edge locate the corresponding ch3 corner of motif 1, sl st through both loops and continue the round of motif 2, joining at each matching corner and side spaces with sl st through both motifs at every ch3 or ch2 space to make a flat join. Repeat to add motifs 3 and 4. This round is effectively the finishing round of each motif and the first join round. No additional stitch count change but each join closes matching ch3 spaces.
Info :
If joining after all motifs are finished: place two motifs right sides together, whip-stitch through the top loops of the outer round (through both motifs) using main cream yarn. Use a running whip to create a flat seam. Join motifs from left-to-right to form the runner length.
Round 22 :
Once all motifs are connected in a row of four, with right side facing up and using main cream, work a unifying round around the entire assembled rectangle: join yarn at any side, ch3, dc evenly across edges and into joining seams placing 3 dc in corners to square them. Work dc into top loops and back loops to smooth the seam. This unifying round blends seams and prepares for a wider lace border. Approx total for entire runner round: 4 motifs side-by-side produce approx 480 dc-equivalents (summed sides and seams).
Info :
When working around the assembled runner, keep the fabric flat and adjust dc counts per side to keep edges straight — mine used roughly the same number of stitches per side of each motif; use stitch markers at the centers of each side to distribute stitches evenly.
Round 23 :
Ch1, sc evenly across the entire outer edge; at each seam space where two motifs meet, work (sc, ch3, sc) to keep open channels visible and consistent. Join. This neat sc band gives a strong foundation for an outer border. Approx total sc: 480
Round 24 :
Ch3, dc in each st to form the first outer decorative dc row, but at each (sc, ch3, sc) seam space work (dc, ch3, dc) to maintain the little holes along the runner join. Join. Approx total: 480 dc
Info :
At this point the runner resembles the photo: four floral centers with airy horizontal holes between them. We now build a layered scalloped border on the long sides and a detailed scallop on the short ends.
— Long Side Border Building (work along both long edges) :
Round 25 :
Ch1, sc in each dc across the first long edge (count approx 240 sts per long side combined from all motifs). Place a stitch marker at each connection point between motifs to keep even. Join. (approx 240 sc per long side)
Round 26 :
Ch3, (dc in next 2 sts, ch2, sk 2) repeat across to create openness; at each motif connection (where ch3 holes are) work (dc, ch3, dc) to keep uniformity. Join. (approx 240 dc)
Round 27 :
Ch1, sc across, and in each ch2 space work (sc, ch3, sc) to create decorative little arches. Join. (approx 240 sc)
Round 28 :
Ch3, *dc in next 3 sts, shell (5 dc) in next ch3 space, dc next 3 sts* — repeat along the long edge to create scallop bases. Join. (approx 200-240 total dc-equivalents depending on spacing)
Info :
Use stitch markers to ensure shells fall evenly along the length. For the pictured runner the shells are large and deep creating a scalloped edge. If your spacing differs, adjust the number of dc between shells so shells align across motifs.
Round 29 :
Ch1, sc in each stitch across shell bases; in each shell space work (sc, ch5, sc) to create larger arches for the final scallop. Join. (count ~200 sc spaces)
Round 30 :
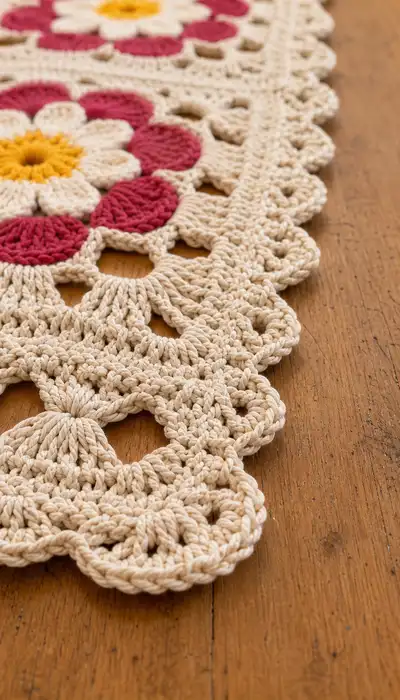
Switch to decorative scallop: In each ch5 space work 9 dc tightly into the space and sl st to base to create a pronounced scallop; in non-ch5 places work sc to hold tension. Join. This forms the long scalloped edge seen in the photo. Finish both long sides identically.
Info :
For a firmer scallop, use a slightly smaller hook for the scallop rounds. Check and block the scallops gently after completing both sides to round them out neatly.
— Short End Decorative Panels (both ends) :
Round 31 :
At each short end (the ends of the runner where a full motif edge sits), work a rectangular decorative panel: ch1, sc across end (working into the round-22 unifying band). Work 3-4 rows of sc to create a base (approx 30-40 sc depending on runner width). Join.
Round 32 :
Ch3, dc across the end, at each side ch3 corner work 3 dc for a neat corner. Join. (approx 30-40 dc)
Round 33 :
Work a triangular scallop: ch1, *sk 2, 7 dc in next st, sk 2, sl st* repeat across to create rounded clamshells that complement the long scallops. Join. (count depends on width ~8 scallops)
Info :
Ensure these short-end scallops align visually with the long-side scallops — they should sit flush and frame the runner ends with the same rhythm of shapes.
— Final Edging Rounds (whole runner) :
Round 34 :
With cream, ch1, sc evenly around the entire outside edge including shells and end scallops. Place (sc, ch3, sc) in corners to keep them airy. Join. This tidy band stabilizes the scallops for a final decorative finish. Approx total sc 900+ across entire runner edge (sum of long sides plus ends)
Round 35 :
Ch3, *skip next sc, 9 dc in next sc, skip next sc, sc in next sc* around to form denser scallops over each previous ch5 spaces and shell peaks. Join. This defines each scallop into a bold rounded finish similar to the photo's soft edges.
Round 36 :
Ch1, sc across rounding the top of each scallop and working 3 sc in the base of each shell to anchor. Join. This evens the scallops and secures the border.
Round 37 :
Optional decorative picot: ch1, sc across and in the top of each scallop work (sc, ch3, sl st in same st) to create mini-loop accents all around. Join. This adds small loops visible on close viewing like the photo details. Fasten off and weave in all ends.
Info :
Block the entire runner gently to settle scallops and ensure straight edges. Use pins to maintain scallop shape and steam or wet-block per yarn manufacturer instructions for cotton yarn.
Info :
Trim and weave in all tails neatly on the back of the runner. If motifs were joined by whip stitch, add a final topstitch row of slip stitch around the seam edges to flatten and disguise joins.
— Alternate Construction Notes & Extra Decorative Rounds :
Info :
If you prefer a more lacy center between motifs, add an extra round of chain arches (ch5 spaces) between motifs before unifying. To make a shorter runner, reduce motifs to 2 or 3 and follow the same joining and border rounds. For a wider table runner, add more motifs across and repeat border patterns to expand the length.
Info :
Gauge note: Using 4.0mm hook with cotton worsted, each completed motif measures approximately 18 x 18 cm blocked. The pictured runner made with 4 motifs end-to-end measures about 78-85 cm length (excluding final scallop depth). Adjust yarn weight or hook size to change finished size proportionally.
Info :
Care instructions: Hand wash or gentle machine cycle in cool water; reshape and dry flat. Cotton will soften over time and the scallops will relax — reblock if needed to refresh shape.
This Vintage Daisy Square Table Runner brings a touch of handmade elegance to any table — each motif is a little floral celebration, and the scalloped border finishes it with vintage charm. The combination of textured puff petals and airy lace makes it both decorative and tactile. Block, assemble, and enjoy the warm, cottage-style atmosphere it creates for tea time or celebrations. 🧶🌼✨