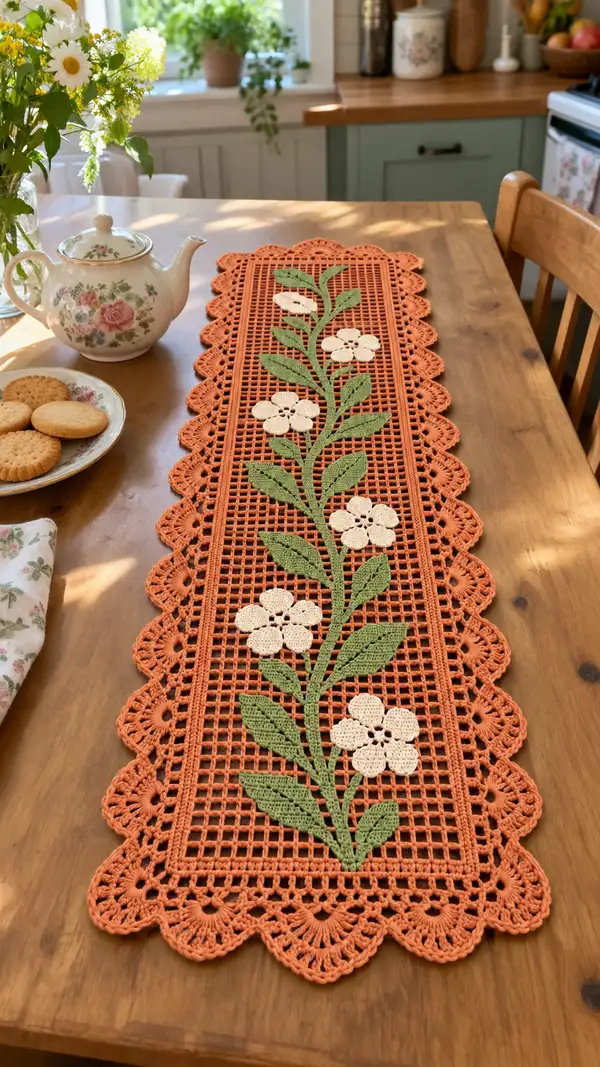
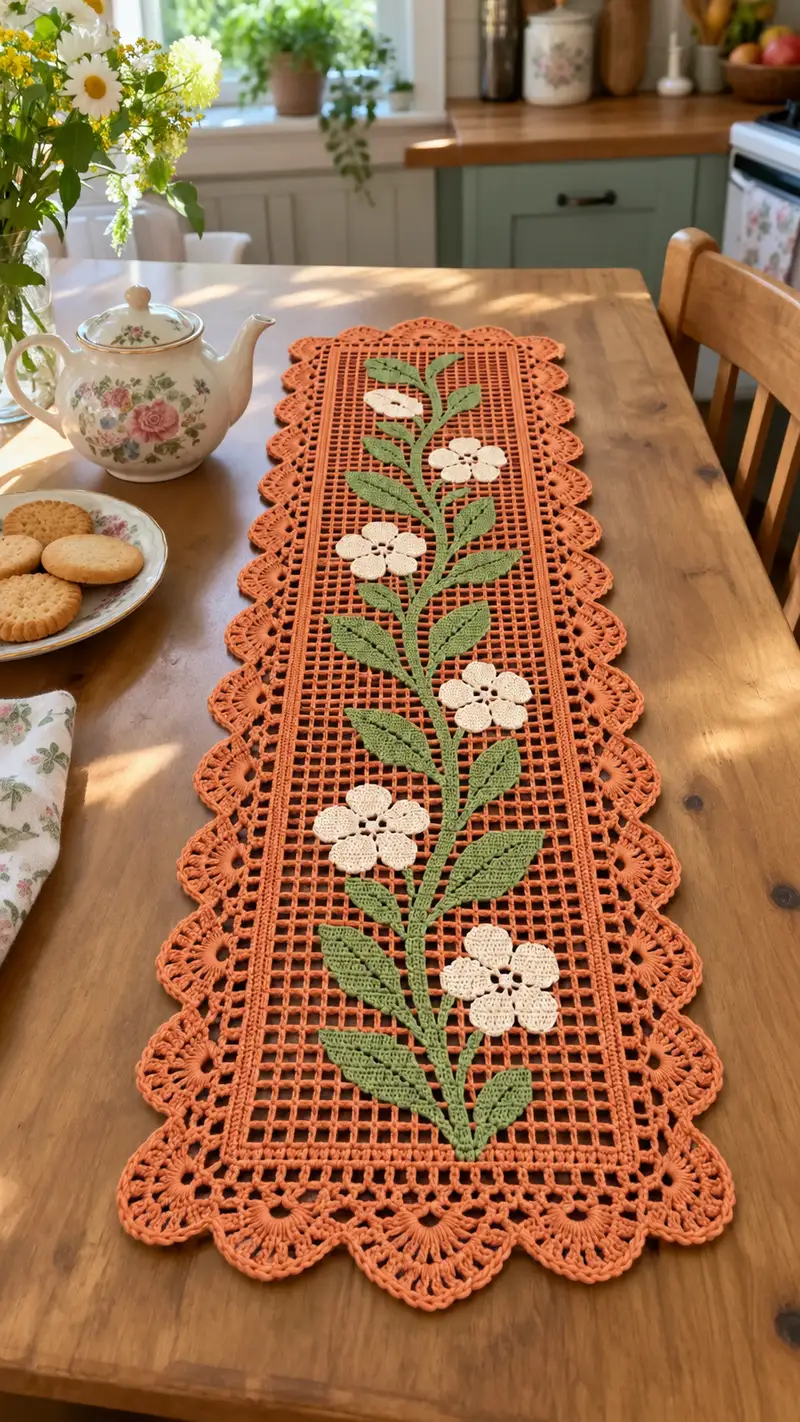
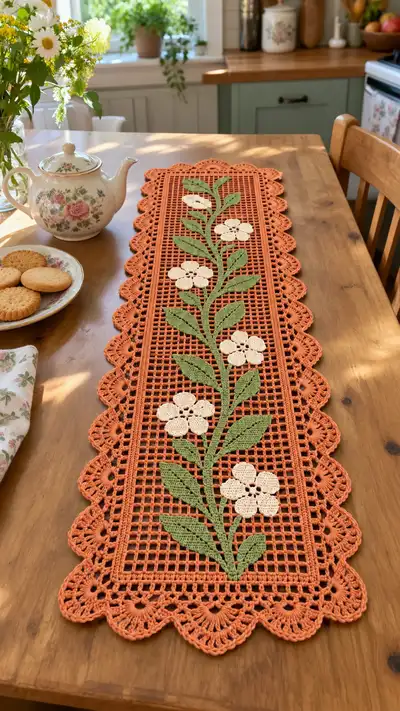
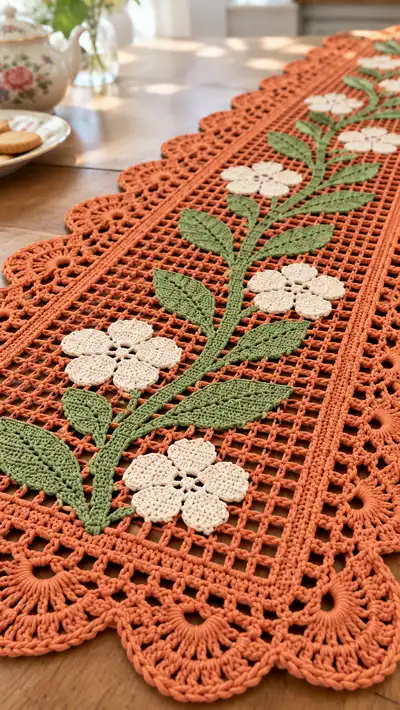
Create a charming vintage-inspired floral filet table runner featuring open mesh, scalloped edges, and raised appliqued vine, leaves and blossoms. This runner showcases a warm terracotta main panel with soft cream flowers and delicate green leaves, perfect for a sunlit kitchen table. Detailed step-by-step instructions guide you through the filet mesh, separate appliques, and the decorative scalloped border for a heirloom finish.
Progress Tracker
0% Complete
— Supplies & Gauge :
Info :
Recommended gauge: 22 mesh units (each mesh unit = dc + ch2 space) by 8 rows = 10 cm when worked with 3.0mm hook and DK mercerized cotton. Gauge is optional for decorative pieces, but consistent tension ensures straight edges and crisp mesh.
Info :
Measurements of finished runner (as photographed): approximately 120 cm (47 in) long by 22 cm (8.5 in) wide including scalloped edge. Adjust foundation chain multiple and mesh repeats for a wider or longer runner.
— Main Filet Mesh Panel (work flat in rows) :
Round 1 (Foundation) :
Chain 183. This chain count yields 61 mesh units across (each mesh unit corresponds to one 'dc+ch2' unit). Additional chains required for turning are worked with turning chs in subsequent rows.
Round 2 :
Dc in 4th ch from hook (counts as first dc), *ch2, sk 2 ch, dc in next ch*; rep from * to * across until you reach the last ch; end with dc in the final ch. You will have 61 mesh units across. Turn. (61 mesh)
Info :
Count your mesh units now and place a stitch marker in the first mesh unit of the next row so you do not lose track. The counts below reference mesh units; each mesh unit is written as either 'open mesh' = ch2 sp or 'filled mesh' = dc over the space.
Round 3 :
Ch3 (counts as dc), *ch2, sk next ch2 sp, dc into next dc (this makes an open mesh)*; rep * to * across to end; finish with dc in top of turning ch. Turn. (61 mesh)
Round 4-7 :
Work even in established filet mesh pattern (61 mesh) keeping panels open: ch3, *ch2, sk ch2 sp, dc in next dc* rep across. These rows are a neutral background that frame the floral motif. (61 mesh each row)
Info :
At row 8 you will begin the central motif placement. Use a removable marker to note the center mesh column (mesh 31 of 61) and map the vine route before you start motif rows.
Round 8 :
Begin motif row. Ch3, work open meshes until you reach mesh position 15; at mesh 15 change to filled meshes to begin the first cluster (see diagram). Exact instruction: ch3, *ch2, sk ch2 sp, dc* across until 14 open meshes completed; then (dc, dc) in consecutive mesh units for 6 meshes to create a filled block (interpretation: replace open mesh by dc in the dc stitch below and ch2 on next row to form a visual solid). Continue to the end keeping counts equal to 61 mesh units. Turn. (61 mesh)
Round 9-13 :
Continue to work rows shaping the floral outline in the central third of the panel: alternate filled meshes (dc) and open meshes (dc + ch2) following motif placement so that the vine and leaf silhouettes begin to appear. Maintain 61 mesh units each row. These rows form the base for applique placement and should be worked carefully to create rectangular openings for sewing leaves and blossoms.
Info :
Eye/Placement :
Decide the vertical placement of each applique element now: there are five primary blossom positions evenly spaced along the length of the runner. Mark the row numbers where each flower center will align (approximately rows 12, 24, 36, 48 and 60 if working a total of 72 mesh rows). Place removable pins or thread markers through the mesh squares at the centers for later attachment.
Round 14-24 :
Work even in mesh following your marked motif grid. Solidify the vine route by working a narrow column of filled meshes (1-3 mesh width depending on curve) that will act as anchor stitches for sewing the crocheted vine later. For curved portions of the vine, use alternating sequences of filled/open meshes to create the curve illusion: (filled, open, filled) etc. Each row still equals 61 mesh units. (61 mesh)
Round 25 :
Ch3, *ch2, sk ch2 sp, dc* across entire row to create a light band below the first flower. This gives a little breathing room for applique. (61 mesh)
Round 26-34 :
Continue working mesh rows, following motif marks for additional flowers and leaves. Keep counts uniform. At the rows that will later be covered by appliques, you can substitute one or two filled meshes to provide a firmer anchor for sewing. (61 mesh each row)
Info :
Begin blocking the first small appliques (flowers and leaves) now so they are ready to attach as you complete the panel. Blocking gives flatter sewing surfaces and a more professional finish.
Round 35-44 :
Maintain mesh rows, finishing the central vine area and preparing the upper portion of the panel. If a gentle taper is desired at either end of the central panel, replace 1 filled mesh on the outer column with open mesh for 2-3 rows to create the sense of lightness near the ends. (61 mesh)
Info :
When you reach row 44, verify the vertical spacing for your final two flower placements. Re-measure from the start edge to ensure flowers are evenly spaced. Adjust a row or two of plain mesh if necessary to center the composition.
Round 45-60 :
Work mesh rows to complete the main panel length. Continue to mark the center column and any additional anchor filled meshes. Finish the last row as ch3, *ch2, sk ch2 sp, dc* to maintain the open grid. (61 mesh each row)
Round 61 (Final mesh row) :
Work one final even mesh row. Fasten off leaving a 30 cm (12 in) tail to help connect to the border if you prefer to join immediately. Block the mesh panel flat, pinning straight edges carefully. Allow to dry fully before adding border. (61 mesh)
Info :
Blocking tip: stretch gently until squares are regular, and use a damp cloth or a light spray of water to set cotton fibers. Do not over-stretch the mesh - the scalloped border will give the final shape.
— Long Curved Vine (Make 1) :
Round 1 :
Ch 140 (or length to match center column when laid on mesh; vine should be slightly shorter than the panel height to allow for curvature). Sl st into 2nd ch from hook and each ch across to create a cord, or alternative: work foundation single crochet along the chain for a flat cord. You now have a cord approx the length of the runner's center column.
Round 2 :
With same color (green), work 1 sc in each chain across to produce a compact stem (140 sc). Fasten off, leave long tail for sewing. This gives a sturdy strap to anchor leaves and flowers.
Round 3-6 :
Optional shaping: if you prefer a slightly flattened thicker stem, re-join yarn along cord edge and work 1 rnd of sc around both sides of the cord: sl st to the end, work 1 sc in each st along the side, 3 sc in end, 1 sc in each st back along underside, 3 sc in starting end to finish. This yields an oval stem that's easy to sew and lay flat. Fasten off. Leave tail.
Info :
When positioning the vine, arrange a gentle S-curve so it reads naturally across the mesh. Pin into place lightly and ensure that leaves and flowers will align with their marked centers before sewing.
— Leaves (Make 12-14 assorted sizes) :
Leaf (Small) Round 1 :
With green, ch 12. Sc in 2nd ch from hook, hdc in next, dc in next 2, tr in next 3, dc in next 2, hdc in next, sc in last. Turn to work along other side of foundation chain: sc in first base st, hdc in next, dc in next 2, tr in next 3, dc in next 2, hdc in next, sc in last. Slip stitch to first sc to close. Fasten off. (Very small leaf approx 3.5 cm)
Leaf (Medium) Round 1 :
With green, ch 16. Sc in 2nd ch from hook, sc in next, hdc in next 2, dc in next 3, tr in next 4, dc in next 3, hdc in next 2, sc in next 2. Turn and mirror across foundation chain: sc, sc, hdc, hdc, dc x3, tr x4, dc x3, hdc x2, sc x2. Slip stitch to join. Fasten off. (Medium leaf approx 6 cm)
Leaf (Large) Round 1 :
With green, ch 22. Sc in 2nd ch, sc next 2, hdc next 3, dc next 4, tr next 6, dc next 4, hdc next 3, sc next 2, sc last. Mirror along opposite side working into foundation chains and back along base: sc x2, hdc x3, dc x4, tr x6, dc x4, hdc x3, sc x2. Sl st to join. Fasten off. (Large leaf approx 9 cm)
Info :
Make a mix of small (4), medium (6) and large (4) leaves to match the photograph. Block each leaf lightly with steam or pinning to accent the center ridge and set the edges. Use a thin needle and matching green to sew leaves to vine so veins are aligned.
Leaf Vein Embroidery :
With darker green, embroider 1-2 rows of running stitch down the leaf center to mimic veins. Use a length of stranded cotton and small stitches for subtle detail. Fasten off and weave in ends on the undersides.
— Flower (Make 6) :
Round 1 :
With cream, make a magic ring. Ch1, work 6 sc into ring. Pull tight. (6)
Round 2 :
Ch1, *(2 sc) in next st, sc in next st*; rep around to make a slightly flared disc. Final count: (9 - 12 sts depending on increases). For this version: (2 sc in every second st) x6 = 18 sc. Turn if desired. (18)
Info :
This pattern creates a small circular center for petals to attach; petals are worked individually into the edge of this disc.
Round 3 (Petal foundation) :
Ch5, sl st into next base st to make a petal loop; repeat to create 6 loops evenly spaced around the disc (ch5 loop, sl st into next base st x6). End and fasten off leaving a long tail for sewing. You now have 6 petal foundation loops. Block flat if necessary.
Petal (work into each loop) :
Re-join cream into the first ch5 loop: sc, hdc, 3 dc, hdc, sc into loop; sl st to base. Repeat for each of 6 petals around. This yields a 6-petal flower with gently rounded petals. Fasten off and weave in ends. Approx diameter 5-6 cm depending on hook.
Info :
For a crisp smooth petal appearance, block each flower flat and pin between two sheets of fabric while damp until dry. This ensures petals sit nicely on the mesh.
Alternate Flower Version (Layered) :
For fuller flowers, make a second, smaller 6-petal disc (ch 3 loops and smaller petals) and sew centered on top of the first for a layered look. Use matching cream or a pale yellow center for contrast.
— Small Accent Buds (Make 4) :
Round 1 :
Ch6, sl st to form small circle. Ch1, work 6 sc in circle. Fasten off leaving tail for sewing. Approx 1.5 cm diameter. These fill small gaps on the vine if needed.
Info :
Make extra buds so you have options when arranging the vine; they are quick to make and useful for balancing composition.
— Attaching Appliques (Sewing & Positioning) :
Info :
Lay blocked mesh panel flat. Arrange the stem along the central marked column and pin lightly every 5-7 cm. Place leaves adjacent to the stem and flowers at their pre-marked centers (rows approx 12, 24, 36, 48, 60). Use thin pins or small sewing pins to hold pieces in place while attaching.
Sewing the Stem :
Thread a yarn needle with matching green and whip stitch along the underside of the stem into filled mesh stitches or dc posts. Use small, invisible stitches so the vine appears to sit on top of the mesh. Sew along full length with 3-4 secure passes at each anchor point to prevent lifting. Knot and weave in tails on the wrong side of the mesh.
Sewing Leaves :
Sew leaves to the stem with a few secure stitches at the leaf base, then add 2-3 stitches along the leaf midline into the stem to secure. Shape leaf slightly upward as you sew so leaves sit proud of the mesh for a dimensional look. Hide thread tails under the leaf and trim close after weaving in securely.
Sewing Flowers :
Center each flower on its marked mesh square and stitch through the central disc into the underlying filled meshes of the panel. Secure with 10-12 small stitches across the underside of the flower, knot securely and weave in ends. Avoid large knots on the right side by tucking them under the flower base.
Info :
As you sew, occasionally flip the work and check the front to ensure appliques lie flat and in proper alignment. Adjust stitches where necessary. Use spare pins to test positioning before sewing permanently.
— Decorative Scalloped Border (Worked around entire panel) :
Preparatory Round :
With terracotta yarn, re-join at any corner of the blocked mesh panel. Work a neat round of sc along the outermost mesh edge to create a firm foundation for the scallops. Work 1 sc per mesh unit along sides and 3 sc in each corner to turn. This evens out edges and prepares for subsequent rounds. Fasten off and re-join as needed. (Panel perimeter stabilized)
Round 1 :
Join terracotta along the foundation sc round. Chain 3 (counts as dc), *skip 1 sc, dc in next sc* repeat along to create a light row of dcs around the edge. Place 3 dc clusters in corners to maintain square turn. End with sl st to top of starting ch3. Turn if needed. This gives a slight raised ridge before decorative rounds.
Info :
Measure the perimeter and mark every 4-6 cm to maintain even scallop spacing. The scallops you'll form are worked as repeating groups along straight edges and special clusters at corners for a continuous look.
Round 2 :
Ch3, *skip 1 st, (5 dc shell) in next st, skip 1, sc in next*, repeat along side. At corners work (5 dc shell, ch2, 5 dc shell) in corner sc to create roomy corner shells. Sl st to join at end. This forms the first scallop outline.
Round 3 :
Work behind the shells: sl st into the base of the first shell, ch3, (2 dc in same base, tr in next dc of same shell, 2 dc in same base) to form a deep fan, sl st to the top of the neighboring sc. Rep across each shell to create open fan shells with strong texture. Join with sl st and fasten off. (Repeat shells along entire perimeter)
Info :
For the scalloped edges shown, the design uses two rows of shells: a smaller outer shell and a fuller fan to give the scalloped scalloped-lobed appearance. Keep shells aligned by counting base stitches and using your marks from Info notes.
Round 4 :
Re-join and work a finishing round: sc evenly across the backs of the shells to tidy edges, then work a picot or small ch3 loop at the top of each fan to highlight the lobed scallop edge. Example: *sc in top of fan, ch3, sl st in 3rd ch (picot), sc in next base* repeat. Fasten off and weave ends securely.
Round 5 (Optional Extra Sculpted Edge) :
If you prefer larger scallops as in the photo, add an extra round in which you work 9-tr fans into each base shell: ch3, 9 tr in shell base, sl st between shells; this will create larger lobes. Block again after edge completion to open scallops fully. Fasten off and weave ends.
Info :
Edge finish tip: If you find the scallops pulling in, add an extra round of sc along the inner side of the shell to anchor them more securely before creating larger fans.
— Finishing Touches & Final Blocking :
Final Assembly :
Weave in all remaining yarn tails on the wrong side using a yarn needle. If any appliques feel loose, reinforce with a few extra hidden stitches. Trim threads close after weaving to avoid lumps under the runner.
Blocking :
Lay runner on a clean blocking mat. Pin outer scallops at uniform spacing using rust-proof pins. Lightly damp-spray the runner or mist with steam, then allow to dry fully. Reshape mesh squares and scallops while damp to achieve even tension and crisp geometry.
Info :
Final checks: view runner from both sides of the table to ensure the vine lies flat and flowers are positioned as intended. If elements are shifting, a few tiny catching stitches on the underside will secure them without being seen from the top.
Care Instructions :
Hand wash gently in lukewarm water with a mild detergent. Roll in towel to remove excess water and reshape while damp. Do not wring. Iron on a low setting with a cloth between iron and runner if desired; avoid direct heat on cotton if heavily mercerized as it can dull sheen.
Info :
Storage tip: store flat or gently rolled, avoid folding across the scalloped edges to prevent creases that are hard to remove.
This vintage floral filet runner is a lovely blend of open mesh and dimensional appliques that will brighten any table with handmade charm. The warm terracotta tone and cream blossoms make a welcoming accent for daily use or special occasions. I hope you enjoy blocking, stitching and arranging each flower — the process is as soothing as the final result is beautiful. 🧶🌸 Take pride in every scallop and stitch, and enjoy showing it off on your favorite table! ✨