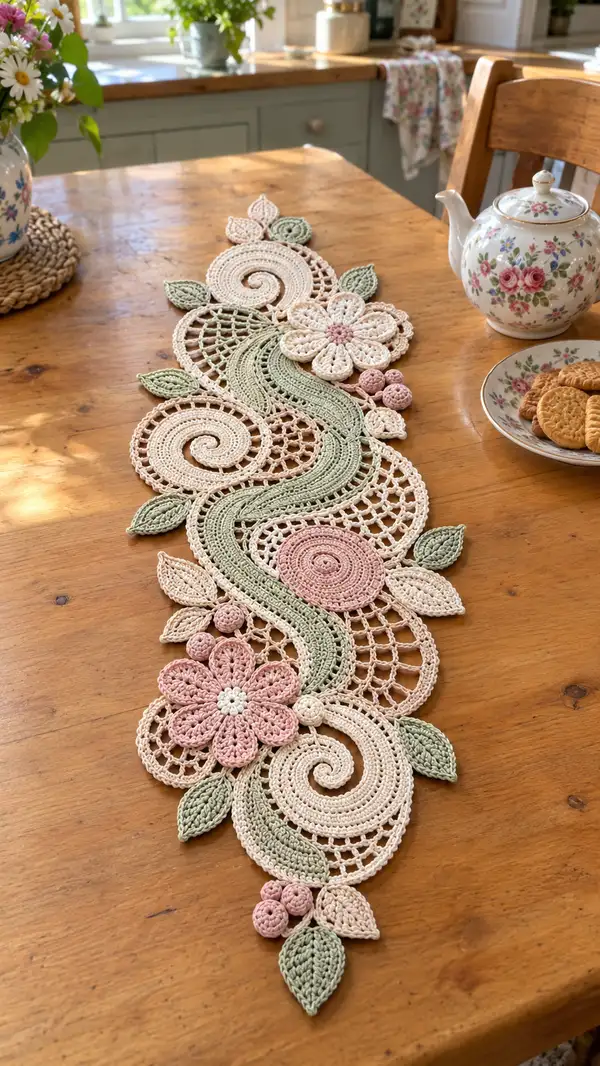
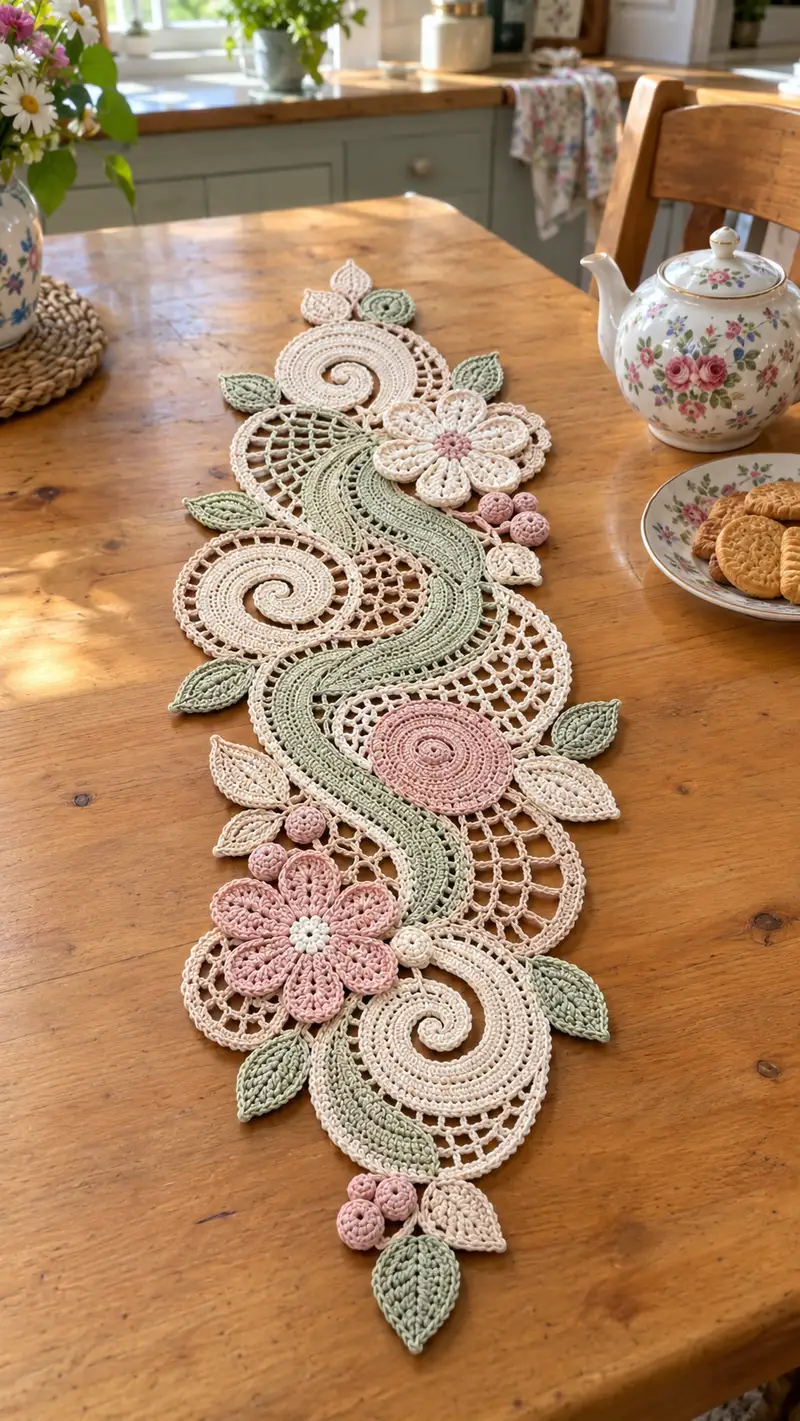
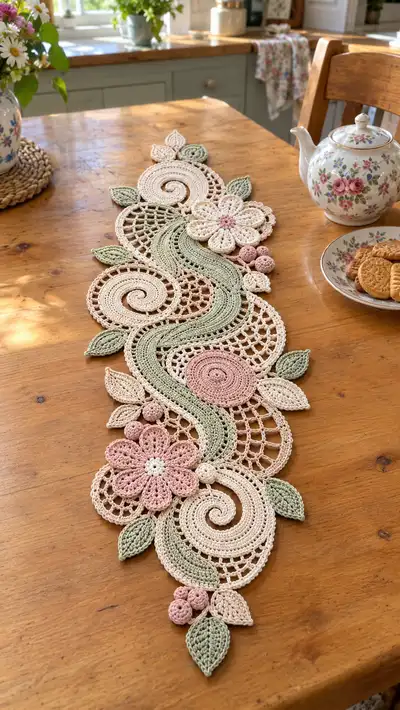
Create an elegant vintage-inspired floral lace table runner featuring spirals, openwork lattice, a sinuous S-band, layered flowers, leaves and tiny berry accents. Soft blush, cream and sage tones combine for a delicate, cottagecore centerpiece. This pattern guides you through each motif, stitch counts and assembly for a durable, pretty runner perfect for tea settings and seasonal decor.
Progress Tracker
0% Complete
— Overview & Notes :
Info :
This pattern is modular. Make each motif separately then assemble using a combination of crocheted mesh joining and whipping with a yarn needle. Use the same hook for all motifs for consistent gauge. Block motifs flat to the dimensions suggested in assembly notes before joining. Keep stitch markers at round starts. The sample runner is approximately 60-70 cm long and 18-22 cm at the widest point when made in DK-weight cotton with a 2.5mm hook.
— Large Spiral Motif (Make 4) :
Round 1 :
6 sc in magic ring (6)
Round 3 :
(1 sc, inc) x6 (18)
Round 4 :
(2 sc, inc) x6 (24)
Round 5 :
(3 sc, inc) x6 (30)
Info :
Start forming a very shallow spiral by placing the first stitch of this round into the front loop only of the joining stitch to give a slight ridge that encourages curling. Keep tension even to maintain flat spiral that will curl slightly upward at center.
Round 6 :
(4 sc, inc) x6 (36)
Round 7 :
(5 sc, inc) x6 (42)
Round 8 :
(6 sc, inc) x6 (48)
Round 9 :
1 sc in each st (48)
Round 10 :
1 sc in each st (48)
Info :
To accentuate the spiral ridge, work rounds 9 and 10 in BLO to create a shallow channel. This gives the spiral definition when layered with mesh motifs.
Round 11 :
1 sc in each st BLO (48)
Round 12 :
(7 sc, inc) x6 (54)
Round 13 :
1 sc in each st (54)
Round 14 :
Working along one edge only: ch1, turn, 1 sc in next 27 sts, then ch5, sk 27 sts across to create open arc for later mesh joining; finish round by 1 sc in remaining 27 sts (54 minus counted skipped arc)
Info :
Round 14 introduces an intentional open arc (ch5 space) to allow overlap with a mesh circle. The spiral is not a perfect circle — stagger rounds to make a tapering running spiral. Adjust ch space size to make larger or smaller openings.
Round 15 :
1 sc around entire outer edge working into both rows and around ch5 space: where ch5 was left, work (1 sc, ch3, 1 sc) into that space to keep the arc open (54 + 2 ch spaces)
Round 16 :
1 sc in each st (including into ch3 loops) (approx 56)
Round 17 :
(8 sc, inc) x6 (60)
Round 18 :
1 sc in each st (60)
Round 19 :
Edge round: *ch3, sk2, sl st in next st* repeat to create picot-like open loops around final edge (60)
Info :
Fasten off leaving a long tail for sewing. Block the spiral flat on a mat, pinning the spiral to keep the center slightly raised for depth. Make four in cream or alternate colors according to layout.
— Mesh Circle Motif (Make 4) :
Round 1 :
6 sc in magic ring (6)
Round 3 :
(1 sc, inc) x6 (18)
Round 4 :
(2 sc, inc) x6 (24)
Round 5 :
(3 sc, inc) x6 (30)
Round 6 :
(4 sc, inc) x6 (36)
Round 7 :
1 sc in each st (36)
Info :
Switch to linen or cream for lacy effect. From round 8 the circle opens into an airy mesh using chains and double crochets to create a doily-like openwork that will sit under spirals and flowers.
Round 8 :
*ch5, sk1, dc in next st* repeat around creating a ring of open arches (approx 12 arches)
Round 9 :
Into each ch5 arch: (sc, ch3, 3 dc, ch3, sc) to form a fan shell (36 around)
Round 10 :
Working between fans: *ch4, sl st into space between fan and next fan* repeat to form net (36 loops)
Round 11 :
Round of sl sts around base to tidy edges: 1 sl st in each st and into top loops of fans (approx 72)
Round 12 :
Optional decorative edge: *ch3, sc in next top of fan* repeat (72)
Info :
Block mesh circles using pins to keep openings even. If you prefer larger mesh, change ch5 to ch7 in round 8 and adjust fan counts accordingly. Fasten off leaving tails for sewing to spirals and S-band.
— S-Shaped Band (Make 1 long band; can be made in 2 halves) :
Info :
The central S-band is worked flat back-and-forth in rows and then shaped with short increases/dec to create sinuosity. Work using sage green. This band is the structural spine connecting many motifs — make it 2 pieces and join if necessary to reach the length in your layout.
Row 1 :
Ch72, sc in 2nd ch from hook and across (71 sc)
Row 2 :
Ch1, turn, sc in each st across (71)
Row 3 :
Ch1, turn, 8 sc, inc, 53 sc, inc, 8 sc (73)
Info :
Row 3 introduces two increases spaced to create a gentle bulge — this bulge, together with later decreases, will form the S curve. Use stitch markers at the increase points to maintain shape across rows.
Row 4 :
Ch1, turn, sc in each st (73)
Row 5 :
Ch1, turn, 8 sc, (inc, 1 sc)x2, 49 sc, (1 sc, dec)x2, 8 sc (73)
Row 6 :
Ch1, turn, sc across (73)
Row 7 :
Ch1, turn, 7 sc, dec, 51 sc, dec, 7 sc (71)
Row 8 :
Ch1, turn, sc across (71)
Row 9 :
Ch1, turn, 7 sc, inc, 53 sc, inc, 7 sc (73)
Row 10 :
Ch1, turn, sc across (73)
Info :
Continue this method of building bulges and shallow tapers every 2 rows to create an S-shaped undulation. To lengthen the band, continue repeating a 4-row shaping sequence: one row to shape (inc/dec) and one even row to stabilize. Aim for approximately 50-70 rows total (worked in rows) so the band can snake through 3-4 spiral and mesh motifs. For a very long runner, make two bands and join with sl st seam.
Row 11-40 :
Repeat shaping pattern established in Rows 3-10 alternating increases and decreases every 2-4 rows to form 3 major curves (maintain approx 71-73 sts width). After Row 40 the band should measure roughly the length of the motif area (adjust number of repeats to match your layout).
Row 41 :
Ch1, turn, sc across and fasten off leaving a long tail for sewing (approx 71)
Info :
Work last row in BLO to create a distinct ridge along one side of the band for decorative effect. Block the band, pinning the S-shape to hold curvature before attaching motifs. If your band is constructed in two pieces, join them with slip stitch seam on wrong side and weave tails in neatly.
— Large Flower (Make 2) :
Round 1 :
6 sc in magic ring (6)
Round 3 :
(1 sc, inc) x6 (18)
Round 4 :
Ch1, sc in each st (18) — fasten off center and join new color for petals if desired
Info :
The flower center is sturdy — leave a tail to sew through the center and attach a small cluster of embroidered beads or tightly worked popcorns if desired. Petals are worked into front loops of round 4 to give lift.
Round 5 :
Join petal color in FLO of round 4, *(ch2, 3 dc, ch2, sl st) into same st to form petal base*, sl st into next st, rep from * 6 times to form 6 petals (6 petals)
Round 6 :
Into each petal: sl st into center of petal, *(sc, hdc, 3 dc, hdc, sc) in center of petal* repeat 6 times. Fasten off leaving long tail for sewing (each petal 7 sts textured)
Round 7 :
Optional picot edge: join contrast thread, *(sc, ch3, sc) at petal tip* repeat to create delicate scallop
Info :
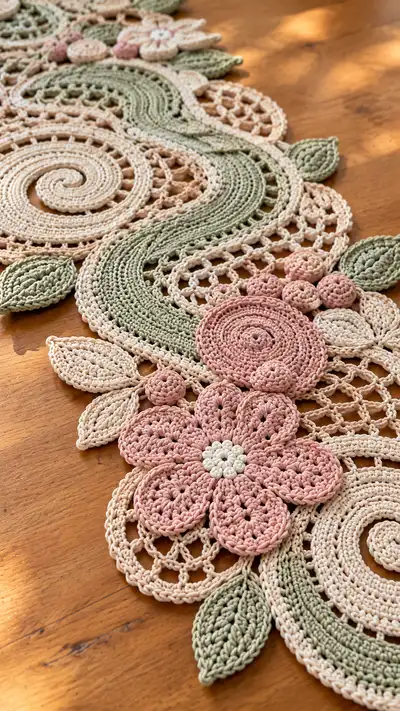
For a dimensional petal, work Round 6 slightly tighter than center so petals lift when blocked. Add a small cluster of white popcorns in the center as shown in photos — see Berry instructions for popcorn technique.
— Small Rosette Disc (Make 4-6) :
Round 1 :
6 sc in magic ring (6)
Round 3 :
(1 sc, inc) x6 (18)
Round 4 :
1 sc in each st (18)
Round 5 :
Form raised spiral: *hdc in next 2, 3 dc in next, hdc next 2* repeat around to create textured rosette (18 textured groups)
Info :
These small discs serve as filler circles and berry pedestals. Work in pink or cream and block lightly flat. Fasten off long tail to whipstitch into layout.
— Berry Sphere (Make sets of 12) :
Round 1 :
6 sc in magic ring (6)
Round 3 :
(1 sc, inc) x6 (18)
Round 4 :
(2 sc, inc) x6 (24)
Round 5 :
1 sc in each st (24)
Round 6 :
(2 sc, dec) x6 (18)
Round 7 :
(1 sc, dec) x6 (12)
Round 8 :
6 dec (6) — fasten off leaving long tail
Info :
Stuff lightly during rounds 4-7 to create a small firm berry. Overstuffing will make the berry bumpy and difficult to sew flat. Use dusty pink for berries used in clusters near flowers.
— Leaf (Large) (Make 12) :
Round 1 :
Ch8, sc in 2nd ch from hook, hdc next, dc next, tr next, dc next, hdc next, sc last (7 sts) — turn to work along other side of chain
Round 2 :
Work along opposite side: hdc in first ch, dc in next, tr in center ch, dc next, hdc next, sc last, sl st to join at base — do not fasten off (approx 13 sts total around)
Round 3 :
Along entire leaf edge: *sc, hdc, 3 dc, hdc, sc* in apex stitch to give fullness, then sc along remaining edge. Fasten off and weave tail (approx 21 sts)
Info :
Work leaves in sage green. For a vein down the center, after blocking embroider a line of sl sts with matching yarn. Leaves can be made in two sizes by adjusting starting ch to 6 (small) or 10 (extra large).
— Leaf (Small) (Make 10) :
Round 1 :
Ch6, sc in 2nd ch from hook, hdc, dc, hdc, sc — work back along chain mirroring first side and sl st at base (approx 9 sts)
Round 2 :
Edge round: *sc, 3 dc in apex, sc* to shape small petiole and give a plump leaf. Fasten off (approx 13 sts)
Info :
Make small and large leaves in proportions shown. Block leaves flat and pin to keep pointy tips sharp before joining.
— Small Decorative Fans (Chain-Lace Fillers) (Make 6) :
Round 1 :
Ch12, sc in 2nd ch from hook and across to create small foundation (11 sc)
Round 2 :
Join to opposite end: ch1, turn, (ch3, sk1, sc) across to create open loop edge (approx 6 loops)
Round 3 :
Into each ch3 loop: (sc, 3 dc, sc) to form tiny fan shells. Fasten off leaving tail for joining.
Info :
Fans are perfect to tuck between spirals and mesh circles to fill gaps without adding bulk. Work in cream for a subtle lace texture.
— Joining & Mesh Connectors :
Info :
Lay out all motifs on a blocking mat following the photo layout. Pin each motif to matching spacing before any sewing. Join motifs using either: 1) crocheted mesh connectors (chain arches and sl st to connect adjacent motif edges) or 2) whip-stitch with matching yarn. The following is a repeatable connector motif pattern to make uniform mesh joins.
Connector Round A :
On motif A edge, work *sc in edge st, ch5, sk 2 sts of edge, sc in next edge st* repeat to create chain loops across joining edge. Fasten off but leave tail.
Connector Round B :
On motif B edge, stitch matching scs opposite motif A's scs, then join loops by inserting hook through both ch5 loops and working (sc, ch3, sc) through paired loops to lock them together. Work across to connect entire edge.
Info :
When mesh edges do not have identical numbers of arches, distribute connectors so that larger loops on one motif match two smaller loops on the other by alternating one-ch and two-ch connectors. Keep connectors loose enough so joined area lies flat when blocked.
— Decorative Edge & Scallop Finishing :
Round 1 :
Work around entire assembled runner edge: join cream yarn, *(sc in next 3 sts, ch3, skip 1)* repeat to create a simple lace border around outermost perimeter. Work evenly across curved and straight edges, adding or skipping a repeat where needed to maintain smooth curves.
Round 2 :
Into each ch3 space: (sc, hdc, 3 dc, hdc, sc) to form scalloped edging. Where the edge meets a leaf or flower, omit scallop and instead fasten off to avoid bulky joins.
Info :
For a refined border, work a final round of single crochet in BLO only to create a subtle ridge that frames the runner. Block again after edging to make scallops even and crisp.
— Final Finishing Touches :
Info :
Weave in all ends neatly on the wrong side where possible. Use a few hidden whip-stitches to secure larger motifs further if they lift after blocking. If you want a heavier runner that lies flatter on the table, stitch several small backing stitches in matching thread across key seams on the wrong side to slightly tension the runner into a more rigid pane.
Blocking :
Soak the entire runner in warm water with a tiny amount of wool wash, gently squeeze out excess, lay flat on a blocking mat and pin each motif into shape — pay attention to the S-band curves and flower petals. Allow to dry completely. Remove pins and press lightly if desired.
Assembly Layout Tip :
Arrange motifs as in the reference photos: alternate spiral and mesh, tuck rossettes and small discs into open mesh, place large flowers slightly off-center on one side of the S-band, and cluster leaves and berries at the low points of spirals. Use photos as guide for scale and spacing, adjusting to your preferred length.
Info :
Expect to make approximately: 4 large spirals, 4 mesh circles, 1 long S-band (or 2 halves), 2 large flowers, 4-6 small rosettes, 12-16 leaves (mixed sizes), 12 berry spheres and 6 small fans. This yields a balanced runner similar to the sample. Adjust motif counts to lengthen or shorten the runner.
Completing this floral lace table runner is a true joy — every spiral and petal reveals itself as you assemble the motifs. The soft cream, blush and sage palette brings a vintage cottage feel to your table. Blocked and finished, it makes a graceful centerpiece for tea or special occasions. 🧶🌸 Don't forget to take photos and share your finished runner — it's the perfect handmade gift or heirloom piece! ✨