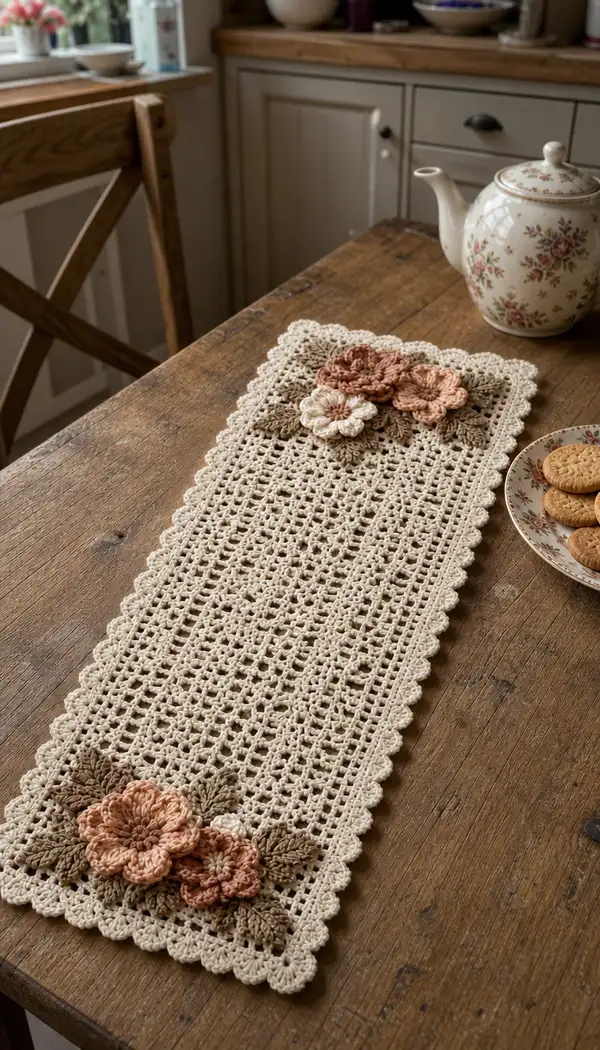
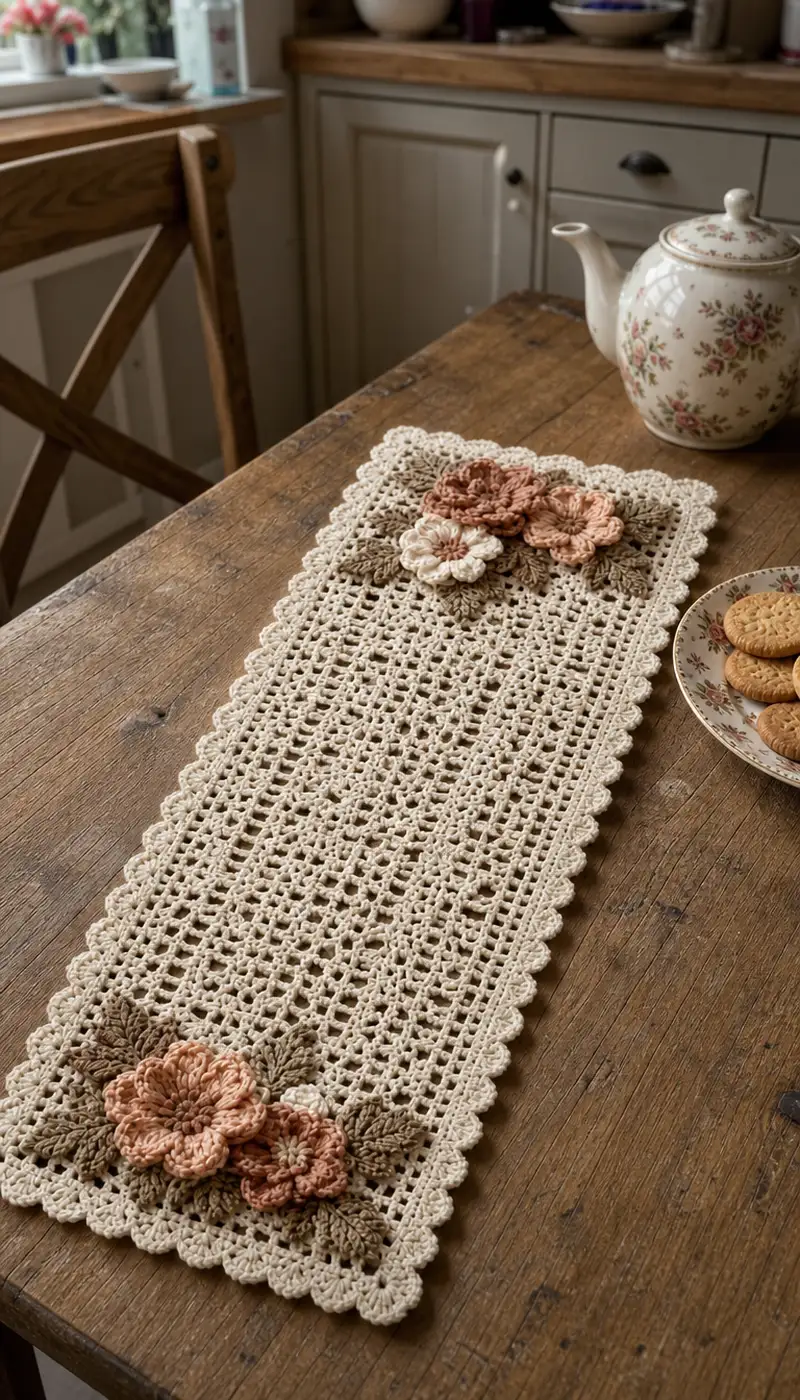
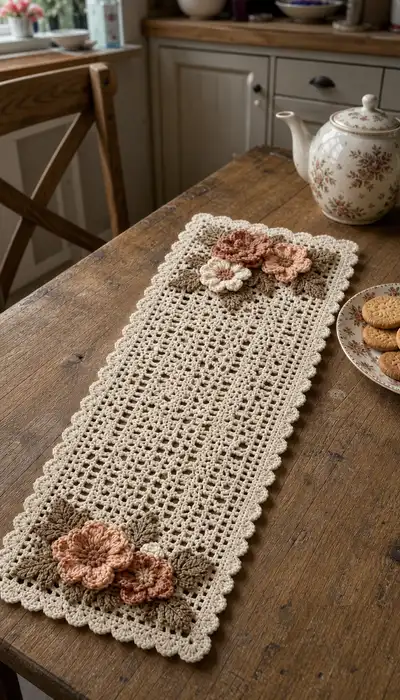
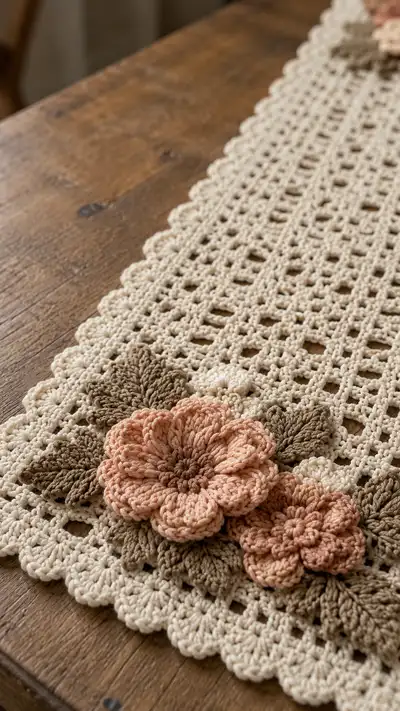
A delicate, vintage-inspired crochet table runner worked in a soft cream mesh with scalloped edges and layered floral appliques in warm peach and olive tones. The open lattice body gives a light, airy look while the raised flowers add charming texture and depth. Designed to drape beautifully over narrow dining tables, dressers or sideboards, this runner pairs perfectly with cottagecore or farmhouse decor. Clear step-by-step instructions and helpful Info sections guide you through each part from mesh panel to finishing touches.
Progress Tracker
0% Complete
— Overview & Gauge :
Info :
This runner is worked flat in rows overall (mesh panel) with separate appliques (flowers and leaves) sewn on later. Finished size using the yarn and hook suggested is approximately 12" (30 cm) wide by 36" (92 cm) long. Gauge of the mesh is approx 12 mesh repeats (dc + ch2 spaces) = 4" (10 cm) square when blocked; adjust foundation chain or number of repeats to change width/length.
Info :
Materials chosen are cotton DK. Use a 3.5mm hook to keep fabric slightly firm and neat. Blocking opens the lace and evens scalloped border beautifully.
— Abbreviations & Notes :
Info :
All stitch counts are written for one end-to-end runner using the given foundation chain. Numbers are exact for the pattern layout as written. Turning chain counts as first dc where noted. Maintain consistent tension for lace clarity. Use stitch markers at row ends for even edges.
— Main Mesh Panel :
Row 1 :
Foundation: Chain 121 (this is a multiple of 3 + 1 giving 40 dc positions). Turn, ch 3 (counts as first dc), dc into 4th ch from hook, *ch 2, sk next 2 ch, dc in next ch*; rep from * to * across until you reach the last ch; end with dc in final ch. You will have 40 dc and 39 ch-2 spaces across (40 dc + 39 ch2 = 79 stitch positions).
Info :
The ch-2 spaces create the open mesh squares. Keep chains even and do not pull too tight as consistency in ch-2 height is essential for an even fabric.
Row 2 :
Turn, ch 3 (counts as dc), dc into the top of next dc, *ch 2, sk next ch-2 space, dc in top of next dc*; rep across. Maintain 40 dc and 39 ch2 spaces (40 dc, 39 ch2).
Row 3 :
Repeat Row 2 exactly (40 dc, 39 ch2).
Info :
After a few rows check that your sides are straight. The number of dc per row stays the same (40). Use a light blocking after completing a sample of 8–10 rows if needed to check gauge and adjust hook size.
Rows 4-10 :
Repeat Row 2. Work evenly in the mesh to establish length. (Each row: 40 dc, 39 ch2 spaces.)
Info :
I like to place a stitch marker at the first dc of every 10th row to keep track of progress and ensure edge tension is consistent. If your edges ripple, try tightening the first or last dc by a slight tug or adjust hook one size down for the first stitch only.
Rows 11-20 :
Repeat Row 2. Keep an eye on stitch count: 40 dc, 39 ch2 spaces each row. By Row 20 the runner will begin to take visible shape; check length to see if you want a longer or shorter runner.
Info :
If you prefer a longer runner, continue repeating Row 2 until you reach the desired length. For symmetry with appliques, aim for an even number of mesh rows so the floral clusters sit comfortably at the short ends.
Rows 21-40 :
Repeat Row 2. At Row 40 you will have a long central panel; this pattern suggests a total of 80 mesh rows for a 36" runner. Continue to Row 80 if following the pattern exactly. (Each row: 40 dc, 39 ch2.)
Info :
Rows 21–40 are repetitive; it's a soothing, meditative portion of the project. Keep checks every 10–12 rows for edge consistency. Place markers or take photos to ensure both ends of the runner match when you finish.
Rows 41-60 :
Repeat Row 2. Continue to maintain 40 dc and 39 ch2 spaces per row. The mesh should remain airy and even.
Info :
If you notice that the holes in the mesh are closing, your tension may be too tight; switch to a slightly larger hook by 0.25–0.5 mm. Conversely, if the mesh is too loose, go down a hook size.
Rows 61-75 :
Repeat Row 2. This stretch brings you close to the full length; check the runner against the table to confirm ending row for appliques placement. (40 dc, 39 ch2.)
Info :
Mark the final mesh row that will be the inner edge for each applique cluster. I suggest leaving 2 mesh rows (approx. 1/2"–3/4") beyond where the appliques will sit so the flowers sit nicely on top of the scalloped border.
Rows 76-80 :
Repeat Row 2 for rows 76–80. Finish with Row 80 and fasten off leaving a 16" (40 cm) tail for attaching the border later. Your mesh panel is now complete and measures approximately 36" in length if gauge matches; adjust by adding/removing mesh repeats as needed.
Info :
Block the mesh panel lightly to open the lace. Pin straight along the edges using T-pins and a blocking mat; mist lightly with water and allow to dry fully before proceeding to the scalloped border.
— Scalloped Shell Border (worked all around) :
Round 1 :
With right side facing, join cream yarn with sl st at any corner top (pick a corner ch-3 space). Working along the long edge, sc evenly around the perimeter: 1 sc in each dc and into the top of each ch-2 space along the top and bottom edges, and 1 sc in each row-end across the sides. For this runner you will work approximately 318 sc around (see Info for exact counting). Place 3 sc in each corner to maintain flatness. Join with sl st to first sc.
Info :
Exact sc count will vary slightly with tension; if you want numerical symmetry, count the number of dc positions across the top (40) and sides (80 rows). The total sc ≈ 2*(40+80) = 240 plus additional positions for ch spaces and corner increases. The aim is to have consistent spacing for shells in the next round; add or remove a few sc to make rounds fit shells evenly.
Round 2 :
Ch 1, work sc in same st and across: 1 sc in each sc around. Join with sl st. (This evens the edge and creates a stable base for shells.)
Info :
Round 2 smooths the edge. If your last round had gaps, this rounds evens stitch density and prepares for scallops.
Round 3 - Shell Round :
Ch 1. *Skip 2 sc, 5 dc in next sc (shell made), skip 2 sc, sl st in next sc*; rep around. At corners, work 5 dc into corner sc (counts as increased shell at corner). You will place shells evenly around the perimeter; count shells to fit symmetrically (approx 40–44 shells around). Join with sl st to first shell.
Info :
This shell round forms the scalloped edge. If you find shells bunching at the corner, adjust by adding an extra sl st or sc before the corner shell. Aim for even spacing; shells should be consistent in size (5 dc each).
Round 4 :
Ch 1. Working over shells: sl st into center dc of each 5-dc shell from previous round, *ch 3, sl st in center dc of next shell*; rep around. This gives a decorative picot-look and lifts the scallop. Join and fasten off. Weave in ends.
Info :
Optional extra round: for a fuller scallop, work another row of 3-dc shells into the previous shells instead of sl st and ch3. For a delicate runner, the single shell row is sufficient.
— Large Layered Flower (Make 1 for each end) :
Round 1 :
Using Dusty Peach, make a magic ring. Ch 1, work 10 sc into MR, pull tight (10). Join with sl st to first sc.
Round 2 :
Ch 1, *sc in next st, sc in next st, ch 2, sk 1 sc*; rep around placing small ch-2 loops; you will create 10 ch-2 loops spaced evenly. Join with sl st to first sc. (20 sc positions including loops visually.)
Info :
This creates the base around which petals will be built. Keep the ring small but not overly tight so petals sit flat.
Round 3 :
Switch to Blush/Light Peach. Working in each ch-2 loop from Round 2: *[ch 2, (yarn over, insert hook in loop, pull up a long loop) x5, yarn over and pull through all loops to form a tall puff petal, ch 1, sl st in same loop]*; rep 10 times to make 10 large petals. Fasten off long tail for sewing. (10 petals total.)
Info :
Puff petals: keep each puff even by pulling loops to the same height; do not overfill the petal. You can use a 3.0mm hook for tighter puff stitches if desired.
Round 4 :
With a short length of Dusty Peach, work into the base of the petals to create a second smaller petal layer: Sl st into the base between two petals, *ch 2, [3 dc in same sp], ch 2, sl st into next base between petals*; rep around to form a ring of 10 small clusters sitting between the large petals. Fasten off and weave ends. (10 small clusters.)
Info :
Layering the petals gives dimension. You may optionally embroider a small button or French knots for the flower center. If inserting a small pad of stuffing for a padded petal look, do so before closing the flower center, using a tiny bit of fiberfill.
— Medium Flower (Make 2 per end cluster) :
Round 1 :
Using Dusty Peach, ch 2, in 2nd ch from hook work 6 sc (6). Join with sl st. (6)
Round 2 :
Ch 1, *sc in next st, sc in next st, ch 1*; rep around creating 6 ch-1 loops. Join. (6 loops)
Round 3 :
Switch to Blush. Into each ch-1 loop: *(yarn over, insert in loop, pull up loop) x4, yarn over pull through all loops (4-loop puff), ch 1, sl st in loop base*; rep around to make 6 puff petals. Fasten off. (6 petals)
Info :
Make two of these medium flowers for each cluster. They are smaller than the big flower and will tuck beneath petals for layered effect.
— Small Flower / Bud (Make 2–4 per end) :
Round 1 :
Using Light Peach, make magic ring, ch 1, 6 sc into ring (6). Pull tight and join with sl st. Fasten off with long tail for sewing. (6)
Info :
These small rosettes fill gaps between larger flowers. They are quick and add lovely texture. You can leave centers plain or add a tiny French knot with embroidery floss.
— Sculpted Leaves (Make 6–8 per end depending on cluster size) :
Leaf Row 1 :
Using Olive yarn, ch 12. In 2nd ch from hook: sl st, hdc, dc, tr, 2 tr in next, tr, dc, hdc, sl st in last ch – forming left side of leaf. Now continue along opposite side of foundation chain: hdc in next, dc, tr, 2 tr in next, tr, dc, hdc, sl st to join to starting point. Fasten off leaving tail for sewing. The leaf should be slightly cupped with a central ridge created by taller stitches.
Info :
Work leaves flat and use BLO on last round if you want a pronounced central vein. For an articulated leaf, chain a shorter foundation (10–14) to vary sizes. Block leaves lightly with a fingertip of steam to shape.
Leaf Row 2 (Alternate textured leaf) :
Ch 10. Work sc, hdc, (dc, ch 1, dc) in center ch to create a point, then continue symmetrical decrease: hdc, sc across. Finish with sl st. Fasten off. Make leaves in two sizes: four larger (ch12 base) and four medium (ch10 base) for each cluster.
Info :
Leaves may be made in BLO on the last row to create ridged texture; work 1 sc in BLO only around leaf to give a raised seam if desired.
— Small Decorative Seed Flowers / Centers :
Round 1 :
Using deep peach or brown, ch 2, 8 sc in 2nd ch from hook. Join and fasten off with a small tail for sewing. Use as center for medium flowers or scattered buds. (8)
Info :
Sew these into the center of puff petals to give a finished, professional look. A dab of fabric glue inside the center helps secure if you do not want visible knots.
— Flower Assembly & Layering Instructions :
Info :
Arrange one large flower, two medium flowers, two small rosettes and 3–4 leaves in a pleasing cluster at each short end of the runner. Use the long tails left on the flowers and leaves to baste them in place temporarily with large running stitches, then stitch firmly with yarn needle in a ladder or whip-stitch to secure edges. Add seed centers to medium flowers by sewing the small decorative seed flowers into place.
Info :
For a balanced look, offset the largest bloom slightly to one side and nestle medium blooms and leaves around it. Use photos or a mirror to check placement from both short ends to ensure symmetry.
— Detailed Stitching for Flower Petals (Puff Technique Explained) :
Info :
Puff petal: Yarn over, insert hook in target loop or space, yarn over and pull up a long loop (repeat this step the specified number of times to gather loops on hook), then yarn over and pull through all loops on hook, ch 1 to close puff. Work sl st at petal base to anchor. For a 5-loop puff, use 5 pull-up loops prior to final draw-through. Keep loops an even height by pulling to the same level before closing the puff.
Info :
If petals appear too tall and floppy, reduce loop count or use slightly smaller hook for flower rounds. Conversely, increase loop count for fuller petals.
— Optional Raised Centre (French Knot Alternative) :
Info :
Instead of sewing on a separate seed flower, you can embroider 6–8 French knots in the flower center using contrasting embroidery floss. Use a yarn needle and short sections of floss, wrap the floss around the needle twice for a chunky knot, and insert back close to the starting point. Secure on the wrong side with a small knot.
— Extra Decorative Border Option (If You Want a Fuller Edge) :
Round 1 :
After initial shell round, join yarn in center of a shell. *Ch 1, sc in same center dc, ch 4, sc in center dc of next shell*; rep around to create picot loops between shells. Join and fasten off. This gives a lacy fringe that complements the floral clusters.
Info :
Use extra rounds only if your table runner is purely decorative; avoid fringe when the runner will be used under heavy dishware to reduce catching and wear.
— Finishing & Weaving in Ends :
Info :
Use the long tails left on appliques to sew them in place with a yarn needle. Stitch through the scalloped border base and through the mesh at two or three anchoring points for each applique piece. Weave remaining tails along the underside of the runner, through multiple stitches, and trim. Block runner and appliques assembled to ensure the clusters sit flat and the scalloped border fans evenly.
Round 2 :
Once appliques are sewn, do a final light block: pin runner to blocking mat, using T-pins along scalloped edges to open shells, and pin leaves and petals in desired shape. Spray lightly with water or steam from a distance. Allow to dry completely before removing pins.
Info :
Blocking also helps the mesh stretch slightly and gives professional, draped edges. If using cotton yarn, it will hold the block well; if you used cotton-blend, take care with heat.
— Troubleshooting & Tips :
Info :
If shells on the border warp or the runner ruffles, add or remove single crochets at intervals to redistribute fabric tension. If flowers sit too flat, add a small felt circle under the base before sewing to give slight lift. For stronger attachment of appliques, come up through the mesh from the underside and take a few stitches around petals and leaves to catch the mesh without pulling visible thread on top.
Info :
To make a longer runner, add more mesh repeats (each repeat is one row of 40 dc across). Keep the number of mesh rows even so the floral clusters remain centered on each end.
This vintage floral table runner combines airy mesh with sculptural, layered flowers for a piece that's both delicate and tactile. Each petal and leaf is crafted to bring charm and texture to your tabletop decor. Pinning, sewing and gentle blocking finish the runner for a professional, handmade look that you'll be proud to display. 🧶🌸 Whether used for everyday warmth or holiday settings, this runner is sure to delight. Enjoy every stitch and share your creation with pride! 🎀