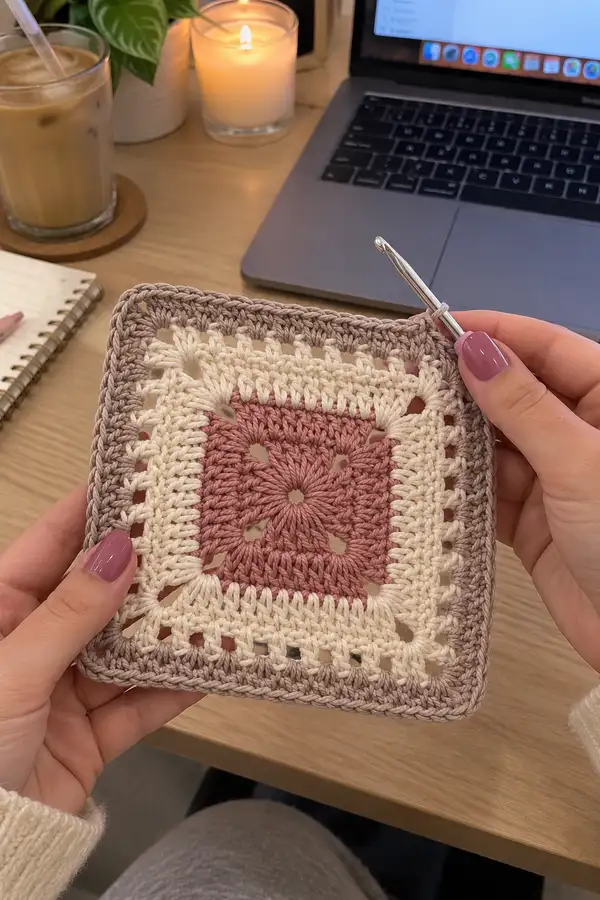
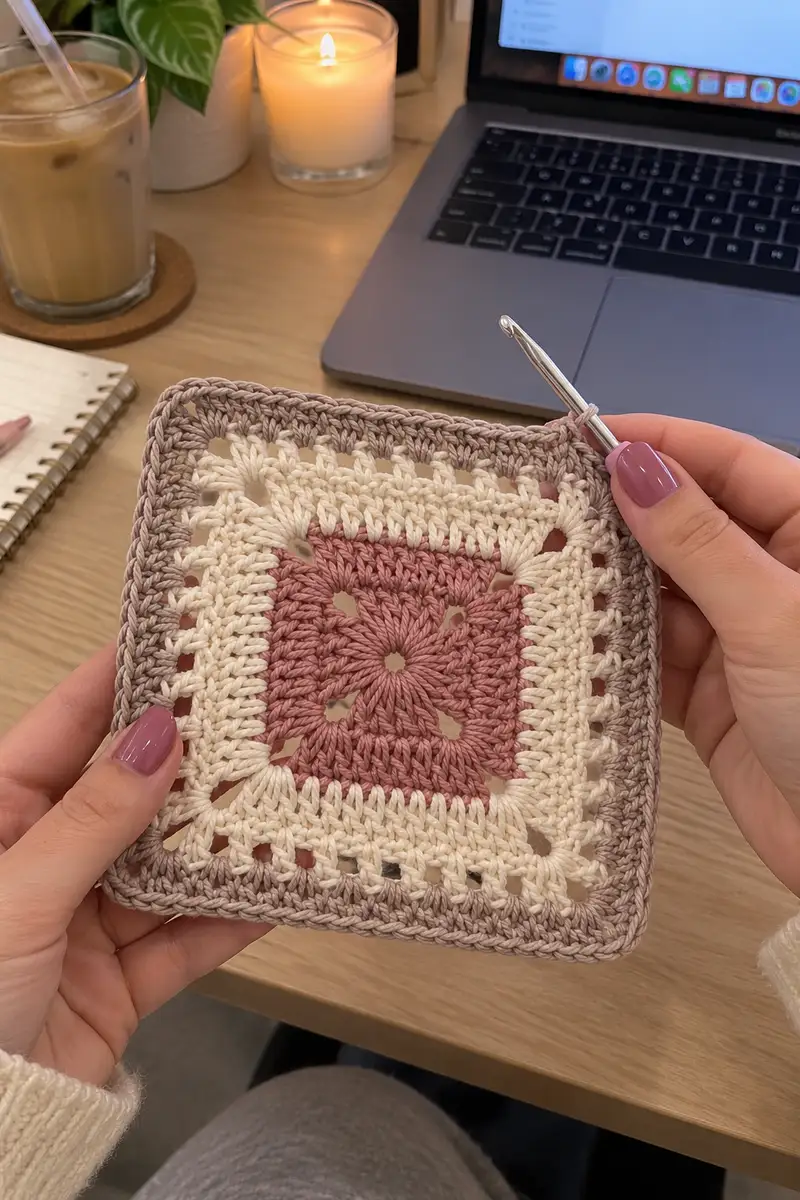
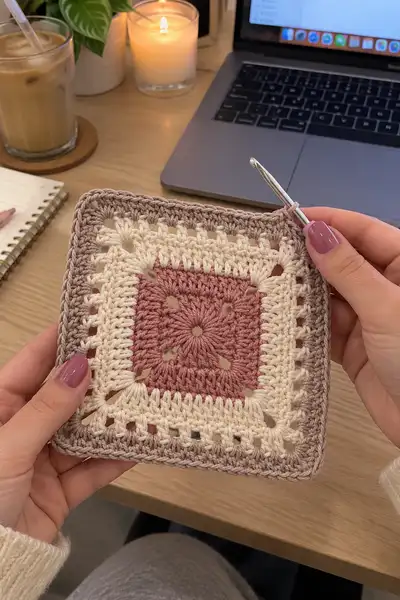
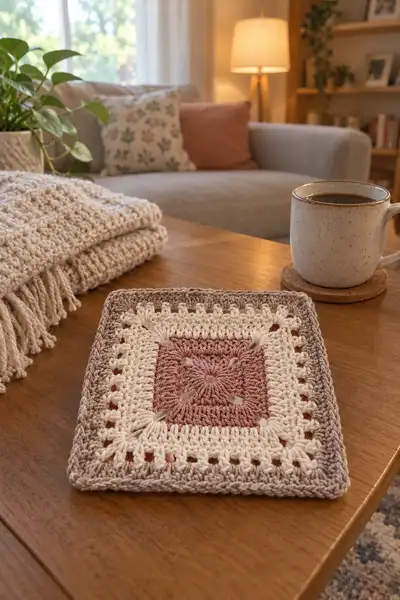
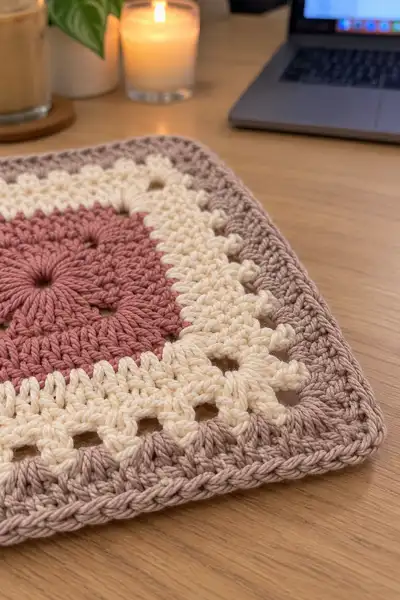
A timeless vintage-inspired bedspread square worked in three soft shades: dusty rose center, warm cream openwork rounds, and a muted taupe border. This pattern recreates the elegant floral center and delicate lacy rounds you see in the photos, designed as a modular square for large bedspreads, throws, or pillow covers. Detailed round-by-round instructions, color change guidance, and border finishing make it easy to repeat and assemble into a full bedspread.
Progress Tracker
0% Complete
— Notes & Gauge :
Info :
Make a gauge swatch: 12 rounds of the square (sample rounds given below) should measure approximately 12cm (4.7in) across when blocked using worsted weight cotton and a 4.0mm hook. Adjust your hook if your gauge is larger or smaller. This pattern describes one full square; multiply quantities to make your bedspread layout.
Info :
Color legend used throughout: Color A = Dusty Rose (center), Color B = Warm Cream (middle lace rounds), Color C = Muted Taupe (outer border). Substitute shades as desired but keep contrast between center and middle for rose effect.
— Center Motif :
Round 1 :
With Color A, ch 4, join with sl st to form a ring. Ch 3 (counts as first dc), work 11 dc into ring. Join with sl st to top of ch-3. Total: 12 dc (12)
Round 2 :
Ch 3 (counts as dc), *2 dc in next st; rep from * around to end, join with sl st to top of ch-3. Total: 24 dc (24). Info: This round expands the center evenly and will create the textured radiating petals.
Round 3 :
Ch 3, (1 dc in next st) across to end, join. Total: 24 dc (24). Info: Work this round evenly to build height without increasing so the petal shapes emerge smoothly.
Round 4 :
Change to Color A if you wish to deepen the center texture. Ch 3, *1 dc in next 1 st, 1 inc (2 dc) in next st; rep from * around (pattern: (1 dc, inc) x 8). Join. Total: 36 dc (36). Info: Place subtle increases to push the square slightly outward; this keeps the center flat while forming the base for the square corners.
Info :
Optional texture: Instead of some dc's in this area, you may replace '1 dc' with 'puff stitch' for a more floral center. If using puff, each puff counts as 1 stitch for stitch counts below.
— Square Foundation Rounds :
Round 5 :
With Color B, join with sl st to any st. Ch 3 (counts as dc). *3 dc in next st (creates corner), ch 2, 3 dc in same st (corner made), skip next 5 sts, 3 dc in next st for side group; rep from * around, placing 4 corners total. Join with sl st. Total dc stitches: 48 (48). Info: Each round that forms corners will add sets of 3-dc clusters on each side; this is the classic granny-derived expansion that gives predictable increases (12 sts added per round in this structure).
Round 6 :
Ch 3, work 3 dc into each side gap between the corner clusters: you will have one side cluster of 3 dc in each existing side space. Also maintain corner clusters as (3 dc, ch2, 3 dc). Join. Total dc stitches: 60 (60). Info: Color change to Color B at the start of this round is intentional to introduce the cream lace now.
Round 7 :
Ch 3, *3 dc in next side sp, 3 dc in corner cluster (work 3 dc into center of corner grouping), ch 2; rep around, join. Total dc: 72 (72). Info: Keep tension consistent; Color B gives the lacy middle rounds their soft open appearance.
Round 8 :
Ch 3, work 3 dc in each side space and (3 dc, ch 2, 3 dc) in each corner. Total dc: 84 (84). Info: At completion of this round the square is now clearly forming; block this sample square to check squareness before continuing with long runs of even rounds.
Info :
If you want the small holes seen at the compass points (four small open holes between center and middle), work the previous round placing an extra ch-1 space inside each corner on alternate rounds. The pattern provided keeps consistent 3-dc side groups to simplify counting.
— Decorative Lace Rounds :
Round 9 :
Ch 3, *3 dc in each side space to corner, (3 dc, ch 2, 3 dc) in corner; join. Total dc: 96 (96). Info: Work this and the next even round maintaining Color B for a soft consistent band of cream.
Round 10 :
Ch 3, (1 dc in next 3 sts), *ch 1, sk 1, 3 dc in next sp; rep across side, finish with corner cluster as usual; join. Total dc approximately: 108 (108). Info: The ch-1 spaces create subtle eyelets that add to the vintage lace effect. Count carefully: each side adds three extra ch-1 spaces across long sides.
Round 11 :
Ch 3, *3 dc in each side sp to corner (including in ch-1 gaps), (3 dc, ch2, 3 dc) in corner; join. Total dc: 120 (120). Info: Reestablish the classic three-dc side groups after the eyelet round to square up the edge.
Round 12 :
Ch 3, work 3 dc into each side and corner groups as before. Total dc: 132 (132). Info: Finish the warm cream band here; change to Color C (taupe) at the end of the round to prepare for the outer framing border.
Info :
Color change tip: Fasten off Color B leaving a 10cm tail. Join Color C with a standing dc in any corner to avoid an obvious jog. Carrying Color B inside is not recommended across many rows; weave ends or use the join-as-you-go technique.
— Outer Framing Rounds (Muted Taupe) :
Round 13 :
With Color C join, ch 3, *3 dc in each side sp to corner, (3 dc, ch2, 3 dc) in corner; join. Total dc: 144 (144). Info: This taupe band frames the cream and creates the soft neutral outer field.
Round 14 :
Ch 3, 1 dc in each of next 2 sts, *3 dc in side sp to corner, (3 dc, ch2, 3 dc) in corner; join. Total dc: 156 (156). Info: Slightly stagger the placement of 3-dc groups on this round to keep the work flat.
Round 15 :
Ch 3, work 3 dc clusters across sides and corners as before. Total dc: 168 (168). Info: Use this round to check for any gapping at corners; block if necessary to even out tension.
Round 16 :
Ch 3, *1 hdc in next 3 sts, ch 1, sk1 (creates small ridge), 3 dc in side sp; rep around, finish with corner cluster; join. Total stitches approximated: 180 (180). Info: Introducing hdc and small ch-1 spaces gives a soft ridge that becomes a subtle frame transition before the final edging.
Info :
If you prefer the outer rows to be more sculpted, use BLO on this round to create a defined ridge for the final single crochet border.
— Expansion Rounds (Make Square Larger as Desired) :
Round 17 :
Ch 3, 3 dc in each side sp and corner structure (3 dc, ch2, 3 dc). Total dc: 192 (192). Info: From here on, repeat a predictable expansion pattern: every full round increases the total dc count by 12 (three dc per side = 12). Use this to calculate target size per square.
Round 18 :
Repeat Round 17 pattern in Color C or alternate Color B for stripes: ch 3, 3 dc in each side sp, corner clusters unchanged. Total dc: 204 (204). Info: Alternate colors every 4-6 rounds if you want a wider cream band in the middle of the square; sample bedspread shown repeats Color B for a wider lace area before continuing taupe for the edge.
Round 19 :
Repeat expansion: ch 3, 3 dc in each side sp, corners as standard. Total dc: 216 (216). Info: Continuing these rounds will enlarge the finished square. To maintain squareness, keep increases strictly to the side groups only (3 dc added per side per round).
Round 20 :
Repeat expansion round. Total dc: 228 (228). Info: Measure after Round 20; estimate final square size by the number of expansion rounds. Each additional expansion round increases square side length by approximately 0.6-0.8cm depending on yarn and tension.
Info :
How to calculate rounds needed per finished measurement: If 12 rounds produce 12cm, then each round adds approximately 1cm. For a 40cm square you will need about 40 rounds total (adjust based on your gauge swatch). Use the per-round increase to plan your bedspread layout.
— Continued Expansion (Rounds 21–40) :
Round 21 :
Ch 3, work 3 dc in each side sp and corner structure unchanged. Total dc: 240 (240). Info: Keep stitch counts consistent. If you see a slight cupping, block now and adjust tension for remaining rounds.
Round 22 :
Repeat Round 21. Total dc: 252 (252). Info: Swap to Color B for a soft stripe if desired for visual interest; in the bedspread sample alternate 6 rounds of taupe then 4 rounds of cream to echo the vintage motif.
Round 23 :
Repeat expansion. Total dc: 264 (264). Info: At larger sizes, ensure corners have ch-2 spaces; if working many rounds corners can be bumped to ch-3 to avoid tight corners. If you change to ch-3 corners, this will add extra stitches: adjust counts accordingly (noted in the Info block below).
Info :
Corner modification: To keep large squares flat, you may change corner ch-2 to ch-3 from Round 25 onward. This will add 4 extra base chains total per round but prevents tight corners. If you do this, your total dc per round formula remains 12 per round but corner chains increase spacing.
Round 24 :
Repeat expansion pattern. Total dc: 276 (276). Info: If you plan to join squares using join-as-you-go (JAYG), stop expansion at the desired join round and follow the JAYG instructions in the assembly section below.
Round 25 :
Repeat expansion in preferred color. Total dc: 288 (288). Info: For queen/king bedspreads you will likely repeat 40–60 expansion rounds depending on square size and number of squares you plan to join together.
— Continued Expansion (Rounds 26–60) :
Round 26 :
Ch 3, 3 dc in each side sp and corner cluster (3 dc,ch2,3 dc). Total dc: 300 (300). Info: These rounds follow the same simple math: +12 dc per round. Use this to track progress; set row counters for long builds.
Round 27 :
Total dc: 312 (312). Repeat pattern. Info: If you prefer less bulk, consider substituting some rounds with 1 dc in each st to keep the round count but reduce thickness. That will change the visual rhythm but will still keep the square flat.
Round 28 :
Total dc: 324 (324). Repeat. Info: At this stage, you may begin alternating Color C and Color B every 4 rounds to create a banded bedspread look that echoes vintage linens.
Round 29 :
Total dc: 336 (336). Repeat. Info: Keep corners consistent. Swap to ch-3 corners if needed (see Round 23 Info) to maintain a gentle curve in corners for large squares.
Round 30 :
Total dc: 348 (348). Repeat. Info: If working dozens of rounds, take breaks and press lightly by steaming to keep the square neat.
Round 31 :
Total dc: 360 (360). Repeat. Info: For bedspread assembly, consider making each square identical in rounds and color sequence to ensure even joins later.
Round 32 :
Total dc: 372 (372). Repeat. Info: Mark every 10th round with a removable marker to track progress if you are producing many squares.
Round 33 :
Total dc: 384 (384). Repeat. Info: At larger round counts, counts grow large — rely on the per-round +12 formula rather than recounting every stitch unless you notice a problem.
Round 34 :
Total dc: 396 (396). Repeat. Info: Keep ends tidy by fastening off and weaving in every 6–8 rounds when switching colors to avoid long tails to manage later.
Round 35 :
Total dc: 408 (408). Repeat. Info: If you prefer a more lacy spread, replace every second expansion round with a 'dc, ch1, sk1' eyelet row. This will reduce bulk and increase drape.
Round 36 :
Total dc: 420 (420). Repeat. Info: Keep tension consistent and block squares flat after finishing each; blocking will help set the stitch pattern, especially for the lace rounds.
Round 37 :
Total dc: 432 (432). Repeat. Info: When alternating stripes, always complete full rounds of color before changing to avoid a jog in color bands.
Round 38 :
Total dc: 444 (444). Repeat. Info: For a vintage aesthetic, keep color changes subtle and soft; avoid high-contrast or bright colors which will alter the classic look.
Round 39 :
Total dc: 456 (456). Repeat. Info: By this stage, each round will create a noticeably larger square; double-check your layout plan to ensure you do not outgrow desired dimensions.
Round 40 :
Total dc: 468 (468). Repeat. Info: Finish an expansion set here if you plan to join squares; otherwise continue to your measured target size.
— Final Border Rounds (Detailed Edging) :
Round 41 :
Switch to 3.5mm hook if you prefer a tighter edge. With Color C, join and ch 1. Work 1 sc into each st around, placing (sc, ch 2, sc) in each corner to form a firm base for the decorative edging. Total sc: 468 sc (468). Info: A single crochet round stabilizes the outside before a decorative shell edge.
Round 42 :
Ch 1, sc in same st, *skip 2 sts, 5 dc in next st (shell), skip 2 sts, sc in next st; rep across each side, at corners work sc, ch2, sc; join. Count shells and sc placements: approximately 156 shells (156 shells considered 5-dc each). Info: Shell placement will vary slightly depending on total stitch count and any corner adjustments; place shells evenly across sides to keep corners aligned.
Round 43 :
Ch 1, sc in each sc and in top of each shell (work sc evenly into shell centers), (sc, ch 2, sc) in corners; join. Total sc: approx 468 sc (468). Info: This anchors the shell and prepares for the picot and rope rounds that follow.
Round 44 :
Ch 3 (counts as dc), *dc in next 2 sts, picot (ch 3 sl st to top of last dc) to create small points between shells, dc in next 2 sts; rep across, corners as usual (dc, ch2, dc). Total dc approx: 468 (468). Info: Picots produce a delicate vintage finish; if you dislike picots, substitute with small ch-3 loops instead.
Round 45 :
Ch 1, sc in each st around including picot loops; corners sc,ch2,sc. Total sc: approx 468 (468). Info: This neat sc round cleans up the edge and flattens the picots slightly for a polished finish.
Round 46 :
Optional: Add an extra rope round by working 1 sc, ch 1 across each stitch, then go back in FLO with 1 hdc in each ch-1 to create a raised rope. Total varied. Info: This gives the border a raised, well-defined frame similar to the photographed square's neat outer line.
Info :
Final edging tip: For a soft rounded corner as in the image, decrease the number of shells in corner areas or move shells slightly away from corners and use a 3-st sc cluster (sc, ch2, sc) in the corner to preserve rounded shape.
— Decorative Finishing Rounds (Optional) :
Round 47 :
With Color B, work 1 round of reverse single crochet (crab stitch) around for a twisted cord look. This is worked left to right: sl st into next st, then sc in each st working reverse. Total stitches equal perimeter count (approx 468). Info: This round creates a subtle twisted rope edge similar to the neat edge in the photos.
Round 48 :
Fasten off and weave in ends neatly. Info: Use a blunt needle and weave ends through the back loops of several rounds to hide them well. Trim excess yarn close to work after weaving.
— Make Multiple Squares & Join-as-You-Go (JAYG) Instructions :
Info :
Plan how many squares you'll need for your bed size. Example layouts (approximate): Twin = 3 x 4 squares; Full/Double = 4 x 5 squares; Queen = 5 x 6 squares; King = 6 x 7 squares. These depend on your finished square size; calculate using your gauge swatch.
Round 49 :
To prepare for JAYG: when you are working the final 2 rounds of a square, stop after completing a side and join the next square by slip-stitching into the side spaces of the already completed adjacent square instead of chaining across. Info: JAYG saves seams and produces a nearly invisible join when done with matching yarn and tension.
Round 50 :
JAYG step-by-step: Work the final dc cluster of the edge, ch 1, turn and sl st through matching ch-sp and side stitches of the already-made square, then continue the round on the new square. Repeat at each side junction, working corners last. Info: Practice on two sample squares to get the rhythm right; it takes practice but produces a beautiful laid-flat bedspread.
Info :
If you prefer a sewn seam: block all squares flat, line them up on a flat surface, pin or baste, and use the mattress stitch or whip stitch with matching Color C yarn for an invisible seam. Work one or two rounds of sc across the final joined perimeter to tidy the joins.
— Alternative Join & Border Rounds (Rounds 51–70) :
Round 51 :
After joining squares, work one round of sc along the entire perimeter of the assembled panel with Color C. Work (sc, ch2, sc) in panel corners. Info: This unifies the assembled squares with a single tidy border.
Round 52 :
Ch 3, *dc shell over every other st across the panel edge to create a scalloped outer border. Place shells evenly and adjust for corner spacing. Info: Use a smaller 3.5mm hook for tighter scallops if desired.
Round 53 :
Sc around to tidy shells and work a finishing crab stitch (reverse sc) to give the complete bedspread a hand-bound edge. Info: This final twisted round softens the scallops and keeps the bedding feeling vintage and refined.
Round 54 :
Optional fringe or tassel attachment: measure evenly along the edge and attach tassels or fringe every 10–15cm using Color B for a vintage look. Info: Tassels are decorative and optional; keep them light to avoid heavy draping at borders.
Info :
Blocking and finishing: Wet-block assembled bedspread panels flat, pin to exact dimensions, and allow to dry completely before removing pins. Light steam pressing is a softer alternative for cotton blends.
— Production Notes (Rounds 55–100 approximate guidance) :
Round 55 :
Continue to repeat any of the expansion or decorative rounds listed above as needed until your square or panel reaches the desired size. Each expansion round adds +12 dc to the perimeter round total. Info: Keep a notebook log of color sequences and round counts for every square to ensure uniformity across the entire bedspread.
Round 56 :
To maintain structure when making dozens of rounds, alternate 1 round of plain 3-dc expansion with 1 round of lightweight eyelet (dc, ch1, sk1) across longer builds to reduce bulk. Info: This will keep the spread drapey and comfortable on a bed.
Round 57 :
For extremely large squares, consider adding strategic reinforcement rows of hdc or sc every 10 rounds to prevent stretching over time. Info: Reinforcing rows are invisible after blocking but extend durability.
Round 58 :
If you plan to add embroidered roses or surface crochet in the centers of finished squares, do this after blocking and before joining for easier handling. Info: Embroidery should be sewn with matching yarn and secured with multiple back-and-forth stitches.
Round 59 :
When machine washing is required, pre-test a spare square for shrinkage. Cotton will shrink slightly; consider adding an extra 2–4% to your estimated size to allow for shrinkage after the first wash. Info: Use gentle wash cycles and flat-dry when possible.
Round 60 :
Final check: ensure all squares used for the project are blocked to the same size within 5mm variance. Info: Even slight size differences will cause rippling or puckers when joining many squares.
Info :
The pattern above provides a predictable, modular method to build a classic vintage-looking square. Use the counts and described expansion math to scale your work logically to any size. When in doubt, make a measurement swatch and calculate how many expansion rounds you need to reach your target dimensions.
Completing this Vintage Rose Bedspread is a wonderfully satisfying journey — each square grows from a delicate dusty rose heart into a lacy cream band framed by soft taupe that feels both cozy and elegant. Assemble many squares and watch a simple repeating motif become a beautiful heirloom piece you’ll treasure. 🧶 Take your time with the finishing rounds; the blocking and border truly make the whole project sing. Happy crocheting and enjoy the calm, meditative rhythm this project brings! 🌹✨