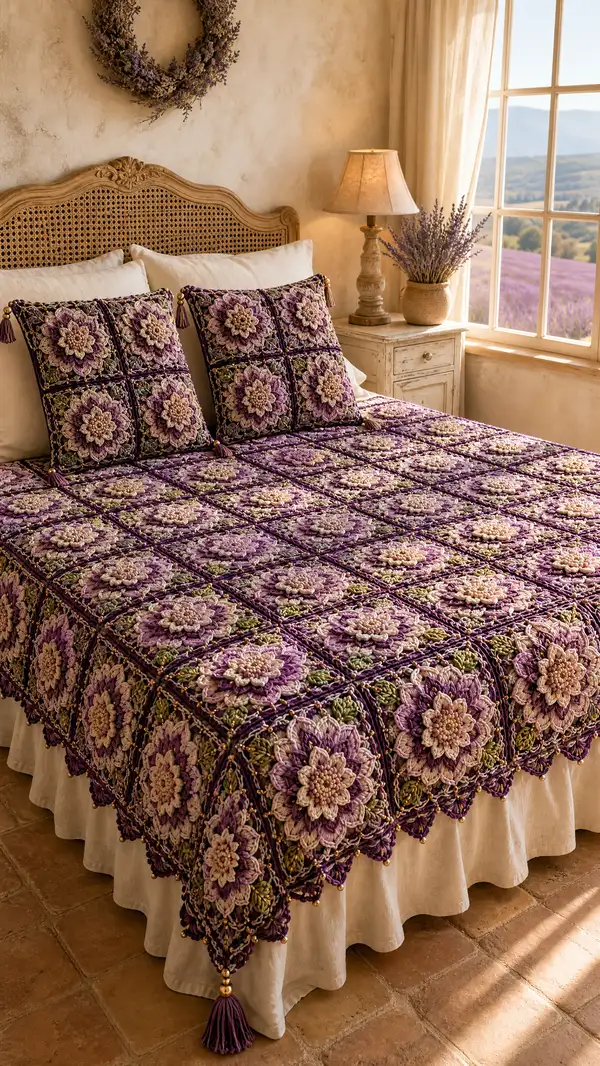
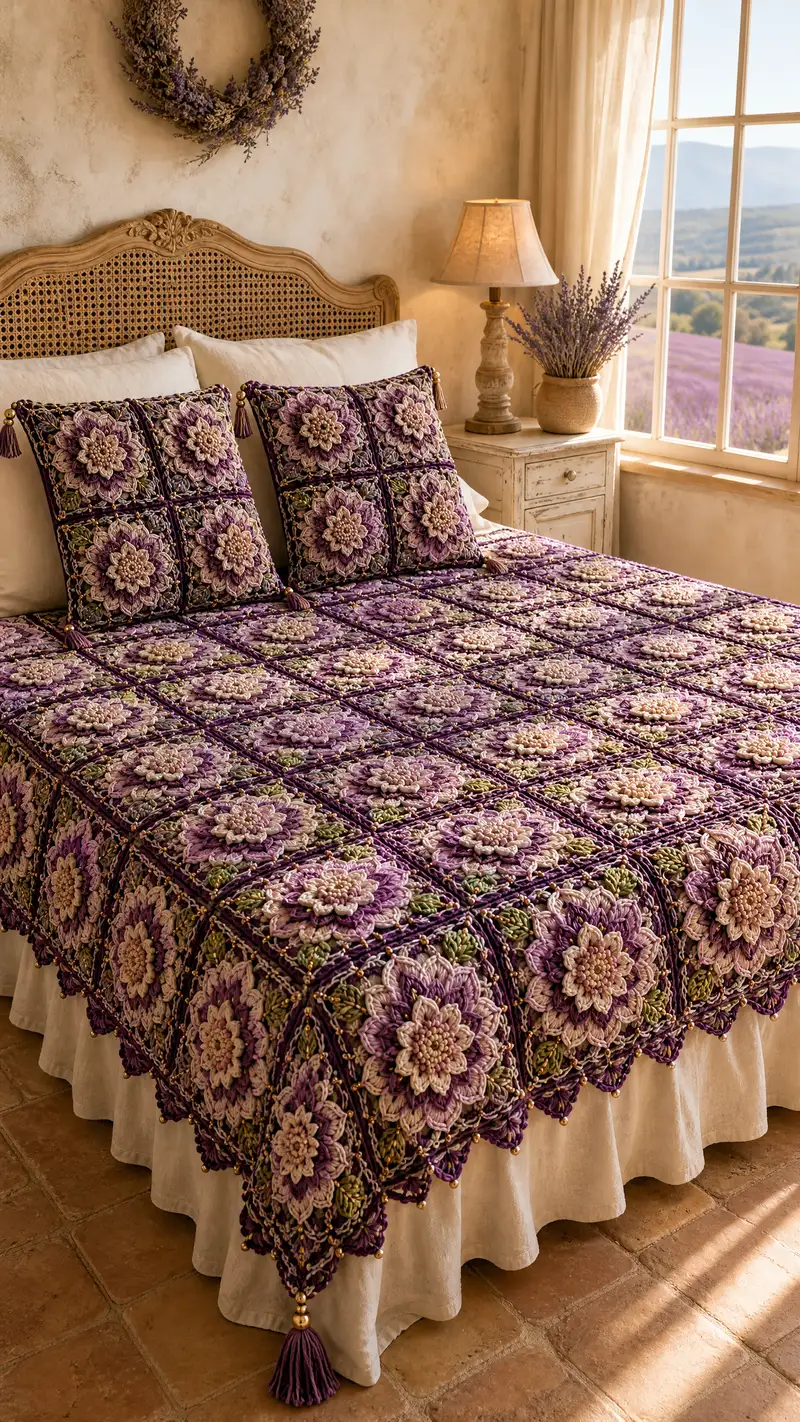
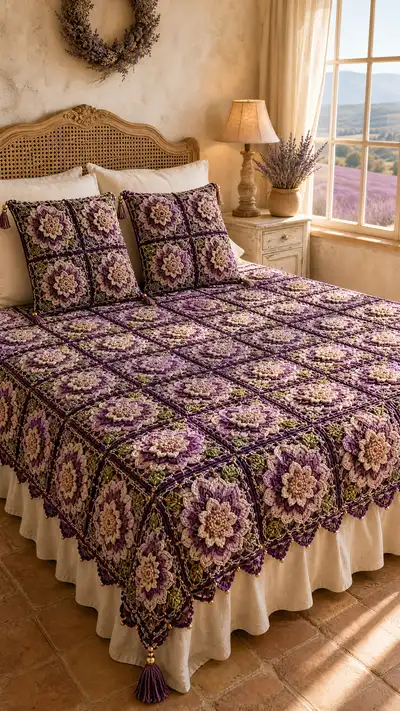
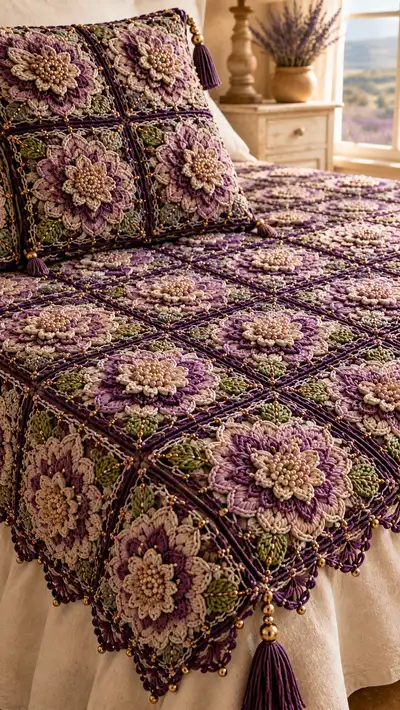
A luxurious layered granny bedspread featuring three-dimensional lavender floral motifs, delicate beading and long tasselled corners. This pattern creates a richly textured bedcover and matching pillow shams in soft purples, greens and creams. Each square is built in layers for dramatic petal depth, then joined and edged with a decorative lacy border and brass-tone beads. Detailed step-by-step instructions guide you through motif construction, join-as-you-go technique, edging, tassels and pillow finishing.
Progress Tracker
0% Complete
— Overview & Gauge :
Info :
Make a 10cm/4in square gauge by working one full motif through Round 36 using the recommended hook and yarn. Gauge is not critical for modular assembly but important for even joins and consistent bedspread size. All rounds are worked in continuous rounds unless noted. Join rounds with sl st. Work puff stitches by yarning over, inserting hook, yarning over and pulling loop through 3 or 4 times to create elongated stitches, then draw yarn through all loops and secure with a ch or sc as instructed.
— Floral Layered Motif (make one square) :
Round 1 :
Work 8 sc in magic ring (8)
Round 2 :
Inc in each st around (16)
Round 3 :
(1 sc, inc) x 8 (24)
Round 4 :
(2 sc, inc) x 8 (32)
Info :
This establishes a firm, compact center to anchor beadwork. If you plan to glue beads, place them now; for sewn beads wait until the motif is blocked.
Round 5 :
Change to cream. 1 sc in each st around (32)
Round 6 :
Work bead round: ch1, *(sl st into next st, push a 4mm bead onto thread and slide to work, ch1)* repeat around (32 beads placed) (32)
Info :
Slip-stitching beads into place creates a jewel-like center ring. Use a fine beading needle and thread to pre-string beads on a short length, and slide as you sl st so beads are secured within the round.
Round 7 :
Change to soft pink. *Ch2, puff (yarn over, insert hook, pull up loop six times total), ch2, sl st into next st* repeat 8 times into the bead ring to form 8 small puff clusters (8 petals)
Round 8 :
1 sc between each puff cluster around (16)
Info :
Keep tension slightly loose on puff stitches to let petals sit above the center. Count puff clusters to ensure an even petal ring; adjust repeats if a small count error occurs.
Round 9 :
Change to lavender. In each puff cluster work: sl st into base, ch1, (sc, hdc, dc, puff, dc, hdc, sc) to create a fuller petal; sl st to next base (8 larger petals)
Round 10 :
1 sc in each st around petals to bind and create a neat edge (56)
Info :
If you prefer a sharper petal, add an extra dc or use dtr in the center of the petal. This round creates the first depth layer so maintain consistent stitch heights.
Round 11 :
Change to plum. *(Ch3, skip 1, sl st) into next 2 stitches to create decorative loops* repeat around to add a subtle lacy ridge (56 loops)
Round 12 :
1 sc in each st and in each ch3 loop around (56)
Round 13 :
Change to lavender. Work 16 elongated puff leaves: *[skip 2 sts, work (puff in next st, ch1, puff in same st), ch1]* around placing clusters evenly to start a second petal ring (16 puff clusters)
Round 14 :
Between each puff cluster: (sc, hdc, dc) into the base of the cluster to open petals (48)
Info :
These puff cluster groups form the intermediate petal layer. Use stitch markers for the first and last cluster to ensure even spacing if the cluster count feels off.
Round 15 :
Change to soft pink. In each of the 16 cluster bases work: (sc, ch2, 3 dc shell, ch2, sc) to make pronounced sculpted petals (each shell occupies a wide area) (16 shells)
Round 16 :
1 sc around including into each ch-space of shells to tidy edges (96)
Round 17 :
Change to olive green for leaf foundation: *ch4, sl st into next st* around placement positions (24 small chain loops) (24)
Round 18 :
In each ch4 loop work: (sc, hdc, 3 dc, hdc, sc) to make small leaf motifs (24 leaves)
Info :
These leaf motifs sit between larger petals; keep them slightly flattened during work so they tuck under the next border round. Place pins to hold leaves during blocking if needed.
Round 19 :
Change to plum. 1 sc in each st around to create a uniform base (120)
Round 20 :
*(3 sc, ch3, 3 sc) forming corner cluster, 12 sc across side spaces* Repeat to create a rounded-square scaffold of 4 corner ch3 spaces (work 4 corners) (approx.120-132 depending on distribution)
Info :
This round begins the conversion of the round motif into a square approximate shape. Adjust the number of sc between corner clusters to keep the motif centered; use stitch counts to distribute evenly across sides.
Round 21 :
Change to cream. In each corner ch3 space work: (sc, ch2, 5 dc, ch2, sc) to make a pronounced corner petal cluster (4 big corner petals)
Round 22 :
1 sc around across previous stitches, working 1 sc into each dc and sc st to unify the square (approx.164)
Round 23 :
Change to lavender. Work chain arches along the side: *ch6, skip 3, sl st* repeat across each side to create a lacy side outline. Make sure corners retain the corner petals as anchors (approx. 28 arches)
Round 24 :
Into each ch6 arch work: (sc, 3 dc, sc) to create scallops and strengthen side structure (scallop count depends on arch count) (approx. 112 stitches)
Info :
At this stage, the motif has both a round floral center and a square exterior. Measure across the square diagonally and side-to-side; motifs should be within 2-3 mm of each other for even joining. Block if needed before continuing.
Round 25 :
Change to plum. 1 sc around in BLO to create a raised ridge that will help when joining the squares (112)
Round 26 :
Decorative overlay: *ch4, sl st to create corner picot clusters across sides, lay thin metallic thread over petals and chain it in with sl st at 6-8 evenly spaced points* (visual overlay, no stitch count)
Info :
If using metallic thread, carry it loosely and secure at discrete points with sl st. Do not pull tight or it will pucker the motif. This overlay is optional but gives that jewel-lined look present in the photographed bedspread.
Round 27 :
Change to cream. Work a bead accent row similar to Round 6: sl st, place small bead onto stitch, ch1, repeat around to echo the center bead ring (112 beads placed) (112)
Round 28 :
Join border foundation: ch1, 1 sc in each st around working 3 sc in each corner space to ensure squared corners (approx. 120)
Round 29 :
Decorative corner picots: In each corner area work (sc, ch3, sl st back into sc) to form small loops (4 corners)
Round 30 :
Final motif tidy: 1 sc in each st around, weave in ends and trim. Block motif to size and flatten layers with steam or wet-blocking. Final finished motif should measure approx. 18-20cm (7-8in) square depending on yarn and tension.
Info :
Many of the decorative rounds use approximate stitch counts because puff and shell stitches alter counts slightly; the counts given are target ranges and must be adjusted to keep the square regular. Count your stitches frequently and use blocking to unify size across motifs.
— Square Frame & Reinforcement (continue on each motif) :
Round 31 :
Change to plum. Work 1 sc evenly around working (3 sc, ch1, 3 sc) into each corner to beef up the corner and provide anchor for join-as-you-go (approx. 128)
Round 32 :
1 hdc in each st around to add a subtle ridge and slightly firm the square (128)
Info :
This reinforcement layer prevents corners from stretching when joined. If you prefer a flatter lay, use sc instead of hdc for this round.
Round 33 :
FLO: 1 sc in each st FLO around to create a small ridge that will highlight the square grid when assembled (128)
Round 34 :
Change to cream. *Ch5, sl st into next 2 sts to create side chain points across each side* repeat forming 4 groups of chain points per side (~16 chain points)
Round 35 :
Into each ch5 point make (sc, 5 dc, sc) to form small corner blossom points enhancing the square silhouette (approx. 160)
Round 36 :
Edge finish for motif: 1 sc in each st around. Fasten off leaving a tail for joining. Block motif carefully to exact size for assembly.
Info :
Prepare all motifs in the same manner and block them in the same orientation so that petal direction and bead positions are aligned when joining. Make as many motifs as required for your bed size: single bed typically 24-30 motifs (6x4 to 6x5), double/queen 48-56 motifs (8x6 to 8x7), king adjust accordingly.
— Join-As-You-Go & Center Panel Assembly :
Round 37 :
Place first motif RS up. Attach plum yarn to a side sc on motif A; ch1, 1 sc into same st to secure (join row start) (no stitch count)
Round 38 :
Preparing to join motif B: With motifs RS together where joining is desired, bring motif B up beside motif A. Align centers. Insert hook into next sc on motif A then into corresponding sc on motif B, work a sl st to join. Repeat sl st joins across the side with joins every 6-8 stitches to secure motifs flat (join length depends on motif size)
Info :
When joining, maintain tension equal to the motif fabric so the seam sits flat and does not pull. For stronger joins, use 1 sc through both motifs instead of sl st every other stitch, alternating sl st and sc for reduced bulk.
Round 39 :
After joining one side, rotate the work and join the next adjacent motif in the same manner until a row of motifs is joined. Add stitch markers at each seam to maintain alignment when joining rows together (no stitch count)
Round 40 :
Form grid: once two rows are joined, continue joining subsequent motifs using join-as-you-go along the side of already-joined motifs, working into the reinforcement sc row (Round 31) to ensure structural joins (no stitch count)
Info :
For larger bedspreads, assemble motifs in strips or panels then join panels together to make management easier. Press or steam panels lightly after each panel completion to keep work flat.
Round 41 :
After full grid formed, work a connecting row in plum across all seam lines: with RS up, join plum to first seam intersection and work 1 sc along seam through both motif edges working extra sc at corner intersections to create a raised lattice (approx. variable)
Round 42 :
In the lattice row work chain loops between each sc cluster: *ch6, sl st into next sc of seam* continue along all seams to form decorative openwork channels across the bedspread (variable count)
Info :
This decorative seam row replicates the dark plum linear detailing visible between square motifs in the photo. Keep spacing regular; measure the side of a finished square and divide seam loops evenly to avoid bunching.
Round 43 :
Reinforce seam lattice with a row of sc across both edges of the ch6 loops to lock them down, working 1 sc into each ch6 midpoint to anchor beads later (variable count)
Round 44 :
Thread beads onto a fine thread and secure every 2nd ch6 loop by couching a bead through the loop with sl st, or use sl st with pre-strung bead to attach them to the midpoints (variable)
Info :
Stringing beads into the seam loops gives the bedspread the tiny jewel points visible in the photos. Attach beads securely and test a corner before committing to all seams as bead counts and placements are a personal choice.
— Outer Decorative Border & Scallops :
Round 45 :
With RS up and plum yarn, join to any seam or edge stitch and work 1 sc evenly around the entire outer edge of the assembled panel. Work 3 sc in corners for sharp, square corners. This creates a base for the decorative border (work total stitches to encompass edge)
Round 46 :
Change to lavender. *1 hdc in next 2 sts, ch3, sk 2, 1 sc in next st* repeat around to create even chain arches for lace scalloping (approx. variable)
Round 47 :
Into each ch3 arch work: (sc, 5 dc, sc) to build the scalloped shell; place shells evenly around. Add 3 shells in each outer corner for rounded corners (shell count variable)
Info :
When working the shells, ensure corners receive additional shells or extra dc clusters so the border lies flat. Use blocking pins to set scallops before drying.
Round 48 :
Change to cream. Work a picot edging: *(sc, ch3, sl st into base of last sc)* across shells to create a delicate pointed edging that will pick up beads later (variable)
Round 49 :
With plum, work an overlay lattice: *sl st into back of shell base, ch10, sl st into next shell base* repeat to form long connecting chains across scallops (this creates the diamond overlay seen between squares)
Info :
This overlay forms the rope-like diamond grid visible across the bedspread. Keep chains consistent in length; shorter or longer chains will change the diamond size dramatically. Use stitch markers every 10 chains while measuring against the motif to maintain uniform diamonds.
Round 50 :
Embellish overlay: string small beads onto plumb yarn and, using the chain overlay row as anchor points, work sl st into chain midpoints securing beads evenly to give the 'gold dot' appearance. Tie off and weave ends securely at the back.
Round 51 :
Change to olive green. Work leaf clusters between scallops on the border by making small two-row leaf petals: ch4, sl st back into base, then in next row work sc, hdc, 3 dc, hdc, sc across each leaf. Place leaves at 3-5 regular points depending on border length (variable)
Round 52 :
Edge reinforcement: with plum, 1 sc in each st around including into picot tips, placing 3 sc in corners to stabilize. Fasten off leaving long tail for tassel attachment points (approx. variable)
Info :
After this row, the blanket edge is stable and ready for tassels. Block the full bedspread flat and verify that border scallops are even and diamond overlays are not twisted. Make adjustments before final finishing.
— Tassels, Beads & Corner Finishing :
Round 53 :
Create tassel bundle: Wind main plum yarn around a 10cm/4in cardboard 60 times for a medium-thick tassel. Remove, tie top with short yarn tail and attach bead string as below (no stitch count)
Round 54 :
Attach tassel to corner: fold tassel tie into a loop and pull through outermost corner sc, pass ends through loop to secure (lark's head) and tighten so tassel hangs neatly from corner picot. Repeat for all four corners and additional side points if desired.
Round 55 :
String beads: Attach a strand of 3 brass-tone beads to the top of tassel using strong thread, slide beads to top of tassel, knot thread and secure by sewing into corner area. Add a bead above the corner picot on each corner for symmetry (no stitch count)
Info :
Select bead sizes and weights according to how you want tassels to hang; larger beads will pull corners down and create more drape. Test one tassel first before completing all corners to ensure balance.
Round 56 :
Trim tassel ends evenly and wrap a small decorative yarn wrap at top to hide knots. Secure wrap with a dab of fabric glue if needed, then weave in all ends into the back of the border.
Round 57 :
Optional final sheen: lightly tack metallic thread across highlight points using tiny sl st or couching to accent petal edges and overlay chains, then steam lightly to set (no stitch count)
Info :
All finishing touches (beads, tassels, metallic thread) are optional but they contribute to the jewel quality of the spread. Secure beads and tassels thoroughly if the piece will be used frequently.
— Pillow Shams (Make 2 fronts, 2 backs each) :
Round 58 :
Arrange four motifs RS up in 2x2 square for a pillow front. Join them using join-as-you-go method described in Rounds 37-44 so there is a neat plum seam around and between motifs. Fasten off and weave in ends.
Round 59 :
Edging around sham: with plum, join at outer edge and work 1 sc around entire 2x2 panel, placing 3 sc in each outer corner for firmness (approx. variable)
Round 60 :
Change to lavender and work 2 rounds of scallop shells across the edge: round 1 shells: (sc, 5 dc, sc) into chain arches; round 2 shells: into each previous shell work (sc, 7 dc, sc) for a plump decorative border (variable stitch counts)
Round 61 :
Make a backing: using plum yarn create a rectangle of sc rows to match the finished 2x2 front measurements plus 1.5cm seam allowance. Join backing to front by sewing an invisible whip stitch or by crocheting 1 round sc through both layers, leaving one side open for insert (no stitch count)
Round 62 :
Insert pillow form and close opening with slip-stitch or sew closed using tapestry needle. Attach small tassels and bead accents at the four corners of the sham using method described in Rounds 53-55.
Info :
For an envelope closure, make the backing slightly larger and overlap the back panels by one third, finishing the edge with a tidy sc row. Alternatively add a zipper or buttons as preferred.
— Final Finishing & Care :
Round 63 :
Weave in all tail ends on the wrong side using a tapestry needle, burying ends across multiple stitches for security. Trim excess yarn carefully.
Round 64 :
Final blocking: wet block the full bedspread on a flat surface, pinning scallops and diamonds in place. Allow to dry completely before removing pins.
Round 65 :
Light steam: using a steam iron held above the piece, lightly steam to set shape if safe for the yarn fiber. Avoid pressing directly on beads or metallic thread.
Info :
Label the underside with a small sewn tag describing fiber content and care instructions: hand wash cool, reshape and dry flat to preserve shape and bead finishes.
This layered floral bedspread combines sculptural crochet techniques with delicate beadwork to create a truly special heirloom. Each square blossoms with layered petals and jewel accents, assembling into a luxurious cover that transforms your bedroom. The matching shams and tasseled corners make the final result sumptuously coordinated. 🧶✨ Try it in your favorite colorway and enjoy the slow, rewarding process of making something beautiful by hand. 🌸