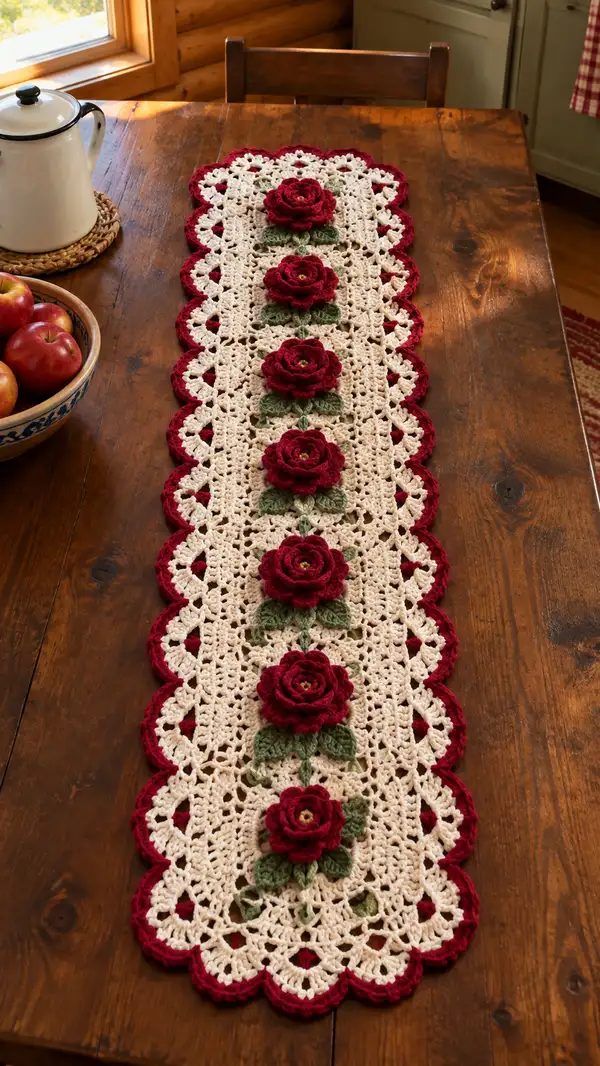
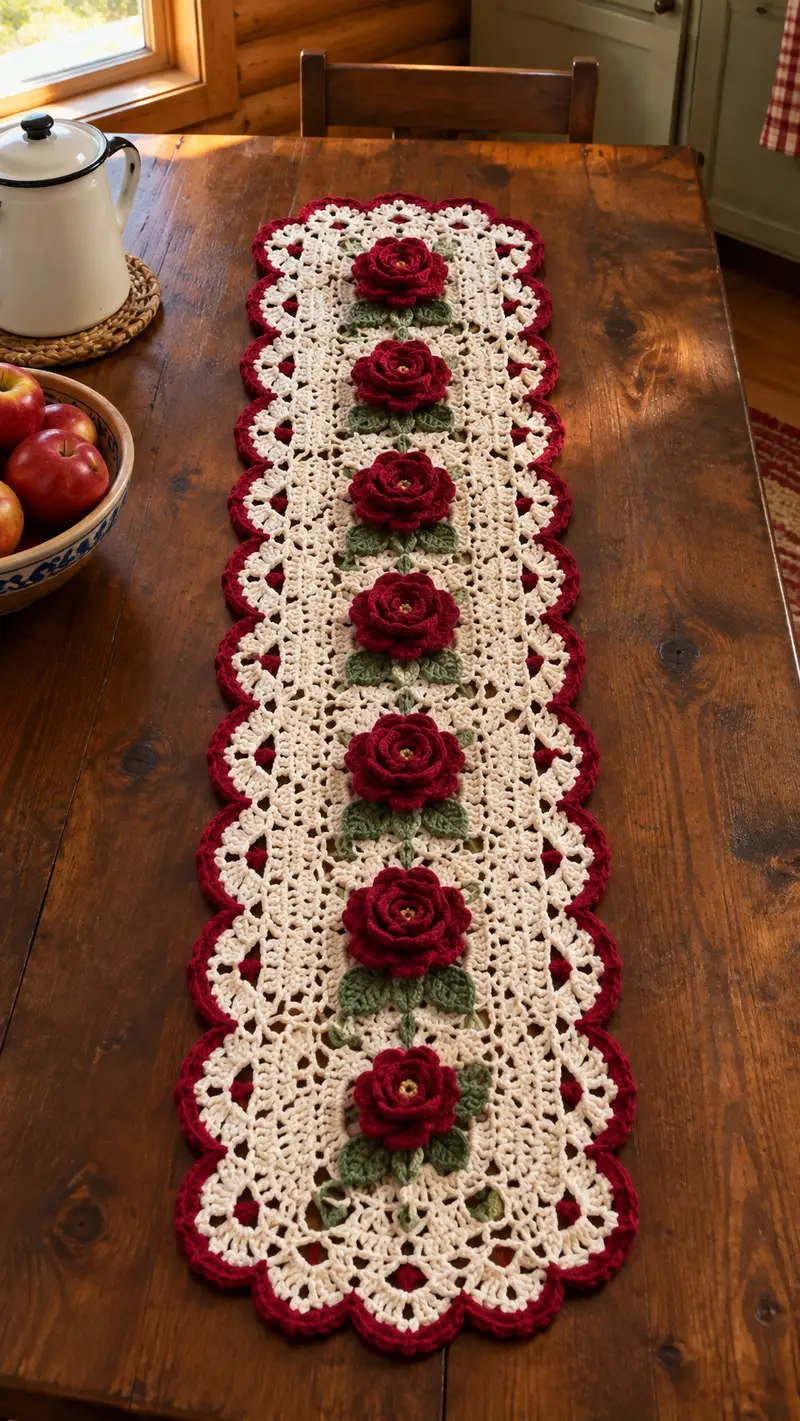
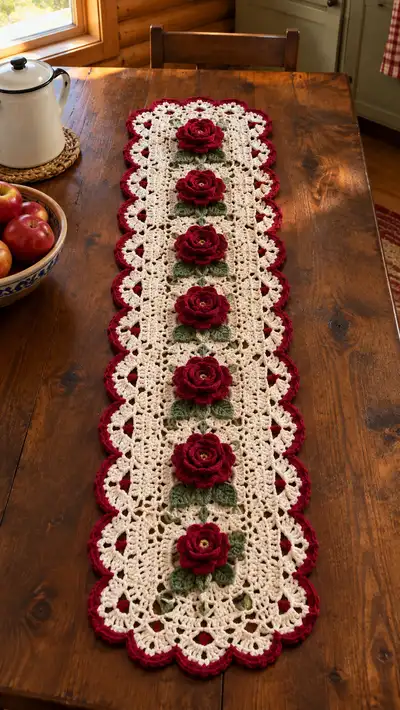
This elegant table runner features a lacey cream base embellished with five dimensional crimson roses and soft green leaves. The runner has scalloped crimson edging, delicate openwork panels, and a central vine motif connecting the roses. The finished piece adds a vintage, romantic touch to dining tables and sideboards.
Progress Tracker
0% Complete
— Notes & Gauge :
Info :
Gauge is not critical for this decorative runner, but sample gauge helps maintain proportion. 16 dc and 8 rows = 4in using 4.0mm hook in cream yarn. Because this runner is long and lacey, consistent tension is important to produce even openwork. This pattern is written in 'round' style so repeat blocks read consistently across the rectangle.
— Materials & Preparation :
Info :
Prepare yarn bobbins or small cakes for each color to maintain tidy work. Block the lace panel flat before attaching roses and edging for best results. Work roses and leaves separately then attach.
— Foundation Row & Central Panel (work as joined rounds across long rectangle) :
Round 1 :
Ch 129, join with sl st to first ch to form a long ring (you will work motifs around this foundation). For ease, mark the first ch position with a removable stitch marker (129 chains)
Round 2 :
Ch3 (counts as dc), dc in same ch, *sk 2 ch, (3 dc, ch2, 3 dc) in next ch (shell), sk 2 ch, dc in next 3 ch; rep from * across to last 1 ch, join with sl st to top of ch3 (pattern forms first row of shells)
Round 3 :
Ch3, dc in next dc, *in ch2-sp of shell make (3 dc, ch2, 3 dc), dc in next 3 dc; rep from * across, join (even shell repeats form alternating openwork)
Round 4-7 :
Repeat Round 3 for a total of 6 rows of shells to create a sturdy lace band (keeps width stable)
Info :
These first six rounds form the anchor bands at each end of the runner and generate the scalloped loops visible under the crimson border. Keep tension even so shells are uniform.
Round 8 :
Ch3, dc in next 3 dc, *ch1, sk next small sp (between shells), dc in next 3 dc, ch1, sk sp, (3 dc,ch2,3 dc) into next ch2-sp; rep across, join (creates alternation of shells and straight dc groups)
Round 9-14 :
Work 6 rounds even as Round 8 to build the central lace field. Keep counts consistent; there should be 21 shell spaces across the width (counts vary by initial chain length—maintain shell placement)
Info :
Mark the center line along the runner with stitch markers (place markers at top and bottom of center shell around Round 9). This center line is where roses will align. There should be five equidistant shell clusters along the center that will receive roses; use markers to indicate these positions now.
Round 15 :
Ch3, dc in next 3 dc, *ch1, sk ch1 space, dc in next 3, ch1, (3 dc,ch2,3 dc) in next ch2-sp; rep across, join
Round 16-22 :
Repeat Round 15 for seven rounds to raise the main field high enough to support rose attachments (this creates about 8-10 rows between rose centers). Keep markers aligned to check that center repeats remain straight
Info :
If you prefer a slightly wider runner, add extra repeats of Round 16. To shorten, subtract repeats before attaching roses. Keep symmetry for even rose spacing.
Round 23 :
Ch1, sc evenly around whole rectangle working 2 sc in each shell's outer dc tip to maintain corners and add stability; join with sl st (this creates a stable frame to anchor vine stitches)
Round 24-32 :
Work 9 rounds of filler lace: Ch3, *dc in next 2 sts, ch2, sk 2 sts, dc in next 3; rep across, join. These rounds create vertical openwork columns where the vine will be embroidered to connect roses (9 rounds)
Info :
After Round 32 the panel should measure approximately 46-50 inches long depending on your tension. If you want extra length, add repeats of Rounds 16-22 before continuing to edging rounds. Place pins and block panel flat now for easier rose placement.
— Rose Construction (Make 5) :
Round 1 :
Using crimson yarn and 3.5mm hook: 6 sc in magic ring (6)
Round 3 :
(1 sc, inc) x6 (18)
Info :
Use a smaller hook for roses if you want tighter, more defined petals. Leave a long tail for sewing later. Keep rounds tight so petals hold shape.
Round 4 :
(2 sc, inc) x6 (24)
Round 5 :
(3 sc, inc) x6 (30)
Round 6 :
Ch2, *in next st work (dc, tr, dc) to make a tall petal, sl st in next st; rep around in each st to form a petal ridge; join to first sl st (15 petals made, petal ridges sit around center)
Info :
Round 6 shapes the first petal layer. Keep petals slightly loose so later rounds can curve them upward. Do not stuff; roses are flat base spirals that curl naturally when seamed.
Round 7 :
Working into the back bumps of Round 6 petals: (ch3, 3 dc, ch3, sl st) into the space at the base of every other petal to create larger outer petal bases; rep around for 8 larger petals (approx 8-10 large petal bases depending on spacing)
Round 8 :
In each large petal base work: (sc, hdc, 3 dc, hdc, sc) to form full rounded petal. Fasten off and leave long tail for sewing. (8 large petals)
Info :
Create a spiral by sewing the flat spiral center onto itself slightly off-center to mimic rose bloom depth. Use the long tail to stitch through the base and pull to form 3D shape.
Round 9 :
Optional extra petal round: With crimson, join in spaces between large petals and make small raised petals by (ch2, 5 dc, ch2, sl st) into each gap to fill any visible base and increase fullness. Fasten off leaving long tail (8 micro-petals)
Round 10 :
Optional center: Embroider tiny french knot-like cluster with golden yarn into the very center or place a small seeded bead and secure with matching thread. Fasten off and weave ends (center detail)
Info :
Make five roses identical in size. Block gently on a flat surface if petals curl too severely. Do not over-starch — subtle curling adds a natural look.
— Leaf Unit Construction (Make 10 or as needed) :
Round 1 :
Using green yarn and 3.5mm hook: Ch8, sc in 2nd ch from hook, hdc, dc, tr, dc, hdc, sc to form leaf on one side; working down opposite side of foundation ch: sc, hdc, dc, sl st to join at base (approx 14 sts total, 1 leaf)
Round 2 :
Turn leaf and work small picot edges: *sc in each st around, in tip ch make (sc, ch3, sl st in 3rd ch) for slight point, continue around, sl st to base and fasten off leaving long tail for attachment
Info :
Leaves are worked single-layer and sewn flat beneath roses. Make two leaves per rose cluster (one on each side of vine) and a few spare for later filling. Spray-block leaves lightly to shape.
— Vine & Stem Embroidery (worked on panel) :
Round 1 :
Using green yarn, with yarn needle stitch a simple chain-stitch vine along the center markers: bring yarn from back at the bottom center marker, make chain-stitch loops across central column aligning to shell spaces until top marker reached
Round 2 :
Embroider short side twig stitches from the main vine to mark leaf placements; secure yarn and weave ends to back when vine is complete
Info :
Place vine so each rose will sit neatly over a central shell space. Use removable pins to test placement of flowers before final sewing. Keep vine slightly raised by using chain stitch rather than flat sl st for a dimensional look.
— Attaching Roses & Leaves :
Round 1 :
Position first rose on bottom center marker; pin in place so the base sits in the center of a shell opening. Using long tail, whip stitch through cream base and rose foundation turning the rose slightly as you attach to create fullness. Make 10-14 evenly spaced stitches around the base (secure firmly)
Round 2 :
Sew two leaves under each rose on either side of the vine; stitch leaf bases to the panel and to the vine threads so they appear to emerge naturally. Use small stitches through leaf base only to avoid visible front stitches
Info :
Attach all five roses evenly spaced. Typical spacing between rose centers is 8-10 shell repeats depending on runner length; use markers to ensure even distribution. Turn runner over frequently to keep attachment tidy on reverse.
— Border Preparation & Crimson Scalloped Edge :
Round 1 :
With cream yarn, sc evenly around entire panel edge, placing 3 sc in outer points of shell tips to maintain scallop shape; join with sl st (this reinforces edge and creates a nice base for crimson scallop)
Info :
Count stitches as you go so the scallop rounds will align on both long sides. Adjust spacing by adding or removing 1-2 sc in corners to keep scallops even.
Round 2 :
Change to crimson yarn. Join with sl st to first sc. *Ch1, (sc, ch2, sc) into the top of each shell tip to form small picot pairs across the edge; rep across to build a crimson picot foundation (picot pairs reinforce scallop)
Round 3 :
Working in the ch2-sp of each pair: make (5 dc, sl st) to create a scallop; rep across, join. Each scallop will be centered on the cream shell making a rich crimson border (scallops formed)
Round 4 :
In between scallops, make small cluster: sl st to midpoint, (sc, hdc, sc) to tidy the joins; fasten off and weave ends
Info :
For an even deeper crimson edge, repeat Round 3 into the outermost dc of scallops to add a second tier of crimson layers. Block scallops gently to open each curve evenly.
— Detailed Round-by-Round Lace Field Expansion (Additional structural rounds to reach target length and texture) :
Round 33 :
Return to cream yarn and work Ch3, dc in next 3, *ch2, sk 2, (3 dc,ch2,3 dc) in next ch2-sp of long center field; rep across, join (this reopens field for texture; counts stable)
Round 34-38 :
Repeat Round 33 five times to add vertical height and to create space for a decorative runner pattern between rose rows (5 rounds)
Info :
If your runner is shorter than pictured, stop here and begin edging; if longer, repeat these rounds until desired length is reached before proceeding to border reinforcement.
Round 39 :
Ch1, sc evenly in each st around, placing (sc, ch2, sc) in shell tips to reinforce outer shells; join
Round 40 :
With crimson yarn, slip stitch into each outer sc and work (sc, ch1, sc) in each reinforced shell tip to reestablish crimson outline before final scallops (this gives visible small crimson diamond motifs in outer shell holes)
Round 41-44 :
Work 4 rounds of finishing texture in cream: (ch3, dc2tog over next 2 sts, ch1, dc in next 2) rep across to build a soft raised lattice over the length; join each round (4 rounds)
Info :
These rounds add subtle texture near the roses so the floral clusters sit on a slight cushion, helping the roses to appear integrated. Keep stitches relaxed; do not stretch panel during these rounds to avoid distortion.
— Final Scalloped Edge Round (detailed) :
Round 45 :
With crimson yarn, join at an outer shell tip. *Ch1, sc around the outer loop of each cream shell foundation, then into the ch2-space make (sc, ch3, sc) to deepen the scallop; rep across long sides and ends. Each scallop base will have an inner ch3 loop for final shell petals (counts vary but keep scallop symmetry)
Round 46 :
In each ch3-sp work (3 dc, ch2, 3 dc) then sl st to next scallop base; repeat to form pronounced scallops (scallops formed)
Round 47 :
Edge finish: Sl st around outermost scallops into ridges, then (sc, picot, sc) in the top of each scallop to create crisp tips; fasten off and weave ends. Block to open scallops evenly (edge complete)
Info :
Blocking the entire runner while the scallop edge is wet will ensure even curves. Pin each scallop to identical spacing so the finished runner lies flat.
— Alternate Rose Detail (if you want deeper bloom) :
Round 1 :
Create a secondary rose by making an extra petal tier: after Round 8, join crimson in backs of large petals and make (ch2, 7 dc, ch2, sl st) in every other petal space to create very full outer petals; this adds 1-2 rounds per rose
Round 2 :
Sew extra tier into underlying petal bases and adjust leaf positions so outer petals overhang slightly onto scalloped edge for dramatic effect
Info :
Use this option only if you want the roses to be very prominent. It increases weight at the center so ensure secure sewing and consider a light dab of fabric glue at the base for long-term stability.
— Finishing Touches :
Round 1 :
Weave in all ends from back using yarn needle. Check that each rose is seated symmetrically and adjust by tightening a running stitch at base if necessary
Round 2 :
Steam block very lightly from the front to set petals without flattening; use a pressing cloth to protect yarn fiber. Allow to dry fully pinned to blocking board
Info :
If desired, add a tiny dab of golden yarn or a bead sewn into the center of each rose for a vintage highlight. Secure beads through multiple stitches and knot on the back for safety.
Round 3 :
Final inspection: ensure no loose stitches, edges are even, and roses and leaves are secure. Store or display flat to maintain shape.
This Crimson Rose on Cream Table Runner brings together delicate lacework and dimensional flowers for a timeless centerpiece. The layered petals and scalloped crimson edge create a romantic accent that dresses any table with hand-crafted charm. Enjoy the meditative process of building each rose and shaping the lace; the result is a beautiful heirloom-style runner to treasure or gift. 🧶🌹