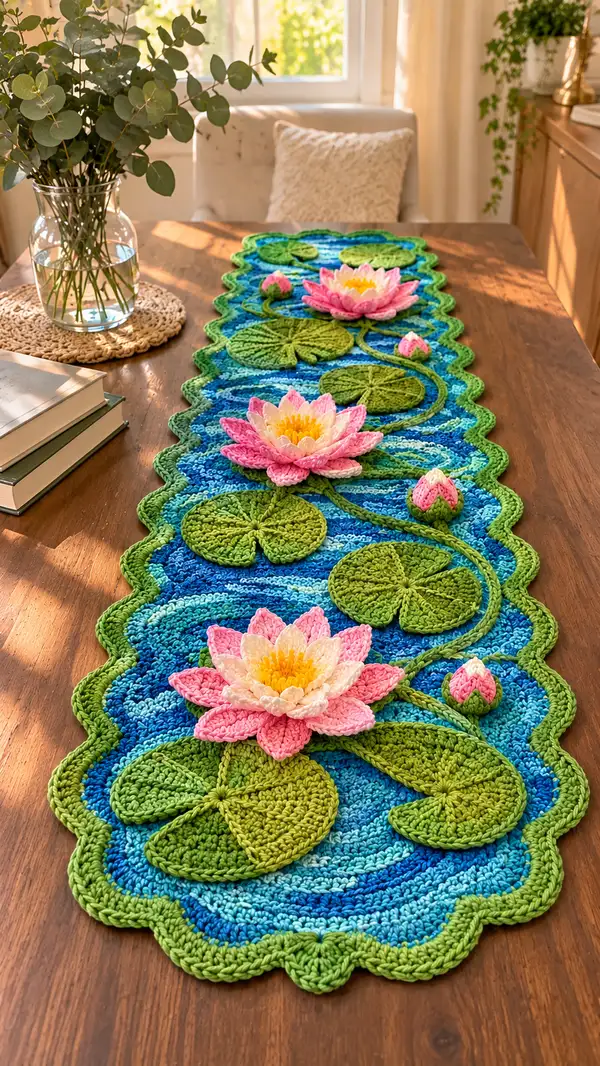
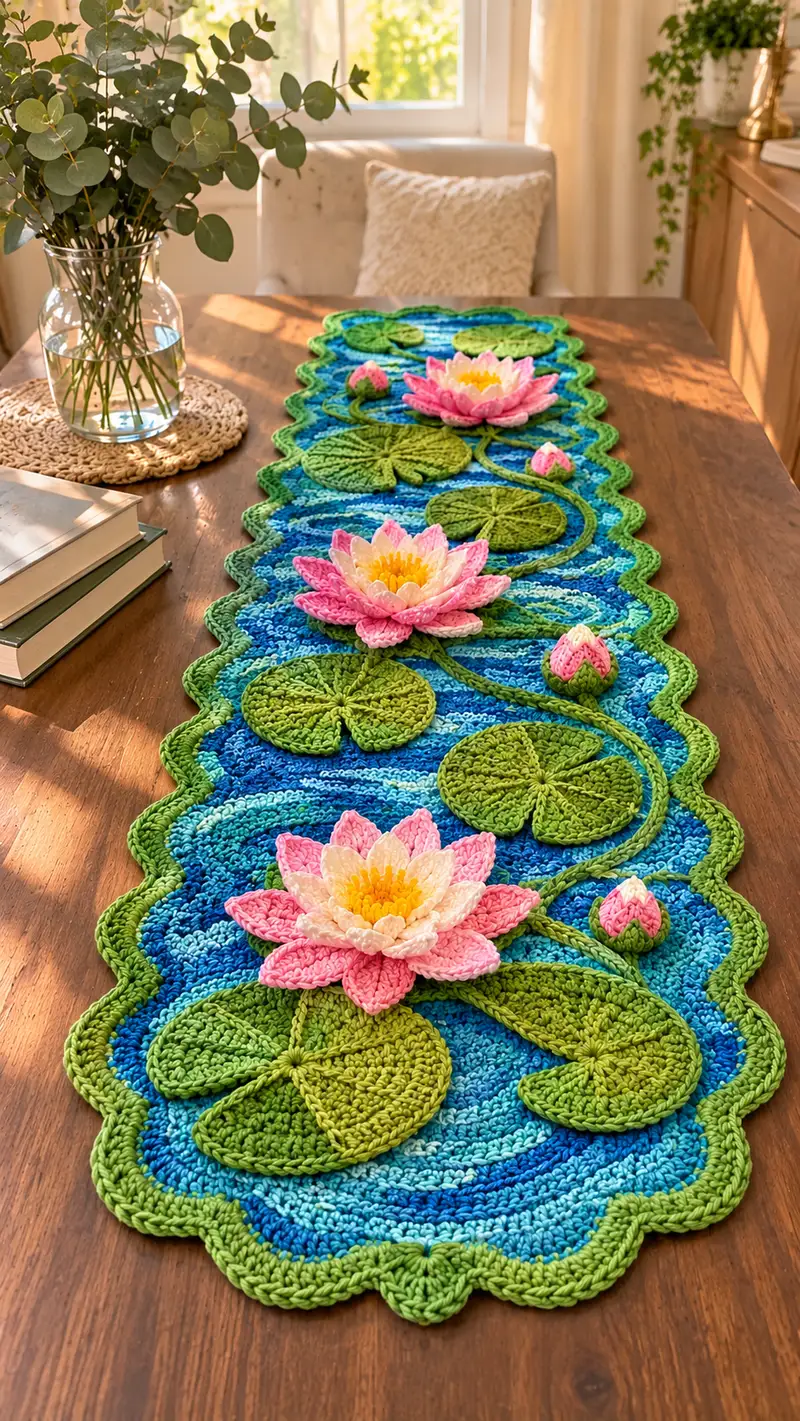
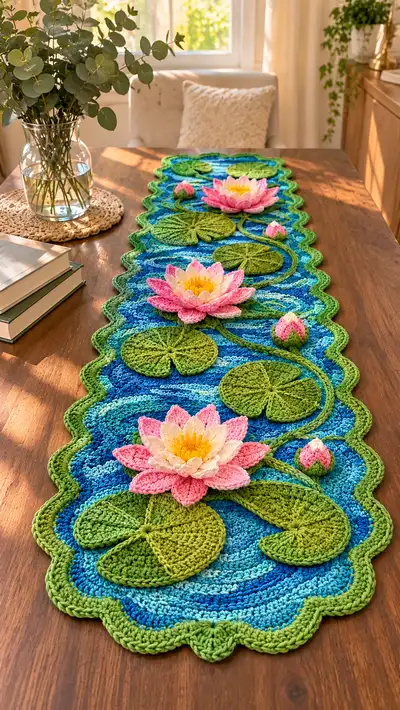
Bring a serene pond to your table with this Water Lily Pond Table Runner pattern. The design features a textured variegated blue "water" background, scalloped green border, layered lily pads, curling vines, and sculptural 3D water lilies and buds in shades of pink and yellow. This pattern includes step-by-step instructions for the background oval, scalloped edging, lily pads, large layered blossoms, small buds, vines, and assembly tips to place blooms for a natural, flowing composition.
Progress Tracker
0% Complete
— Pond Base (Background Oval) :
Round 1 :
6 sc in magic ring (6)
Round 3 :
(1 sc, 1 inc) x 6 (18)
Round 4 :
(2 sc, 1 inc) x 6 (24)
Round 5 :
(3 sc, 1 inc) x 6 (30)
Info :
Start with variegated blue yarn for the water. Work tightly so fabric does not gap; use a stitch marker to mark the first stitch of each round
Round 6 :
(4 sc, 1 inc) x 6 (36)
Round 7 :
(5 sc, 1 inc) x 6 (42)
Round 8 :
(6 sc, 1 inc) x 6 (48)
Round 9 :
(7 sc, 1 inc) x 6 (54)
Round 10 :
(8 sc, 1 inc) x 6 (60)
Info :
By Round 10 you have formed a round that will begin to flatten; we will convert the increasing circular motif into an elongated oval by adding extra rounds at the two opposite ends only—this creates length eventually for a runner
Round 11 :
(9 sc, 1 inc) x 6 (66)
Round 12 :
(10 sc, 1 inc) x 6 (72)
Round 13 :
(11 sc, 1 inc) x 6 (78)
Round 14 :
(12 sc, 1 inc) x 6 (84)
Info :
Change to a second variegated blue if you want more contrast in water. Carry the unused yarn along the wrong side or fasten off and join cleanly to avoid bulk
Round 15 :
(13 sc, 1 inc) x 6 (90)
Round 16 :
(14 sc, 1 inc) x 6 (96)
Round 17 :
(15 sc, 1 inc) x 6 (102)
Round 18 :
(16 sc, 1 inc) x 6 (108)
Round 19 :
(17 sc, 1 inc) x 6 (114)
Round 20 :
(18 sc, 1 inc) x 6 (120)
Info :
At this stage you have a large round of 120 sts. To elongate the piece without changing stitch count drastically, we will work a series of even rounds and then add short increase rows only at the two opposite ends of the oval; use stitch markers to mark the long sides (left/right) and ends (top/bottom) so you can add shaping consistently
Round 21-28 :
1 sc in each st (120)
Info :
Make 8 even rounds to build height; keep tension constant. These rounds form the central area of the runner; if you prefer a longer runner add more even rounds here
Round 29 :
Work 1 sc in next 18 sts, 1 inc in next 2 sts, 1 sc in next 62 sts, 1 inc in next 2 sts, 1 sc in remaining 18 sts (122)
Info :
Rounds 29-34 add small increases at the two ends of the oval only to elongate the runner lengthwise—this technique expands two opposite arcs and keeps sides stable
Round 30 :
1 sc in next 20 sts, 1 inc in next 2 sts, 1 sc in next 58 sts, 1 inc in next 2 sts, 1 sc in remaining 20 sts (124)
Round 31 :
1 sc in each st (124)
Round 32 :
1 sc in next 22 sts, 1 inc in next 2 sts, 1 sc in next 56 sts, 1 inc in next 2 sts, 1 sc in remaining 22 sts (126)
Round 33 :
1 sc in each st (126)
Round 34 :
1 sc in next 24 sts, 1 inc in next 2 sts, 1 sc in next 52 sts, 1 inc in next 2 sts, 1 sc in remaining 24 sts (128)
Round 35-44 :
1 sc in each st (128)
Info :
Work 10 rounds even to build the long central stretch of the runner—the number of rounds here controls length; add or remove even rounds to adjust runner length to your table
Round 45 :
1 sc in next 26 sts, 1 dec over next 2 sts, 1 sc in next 54 sts, 1 dec over next 2 sts, 1 sc in remaining 26 sts (126)
Round 46 :
1 sc in each st (126)
Round 47 :
1 sc in next 24 sts, 1 dec over next 2 sts, 1 sc in next 56 sts, 1 dec over next 2 sts, 1 sc in remaining 24 sts (124)
Round 48 :
1 sc in each st (124)
Round 49 :
1 sc in next 22 sts, 1 dec over next 2 sts, 1 sc in next 58 sts, 1 dec over next 2 sts, 1 sc in remaining 22 sts (122)
Round 50 :
1 sc in each st (122)
Info :
These decreasing rounds subtly taper the ends back toward the rounded scalloped edge; we aim to finish the base with an even edge that will take scallops nicely
Round 51-56 :
1 sc in each st (122)
Info :
Finish the pond base to the desired size by working 6 even rounds here; if you need a wider border, work additional rounds before beginning the scalloped edging
— Scalloped Border :
Info :
Switch to bright leaf green for scalloped border. We will create a rounded scallop that follows the oval edge. Work a single round of single crochet to prepare the edge, then a scallop round using shells
Round 1 :
Join green in any stitch; ch1, 1 sc in each st around, join with sl st to first sc (122)
Round 2 :
(Ch1, skip 2 sts, 7 dc in next st, skip 2 sts, sl st in next st) around to create scallops; adjust spacing so scallops sit evenly (approx 40 scallops)
Info :
For a neater finish work Round 2 in FLO of the previous round to give scallops a defined edge. Adjust the number of dc in shells to alter scallop size
Round 3 :
Work 1 sc in each st across scallop round joining on top of shell posts to tidy the edge and flatten shells (approx 122)
Round 4 :
Finish with an edging round: (sc in next 3 sts, picot or ch3 sl st in next st) around for decorative points; fasten off and weave in ends
Info :
Block the runner gently before attaching motifs to ensure scallops sit evenly. Use steam or damp blocking suitable for yarn fiber
— Lily Pads (Make 6) :
Info :
Each lily pad is worked in the round using two shades of green for variation. We'll make 6 large pads and 2 smaller pads if desired; adjust counts for size
Round 1 :
6 sc in magic ring (6)
Round 3 :
(1 sc, 1 inc) x 6 (18)
Round 4 :
(2 sc, 1 inc) x 6 (24)
Round 5 :
(3 sc, 1 inc) x 6 (30)
Info :
Change to a lighter or darker green on Round 5 for a subtle shaded pad. Work tightly so pads hold shape without stuffing
Round 6 :
(4 sc, 1 inc) x 6 (36)
Round 7 :
(5 sc, 1 inc) x 6 (42)
Round 8 :
1 sc in each st (42)
Round 9 :
1 sc in next 6 sts, hdc in next 6 sts, dc in next 12 sts, hdc in next 6 sts, sc in remaining 12 sts (42)
Info :
Use alternating stitch heights to create subtle ridges resembling pad texture. You can add a surface stripe with tapestry crochet or chain-and-slip stitch lines to mimic veins
Round 10 :
BLO: 1 sc in each st BLO for a defined rim (42)
Round 11 :
Fold a small wedge to create a pad notch (the typical pad cut) by skipping 6 sts and sl st to next st; in the skipped area work sc along edge to produce a dipped notch—approx shape is formed (36)
Info :
If you want firmer pads, place a thin layer of felt or a bit of fiberfill underneath and sew shut before appliquing to the runner
Round 12 :
Decorative radial ridges: from center use surface slip stitch spokes (6-8 spokes) evenly spaced; tie off and weave in ends
Round 13 :
Fasten off leaving 20-25cm tail for sewing (if making larger or smaller pads, adjust rounds 6-11)
Info :
Block round pads flat on a board to open up the stitches and create a classic lily-pad look before attaching to the pond
— Lily Flower (Large - Make 3) :
Info :
Each large water lily is a layered assembly: central small yellow cone, inner small petals (cream/white), then two to three outer petal rounds in pink shades. We'll build a petal base disc and then work petal clusters around the disc. Use smaller hook (3.25mm) for crisp petals
Round 1 :
6 sc in magic ring with yellow (6)
Round 3 :
(1 sc, 1 inc) x 6 (18)
Round 4 :
1 sc in each st (18)
Info :
This small yellow center will be lightly stuffed; start stuffing lightly now with a small tuft—do not overstuff to allow petals to sit around it
Round 5 :
(2 sc, 1 inc) x 6 (24)
Round 6 :
1 sc in each st (24)
Round 7 :
Change to cream or pale yellow; ch1, *sc in next st, ch3, skip 1 st*, rep around to make petal base loops; join (24 loops)
Info :
Petal bases are formed by working loops which we will then work petals into. Keep these loops evenly spaced; they will determine petal count
Round 8 :
Work petals into each ch3 loop: (sc, hdc, 3 dc, hdc, sc) in each ch3 loop around (24 petals)
Round 9 :
Fasten off cream and change to light pink; in between petals of Round 8 work small outer base ch2 loops at staggered position to form next petal row (24 loops)
Round 10 :
Work larger petals into new loops: (sc, hdc, 5 dc, hdc, sc) in each loop (24 larger petals)
Info :
Use a lighter pink for inner row and a brighter pink for outer rows to create a gradient. Keep petals slightly cupped by blocking or shaping with light steam
Round 11 :
Stagger and attach another round of petals behind the previous: join deeper pink, ch2, *sl st between two petals, ch2* around to create 24 anchor points
Round 12 :
Work full petals in bright pink into each anchor point: (sc, hdc, 7 dc, hdc, sc) (24 petals)
Round 13 :
Work an outermost decorative row of slightly longer petals if desired: join paler pink at petal tips and sc around tips to tidy and shape
Info :
Trim and shape petals: snip yarn tail and tuck ends; the layers should sit so the inner petals slightly overlap to form a realistic blossom. Place a small bit of stuffing into the center before completing outer petals
Round 14 :
Sew the yellow center into the flower center (use the long tail left from the center rounds), anchoring through the flower disc to secure
Round 15 :
Lightly steam-block each flower and cup petals upward to achieve a lifelike bloom; fasten off and weave ends
Info :
For extra realism add a small fringe of short stitches (sl st clusters) in yellow around the yellow cone to mimic stamens
— Small Lily Buds (Make 3-4) :
Info :
Buds are worked as tiny teardrop cones in pink with a small green base; they are lightly stuffed and sewn to the surface
Round 1 :
6 sc in magic ring (6)
Round 3 :
(1 sc, 1 inc) x 6 (18)
Round 4 :
1 sc in each st (18)
Round 5 :
Change to pink; (2 sc, 1 dec) x 6 (12)
Round 6 :
1 sc in each st (12)
Round 7 :
(1 sc, 1 dec) x 4 (8)
Info :
Stop stuffing early so the bud remains pointy and slightly collapsible. Close with sl st and leave tail to sew to pond
Round 9 :
Fasten off leaving long tail. Use green to make a small calyx: make 5 sc around base and sl st to attach
— Curled Vines and Tendrils :
Info :
Vines are made by working long thin cords in green using a tubular technique or i-cord style chain and single crochet to create rope-like tendrils that can be curved and sewn in flowing lines
Round 1 :
Ch 60 (or length desired), join with sl st to form a cord; or work foundation sc 60 for thicker cord
Round 2 :
Optional: Work 1 sc in each ch for a thicker rope (60)
Info :
Make several vines of different lengths (approx 3 x 60, 2 x 40, 2 x 20) so they can snake around and connect flowers and pads naturally
Round 3 :
Finish cords and fasten off with long tails for sewing; lightly block to relax the cord so you can shape it
— Small Decorative Leaves (Make 4-6) :
Round 1 :
Ch8, 1 sc in 2nd ch from hook, hdc, dc, hdc, 1 sc in last ch, rotate and work on opposite side of foundation: hdc, dc, hdc, sl st to join (approx 14 sts)
Round 2 :
BLO: 1 sc in each st BLO to create a distinct ridge along the leaf edge; fasten off leaving long tail for sewing
Info :
These small leaves are used to tuck under blooms and along vines for visual complexity—vary colors slightly for realism
— Assembly & Applique :
Info :
Blocking and layout are crucial. Block base flat and block lily pads individually. Lay out the pads, vines and flowers on the base to match a natural composition before sewing. Pin pieces securely
Round 1 :
Position lily pads: place 6 pads spaced along the runner alternating sides; pin using rust-proof pins through outer edges
Round 2 :
Sew lily pads to base by whip stitch around the pad edge using the long tail left from making pads; use small, neat stitches so the seam is not visible (sew through pad edge and base fabric only)
Round 3 :
Arrange vines to flow naturally between pads and flowers. Sew vines with hidden stitches along underside and tack at intervals so they appear to sit on water
Round 4 :
Attach large flowers on top of selected pads: position the flower center over pad center and sew through the very base of the flower disc into pad so the bloom sits firmly
Round 5 :
Sew small buds and decorative leaves in remaining spaces. Add small tacking stitches near petals to secure shape so flowers do not flop when handled
Info :
For a more permanent finish use a couple of invisible stitches under petals to hold them up slightly. Double-check symmetry as you go and trim any long tails
— Finishing Touches :
Round 1 :
Weave in all loose ends with tapestry needle; use small stitches and hide tails inside motifs
Round 2 :
Optional: Add small surface embroidery lines to pads for veins using matching or slightly darker green yarn
Round 3 :
Lightly steam-block petals and pads again if necessary to set shape; avoid excessive heat for acrylic yarns
Info :
Hand wash the finished runner gently, reshape and lay flat to dry. Cotton yarn will soften and settle after first wash which enhances the water-like texture
This Water Lily Pond runner turns everyday table styling into a mini garden showpiece. Layering textured pads, curling vines and sculptural flowers creates depth and movement across the length of the runner. Each piece is an opportunity to make the design uniquely yours—play with colors, pad placement and flower sizes to suit your space. Happy stitching and enjoy arranging your handmade pond! 🧶🌸