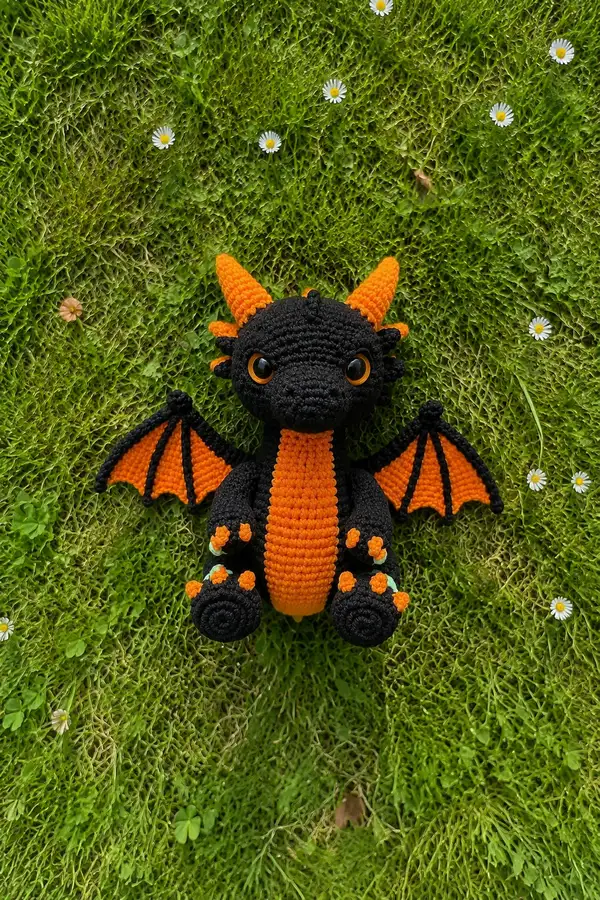
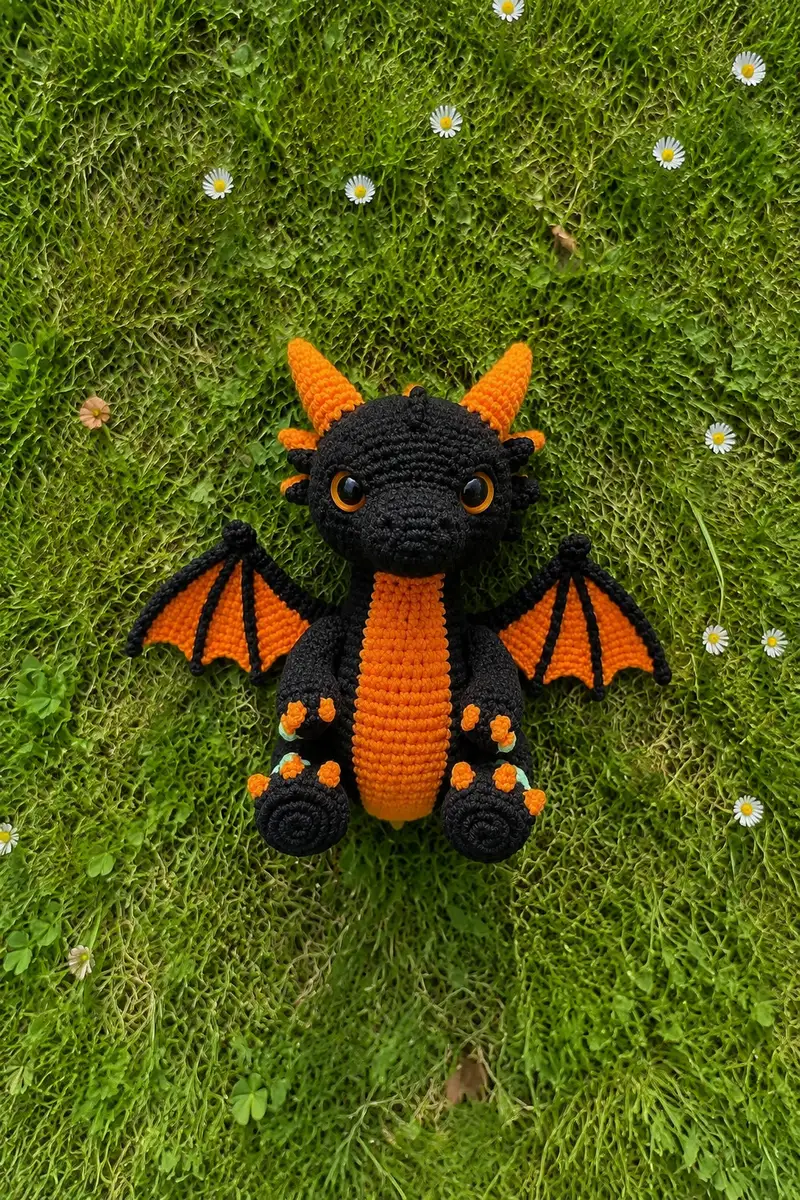
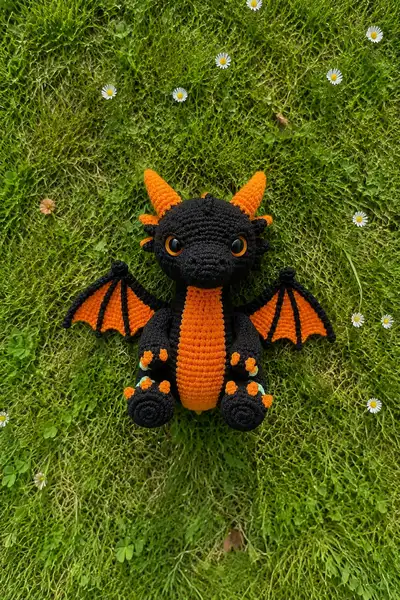
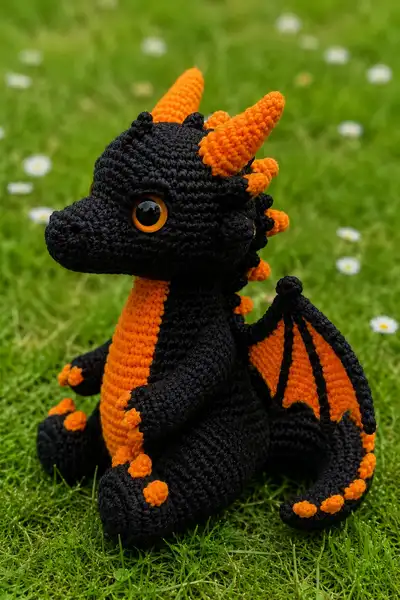
Create a spooky-cute dragon with deep black body and bright pumpkin-orange accents — perfect for Halloween decor or a whimsical gift. This pattern features a round head with a pronounced snout, curved horns, a striped orange belly panel, articulated wings with black ribs, bobble claws, and a tail lined with orange spikes. Detailed step-by-step rounds, clear assembly tips, and stuffing guidance make this an enjoyable intermediate amigurumi project.
Progress Tracker
0% Complete
— Head :
Round 1 :
6 sc in magic ring (6)
Round 3 :
(1 sc, 1 inc) x 6 (18)
Round 4 :
(2 sc, 1 inc) x 6 (24)
Round 5 :
(3 sc, 1 inc) x 6 (30)
Round 6 :
(4 sc, 1 inc) x 6 (36)
Round 7 :
(5 sc, 1 inc) x 6 (42)
Round 8 :
(6 sc, 1 inc) x 6 (48)
Round 9-12 :
1 sc in each st (48)
Info :
Place safety eyes between rounds 13-14 after you continue two more rounds of height — use a stitch marker to mark the center line then count stitches outward about 6-8 stitches depending on how wide-faced you want the dragon. Eyes with orange washers look best set approximately 10-12 stitches apart center-to-center on a 48-st head, but adjust for expression.
Round 13-16 :
1 sc in each st (48)
Info :
Mark the stitch positions for the eyes between rounds 13 and 14. Insert safety eyes and secure with washers once positioned. Do not fully stuff head before eye placement — position washers behind eye and then lightly stuff to anchor them.
Round 17 :
(6 sc, 1 dec) x 6 (42)
Round 18 :
(5 sc, 1 dec) x 6 (36)
Info :
Begin stuffing the head fairly firmly now, focusing on the cheek areas to keep the face rounded; stuff progressively as you work through decreases so the head stays smooth without lumps.
Round 19 :
(4 sc, 1 dec) x 6 (30)
Round 20 :
(3 sc, 1 dec) x 6 (24)
Round 21 :
(2 sc, 1 dec) x 6 (18)
Round 22 :
(1 sc, 1 dec) x 6 (12)
Info :
Stop here for a moment: the head sphere is shaped but this dragon has an elongated snout. We will make the snout as a separate muzzle piece and sew it into the neck opening for a sculpted profile. Leave an opening for neck attachment by stopping with long tail for sewing or keep the stitches live to join later.
Round 23 :
6 dec (6) - Fasten off leaving a long tail for sewing if you prefer closing head; however for neck attachment we will leave a larger neck aperture by skipping final closure and instead use the produced opening to attach the body neck. Fasten off if you will close and sew later.
Info :
If you fasten off and sew the muzzle on, leave a 20-25 cm tail for sewing. If you prefer continuous work, leave the sts open and proceed to the neck join when attaching the body. Always keep a marker at the back center to orient features later.
— Muzzle / Snout (Make 1) :
Round 1 :
6 sc in magic ring (6)
Round 3 :
(1 sc, 1 inc) x 6 (18)
Round 4 :
1 sc in each st (18)
Round 5 :
(2 sc, 1 inc) x 6 (24)
Round 6-8 :
1 sc in each st (24)
Round 9 :
(3 sc, 1 inc) x 6 (30)
Round 10-13 :
1 sc in each st (30)
Info :
This muzzle is elongated — rounds 10-13 create the bridge of the snout. Stuff lightly but not fully to allow a flat-smooth join to the head. The muzzle will be sewn to the head with its round 1 centered under the head front.
Round 14 :
(3 sc, 1 dec) x 6 (24)
Round 15 :
(2 sc, 1 dec) x 6 (18)
Round 16 :
(1 sc, 1 dec) x 6 (12)
Round 17 :
6 dec (6) - Fasten off leaving long tail for sewing
Info :
Sew muzzle to the head opening aligning the muzzle tip with the head front. Use mattress or whip stitch, stuffing lightly as you sew for a smooth transition. Make sure the eyes are symmetrically above the muzzle seam.
— Neck Panel (worked as part of body join) :
Info :
The neck will be created during body attachment. Leave the head opening large enough to insert the beginning rounds of the body. When sewing, make short, even stitches to attach neck rounds to the head's lower rounds to prevent holes.
— Body :
Round 1 :
6 sc in magic ring (6)
Round 3 :
(1 sc, 1 inc) x 6 (18)
Round 4 :
(2 sc, 1 inc) x 6 (24)
Round 5 :
(3 sc, 1 inc) x 6 (30)
Round 6-8 :
1 sc in each st (30)
Info :
For a tall, rounded belly, work 3-4 rounds of even stitches now. The body is worked from the bottom up in this pattern so plan to join the head after creating enough neck rounds to sew in. If you prefer to stuff the body from the bottom, leave an opening at the end rounds for final stuffing and closing.
Round 9 :
(4 sc, 1 inc) x 6 (36)
Round 10-12 :
1 sc in each st (36)
Info :
If you are adding the orange belly as a separate panel, stop here and make the belly panel now. Otherwise, see the Info on color change below to add the belly by tapestry technique. Working the belly panel separately gives a crisp orange stripe without carrying yarn.
Round 13 :
(5 sc, 1 inc) x 6 (42)
Round 14-18 :
1 sc in each st (42)
Info :
Begin to shape the top of the body where the head will attach: work 4-6 rounds of even stitch count to create the neck socket. If you made the head with a closed small hole, leave the final body rounds open to sew onto the head instead of inserting the body into the head.
Round 19 :
(5 sc, 1 dec) x 6 (36)
Round 20 :
(4 sc, 1 dec) x 6 (30)
Round 21 :
(3 sc, 1 dec) x 6 (24)
Info :
Before decreasing further, position the head over the body neck opening to ensure the neck circumference matches. Stuff the body moderately now — firm at the base to allow it to sit upright, softer near the neck so the head can be stabilized when sewn.
Round 22 :
(2 sc, 1 dec) x 6 (18)
Round 23 :
(1 sc, 1 dec) x 6 (12)
Round 24 :
6 dec (6) - Fasten off leaving long tail for sewing / join to head
Info :
Join the body to the head by placing the head over the neck opening (or align openings and sew) and using the long tail to whip stitch around the seam. Make sure the belly panel orientation is centered at the front. If you left the neck rounds open, sew head and body rounds together with ladder stitch for an invisible seam.
— Belly Panel (Make 1) :
Info :
This dragon features a long pumpkin-orange belly. Crochet the belly panel flat as a rectangle and sew to the front of the body for a crisp stripe. Panel works well with 16-20 rows depending on how tall you made your body; width should match the front 8-10 stitches of the body circumference.
Row 1 :
Using orange, ch 10, sc in second ch from hook and across (9)
Row 2 :
Ch 1, turn, 1 sc in each st (9)
Row 3-18 :
Repeat Row 2 until panel height matches the front belly from neck-to-bottom (typically 16 rows for this size)
Info :
When attaching the belly panel, center it at the front of the body and sew with matching orange yarn. Use mattress stitch for a flat join. If desired, before sewing, round the bottom row into a slight curve by decreasing edges on final rows (optional).
— Arms (Make 2) :
Round 1 :
6 sc in magic ring (6)
Round 3 :
(1 sc, 1 inc) x 6 (18)
Round 4-5 :
1 sc in each st (18)
Info :
This section forms the hand area. The dragon has three small orange bobble 'claws' on each paw; we will add bobbles to the first round later. Stuff the hand area firmly so claws sit up well.
Round 6 :
(2 sc, 1 dec) x 6 (12)
Round 7-10 :
1 sc in each st (12)
Info :
Work the lower arm here; these rounds give the length. Stuff the hand end firmly but leave the upper arm cavity less full to allow a seamless join to the body.
Round 11 :
(1 sc, 1 dec) x 4 (8)
Round 12-14 :
1 sc in each st (8)
Round 15 :
(1 sc, inc) x 4 (12) - optional slight flare to shoulder
Round 16 :
1 sc in each st (12)
Round 17 :
(2 sc, 1 dec) x 4 (9) - shape to attach
Round 18 :
Fasten off leaving long tail for sewing
Info :
Make 3 small bobbles (see Bobble Info) in orange and sew them to the last hand round where the three fingertips would be. Use a dab of glue if needed for display items but stitch for durability. Sew each arm to the body at side seams around body rounds 12-15 so arms sit slightly forward.
— Legs (Make 2) :
Round 1 :
6 sc in magic ring (6)
Round 3 :
(1 sc, 1 inc) x 6 (18)
Round 4 :
(2 sc, 1 inc) x 6 (24)
Round 5-6 :
1 sc in each st (24)
Round 7 :
(3 sc, 1 inc) x 6 (30)
Round 8-12 :
1 sc in each st (30)
Info :
These rounds form the foot base. Feet are slightly flattened disks with bobble paw pads on top. Stuff foot base firmly and flatten slightly to allow the dragon to sit. Add a small circle of cardboard or felt inside the foot for added stability if desired.
Round 13 :
(3 sc, 1 dec) x 6 (24)
Round 14 :
(2 sc, 1 dec) x 6 (18)
Round 15-18 :
1 sc in each st (18)
Round 19 :
(1 sc, 1 dec) x 6 (12)
Round 20 :
6 dec (6) - Fasten off leaving long tail for sewing
Info :
Sew feet to bottom of body spaced approximately 10-12 stitches apart across the front bottom of the body so dragon sits upright. Add three bobble pads to each foot in orange and a small contrasting accent bobble in lime/mint if you like — place evenly across the toe area.
— Horns (2 large, 2 medium, 4 small spikes) :
Large Horns (Make 2) Round 1 :
6 sc in magic ring (6)
Round 3 :
(1 sc, 1 inc) x 6 (18)
Round 4 :
1 sc in each st (18)
Round 5 :
(2 sc, 1 inc) x 6 (24)
Round 6-8 :
1 sc in each st (24)
Round 9 :
(2 sc, 1 dec) x 6 (18)
Round 10 :
(1 sc, 1 dec) x 6 (12)
Round 11 :
6 dec (6) - Stuff firmly and fasten off leaving long tail for sewing
Medium Horns (Make 2) :
Follow large horn instructions but stop after Round 8 (size about 18 sts) and decrease: Round 9 (2 sc, 1 dec) x 6 (12); Round 10 6 dec (6). Fasten off.
Small Spikes (Make 4) :
6 sc in mr, sl st into next st and fasten off leaving tail for sewing (small rounded spikes)
Info :
Sew the large horns to the top sides of the head (just behind eye level), medium horns toward the back top of the skull and small spikes along the ridge from the head to the first back scale. Use pins to test placement before sewing. Stuff horns lightly so they hold shape but remain soft.
— Back Spikes / Scales (Make 8-10 small bobble spikes) :
Spike 1 :
6 sc in magic ring, close and fasten off leaving long tail (6)
Spike 2-10 :
Repeat Spike 1 for each spike (6) - Sew spikes along the center back of the head and down the tail spacing them evenly about every 3-4 rounds
Info :
Make 8-10 spikes total — alternate large, medium and small for a natural ridged look. Sew spikes so they angle slightly backward. If you prefer pronounced scales, use bobble technique to make textured pods instead of simple 6-st spikes.
— Wings (Make 2) :
Wing Membrane - flat triangle Round 1 :
Using orange, ch 6, sc in second ch from hook and across (5)
Round 2 :
Ch 1, turn, sc in first st, (inc, sc) across to end to increase width (7)
Round 3 :
Ch 1, turn, sc across, inc at the last stitch to widen tip (9)
Round 4-8 :
Continue increasing at the outer edge each row to shape a triangular membrane until desired wing span is achieved; typical counts: Row 4 (11), Row 5 (13), Row 6 (15), Row 7 (17), Row 8 (19)
Info :
Make a mirror wing for the other side. These are worked flat and are intentionally wider at the top edge to create the bat-wing silhouette. Keep corners pointed for ribbing attachment.
Wing Edge and Ribs :
With black yarn, sl st evenly around the wing perimeter to create a visible border. For ribs, sew or surface crochet 3-4 lines from the outer top corner to the inner bottom edge representing wing bones. Alternatively, chain and sl st down then sew to the membrane for raised ribs. If you want poseable wings, insert thin floral wire along the top rib before final sl st and wrap yarn around to secure.
Info :
Sew wings to body at back sides at rounds approx 10-14 depending on your body height. Make sure ribs face forward and wings align with shoulder placement. Use small, invisible stitches to attach the inner edge so wing seam is neat.
— Tail :
Round 1 :
6 sc in magic ring (6)
Round 3-4 :
1 sc in each st (12)
Round 5 :
(1 sc, 1 inc) x 6 (18)
Round 6-12 :
1 sc in each st (18)
Info :
The tail is slightly tapered and will have orange bobbles along the top. To create the bobbles, make 10 small bobble pieces (see Bobble Info) and sew them spaced along the top center of the tail every 2 rounds. Stuff tail lightly to maintain a soft curve.
Round 13 :
(2 sc, 1 dec) x 6 (14)
Round 14-16 :
1 sc in each st (14)
Round 17 :
(1 sc, 1 dec) x 4 (10)
Round 18-20 :
1 sc in each st (10)
Round 21 :
(1 sc, 1 dec) x 3 (6)
Round 22 :
6 dec (0) - Fasten off and sew tail to lower back of body with long tail; add bobbles and small back spikes as desired
— Bobble / Claw Detail (multiple small pieces) :
Bobble (Make many) :
Ch 2, 4 sc in second ch from hook, sl st into next st and fasten off leaving a tail for sewing (4). Alternatively make a 6-sc magic ring bobble: 6 sc in mr, tighten and fasten off (6).
Info :
Use these bobbles for toes, tail spikes and small dorsal scales. Sew them on using long tails and secure with several passes to avoid loose pieces. Place three bobbles for each paw and 6-8 along tail and back edges.
— Eye & Face Finishing :
Info :
Use 12mm safety eyes with orange washers for this size. If you prefer embroidered eyes, place them between rounds 13-14 and stitch oval shapes with black embroidery thread then add orange ring with yarn or felt circle behind for that pumped ring effect. Add a small embroidered nostril on each side of the snout using 2-3 small stitches of black yarn.
Info :
Optional: Add a small mouth by using a yarn needle and black yarn to stitch a short curve beneath the muzzle. You may also couch a thin highlight of white thread at the top of each eye to create sparkle.
— Assembly & Final Touches :
Info :
Pin all pieces in place before sewing. Sew limbs to body at recommended rounds (arms at body rounds 12-15; legs at bottom front rounds; wings at rounds 10-14). Ensure symmetry by counting stitches from center front to placement points and use pins to hold positions while checking appearance from different angles.
Info :
Weave in all ends into the body, going through several stitches to anchor. If desired, carefully apply a small amount of fabric glue on safety eye washers for display-only items to prevent loosening. For toys intended for babies, do not use safety eyes — embroider eyes instead.
This spooky pumpkin-accent dragon comes together in charming silhouette and bold seasonal color — a wonderful project to celebrate Halloween and autumn crafting. Each carefully stitched section builds personality: the sculpted muzzle, ringed eyes, bobble claws and ribbed wings make this dragon a standout. I hope you enjoyed the process as much as the result — share photos and bring a little spooky magic into your home! 🧶🦇🎃