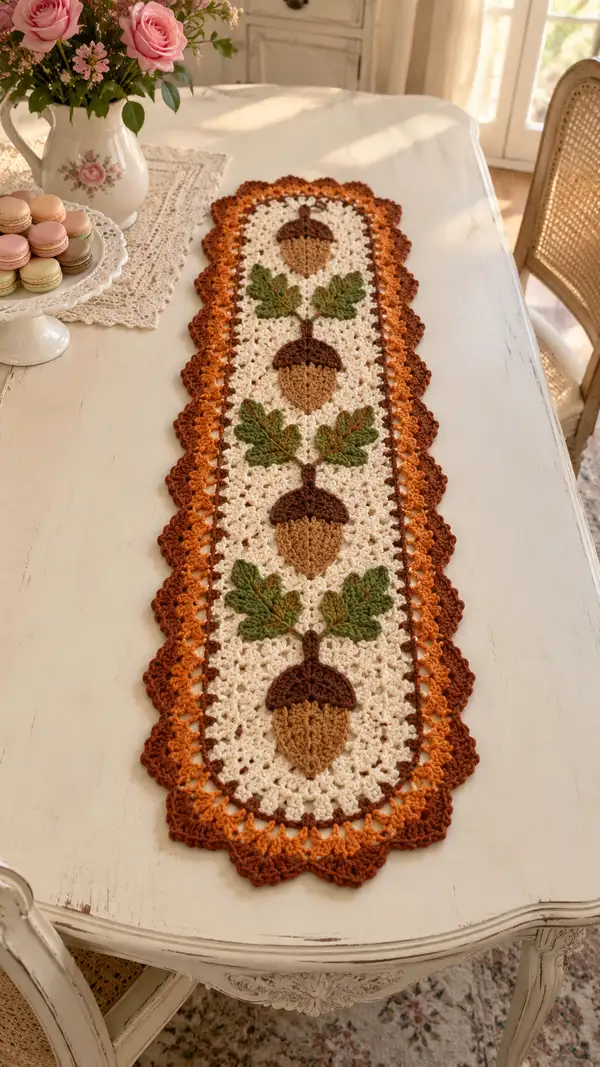
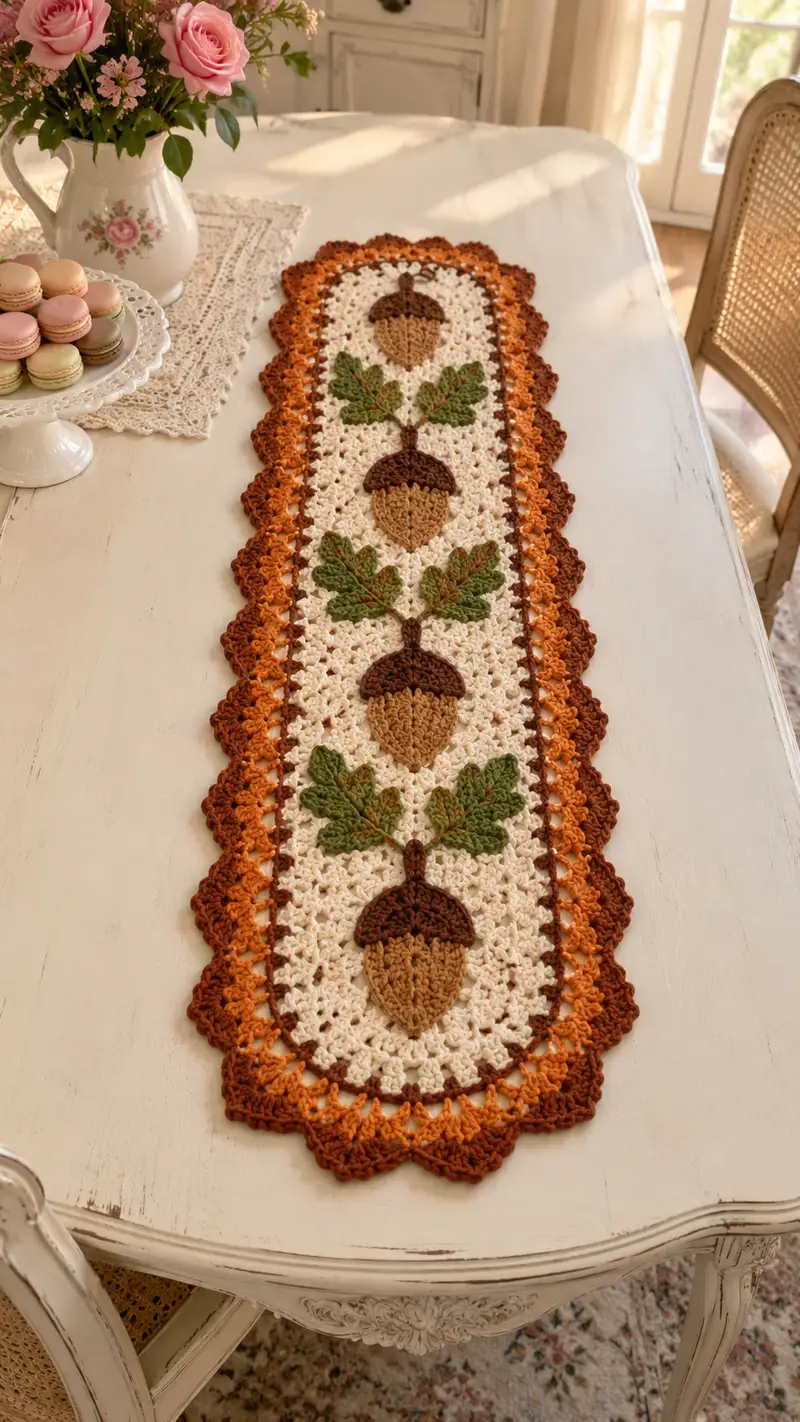
A warm, autumn-inspired table runner featuring repeating acorn appliques and textured oak leaves set on a soft cream background with a scalloped orange-brown border. This runner is worked with cotton or cotton-blend yarn for a crisp, washable finish and finished with a lovely lacy edge that frames the motifs. Ideal for adding seasonal charm to a dining table, sideboard, or mantle.
Progress Tracker
0% Complete
— Notes and Gauge :
Info :
Gauge is not critical for a decorative table runner, but work with a hook that produces a sturdy fabric. With worsted cotton and 4.0mm hook, 10 V-stitch clusters across = approximately 4 inches; adjust hook as needed. Throughout this pattern, join rounds with sl st to the first dc or as directed, and turn when working rows. The project is worked in separate appliques and a central panel, then joined and edged.
Info :
When working color changes, fasten off and weave ends or carry yarn vertically behind work in the panel rows. Use smaller hook (3.5mm) for appliques for slightly firmer motifs that sit nicely on the panel.
— Acorn Applique (Make 4) :
Info :
Each acorn is made of two pieces: the acorn nut (tan) and the cap (dark brown), plus a short stem. Work flat in rounds as a slightly domed oval applique. Use 3.5mm hook for the appliques. Make 4 total, spaced evenly along the runner.
Round 1 :
With tan, make a magic ring, ch1, 6 sc in ring (6)
Round 2 :
Inc in each st around (12)
Round 3 :
(1 sc, inc) x 6 (18)
Round 4 :
(2 sc, inc) x 6 (24)
Round 5 :
(3 sc, inc) x 6 (30)
Info :
To create an oval (elongated) shape rather than a perfect circle, we will bias increases on the short ends and maintain sides. From Round 6 we will add increases only at two opposite sides to lengthen the shape.
Round 6 :
*Sc 6, inc in next st; sc 12, inc in next st; sc 8* — rearranged to form slight oval (32)
Round 7 :
*Sc 7, inc in next st; sc 14, inc in next st; sc 8* (34)
Round 8 :
*Sc 7, inc; sc 15, inc; sc 9* (36)
Round 9 :
1 sc in each st around (36)
Info :
Start shaping the lower tip of the acorn slightly by working some short rows on one end in the next rounds. Place tapestry needle and plan cap overlap area — leave top straight edge open for cap placement later.
Round 10 :
Sc 2, dec, sc 12, dec, sc to end (32)
Round 11 :
Sc 1, dec, sc 10, dec, sc to end (28)
Round 12 :
Sc 1, dec, sc 8, dec, sc to end (24)
Round 13 :
Sc to last 4 sts, dec twice evenly (22)
Round 14 :
Sc in each st (22) — fasten off and weave tail to the back. Leave long tail for sewing if desired.
Info :
Lightly block your acorn nut flat if it has a tendency to curl. Keep the oak nut slightly domed rather than stuffed. If you prefer a puffed nut, add a small amount of fiberfill to the center and hold flat while sewing.
Acorn Cap - Round 1 :
With dark brown and 3.5mm hook, ch6, join to form loop with sl st, ch2 (counts as first hdc for beginning), work 10 hdc into loop, join (10)
Round 2 :
Ch2, hdc in same st, 2 hdc in each st around (20)
Round 3 :
(1 hdc, 2 hdc in next st) x10 (30)
Round 4 :
1 hdc in each st around (30)
Round 5 :
Switch to dc for a textured edge: ch1, dc in each st around (30) — sl st to join, fasten off leaving long tail for sewing
Info :
Position cap over top edge of nut so that the straight edge of cap overlaps about 4–6 stitches of the top of the nut. The cap should look slightly domed; when sewn, leave the top center of cap for stem attachment.
Acorn Stem :
With dark brown, ch6, sc in 2nd ch from hook and across (5 sc), fasten off leaving tail. Roll slightly and sew into top center of cap, or fold and sew as a small cord for a stem. Alternatively, ch10 and sc back to create a small stem cord and sew securely.
Info :
Sew the cap onto the nut with matching yarn and a whip stitch; ensure the seam sits neatly and does not pucker. Make 4 identical acorns for the runner.
— Oak Leaf Applique (Make 8) :
Info :
Leaves are worked flat in rows and shaped using increases and decreases with front post and back post stitches to get raised veins. Make two leaves per acorn (one on each side) for a total of 8 leaves. Use 3.5mm hook and a slightly different green shade for veins if desired.
Row 1 :
With green, ch12. Row does not form a circle; leaves are worked in rows turning each row. In 2nd ch from hook, sc across to last ch; sc in last ch — work along opposite side of ch foundation: sc back into each chain (22 sc total including ends).
Row 2 :
Ch1, turn. Sc in first 3 sts, inc (2 sc in next), sc 8, inc, sc to end (24)
Row 3 :
Ch1, turn. Sc 3, inc, sc 10, inc, sc to end (26)
Row 4 :
Ch1, turn. Sc 4, hdc 2, dc 4, dc2tog, dc 4, hdc 2, sc to end — create a central fuller area (26)
Row 5 :
Ch1, turn. Sc to first 3 sts, dec, sc 12, dec, sc to end (24)
Row 6 :
Ch1, turn. Sc across, making 3 sl st edge points at tip: sc to last 3 sts, sc2tog, sc (22)
Info :
Work a quick vein row along the center: change to darker green or work FLO/BLO post stitches to raise a center vein. You can use 1 sc, 1 fpdc across center column for texture.
Row 7 :
Turn, ch1, work fpdc across center 6 stitches (vein), sc across remaining sts to finish. Fasten off leaving tail for sewing to panel.
Info :
Block leaves on a flat surface; pin the lobes slightly to shape. For a more intricate oak leaf shape, add small picot points on edges by doing sc, ch3, sl st into same st every 3–4 stitches on the edge rows.
— Central Panel (Runner Body) :
Info :
The central panel is worked in joined rounds (or rows) using V-stitches to create an airy but stable mesh. The sample runner measures approximately 36 inches long x 8.5 inches wide; you can adjust length by adding or subtracting repeats. The panel width is made with a foundation chain and worked in rows; we join rows at the end of each row with ch3 counting as first dc for turning or work back-and-forth in joined rounds - choose the method you prefer. Here we work in rows and join each row with a turning chain for clarity.
Foundation Row :
With cream and 4.0mm hook, ch 79 (this number is based on V-stitch multiples: multiple of 4 + 3; 79 gives a narrow runner approx 8–9 inches wide). Row 1: dc in 4th ch from hook (counts as dc), *ch1, skip next ch, (dc, ch1, dc) in next ch (V-st), skip next ch* across, ending with dc in last chain. Turn. (Approximately 39 V-st spaces across — count will vary slightly depending on turning chains.)
Row 2 :
Ch3 (counts as first dc), turn. V-st in each ch1 space across: *(dc, ch1, dc) in each V-st space*, end with dc in top of turning ch. (Maintain the same number of V-sts across.)
Rows 3-12 :
Repeat Row 2 for 10 more rows (total 12 rows). Keep the panel flat; do not stretch. These rows create a stable base for the appliques.
Info :
Block the panel flat before placing appliques for easier placement. Measure and mark center line with pins. The acorns will be centered down the length; the sample has three acorns spaced roughly 8-9 inches apart. Mark positions for centers of acorns before attaching.
Row 13 :
Work one row of alternating V-st and single dc to add a slightly denser band: *(dc in top of V-st, ch1, skip V-st, dc in next V-st) across.* This row acts as a placement band for appliques.
Info :
We will now build the long runner by repeating blocks of rows until the desired length is reached. The pattern sample repeats blocks of 12 rows plus a placement band (Row 13) between each motif. For three acorns, create 3 blocks plus end caps: total approximately 13 blocks to reach sample length; adjust to fit your table.
Repeat Block :
Repeat Rows 2-13 until you have the number of placement bands equal to the number of acorns plus the end caps. For this pattern, work until you have 3 placement bands spaced evenly along the length with about 10 rows between bands. The sample made 38 repeats total (creating a runner approx 36" long). When you reach the preferred length, finish with 12 rows and one final denser placement band, then fasten off leaving long tail for joining the border later.
Info :
Keep the panel edges straight. If your edges wave, add an edge row of sc or hdc in each st around to create a uniform edge before edging rounds.
— Positioning and Attaching Appliques :
Info :
Pin all appliques in place before sewing. On the sample, three acorns are centered in a vertical column with a leaf pair on either side of each acorn's stem. Measure spacing: place first acorn 2.5" from one short end, then space next acorns ~10–11 inches apart center-to-center depending on length. Mark center with stitch markers or pins.
Attach Acorns :
Using matching tan/dark brown yarn and a yarn needle, sew acorn caps and nuts to the panel with small whip stitches — use the long tails left earlier. Sew evenly around the perimeter of the nut and cap, catching the V-stitch spaces beneath to secure. Make sure the cap seam follows the top of the V-stitch band used as placement guide.
Attach Leaves :
Position the two leaves at each acorn so they sit symmetrically. Sew leaf stems to the panel at the stem point using dark brown for the short stem, then tack each leaf at 3–4 points along its midline so it lays flat and slightly raised. Use small invisible stitches along the veins to add secure attachment without showing on the right side.
Info :
If you prefer a Join-As-You-Go (JAYG) approach, you can crochet the appliques directly onto the panel by aligning the final round of the applique over the panel and sl stitching through both layers on every few stitches. This creates an integrated look but is less forgiving for repositioning.
— Inner Border Row (Dark Brown) :
Info :
We will add a tidy inner cord in dark brown to define the panel edge. Work a round of sc all around the panel to even out edges if needed, then add the brown border.
Round 1 :
With dark brown and 4.0mm hook, join at one short end: ch1, sc evenly around entire rectangle, working 3 sc in each corner to maintain flatness. Exact count depends on panel size. Join with sl st to first sc. (Edge will have same number of stitches as the perimeter.)
Round 2 :
Ch3, *sk 1 st, dc in next st, ch1, sk 1 st, dc in next st* around to create a simple openwork ridge. Join and fasten off. This band defines the panel before the scalloped edging.
Info :
Blocking the panel again at this stage helps the inner band sit evenly as you add scallops. Keep pins within the inner edge and maintain symmetry of the short ends' rounding — the runner pictured has rounded short ends for a soft finished look.
— Scalloped Border (Make 3-color Gradient) :
Info :
The scalloped edge is worked in three color rounds to create a warm ombre effect: first a mid orange round, then lighter orange, then deep rust/brown for the final shell scallops. Work with 4.0mm hook. Work evenly spaced increases at short end curves to shape the rounded ends.
Round 1 (Mid Orange) :
With mid orange, join at any edge st. Ch1, sc evenly into every third edge stitch to begin forming a picot-style ridge (adjust as necessary so scallops sit evenly). In corners or rounded ends, work 4 sc in the corner area to add fullness. Join with sl st to first sc.
Round 2 (Mid Orange) :
Ch3 (counts as dc), *skip 1 sc, (5 dc) in next sc (shell made of 5 dc), skip 1 sc, sl st in next sc* repeat around. At short ends, make 2 shells side-by-side to maintain shape. Join with sl st, leave yarn attached for color change.
Info :
Adjust shell counts if needed so final number of shells around is a multiple that allows symmetrical placement; aim for full shells all around with doubled shells at short ends so scallops look uniform.
Round 3 (Light Orange) :
Change to light orange. Sl st to center of any shell, ch2, (hdc, dc, hdc) all in same center st to create a raised petal inside the shell. Sl st to next shell center and repeat. Work around and join. This gives a layered, textured scallop.
Round 4 (Light Orange) :
Ch1, sc in each st around, placing 3 sc in the spaces between paired shells and 2 sc across shells to tidy the look. Join and fasten off mid orange and light orange rounds if desired. Leave tails and weave in later.
Round 5 (Deep Rust) :
With deep rust (final color), join with sl st to front post of a shell center. Ch1, *(sc, ch3, sc) into top of next shell to create a picot arch, sl st to next shell edge* repeat. Then in each arch space, work a larger shell: (dc, dc, dc, ch2, dc, dc, dc) to create a strong scallop. Continue around, making double shells at short ends. Join and fasten off leaving long tail for weaving.
Info :
For a deeper scallop, add one extra dc to the ends of each shell (7 dc shells). The pictured runner has a pronounced scallop; adjust counts to match your preference. After completing the last color round, block carefully to shape the scallops evenly and make short ends round.
— Finishing Touches and Weaving :
Info :
Weave in all ends on the wrong side using a tapestry needle. Trim ends close to fabric after weaving into 4–6 stitches. Press lightly with a damp cloth or steam block to set scallops. Avoid heavy heat on cotton; steam setting is preferred.
Optional :
If you wish to add a subtle highlight to leaves, use a very thin embroidery floss in a lighter green and stitch a satin stitch along the veins. For a vintage look, lightly antique with textile paint diluted and dabbed along scallops and motifs.
Info :
Final blocking: pin the runner flat on blocking mats at the outermost scallop points and short ends. Spray evenly with water and let dry completely to set shape. This will make the scallops tidy and the panel lie flat on the table.
— Alternate Size and Customization :
Info :
To make a shorter runner, reduce the number of central panel repeats and use 2 acorns instead of 3. For a wider runner, increase foundation chain by multiples of 4 and add shells on each border round for proportionate scallops. To change season, swap the acorns for pumpkins or hearts and adjust colors accordingly.
Info :
Color note: If using a yarn cake to get gradient colors for the border, plan the color change so that shifts happen at the scallops not in the middle of a shell. Carry color up the inside between shells if you prefer fewer ends to weave.
This table runner pattern brings autumn charm to your home with layered texture, warm colorwork, and a lacy scalloped edge. Each acorn applique and leaf is designed to sit proudly against a crisp cream mesh, creating a cozy, handmade centerpiece you'll be proud to display. The modular construction makes it easy to customize length and color, and the finished runner is wash-and-care friendly when made in cotton yarn. Gather your yarn and hooks—this is a satisfying project that will brighten your table for seasons to come! 🧶🍁