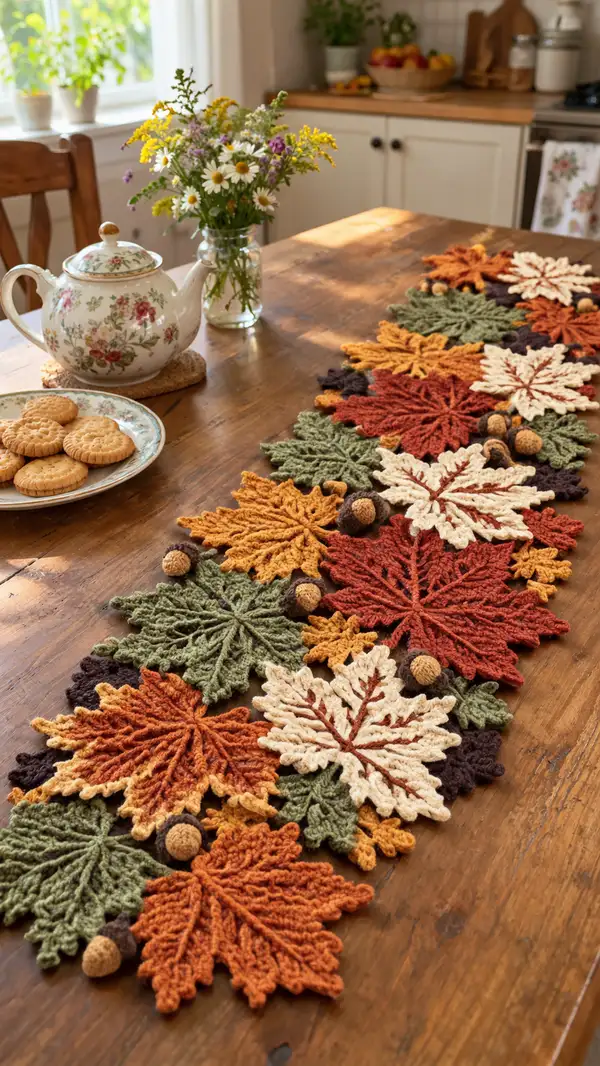
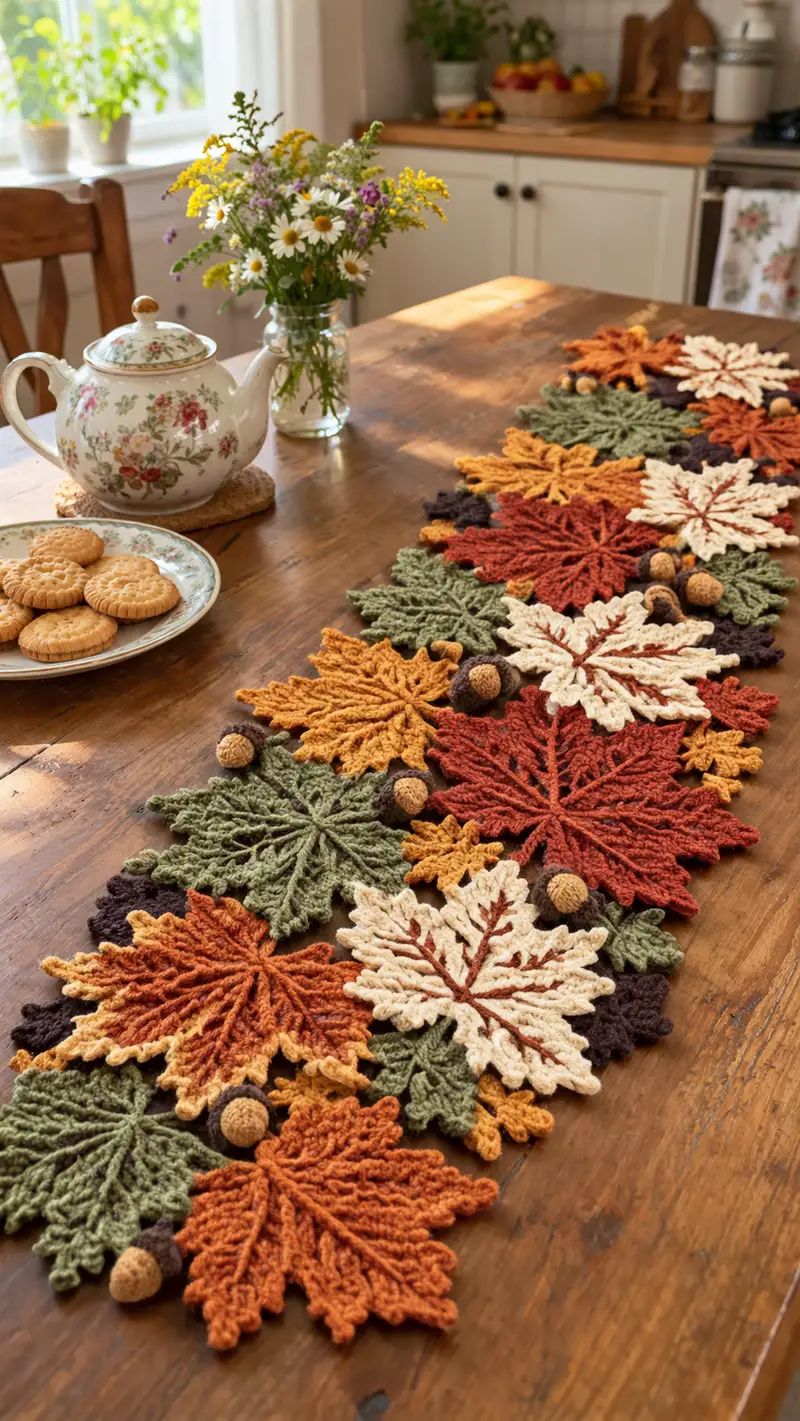
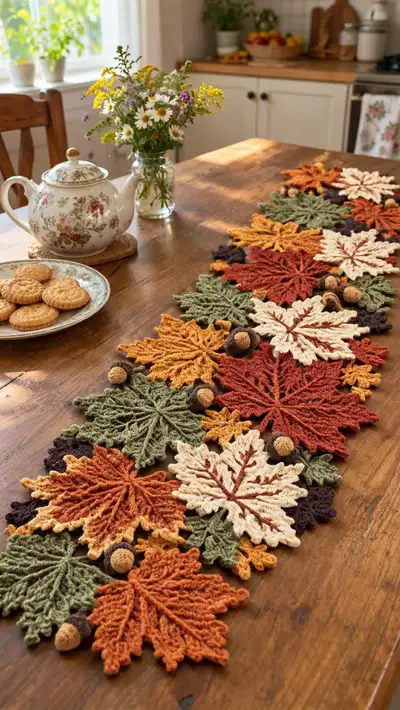
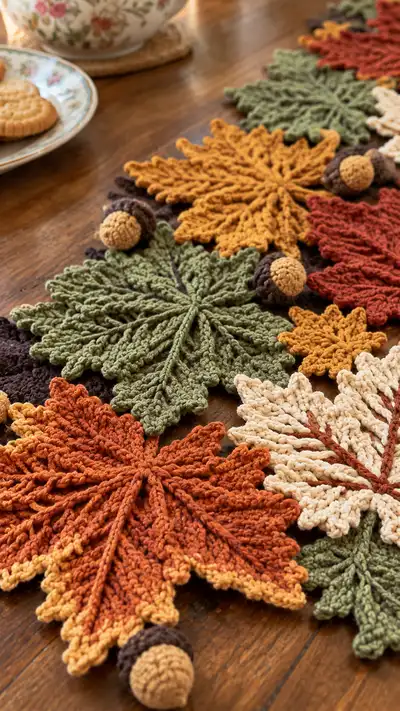
Create a warm, layered autumn table runner composed of crocheted maple-style leaves, small accent leaves and tiny crocheted acorns. This pattern uses textured stitches and raised veins to recreate realistic fall foliage in rich rust, mustard, olive, cream and chocolate tones. The finished runner is perfect for a centerpiece or seasonal decor and is assembled from modular motifs for easy customization.
Progress Tracker
0% Complete
— Notes & Gauge :
Info :
This runner is made up of modular leaves and acorns. Gauge is not critical but for scale each large leaf (worked in worsted weight with 4.0mm hook) will measure roughly 5.5 - 6.5 inches across depending on blocking and tension. Maintain consistent hook and tension for all motifs to keep scale consistent.
Info :
All leaves are worked flat in joined rounds. Use a stitch marker to mark the first stitch of each round. For textured veins we use front post double crochet and chain loops to create raised ridges. Add an Info section every 6-10 rounds if you need reminders for stuffing, blocking or color changes.
— Large Maple-Style Leaf (Make 8-12 depending on runner length) :
Round 1 :
6 sc in magic ring (6)
Round 3 :
(1 sc, inc) x 6 (18)
Round 4 :
(2 sc, inc) x 6 (24)
Round 5 :
(3 sc, inc) x 6 (30)
Round 6 :
(4 sc, inc) x 6 (36)
Round 7 :
(5 sc, inc) x 6 (42)
Round 8 :
(6 sc, inc) x 6 (48)
Round 9-12 :
1 sc in each st (48)
Info :
At this point you have a circular base. From here we will define 8 main lobes (maple points). The motif uses sets of stitches worked into sections; use a removable marker to mark the start of each lobe (every 6 sts, since 48/8 = 6). Mark those base points now so you can keep lobes consistent.
Round 13 :
Work in pattern around to create lobes: *ch 3, skip 2, sl st in next st, 3 sc in next st*; rep from * to * eight times around, join with sl st (48 with chain loops forming lobe bases but stitch count remains 48 when counting real stitches)
Info :
The chain 3 loops will form the outer petal shapes; they are decorative anchors. You are still working in rounds; keep the base 48 main stitches consistent. This round creates visible separation for the lobes.
Round 14 :
1 sc in each base st (48)
Round 15 :
*(2 sc, 1 hdc, 1 dc, ch 3, 1 dc, 1 hdc, 2 sc) all worked into the same lobe base stitch*; rep x 8 (this increases the visual size of each lobe; total base stitch count remains 48 as extra stitches are worked into the same base group)
Info :
When you work many stitches into a single stitch to form a lobe, the numerical count of unique base stitches remains the same. For clarity count main base stitches (48) rather than the total 'worked' stitches if you are tracking lobes. Keep 8 lobes equally spaced.
Round 16 :
1 sc around each lobe group to tidy edge: work 6 sc along each lobe shape (48 sc counted across base groups; the per-lobe worked sc will be visible)
Round 17 :
1 sc in each st (48)
Round 18 :
Work front-post vein rows: *fpdc around the central stitch of each lobe (this raises a ridge), ch 8, sl st into the chain loop created earlier to anchor the vein*; repeat for all 8 lobes. Stay with main stitch count 48.
Info :
To create raised veins, when you work the fpdc, identify the stitch that sits in the center of each lobe and work fpdc around its post. This will pull a vertical ridge toward the lobe tip. The chain 8 loop becomes a seam anchor where you will later create the pointed tip.
Round 19 :
1 sc in each st (48)
Round 20 :
Create point shaping: in each lobe, work into chain loop: ch 1, (sc, hdc, 3 dc, hdc, sc) in chain loop, sl st to base to fasten. Repeat 8 times (this forms 8 pointed tips)
Info :
These clusters are worked into previous chain loop anchors. Ensure each point is symmetrical — place 3 dc at the center of each point for a pronounced tip, with hdc and sc tapering to the base.
Round 21 :
Work a tidy round of sc along entire perimeter: 1 sc in each visible stitch around the leaf edge; where you worked clusters, place 6 sc across each cluster to maintain an even edge (approx 96 worked sc around edge; base 48 sections remain)
Round 22 :
Edge shaping with scallops: *sl st into next 2 sts, (5 sc in next st), sl st into next 2 sts*; repeat around to create small scallops between lobes (this adds decorative picot-like edge)
Info :
If you prefer a sharper edge, replace scallop clusters with picots: ch 3, sl st into base st. The scallops provide a soft, foliate look.
Round 23 :
Return to body with even sc around: 1 sc in each st including scallop stitches to even things out. Fasten off and weave ends. Block flat and pin lobes outward to open shape.
Info :
Blocking is essential. Wet-block or use steam to open the leaf lobes and set the raised veins. Pin to the desired shape on a blocking board and let dry. Repeat to make all large leaves in your selected colors.
— Medium Leaf (Make 10-14) :
Round 1 :
6 sc in magic ring (6)
Round 3 :
(1 sc, inc) x 6 (18)
Round 4 :
(2 sc, inc) x 6 (24)
Round 5 :
1 sc around (24)
Round 6 :
Create 6 lobes: *ch 4, sl st into next st, 4 sc in next st*; rep x 6; tidy with 1 sc round around resulting shape
Round 7 :
1 sc around to even edge (approx 48 worked sc); mark six lobe centers now with clips or markers
Round 8 :
Work fpdc vein: in each marked lobe center, work fpdc down toward base to create raised center vein; secure with sl st; continue around
Info :
Unlike the large leaf, the medium leaf uses 6 lobes and fewer rounds. These motifs sit behind and in between the large leaves on the runner.
Round 9 :
Ch 1, in each lobe chain loop work (sc, hdc, 2 dc, hdc, sc); sl st to base; repeat for all lobes
Round 10 :
1 sc around to tidy edge; add small picot at each tip: *sc, ch 3, sl st in same st, sc in next 3 sts* around tips as desired
Round 11 :
Fasten off, weave ends, and block flat. If you plan a two-tone vein, add contrasting embroidery now with duplicate stitch along the central vein using thin yarn.
Info :
For a subtle rib, use FLO for the tidy rounds to produce a ridge line that the vein will sit on. This adds dimension without bulk.
— Small Accent Leaf (Make 12-18) :
Round 1 :
6 sc in magic ring (6)
Round 3 :
(1 sc, inc) x 6 (18)
Round 4 :
Work one round of sc (18)
Round 5 :
Create pointed shape: *ch 1, (sc, hdc, 3 dc, hdc, sc) in each of 6 evenly spaced base sts*; sl st to join
Round 6 :
Tidy with 1 sc around points, add picot border if desired (approx 36 worked sc)
Info :
These tiny leaves are great for filling gaps. Use contrasting or tonal colors to add variety. Block small leaves with a light steam to flatten tips.
Round 7 :
Fasten off and weave ends.
— Acorn Nut (Make 10-14) :
Round 1 :
6 sc in magic ring (6)
Round 3 :
(1 sc, inc) x 6 (18)
Round 4 :
(2 sc, inc) x 6 (24)
Round 5 :
1 sc in each st (24)
Round 6 :
(3 sc, dec) x 6 (18)
Info :
Start stuffing the nut lightly at round 5-6. Use small, even bits of fiberfill so the acorn remains rounded but soft. Avoid overstuffing which will distort the cap later.
Round 7 :
(1 sc, dec) x 6 (12)
Round 9 :
Fasten off leaving a long tail. Use the tail to close the remaining opening by threading through the 6 sts and pulling tight. Weave tail into nut and hide.
Info :
Make the nuts in a warm golden tan color for contrast with the darker caps. Make a few extras in slightly different sizes for a natural look.
— Acorn Cap (Make 10-14) :
Round 1 :
6 sc in magic ring with dark brown (6)
Round 3 :
(1 sc, inc) x 6 (18)
Round 4 :
(2 sc, inc) x 6 (24)
Round 5 :
Work 1 round BLO sc to create a brim ridge (24)
Round 6 :
Create textured cap: *(sc in next st, ch 2, sl st into same st)* around to make cluster bumps; repeat in each st (24 bumps)
Round 7 :
Fold cap slightly and try on nut to test fit; adjust by blocking or stretching gently while wet
Round 8 :
Fasten off leaving long tail to sew cap to nut. For more secure cap sew around the nut opening with ladder stitch, then weave ends.
Info :
Sew the cap to the nut using matching thread and small, tight stitches. If you want acorns to detach for storage, sew with a few long loops that can be undone rather than a permanent permanent whip stitch.
— Small Filler Rounds / Background Discs (Make many) :
Round 1 :
6 sc in magic ring (6)
Round 3 :
1 sc around (12)
Round 4 :
Fasten off and weave ends. These discs fill gaps and provide dark background color contrast between overlapping leaves.
Info :
Create a mix of 6-, 12- and 18-stitch discs in dark brown and deep plum to tuck under leaf edges and add visual depth.
— Decorative Vein Embroidery (On Leaves) :
Info :
Use a contrasting thinner yarn or doubled worsted yarn held single to embroider veins along the central ridge of each leaf. Secure yarn at the leaf base and use a surface slip stitch or duplicate stitch to trace the vein up to the tip, branching to lobes as needed. Add small angled veins from central ridge into each lobe for realism.
Round 1 :
Start at the leaf base under the first scallop; with yarn tail, pull through to wrong side and bring to right side at base; surface slip stitch up the center line to the tip; fasten off and weave in tails.
Info :
Use embroidery sparingly — a darker brown contrasts beautifully on cream leaves and a deeper rust or brick on lighter tones.
— Joining Leaves & Layout Preparation :
Info :
Before sewing motifs together, block each leaf and disc flat. Lay out your runner on a long surface and experiment with placement. The sample runner alternates large leaves and medium leaves with small leaves filling edges and acorns clustered in pairs between larger leaves.
Round 1 :
Position large leaf #1 center-left; place large leaf #2 slightly overlapping on the right; tuck two medium leaves into the gap above and below; position 1-2 small leaves and a filler disc under overlap; place acorn pair near the center of overlap. Repeat motif sequence along length of runner.
Info :
For a tapered runner, stack leaves more densely at the center and reduce density near the ends. Keep symmetry along the central axis for pleasing balance.
— Assembly Technique (Sewing Tips) :
Round 1 :
Use yarn needle and matching thread to sew pieces together. Start with the largest elements: attach overlapping edges of large leaves with small whip stitches spaced 3-5 mm apart. Do not over-stretch the stitch; keep tension light so the leaves remain slightly layered rather than fused flat.
Round 2 :
Next tuck and sew medium leaves into gaps between large leaves using hidden ladder stitches along the underside (wrong side) of each leaf for an invisible join. Attach small leaves and filler discs similarly, using 2-3 stitches at key anchor points rather than a seam all the way across to preserve texture.
Info :
Sew acorns to the runner by threading through the base of the acorn cap into the underside of two overlapping leaves; a few firm stitches anchor the acorn so it won't fall off during use. Optionally glue a few stitches for extra security but the sewn join is preferred for durability.
Round 3 :
When joining, always check the underside to ensure no tails or knots show. Use small, secure stitches to avoid bulk. Weave and bury ends through several stitches on the underside and trim flush.
Info :
Assemble in gentle sections. After sewing a cluster of 3-5 motifs, lay the runner back out and step back to review the flow; adjust placement as needed before sewing the next cluster.
— Border / Finishing Edge :
Round 1 :
With the assembled runner laid flat, pick a neutral border color (deep brown or cream) and work 1 sc around the entire outer exposed edge of motifs, catching a few threads of each motif as you go to create a cohesive edge. Keep stitches small and evenly spaced.
Round 2 :
Work second round in BLO: 1 sc in each st BLO to create a subtle ridge that sits just inside the edge. This helps the runner keep a crisp silhouette.
Round 3 :
Optional decorative round: *picot edging with (sc, ch 3, sl st in same st)* around to create tiny points which mimic leaf serration. Fasten off and weave in all tails on the underside.
Info :
When the border traverses between two motifs, use small mattress or whip stitches to join edges invisibly from the underside. If you prefer a looser, organic edge, skip the border and leave exposed motifs as-is after blocking.
— Final Blocking & Care :
Info :
Lightly mist the runner with water and pin in place on blocking mats for final shaping. Allow to fully dry for several hours or overnight. This will set the veins and tips and flatten overlaps.
Info :
To clean, spot-wash gently by hand without scrubbing. Lay flat to dry. Avoid washing machines as heavy agitation can distort blocked shapes.
Info :
You can adapt this runner by repeating fewer or more motifs to lengthen or shorten. Make each leaf slightly different in hue to emulate natural variety; this adds richness and visual interest.
Finishing this autumn runner is such a satisfying moment — watching the layered leaves, tiny acorns and warm tones come together feels like setting a scene. Each motif adds a little tactile, seasonal charm and the textured veins give the runner depth and life. I hope you enjoy blocking, stitching and arranging as much as I did — it's a beautiful, cozy project to celebrate the season. 🍁🧶