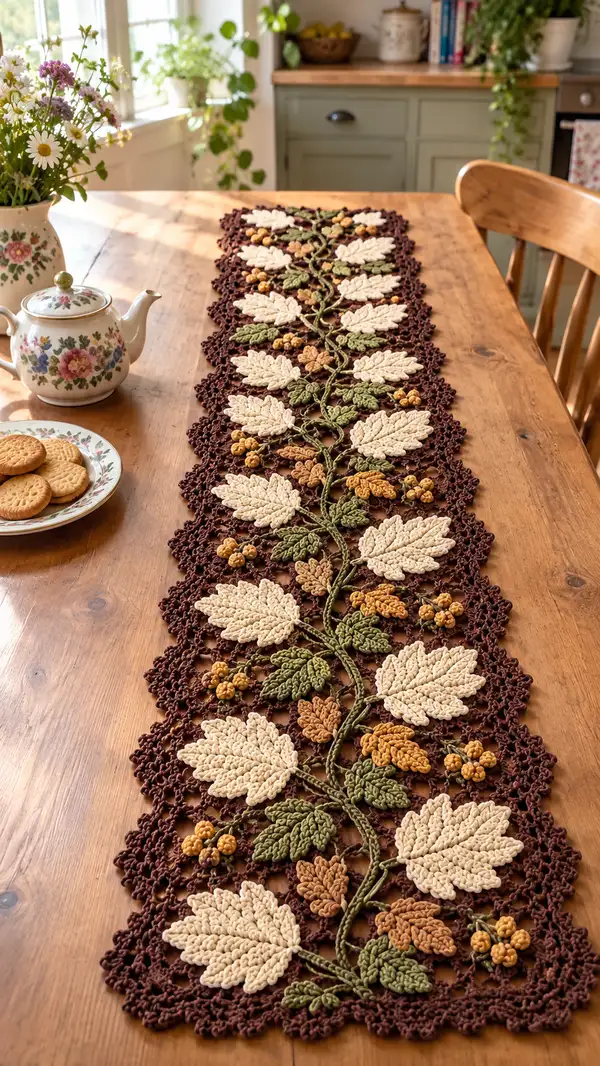
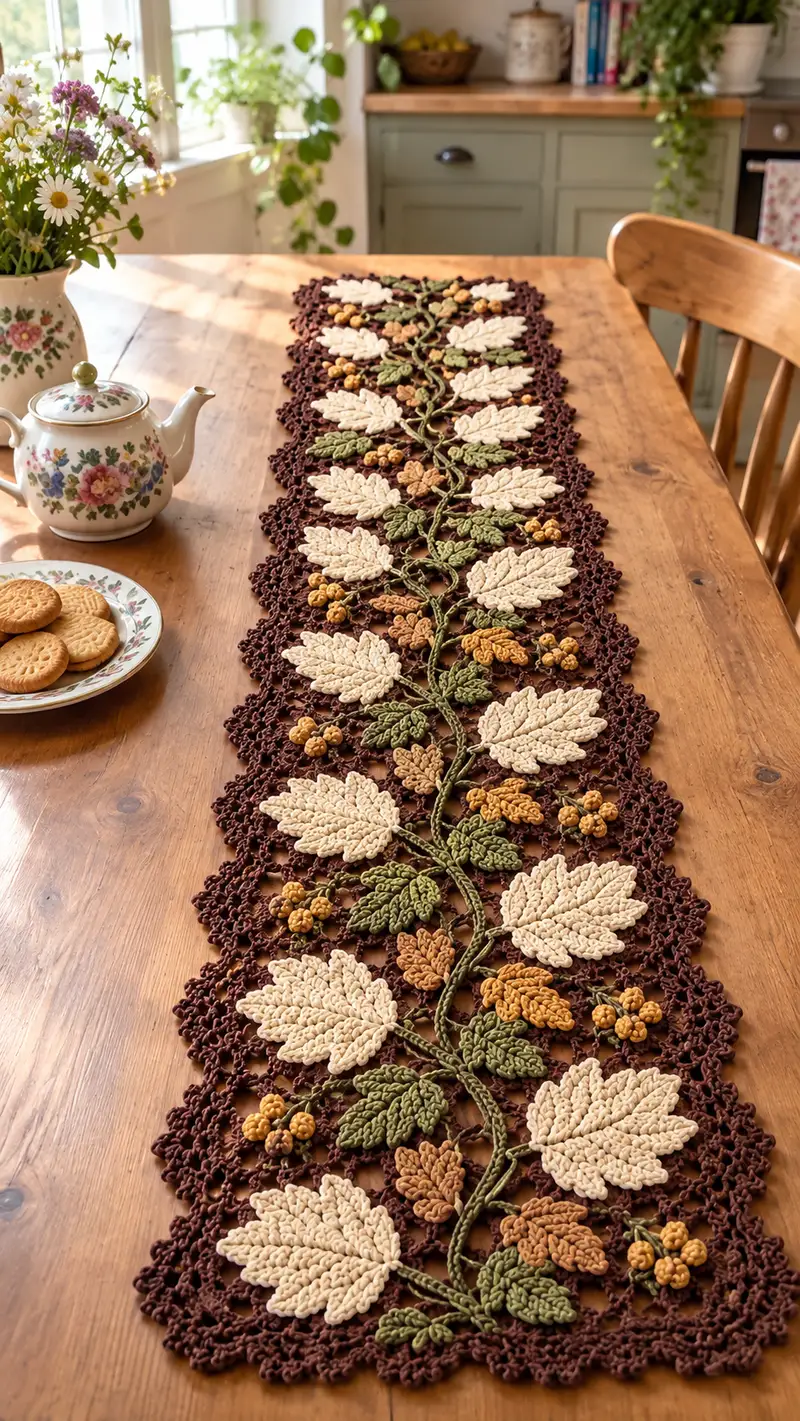
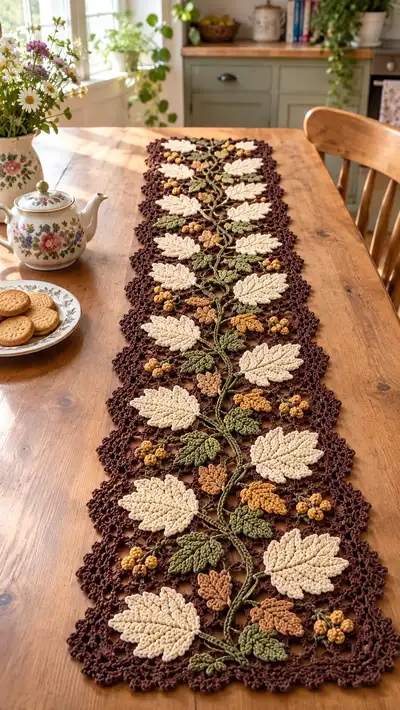
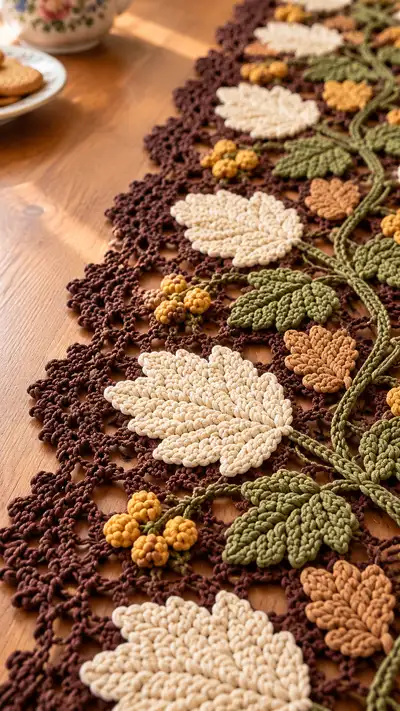
A warm, lace-style table runner inspired by autumn vines and leaves. Features layered cream leaves, olive and tan small leaves, mustard berry clusters and a deep chocolate openwork background. Finished with a delicate scalloped edge to create a classic, handmade centerpiece for a dining table or sideboard.
Progress Tracker
0% Complete
— Overview :
Info :
This runner is made of repeating openwork mesh motifs joined end to end, with appliqued leaves, berry clusters and braided/corded vines worked separately and attached using join-as-you-go and whip stitching. The sample runner in the photograph measures approximately 12 x 48 inches when motifs are joined in a long strip; adjust the number of mesh motifs to change length. Use cotton for crisp stitch definition.
Info :
Work a 4-inch gauge swatch of mesh + one large leaf to check proportions with your hook and tension before beginning. Blocking the mesh motifs and appliques lightly after finishing helps flatten chain spaces and stabilizes joins.
— Mesh Background Motif (Make 12‑16 and join in a long strip) :
Round 1 :
MR, ch1, 6 sc into magic ring (6)
Round 3 :
(1 sc, inc) x 6 (18)
Round 4 :
(2 sc, inc) x 6 (24)
Round 5 :
(3 sc, inc) x 6 (30)
Info :
Rounds 1-5 create a small circular center to stabilize subsequent openwork. Keep tension even; a slightly tight first round will help prevent gaping holes.
Round 6 :
Ch3 (counts as dc), 1 dc in same st, ch2, *2 dc in next 2 sts, ch2* repeat around, sl st to top of ch3 to join. You will have 6 ch-2 corners and 12 dc pairs (36 dc total around centers if counted) creating a star-like base.
Round 7 :
Ch4 (counts as tr), *tr in next dc, ch1* around until ch-2 space then (2 tr, ch3, 2 tr) in each ch-2 to form corner spaces; sl st to join (pattern will measure roughly 2.5-3 inches across at this point)
Round 8 :
Ch1, sc in same st, *ch5, skip 3 tr, sc in next tr* around placing sc into center of each dc pair and into corner clusters to form a mesh of ch-5 loops; sl st to join (24 sc and 12 ch-5 loops)
Info :
From Round 8 onward we will expand the motif in square fashion with chain-loop mesh that becomes the lattice. Count loops carefully; each side will have an even number of ch-5 loops for consistent joins.
Round 9 :
Ch3, dc into same st, *ch3, dc into next ch-5 sp, ch3, dc into next sc* around, making a diagonal lattice; at corners work (dc, ch5, dc) into corner sc. End with sl st to join. This creates a 3-chain mesh grid with larger open squares (12 ch-3 spaces per motif).
Round 10 :
Ch1, sc into same st, *(ch4, sc) into center of each ch-3 sp* around, ensuring (ch4, sc) repeats line each side. You will produce 24 ch-4 mesh loops around motif.
Info :
Work tightly in the sc rounds to define the small anchor points where appliques will attach. Use stitch markers at each corner to help alignment when joining motifs later.
Round 11 :
Ch2 (counts as hdc), 2 hdc in next st, *ch2, skip ch-4 sp, 3 hdc in next sc* repeat around placing 3 hdc clusters separated by ch-2 arches; sl st to join (you will have 12 clusters).
Round 12 :
Ch1, sc in same st, *ch6, sl st into top of next cluster (creating longer chain arches)* around until corners where ch7 is made to curve; sl st to join. This gives a dotted lattice with consistent decorative holes to attach leaves.
Round 13 :
Ch3, 2 dc in same st, *ch1, skip 3 ch, dc3 in next sc* around, work (2 dc, ch5, 2 dc) in each corner to square motif; sl st to join. Count: 12 small 3-dc groups plus corners.
Info :
If you prefer a more open mesh, increase the chain lengths in Rounds 10 and 12. If you prefer a denser base for heavier appliques, reduce chain lengths by 1.
Round 14 :
Ch1, sc in same st, *(ch3, sc) into each ch-arch and into top of corner cluster* around; this anchors the outer edge with small picot-ready loops (48 small sc anchors overall).
Round 15 :
Ch2, hdc in next sc, *(hdc in next 2 sc, ch3)* repeat around working ch3 at corner points; sl st to join (approximately 48 hdc plus 4 ch-3 corner loops)
Round 16 :
Ch1, sc in same st, *ch5, sc in next hdc* around, creating edge loops for joining motifs together later; finish with sl st to join (results in 24 ch-5 loops around perimeter)
Round 17 :
Ch1, sc into each ch-5 loop around working (5 sc) into each corner ch-3 to square the motif edge; sl st to join (rough count: 24 edge sc + corner clusters totaling approx 48 sc)
Info :
Make the number of mesh motifs required for your runner length. The photograph uses 12 wide motifs joined in a column to reach the photographed length; you may make more or fewer motifs to suit your table.
Round 18 :
Optional reinforcement: ch1, sc in each sc around working one extra sc in every corner sc to strengthen join points. Fasten off and weave in ends. Block lightly to square motif.
— Large Leaf Applique (Make 12) :
Round 1 :
MR, ch1, 6 sc into magic ring (6)
Round 3 :
(1 sc, inc) x 6 (18)
Round 4 :
(2 sc, inc) x 6 (24)
Info :
These first rounds form a stout central base for the leaf. Work rather tightly so that the subsequent ridged stitches will sit nicely raised above the mesh.
Round 5 :
BLO: (3 sc, inc) x 6 (30). Working BLO here creates a ridge at the center vein later when worked in front loop posts.
Round 6 :
Ch1, sc in same st, [ch3, skip next st, sc in next st] around the circle to create 15 ch-3 scallop loops (15 ch-3 loops total). Sl st into first sc to join.
Round 7 :
Work leaf edge: Into each ch-3 loop work (sc, hdc, 3 dc, hdc, sc) to create a petal-like tip; sl st to join. You will have 15 small petals; this expands the motif to a rough rounded scalloped shape.
Info :
We will convert this round petal circle into a leaf shape by adding rows of front-post and back-post stitches to form ribs. Keep these next rounds consistent in stitch height to create the layered texture visible in the photo.
Round 8 :
Ch1, sc in next 5 sts, *fpdc around next dc (front post double crochet) to form a raised rib, sc in next 3 sts* repeat around adding 5 front-post ribs total; sl st to join (approx 30 sc + 5 fpdc)
Round 9 :
Ch2, hdc in each sc and 2 hdc around each fpdc post to thicken ribs; at the end sl st to join. This begins the mirrored ribbing pattern that will be shaped into a leaf tip and base.
Round 10 :
Change to FLO for shaping: (ch2, skip 1, sc in next) repeat in a folded arc across half of the circle to mark the leaf midline, then turn work slightly and repeat across the other half. This is best done visually; you will establish a long oval from rounds 6-10.
Round 11 :
Work increases along one edge to create the pointed tip: Starting at one side of midline work (sc, inc) x 6 along edge to elongate one side while keeping the opposite edge flat with even sc. This creates an asymmetrical leaf shape with a defined tip (st count becomes approx 36 on the lengthened side).
Info :
At this point you will begin defining the leaf lobes by alternating small clusters and decreases. Keep a stitch marker at the beginning of rows to keep track of the leaf tip direction.
Round 12 :
Work across entire leaf: sc in each st until you reach the tip area, then (hdc, dc3tog, hdc) across center to narrow tip, continue sc across remainder. Count should be approximately 40 stitches around the newly shaped perimeter.
Round 13 :
Ch1, sc in next 4 sts, *(dec, sc in next 5) repeat across until tip then (sc in next 5, inc) repeat to base to balance shape*. Final perimeter count approximately 36.
Round 14 :
Work leaf veins: With contrasting or same yarn, ch1, sc across midline and work slip-stitch ribs outward: *sl st into next 2 sts, ch1, sl st back into same 2 sts* to form shallow ridges radiating from midline. Repeat across leaf to create 6-8 ribs depending on width.
Round 15 :
Edge finishing: sc around leaf working (sc, picot, sc) at each small lobe to create the textured serrated edge. Final count approx 34 sc plus picots.
Round 16 :
Optional: Lightly steam-block leaf flat, pinning gentle curves toward tip. Fasten off leaving a 12-inch tail for sewing to mesh. Repeat to make 12 leaves. Each leaf is approximately 3.5-4 inches long in the pictured yarn and hook.
Info :
Sew leaves to mesh using the long tail with a whip or invisible stitch. Place large leaves centered on every other mesh motif in the runner strip as in the photo. Pin before sewing to ensure identical placement.
— Small Leaf Applique (Make 18–22) :
Round 1 :
MR, ch1, 6 sc into magic ring (6)
Round 3 :
(1 sc, inc) x 6 (18)
Round 4 :
BLO: (2 sc, inc) x 6 (24)
Info :
Small leaves are shaped more compactly. Working BLO and then finishing in front-loop stitches will give a ribbed textured small leaf that tucks nicely under the large leaves.
Round 5 :
Ch1, sc in same st, *ch3, skip next st, sc in next* repeat around to create 12 small loops. Sl st to join.
Round 6 :
Into each ch-3 loop work (sc, hdc, 3 dc, hdc, sc) to form 12 small rounded lobes; sl st to join (approx 60 sts including lobes)
Round 7 :
Ch1, sc across lobes and work 1 fpdc at every other lobe center to create 6 small raised ribs; sl st to join.
Round 8 :
Ch1, sc around finishing edge with (sc, picot, sc) in lobe tips to mimic serration (approx 36 sc with picots). Fasten off leaving tail for sewing. Repeat to make 18–22 pieces.
Info :
Place small leaves clustered near vine junctions and around berry clusters. Some will be sewn partially under large leaves to emulate layered foliage.
— Acorn/Seed Pod Applique (Make 8–12) :
Round 1 :
MR, ch1, 6 sc into MR (6)
Round 3 :
(1 sc, inc) x 6 (18)
Round 4 :
Change to tan color: (2 sc, inc) x 6 (24)
Round 5 :
Ch1, sc in each st around, then (sc2tog) x 6 to slightly cup the shape (18). Stuff lightly with a tuft of fiber if you wish a rounded cap.
Round 6 :
Switch to darker brown for cap: Join darker yarn to top edge of tan cup and work (sc, ch2, sc) across to create the ridged cap lip (approx 12 sets). Fasten off leaving tail to sew to mesh beside a small leaf.
Info :
These acorn shapes are small accent pieces placed intermittently along the vine. Use small amounts of stuffing and sew them down firmly; if making many, work quickly with a smaller hook (3.5mm) for tighter pods.
— Berry Cluster (Make 18–30 clusters, each cluster has 3–7 berries) :
Round 1 :
MR, ch1, 6 sc into MR (6)
Round 3 :
Sl st into each st around to compress into a tight lentil shape; fasten off leaving 6–8 inch tails to sew. Make 3–7 small berries and sew them in a tight cluster for a single berry bunch (3–7 berries per cluster).
Info :
For a denser berry appearance, use a smaller hook (3.25–3.5mm) and tighter tension. Sew each berry close to cluster mates and anchor to the mesh at two points for stability.
— Vine Cord (Make 2 long cords for left and right vine) :
Round 1 :
Ch 150–220 (depending on runner length). For photographed runner use approx ch200 with 4.0mm hook (cord will be braided/chain-stitched and twisted).
Round 2 :
Sl st into each ch back along the chain working a twisted rope effect: insert hook in front loop only of chain, sl st returning, repeat to the end to create dense chain cord. Fasten off leaving long tail for sewing.
Round 3 :
Optional: Make two cords and braid lightly; block or steam to coax gentle curves. Use cords as the primary vine running the runner center. Sew seams where cords cross if you braid three cords for added thickness.
Info :
Place vine cords along the runner center and stitch them down at regular intervals and at each motif junction. Weave vine tips under or around big leaf stems to give a natural look.
— Join-As-You-Go & Assembly (Attach appliques and join motifs together) :
Info :
Lay out mesh motifs in final order on a blocking board or flat table. Place vine cords roughly centered along the motifs. Pin everything into place before sewing or performing JAYG joins. Work from centre outward to maintain symmetry.
Round 1 :
Joining motifs in strip: With chocolate yarn and right sides facing, align motif A and motif B edges. Using sc through loop on motif A and motif B at every ch-5 edge loop (from Round 16 of mesh), sc them together (sc A to B) evenly across side edge; make 12 sc joins along each seam to create continuous strip. Fasten off and weave ends.
Round 2 :
Repeat joining for all motif edges until full runner strip is complete. The seam should lie flat; if gaps appear, add additional small sc bridges across adjacent ch-3 spaces.
Info :
When joining multiple motifs, leave the topmost and bottommost motif edges unjoined until appliques are attached — this makes it easier to weave vine cords and position leaves without obstruction.
Round 3 :
Attach vine cords: Use the long tail from vine cords and whip stitch through the cord and the mesh anchor points every 3–4 ch-arches. Secure vines at each motif junction and at points where large leaves or clusters will be sewn so seams will be concealed under appliques.
Round 4 :
Place large leaves: On every second motif center pin a large leaf so the leaf tip points toward the center of the runner. Using the long tail left from each leaf, use small whip stitches along the leaf base and a few invisible stitches along the midline to secure. Make sure the leaf edge overlaps mesh evenly by 3–6 stitches.
Round 5 :
Sew small leaves and berry clusters: Position small leaves at vine junctions and under large leaves. Sew small leaves down with a few anchoring invisible stitches at the leaf base; place 3–7 berries as clusters by sewing each berry through the mesh with tight anchor stitches. Trim tails and weave in ends securely.
Info :
Work slowly during assembly — test placement by stepping back occasionally to check balance and spacing. Use pins liberally to avoid lopsided clusters. If adding acorns, place them intermittently and sew through the mesh with multiple passes to secure the weight.
Round 6 :
Secure vine intersections: Where vine cords cross each other or join branches, secure with 3 tight wraps of matching yarn and slip-stitch a small sc over the wrapped section to hide raw ends. This helps keep cords from shifting during use.
Round 7 :
Reinforce high-wear points: If runner will see heavy use, add extra joining stitches around leaf bases and cluster anchors. Use hidden whip stitches through mesh anchors and appliques to reinforce.
Info :
Weave all loose tails into the mesh on the reverse side of the runner: pass tails through stitches on the underside for a cleaner top surface. Trim close once tails are fully secured.
— Border Edging (worked around entire runner once assembled) :
Round 1 :
With chocolate yarn, join at any corner with sl st, ch1, sc evenly around the entire outer edge working 1 sc in each open anchor from mesh (approx 120–160 sc depending on runner length). Place 3 sc in each corner to keep it flat.
Round 2 :
Ch3, skip 2 sc, sl st in next sc to create small loop picot arches around edge: *ch3, sl st in next sc* around; this gives a subtle beaded frame. Adjust spacing to maintain symmetry at corners (approx 40–60 loops).
Round 3 :
Ch1, sc in same st, *(ch5, sc) into each ch3 loop across* around to create a larger scallop frame. At corners work (sc, ch7, sc) to maintain curve. End with sl st to join.
Round 4 :
Into each ch-5 scallop work (sc, hdc, 3 dc, hdc, sc) to form shell scallops. Fasten off and weave in ends. If you want deeper lace, repeat a second shell round into the spaces between shells using ch3 picots.
Info :
Blocking the entire runner after edging will give the scallops crisp definition. Pin shells evenly using blocking wires or pins and lightly steam or wet-block and let dry fully to shape the runner.
Round 5 :
Optional decorative finishing: With contrasting color and a 3.5mm hook, work a single round of surface slip-stitch vines tracing along the cord to highlight the braid; secure ends invisibly and trim tails.
Info :
Final pressing: Use steam gently on cotton yarn and be careful not to flatten three-dimensional berries or heavily textured leaves. Reshape shells and leaf tips as needed during drying.
Round 6 :
Care instructions: Hand-wash gently in cool water with mild soap and reshape while damp. Avoid tumble drying to preserve shape and three-dimensional detailing.
This autumn leaves table runner is a lovely combination of openwork lace and sculpted applique that creates a welcoming, handcrafted centerpiece. Each leaf and berry cluster adds texture and life, and the deep chocolate border frames the whole design beautifully. Working this pattern is rewarding: it breaks into many small, satisfying pieces plus some longer joining sessions. Enjoy the meditative process and the wonderful result on your table. 🍁🧶